General Farm hack rescue.

Currently reading:
General Farm hack rescue.

Well I haven't had much time to take this one forward for a while, Charmania getting all of my attention, but I had a couple of hours today so thought I'd have a crack at the paintwork, a shiny car always generates extra enthusiasm. ;)
To recap, this one had silver overspray covering the whole car and it was recommended that I use a clay bar to remove this as it doesn't remove any paint in the way a paint restorer would. I've ordered a Bilt Hamber clay bar and am keen to see what they can do. But it occurred to me that I do actually want to cut the paintwork back anyway as well as remove the overspray, and as I found with Charmania, these old reds need quite alot of paint removed in order to get anywhere near the original shade.
So, I thought I'd start with the bonnet as I'd already done a corner of it, but quickly realised that this was going to be a long job! I was applying T-cut (turtle wax equivalent) by hand and had to concentrate on small areas at a time, there must be a better way, perhaps I'll wait for the clay bar after all and hope it can work miracles. I had one sheet of 1500 wet and dry in the garage and thought, hmm, I wonder?
Anyway, I took the plunge and started with the wet and dry, being careful on any edges. It was much more effective than the T-cut, I had it wrapped around one of those sponge sanding blocks and the overspray was acting like a guide coat. It still took me an hour to do the bonnet and front wings but the finish was good, well it was after i'd gone over it again with the T-cut as well, and there was still plenty of paint left on the car.
That's as much as I managed today so I'll have to do a small area each day, saving some at the end to test the clay bar on when it arrives.
Oh, and I popped the wheel trims on that are no longer on Charmania, just to improve the appearance for now. I'll take a picture when it's done so that you can see the rust and dents I'll be left with. :)
 
Good work! :)
Haven't Tcut mine yet... had it 20 days now... seems like a lifetime! :rolleyes:

Surprising how they quickly become part of the family isn't it. :)

I've now done the bonnet, both front wings, passenger door and side window frames now. This is the most meticulous polishing job I've ever had to do thanks to all those little silver spots, but the finish i'm getting is making it all worthwhile. :D
 
Have got no further with the bodywork thanks to the weather, so I've started on the interior.
As previously mentioned the trim is being transfered over to Charmania so I've stripped the dash to remove the hammock material, and taken off the door panels. Given them a good clean and let them dry overnight.

Final bit on the saggy seats.....
I did take a front cross strap from the passenger seat and add it to the back of the drivers seat instead of my piece of plywood (if you're new to this thread you'll have to look back a few posts to understand what the hell i'm on about). Seat is less Germanic again but I do not feel the frame poking through, so I'd say that's job done. As LWM pointed out, there are hooks there for the strap, so why there wasn't one fitted I don't know :confused:.
If you have a sagging seat and want to try this, assuming you can get an extra strap, I suggest you pass it across the vertical straps (in photo) behind them, so that it is on top of them when the seat is back in place. Hope that makes sense.

So Farmyard is now half polished and gutted inside :(, apart from the front seats, but they will have to come out this week as another forum member/members ;) is coming to pick them up soon as they are surplus to my requirements.
 
Well I had a visit this afternoon from a celebrity!

After her starring role in Practical classics magazine this month Poppi is doing a UK tour it seems, and today Kev and John brought her to Wiltshire. :slayer:

Actually they came to pick up the front seats I'd taken out of Farmyard as they have identical trim. However, John couldn't wait to drive in greater comfort, so we decided to fit them there and then.
I also had the passenger seat from Charmania available, so before long there were skeletal seat frames, foam pads, and seat covers all over the shop, as we tried to make two good seats out of five questionable ones :(.
I think we were successful, but I wasn't the one who had to sit in them for the next 114 miles so I'll let them confirm that when they get home.

Cheers Kev and Jon, it was a pleasure to meat you again, but especially Poppi (y).

Costs update.

£20 Purchase price of car.
£ 5 Fuel costs for collection.
-£20 Sale of seats. (They insisted ;))

Total so far £5.

Well, we are back from sunny Wiltshire having enjoyed our run back to London. Seats are now so much more comfy with the extra seat straps on the base, no feeling of sinking in to the seats whilst driving.

Had a great day meeting up with Vern, seeing some of the vast car collection he has amassed and drinking tea.

Hope you didn't mind us leaving you all the skeleton seats.

Thanks again (y)
 
I picked up a set of seats yesterday that I wanted to use to test if they were suitable for a Panda. I've had the idea of using them ever since I put the Diahatsu seats in the 750L, but these other ones are such a nice looking set of seats, especially in leather that I thought I'd use them next time. But I didn't want to shell out £200 on a leather set only to find that there was no way they would go in, so I saw these velour ones going cheap on ebay and thought they would be ideal to mess around with. I could experiment trying to fit them in my spares car, then if successful, find a leather set for one if not all of my projects.

Although my plans for the exterior of Farmyard are pretty much finalised in my mind, I needed to wait till I found the right seats before I could then plan the interior around them, all I knew was that I wanted beige. Well yesterday I thought I was going to collect a cheap and tatty set of grey seats that I could chop about and play with, imagine my delight when I got there and found they were not only immaculate but BEIGE!!! The photo of them in the ad. definately made them look grey, but no, beige. These seats are so good that they are going into Farmyard one way or another. I'm confident the fronts will fit with a bit of work, but the rears need something quite drastic, they are wider, a different shape, and 60/40 split, as opposed to the one piece Panda original :(.

My plan for the rears is to use the material from the new seats to try and cover the original Panda seat. Now this is beyond my abilities to do so I will have to spend some real money and get a professional upholsterer to do this for me. After a quick look in the phonebook I found someone close to me, so took the seats over to see what he could do. I've suggested to him that if this experiment is successful, I have at least one other Panda that I would like to recieve the same treatment, so he is going to make and keep patterns so that any subsequent jobs can be carried out more easily, and therefore more cheaply.

I'm going to be a bit secretive about the seats for now, but shall reveal all when things get well under way, but I will say, I'm very excited :D.

Costs update.

£20 Purchase price of car.
£ 5 Fuel costs for collection.
-£20 Sale of old seats. (They insisted ;))
-£1 found in old seats. :)
£25 complete set of s/h seats.

Total so far £29.00
 
Last edited:
My clay bar arrived today, this is the one I went for.....

http://cgi.ebay.co.uk/BILT-HAMBER-A...arts_Vehicles_CarParts_SM?hash=item4a9e4e459e

I chose to go for this one because you get 200g, many others at the same price or dearer were only 100/150g. Also, this one can be used with tap water as a lubricant, whereas the others require a special solution adding another £5 to the price.

I only had five minutes spare to try it today, first I had a go on the blue CLX, not really anything for it to do there though ;).
Next I used it on Farmyard, well that's what I bought it for. I found it worked well on the overspray on side panels but not so good on the roof where the overspray has had time to really get a grip on the paintwork. It was getting it off, but not easily.
I tried it on the windsceen too, and there it proved very effective, leaving a finish like glass :p.
So, roll on the weekend, then I can finish bringing up the paintwork and see what I'm left with. Pictures by Monday.
 
This post contains affiliate links which may earn a commission at no additional cost to you.
Well I had a good half a day with my clay bar yesterday and have some pictures to show the results..........


The one above is a closeup of the paintwork after washing and rubbing with the clay bar, nothing else.
The first picture was taken when the bonnet, front wing and door had been rubbed down with 1500 wet and dry, then 'T cut', then polished, but the back wing had only been washed and rubbed with the clay bar (claybarred ?). As you can see there is not alot between both methods, which has to be a (y) for the clay bar.

This next picture shows the centre of the roof in its original state, covered in overspray and dull paintwork. The clay bar has been used on the outside edge. It was starting to get dark so not a great shot.......


The roof has not been done yet so I'll try and get a better comparison shot later.

Before I'd ever seen one of these clay bars I had expected them to be literally a bar of clay that gradually wore away as you used it, but it's not really like that. It's like hard putty, it doesn't wear away you just constantly fold it over itself to present a clean bit to the paintwork. The more you use it the dirtier it gets, but also it becomes the consistancy of well chewed chewing gum. So it starts out lovely and white, but ends up looking like you've been collecting old chewing gum off the streets for the last twelve months and saving it in a ball. Even in this state though it is still very effective.
As you rub you can feel and hear it working, a rough scratching quickly changes to a smooth glide and you know it's done. Another advantage is that it moulds itself around sharp edged contours where using a rubbing compound is in danger of taking off too much paint.
I shall certainly make sure I have one on hand in future for any new cars that come along, but once it' done, if you keep your car well waxed the dirt in the future shouldn't get through into the paint anyway.
Finally, the bar I have can be cut into quarters and one whole car can be done with each piece, this works out at about £3.00 a car and well worth that.
 
Here's another, better, picture showing what a difference the clay bar is making. The one I have is a fine grade, I think the regular grade would have been better for the roof as the overspray had hardened so much, but it is getting there.


Right, that's enough about clay bars, I'm even boring myself now!

As usual, the better the paintwork gets the more dents and rust you see. Apart from the doors there's very little else, a small ding in the bonnet, some scratching on the sides etc, but it's enough to have me considering a full respray in The dark metallic red rather than just going up to bumper height, or maybe even a completely different colour, as long as it goes with a tan interior. I think the interior is going to come out really well and deserves better than an outside that's only half a job, so my plan is to try and cover all the inside with material so there is no paintwork showing, then with no red on the inside I will have more options for colours outside.
Plus, it will be interesting to see what a fully trimmed Panda will look like.

Hmmm, finished by March is now looking doubtful :rolleyes:
 
Clay bar looks like is on my "To get" list...Like the results

Been neglecting my Pandas..wot with having been away and then coming back to working...must get my act together!!!

Well that was quite an experience you had there Kev, I'm not surprised it's taking a little while to get back into the swing of your normal existance.

Let me know what you think of it. (y)
 
What a gorgeous red that is Vern (y)

Thanks Martin, it does look good in the first picture of the whole car, but I'm afraid it's not a true representation of the colour, I had to use a really cheap camera and it was getting dark. Back with my usual camera for the last shot of the roof which is more like it. But hey! if I choose to respray it, it could be :).
 
Well after three years of sitting idle things may be happening for 'Farmyard'. It's all a bit indefinate at the moment but I hope to report some good news soon.

He's in the workshop at the moment for assessment. The carb linkages were seized solid and the battery was only any good as a doorstop, but another battery and a few minutes with the penetrating oil had it running. :slayer:

I'll take some current pics and post them soon.
 
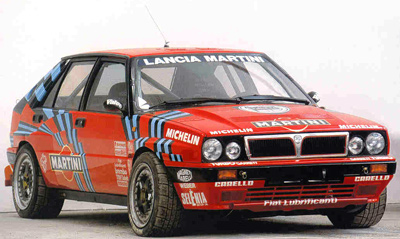
Keep the car red but with Delta inspired Martini graphics...

20120125_971613.jpg


ld5a.jpg


Martini_02.jpg


...I wonder if that white 750's still for sale. :rolleyes:
 
Back
Top