Step 5
Step 5 – Fitting the new system
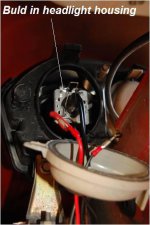
Remove the old bulb and fit the bulb into the bulb holder (being careful not to touch the glass). Connect the live/negative feed from the existing wiring to the power feed for the kit (simple spade connections but I suggest wrapping them in insulation tape to reduce the possibility of shorting and corrosion).

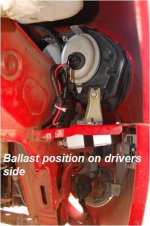
Then Fit ballast to bracket (slides in), feed the wires from the ballast through the inner wing and connect to the wires from the bulb to complete the circuit, tidy up with cable ties to ensure wires are not left unsecured and then replace the inner wheel arches!

Repeat the process for passenger side with the following differences;
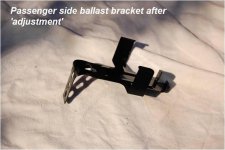
Adapt ballast bracket to fit OVER the inner-outer wing bracket by bending it 90 degrees.
Offer the ballast bracket up to the inner/outer wing bracket and mark the ballast bracket at the edge of the inner/outer wing bracket.
Carefully bend the ballast bracket in a vice. Offer the ballast bracket back up to the car and mark the holes to be drilled – remove and drill the holes!

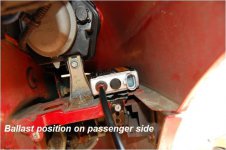
Fit the bracket onto the TOP of the inner/outer wing bracket and wire as per drivers side.
 hid10
hid10
