You are using an out of date browser. It may not display this or other websites correctly.
You should upgrade or use an alternative browser.
You should upgrade or use an alternative browser.
Latest updates
Filters
Show only:
Loading…
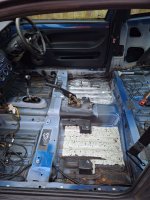
Panda 2012+ Our 2014 Multijet 4x4
Purchased the propshaft I previously mentioned as set about replacing the old one last weekend. Got the original shaft out, some pics including the new one to go in:


Cleaned all the bolts by wire brushing then degreased in acetone. Started to fit the new shaft and began to suspect that it may not be of the best quality. The CV joints were extremely stiff, could barely move them. It had quite a few balance weights on it and when we offered it up it was a tight fit and the centre bearing bracket holes didn't quite line up, had to force the bolts in.
All finished, took it out for a test drive and was not happy. The shaft was noticably sapping power (presumably the CV joints) and began to vibrate at 45mph right through to 60mph. It produced a thrumming throughout the whole cabin. I had a word with another member who had a similar problem with a shaft from this source but his vibration wasn't as bad and disappeared afte a short while. I thought I would give mine a few days but there was no improvement. So, yesterday I ordered a new one from Des Shelly Shafts in Wolverhampton.
It arrived today and I set about doing my second propshaft change in a week. I forgot to take some pics, doh! The new shaft is of a much higher quality - better welding, the CV joints move easily and smoothly, only two small weights for balancing. It fitted perfectly, went on a treat. The test drive was a joy, all the power was back and not a trace of vibration anywhere. Job done.
The other shaft is going back Monday.

Punto (Mk1) Project R the Mk1 Cabrio Restoration project
Rebuild process here
I have also been working on some other little jobs along side the engine.
I have obtained a second steering wheel with airbag which I plan to retrim with Leather, a nice little project to undertake soon.

I have also been working on the allow wheels in the background. This is the first of 4 to be done. It was a total mess of corrosion to begin with so really happy at how well it has turned out. It still needs a couple of coats of lacquer but looking forward to getting all 4 to this state so they can finally go on the car and I can get rid of the horrible modern Punto wheels currently on the car.
The front of the wheel is Steel silver and the back is black with a blend between the two behind the spokes to give them some contrast, once the suspension is sorted the calipers and everything behind the wheels will be painted so the black will help make that pop a bit more.


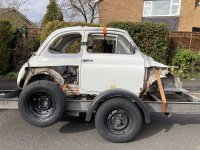
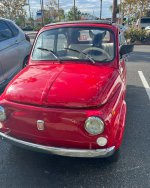
500 (Classic) Giovanni - 1972 500R
All the structural work and welding on the bodyshell is now complete.
Scuttle welded in position along with the front panel and wings. It wasn't a perfect fit where it meets the original parts of the A-post by the windscreen, but again a skim of filler will make it look right. Getting the whole lot to line up was a bit fiddly.

Once the front end was all welded in place I cut out the framework as there was now no risk that the body could deform.
I then welded in place teh repair panels I had previously made for the bottom of the B-posts. At the same time I made up two formers and made panels to repair the A-posts and then weld those in place.


As I've mentioned previously the LH gutter and roof had been damaged at some point in history. The gutter condition was not recoverable so I cut it off, folded up a new section of gutter and welded it in position.


There were a few little repairs required to the roof where the LH rear of the hood attaches. The other hole is also repaired, but I haven't got a picture of that to hand....

And that's it for all the welding. It's all done...at last.
Now on to preparation for making it look shiny and white again!

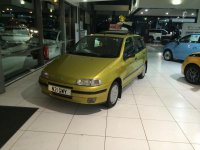
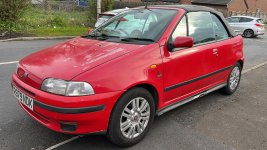
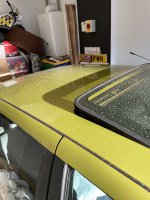
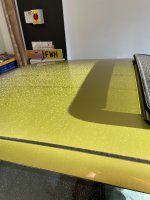
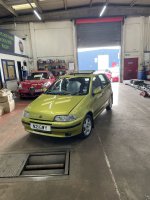
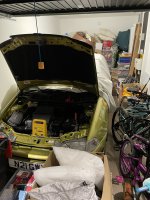
Punto (Mk1) My exploit yellow 75 elx
Have been using the Punto the last couple of days- even took it to to work today, and it rained, then it was blowing a gale and my car park is just pure dust- so tonight was spent getting back to business
Attachments


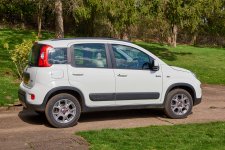
Panda 2012+ Our 2014 Multijet 4x4
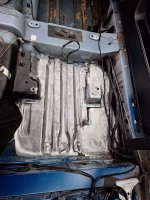
So, back from the Alfa workshop where the Panda spent the last two days having the clutch, DMF, concentric release bearing, crank oil seal and gearbox/transfer box fluids changed. For those interested the total cost was round about £1300.
Unfortunately, I still have a squeaky clutch pedal so it wasn’t the release bearing as I had thought. I had a look at the pedal box and there is grease everywhere so I guess the previous owner or their mechanic already had a go in that area. I think this means that the only culprit left is the master cylinder. Now, do any of you know how a new master cylinder is bled when connected to a concentric bearing? Obviously the bearing can’t be accessed so if the hydraulic line is opened to fit the master cylinder air must get in so how to get that out? Any thoughts or suggestions appreciated.
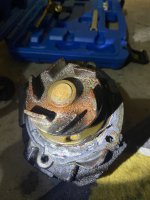
Whilst with the workshop they discovered that the centre propshaft bearing is close to failure so I am going to fit a new one. Anybody see a problem with this one below?
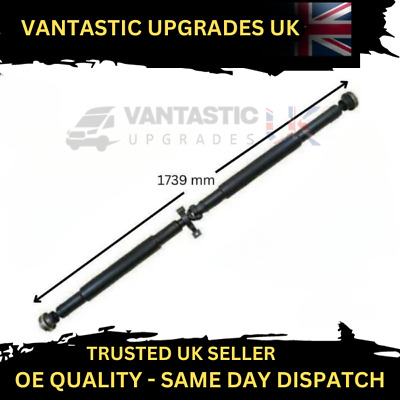
FIAT PANDA PROPSHAFT 4x4 (169) 2004-ON 55222107 55193595 55197051 55264146 | eBay
OE Part Number: 55222107. FIAT PANDA 4x4 2004-ONWARD. Position on vehicle: UNDER. If you have any technical queries regarding any of our products, our trained technicians are here on hand and are happy to help.www.ebay.co.uk
500 (Classic) Ducati powered Fiat from California
It's been almost a year since my last update! A lot has been going on, but almost none of it Fiat related. I took a break from this project as we welcomed our first daughter last June. Now that we've gotten a bit into a rhythm, I've been able to give the Fiat more love!
Front Suspension
During my last updated, I was convinced that a prior repair job had resulted in an asymmetric suspension setup; however, upon further inspection, it appears that the chassis hard points are symmetric but the fenders are not. So I redesign the suspension, again, and I used this opportunity to lower the roll center, add more camber gain, and make some custom upper control arms using rod ends to give this suspension a lot of adjustment. I also now have access to a 3D printer so I was able to make some test parts to make sure I was happy with the alignment before building everything. I ended up adding adjustment to shift the wheel forward or rearward 1/4" (6mm) allowing me to better fill out the wheel well. Has anyone else felt that the front wheel should move rearward to better fill in the wheel well?

Still need to finish the cross brace supports, finalize the hardware, and probably add an anti-roll bar and a rebound stop (will just use the shocks for bump). The GAZ shocks are totally busted, leaking and not holding pressure, so that's disappointing. I might find a local shop to rebuild them (shipping back to the UK is not cheap), or look at switching to a different manufacturer. Also, it is worth noting that with this steering rack and brake upgrade, I do run into interference at full lock between the brake caliper and the upper control arm. The custom arms are designed to reduce this but it will still contact. Not sure if anyone else has run into this issue, but I'll look at modifying the rack to limit the travel so that this can't happen while driving.
Engine Frame
I ended up redesigning to engine frame, adjusting the position of the engine so I don't need a belt tensioner and modifying the frame so I have access to the engine bolts on either side of the rear panel. New parts were designed and printed to verify measurements on the engine and the Fiat's frame, then I had the tubes laser cut and routed out a tacking jig. Once I was happy with how everything fit, I welded it out and cross my fingers. It fit!

Overall, I'm pretty happy with this aesthetic of this frame and how it pays tribute to the classic Ducati trellis frames! I still need to finish welding out the frame, add the last engine mount, gusset everything, oh and build the rest of the engine frame, but this rear section, making sure everything lined up between Fiat's frame and the Ducati's engine mounts was the highest risk. Glad this all seems to fit up nicely.
Looking forward to what everyone thinks. More to come, with hopefully much less time before the next update!
Panda 2012+ Our 2014 Multijet 4x4
Finally done after two attempts. After the first attempt I had to give up and purchase some of the plastic screws that refused to come undone. These are used on the top and bottom of the bumper. For those interested the sequence was:
1. Jack up and remove wheel for the side concerned, in my case the drivers side.
2. Remove 4 or 5 crosshead screws (one under car), 1 x M10 plastic nut, 1 x metal M10 nut and 1 x M10 bolt. Pull inner wing out.
3. Remove Torx screw holding bumper to wing. Unplug the DRL and fog lamp connectors or else the wires may break when the bumper comes away.
4. In my case, cut off all plastic screws along the bottom of the bumper.
5. Remove or cut off plastic screws on top of bumper in engine compartment. Remove 2 x Torx screws.
6. Using a plastic tool for leverage, carefully pull the bumper away from the wing. Keep working the join and the clips will separate, don’t force it!
7. I held the bumper in place with hands/knees and undid the three retaining screws holding the DRL unit.
Reverse the procedure and replace any plastic screws you cut off. These just push straight into their fixing points.
I now have a working, condensation free DRL. Another job off the list.
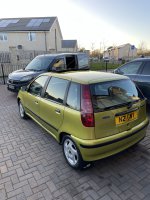
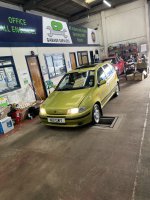
Punto (Mk1) My exploit yellow 75 elx
Taxed and battery charged.
MOT booked 9am Saturday.
Had better dig it out of the garage
Attachments

Panda 100hp runabout
Well, apart from lube on sticking door handle, bonnet release and squeaky rear bootlid struts, did the first minor fix on the car since getting it.
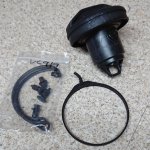
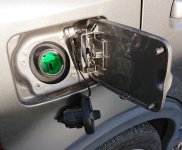
The strap that keeps the petrol cap tethered to the car had rotten away and it's really annoying not having it.
So, order new strap from flebay. Actually, two in a pack, including the pins that may also be needed.
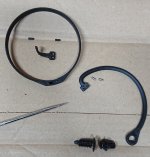
Gently lever off the rotating cuff, push out the thin pins, pull out the rotten strap.
A bit of silicone spray to clean the cap and help lube it.
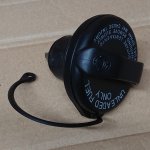
Push in new strap, press pins back through it, slide it back onto the cap, hook the end of the tether onto the catch in the opening flap, job done.
All straightforward enough and means I can do those occasional fill-ups without leaving the petrol cap on the roof!
Attachments
Punto (Mk1) Project R the Mk1 Cabrio Restoration project
The last couple of weeks the rebuild has stalled due to going on holiday, and stupidly losing a clip that has to come from Italy.
So I have taken to doing a little light restoration work, this involved using stuff around the house to Nickel plate some of the more rusty and grubby parts
Brackets that support the air filter box
Misc metal brackets that hold the headlights in place
And I have been plating all the bolts and hardware to prevent corrosion when putting it all back together.


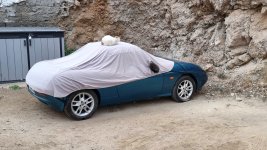
Barchetta My Last car
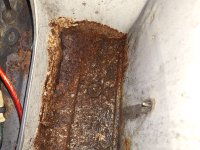
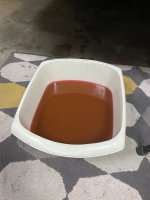
Decided to clean the interior for the first time since purchase. On lifting the passenger side floor mat I found a pool of green 'radiator water' which appears to be coming from the heater core. After some testing I discovered that if I leave the A/C in COLD position it doesn't leak, living in sunny Spain this is not too much of a hardship so I am not going to attempt to fix it for now. The temp gauge is always just below normal so it must be a small leak. Is this a common fault on early models equipped with aircon?
Attachments

Punto (Mk1) Project R the Mk1 Cabrio Restoration project
Its all a little bit out of order here, but here is the video to go with all the bits on the intake side that I had to fix
Coupe Fiat Coupe 16VT
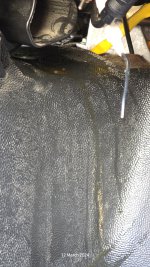
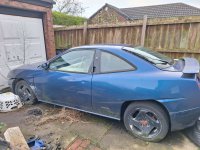
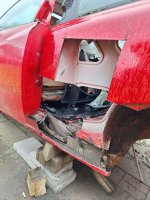
Its been a while since an update over here, updates have been very frequent on the Fiat Coupe Forum, I've been working on the car a decent amount, currently tackling any rust on the floor pan, plan is to strip all the sound deadening and wire brush the entire floor and re-paint once all rust is there is any has been dealt with, the rear passenger quarter panel is completely rusted through on the inside and everything behind it has gone too, not to worry, we cut up the 20v donor which was in good condition in these areas and will be welded in once the weather is nice. Engine will be serviced and a good inspection before running sometime this spring, had a good look around the car and everywhere is all solid no rust except for behind the rear quarter panel, my uncle thinks it has spent most of its life in a garage prior to him owning her and already had rust repairs, hence the lack of rust in other areas
Attachments
Punto (Mk1) Project R the Mk1 Cabrio Restoration project
Started lapping the valves last night, only got one cylinder done but was getting a pretty good seal, put some water in the head and left over night, this
Morning a lot of the water was still there.
Was having problems with the stick not sticking to the valves, basically the valves are just too small so I’ve ordered something better which should arrive same day
Punto (Mk1) Project R the Mk1 Cabrio Restoration project
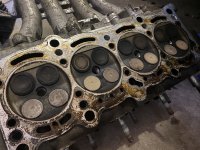
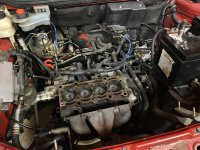
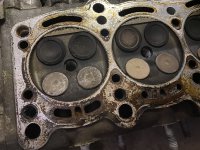
Cylinder head stripped down cleaned, combustion chambers given a light polish and the ports all given a going over to remove burrs moulding marks and anything else that will disrupt airflow.
The valves are all now clean and have been kept with all their own original parts, this engine has double valve springs which is impressive the collets have all been cleaned.
One of the discoveries is that the exhaust valves were so dirty and coked up even when fully open they would have had a considerable restriction in air flow.
They also had a about a mm of cack as were the intake valves the amount of carbon in the engine both in the combustion chamber and on top of the pistons would have massively decreased the displacement, airflow and increased the compression ratio this is probably why I was getting such high figures on the compression test
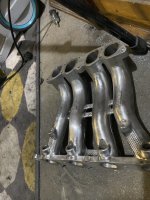
The air intake pipe work has also been cleaned up and will need a wash in the industrial parts washer (dishwasher) to get all the grit and grim out of the inside.


Attachments
Punto (Mk1) Project R the Mk1 Cabrio Restoration project
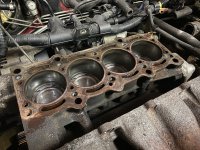
Finally got the head off the engine tonight, fairly straight forward and no blood was spilled, the head bolts turned into a two man job as someone had put the head bolts in with thread lock once the thread lock was broken they came out very easily, if I had to guess I would say it’s had a head gasket before.
I also found a leak between one of the water channels and the oil channel via the head gasket, it was only tiny but it’s reason enough to take the head off.
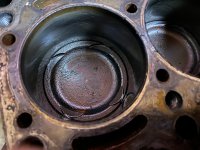
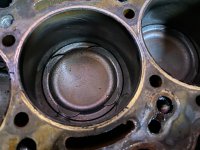
The one thing that had me worried is everything on the intake side was covered in a fine layer of grit, all on the inside of the inlet manifold and it turns out a lot of the dirt on top of the pistons was this mixture of oily grit,
That being said the sides of the bores are perfect and show virtually no signs of wear.
The water pump was grim and had kinda rust all over it, the coolant was murky brown, the oil was really dirty worse than what I drained out of the diesel Punto Evo with 176k on the clock. So I think it’s had a serious lack of servicing in recent years.
I am hoping that once back together this is going to be a good little engine, aside from needing a damn good clean everything moves smoothly and freely, the pistons are actually in good shape if you clean the crap off, so the next stage involves a lot of cleaning and a nylon brush
Attachments
Punto (Mk1) Project R the Mk1 Cabrio Restoration project
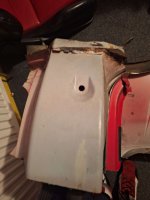
This last week I decided a nice quick job would be to sort out the very slow/week electric windows before the motors burn out. The car has one touch up and down but you have to keep pressing it as the motor frequently thinks the window has closed due to increased resistance.
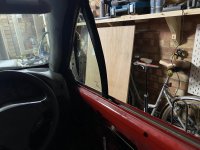
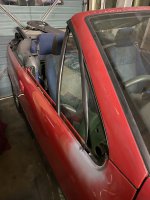
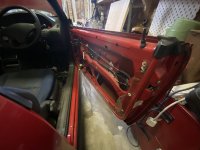
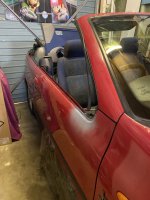
So to get the window motor out you have to remove the door card and all the trims from inside, then you have to remove the weather seals from the top of the door which are clearly the original version that someone at Bertone has taken a Stanley knife to. The little front quarter lite glass it turns out holds the wing mirror on the car along with some others bits, there is a window runner that goes to the bottom of the door and it all has to come out to take the window motor out. I thought it would be wise to repaint the metal work of this piece while off the car, give it a coat of satin black but it turned out the can of black I had on the shelf and was maybe 15 years old, had gone bad and so I needed to wait for that to dry, sand it off and repaint it again, when putting it all back together one of the bolts sheered off, which I then had to drill out and retap.
Finally reassembling it all, and it seems a lot of bloody work for very little accomplished.
The frames/runners that support the glass all have adjustment screws to dial in the angle of the window to make sure it seals against the roof and door frame. So another couple of hours spent getting it all set up correctly.
Whoever designed this needs to be shot