

You are using an out of date browser. It may not display this or other websites correctly.
You should upgrade or use an alternative browser.
You should upgrade or use an alternative browser.
Latest updates
Filters
Show only:
Loading…
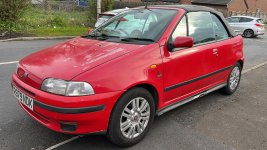
Punto (Mk1) Project R the Mk1 Cabrio Restoration project
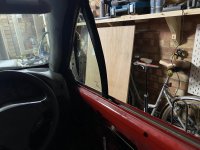
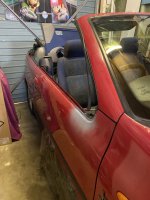
This last week I decided a nice quick job would be to sort out the very slow/week electric windows before the motors burn out. The car has one touch up and down but you have to keep pressing it as the motor frequently thinks the window has closed due to increased resistance.
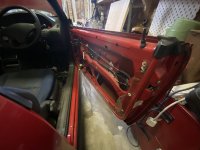
So to get the window motor out you have to remove the door card and all the trims from inside, then you have to remove the weather seals from the top of the door which are clearly the original version that someone at Bertone has taken a Stanley knife to. The little front quarter lite glass it turns out holds the wing mirror on the car along with some others bits, there is a window runner that goes to the bottom of the door and it all has to come out to take the window motor out. I thought it would be wise to repaint the metal work of this piece while off the car, give it a coat of satin black but it turned out the can of black I had on the shelf and was maybe 15 years old, had gone bad and so I needed to wait for that to dry, sand it off and repaint it again, when putting it all back together one of the bolts sheered off, which I then had to drill out and retap.
Finally reassembling it all, and it seems a lot of bloody work for very little accomplished.
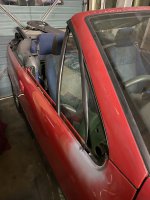
The frames/runners that support the glass all have adjustment screws to dial in the angle of the window to make sure it seals against the roof and door frame. So another couple of hours spent getting it all set up correctly.
Whoever designed this needs to be shot
Attachments
Punto (Mk1) Project R the Mk1 Cabrio Restoration project
So with the car seeming down on power, I opted to start with the spark plugs, aside from being rather old and rusty, one of them was also broken which can’t help.
I’m begining to think there is not one specific reason for the low power and it’s likely to be a culmination of issues.
Punto (Mk1) Project R the Mk1 Cabrio Restoration project
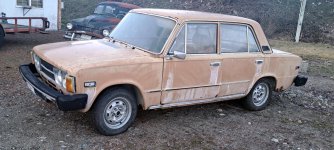
Weirdly I have wanted a Punto Cabriolet since about 2010, I remember seeing them selling very cheaply at the time on Gumtree and thinking it would be cool to have one.
If you've not noticed I have a bit of a thing for Convertible/cabrio cars, I don't know why I just love driving with the roof down in the summer and I love the complexity of a roof that disappears into the back. For me it always has to be a fabric roof with no roll over bar, and the Mk1 Punto was one of very few cars in the 90s when I was growing up that didn't have a hideous roll over hoop, such as the likes of the Escort or the Golf mk1 and mk3/3.5 cabrios.
Here is the story of how I came to get the car, many of you know I run my own youtube channel with quite a few subscribers now so this was not just a chance to relaunch/revamp the channel as it has sat unloved for about 2 - 3 years, but also a chance for me to get a car I had wanted for a long time.
I am also linking my new videos back to this thread on the forum so people can follow things and chip in with ideas and advice if they want.
Punto (Mk1) Project R the Mk1 Cabrio Restoration project
So just to keep this as a history of the restoration process I need to add some updates here, so while I am delving back a bit in time this will just give me scope to look back and to make it easier for people to follow the updates without having to read through all the discussion.
I picked the car up from Stockport, drove it 240 miles home without incident. I had to stop and get wiper fluid, the car was seemingly lacking in power the whole journey initally struggling to get above 60mph but after about half an hour of driving it seemed to free up and could get up to motorway speeds. The top speed on the car should be a touch over 100mph so something isn't quite right. More investigation needed.
The general condition of the car is pretty poor. That said what attracted me to this car is the lack of rust. Or that is to say very little obvious rust for a mk1 punto. Some of them are swiss cheese these days after 25 years on the road despite the older puntos having pretty good rust protection.
The body work is free from any major dents, but the paint is terrible. The car will need repainting.
The wheels are wrong. Currently fitted to the car are some late model Punto wheels from around 2015/16, these are 4x100 fitment and the car does not have wobble bolts so they have to go. Fortunately I have already procured some original Punto GT wheels which came in a horrible black/grey colour so they need to be restored and painted silver to match the OEM wheels this car would have had as an option from new._89CF10B6.jpeg")
The tires on these wheels are date stamped 2008 so they have not been on the road for quite some time, the tires will be taken off to help make refurbishment easier.
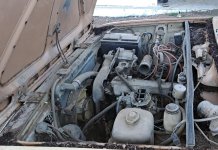
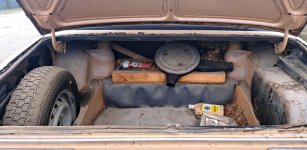
This is the 1.2 85hp 16 valve engine. It is the ELX model with all round electric windows and electric roof. it has a typically 90s/early 2000s stereo and the interior is pretty grotty. I have a plan to completely refurbish the interior including the carpet which appears to have been damaged behind the drivers seat in some sort of minor fire at some point. Which has also damaged the door card. No damage to the seat so these were either not in the car or have been replaced.
The Roof while not the original is still mainly waterproof but is in poor condition. Once all other work is done I think I will look at changing the roof.
So Engine, Body work, interior and roof, there isn't much of this car that doesn't need attention but so far at least the tin worm seems to have been resisted making it a good candidate for restoration.
Here is a little snap shot I found online for what I am aiming for.


Just got this home and am ready to get started on refurb.
Attachments
500 (Classic) Giovanni - 1972 500R
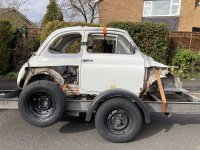
It's been a while since the last update of how the bodywork is progressing, but I've managed to get quite a lot done....
The LHS of the car is now back together from the a-post rearwards. I had to do a repair to the end of the gutter as the new rear quarter panel didn't align properly with the end of the existing gutter. I've used some M5 rivnuts for the fixings of the grille above the engine lid rather than using self-tappers as I've never liked using screws for that sort of thing.

Some detail of the repair to the lower corner of the rear window aperture. This had been poorly repaired in the past so i cut that repair out and made a better job. It'll need a bit of filler to get the shape right.

I drew up some press tools in CAD and 3D printed them to make the inner surround part. I was happy that the tool worked and then welded the part in place. Again, a little bit of filler required to get it just right.


Next onto the rear right hand corner of the engine bay. The corner fillet panel had been used as a jacking point at some time and been crushed, then become rusty, so I cut it out before the shell was blasted. I made a panel and then installed it


Then onto the most expensive panel of the reconstruction - the dash. To cut the old one out and fit the new one only took a couple of hours....the new panel was a very good fit.


Now it's time to move to the front of the car. Scuttle next, then the wings/front panel/inner front panel.
Last edited: