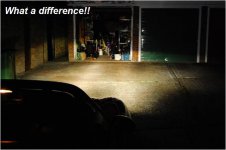
This guide is a reference to how I upgraded my lights to HID units and has been posted to assist anyone completing a simmilar upgrade. Should you follow this guide however you do so at your own risk.
The H1 HID kit I fitted is available from...http://myworld.ebay.co.uk/diane-shop)

HID Kit contents.
2 x Ballasts
2 x Wiring looms
2 x HID Bulbs
2 x Ballast brackets
2 x Fitting kits (nuts, bolts and cable ties)
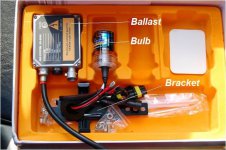
The H1 HID kit I fitted is available from...http://myworld.ebay.co.uk/diane-shop)

HID Kit contents.
2 x Ballasts
2 x Wiring looms
2 x HID Bulbs
2 x Ballast brackets
2 x Fitting kits (nuts, bolts and cable ties)

Tools Required
Wheel brace.
Axle stands.
Jack.
Power drill and assorted bits(see pg5)
10mm spanner.
Philips screwdriver.
Insulating tape.
Small cable ties.
Step 1
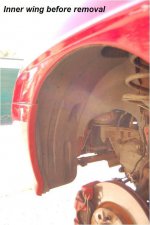
Step 1 – Jack up front of the Barchetta and secure on axle stands then remove the front wheels and inner wing trim (drivers side)
Before removal;
After removal;
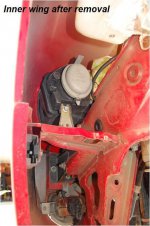
Removing the inner wing trim can be a bit ‘fiddly’, you will need to use a bit of force to remove it, be careful not to scratch the wheel arch!
Step 2
Step 2 – Test kit and fit bracket
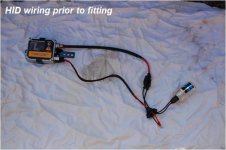
Test the kit before fitting by repeating the wiring required to fit the kit to your B off the car (follow the diagram in the manufacturers instructions). I suggest using the current supply from your headlamps, the wiring for the new kit utilises the positive/negative feed from the standard lighting circuit by being provided with opposing male/female connectors.
NOTE – Make sure that the bulb protector is removed and the kit is insulated from earthing – these kits can kick out in excess of 20k volts (they can kill you).
When you test do not touch the setup while it has a live feed and make sure the bulb is suspended and the wires are insulated.
Step 3
Step 3 – Mount the ballast bracket (Passenger side)
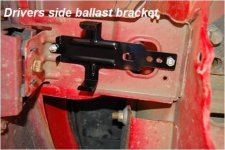
Fit the Ballast mounting bracket underneath the bracket between the inner and outer wings. Offer up the bracket and mark the holes, drill 2 holes to accept the bolts but remember to paint the holes to prevent rusting! Use the nut’s/bolts provided in the kit to secure the bracket and make sure you fit spring washers to stop the nuts vibrating loose in the future.
Step 4
Step 4 – Prepare headlamp sealing cover
Cut a hole in the back of the headlamp cover to accept the rubber grommet for the HID kit. You will need to ensure that you cut the hole slightly off-centre otherwise there will not be room behind it for the bulb and additional wiring when fitted to your B.
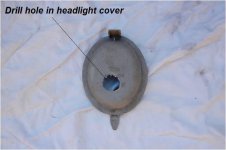
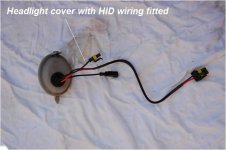
Feed the bulb through the new hole (being careful not to touch the glass) and fit the rubber grommet to seal the until.
Step 5
Step 5 – Fitting the new system
Remove the old bulb and fit the bulb into the bulb holder (being careful not to touch the glass). Connect the live/negative feed from the existing wiring to the power feed for the kit (simple spade connections but I suggest wrapping them in insulation tape to reduce the possibility of shorting and corrosion).
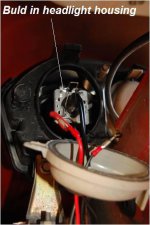
Then Fit ballast to bracket (slides in), feed the wires from the ballast through the inner wing and connect to the wires from the bulb to complete the circuit, tidy up with cable ties to ensure wires are not left unsecured and then replace the inner wheel arches!
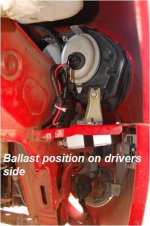
Repeat the process for passenger side with the following differences;
Adapt ballast bracket to fit OVER the inner-outer wing bracket by bending it 90 degrees.
Offer the ballast bracket up to the inner/outer wing bracket and mark the ballast bracket at the edge of the inner/outer wing bracket.
Carefully bend the ballast bracket in a vice. Offer the ballast bracket back up to the car and mark the holes to be drilled – remove and drill the holes!
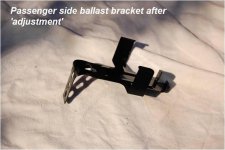
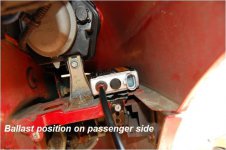
Fit the bracket onto the TOP of the inner/outer wing bracket and wire as per drivers side.
 hid10
hid10Considerations and final results
Considerations:
High voltage – make sure you do not touch any part of the kit while it has a live feed!
The manufacturers instructions (in respect to the wiring) are correct and easy to use – read them first and don’t take my word for it!!!
When drilling the holes I suggest drilling a pilot hole first then chasing out with the correct sized drill bit
Take your time – drilling the holes can be awkward – don’t rush it!
You will need to drill through your B so make sure you cover any holes with paint to inhibit rust otherwise your car will disintegrate when it rains
Its and easy mod – take your time drilling the holes and make sure you leave enough room for the bracket fittings before going wild with power tools. Should take no more than 3 hours to do both sides………
