I try to be unemployed but keep Monday and Friday as days off.


You are using an out of date browser. It may not display this or other websites correctly.
You should upgrade or use an alternative browser.
You should upgrade or use an alternative browser.
General Seat Panda Terra
- Thread starter Alixcompo
- Start date
Currently reading:
General Seat Panda Terra
I try to be unemployed but keep Monday and Friday as days off.
Wise move....impressed again.... BTW, try not to get paint on those wheel trims.
Wise move....impressed again.... BTW, try not to get paint on those wheel trims.
'By The Way' I think that will be a Pinky fund contribution then.?
'By The Way' I think that will be a Pinky fund contribution then.?
That's ok...won't be the first and won't be the last...

Squeezed in an hour today and managed to fit the very 2nd hand windscreen I bought very cheaply. It had a chip in a corner which might not have been a problem except
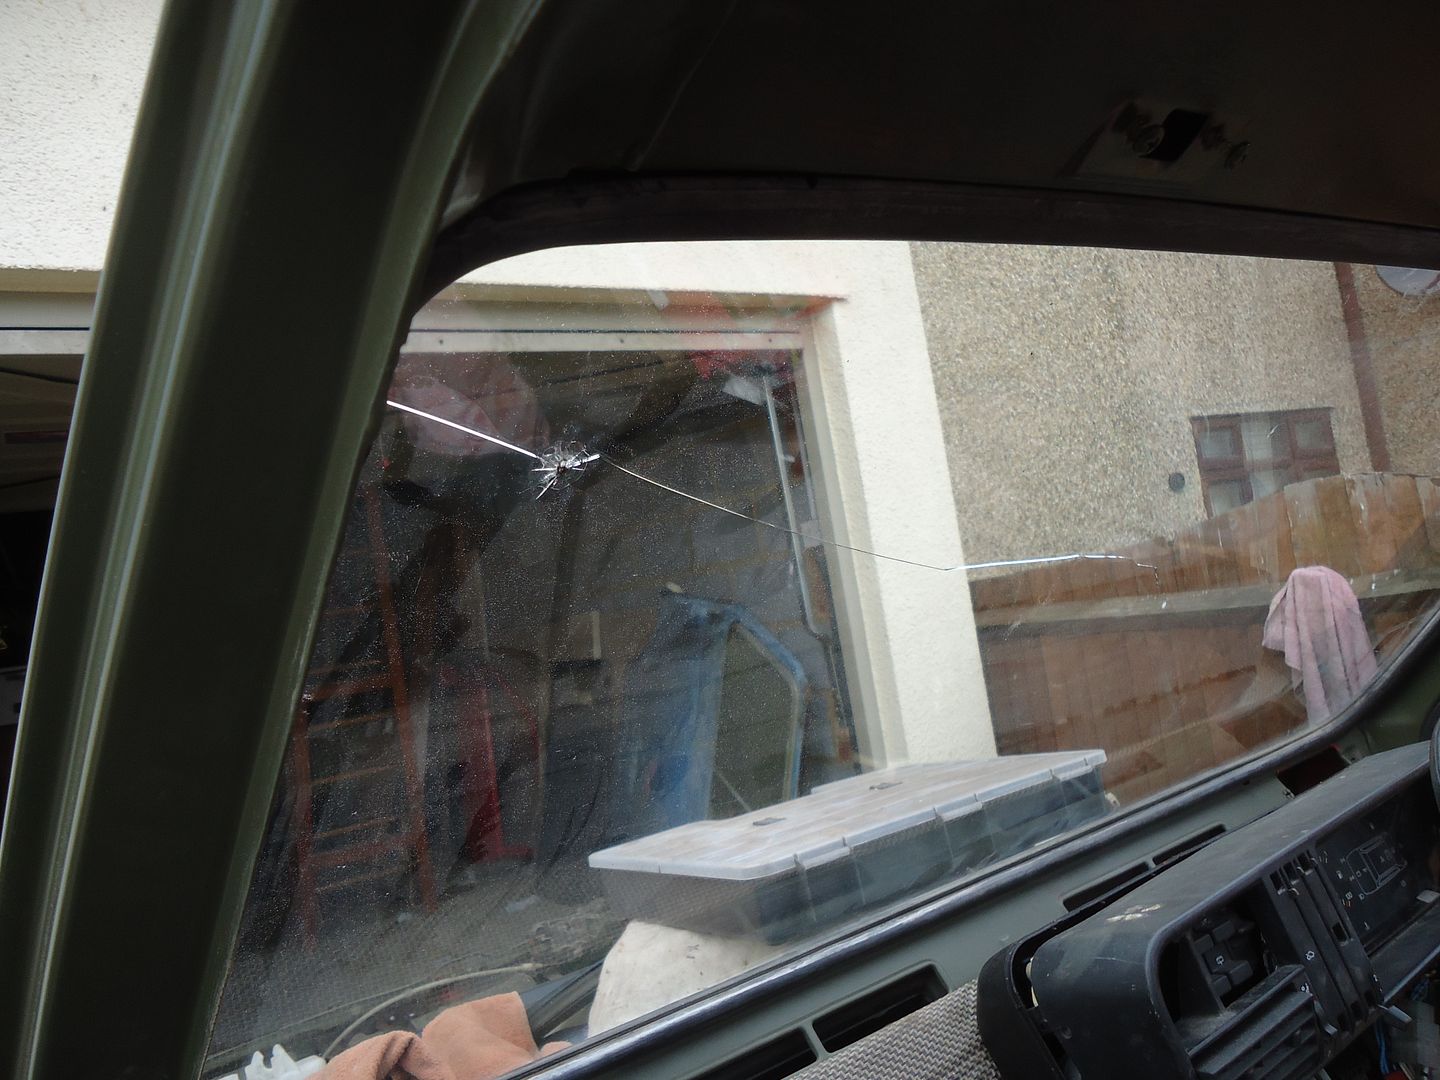
As soon as I touched that corner to pop the rubber in it cracked. Ah well; good experience some would say.! Why is good experience always bad..?
However; undeterred I carried on and I reckon had the screen not had that chip to start with then I would have been ok.
So the score is one screen destroyed on removal and one on fitting. I reckon I have the hang of it now. The next one will be a doddle.
Better news on the passenger door glass.

My modifications to the Marbella door seem to have worked and the MK1 glass and quarterlight fitted easily.
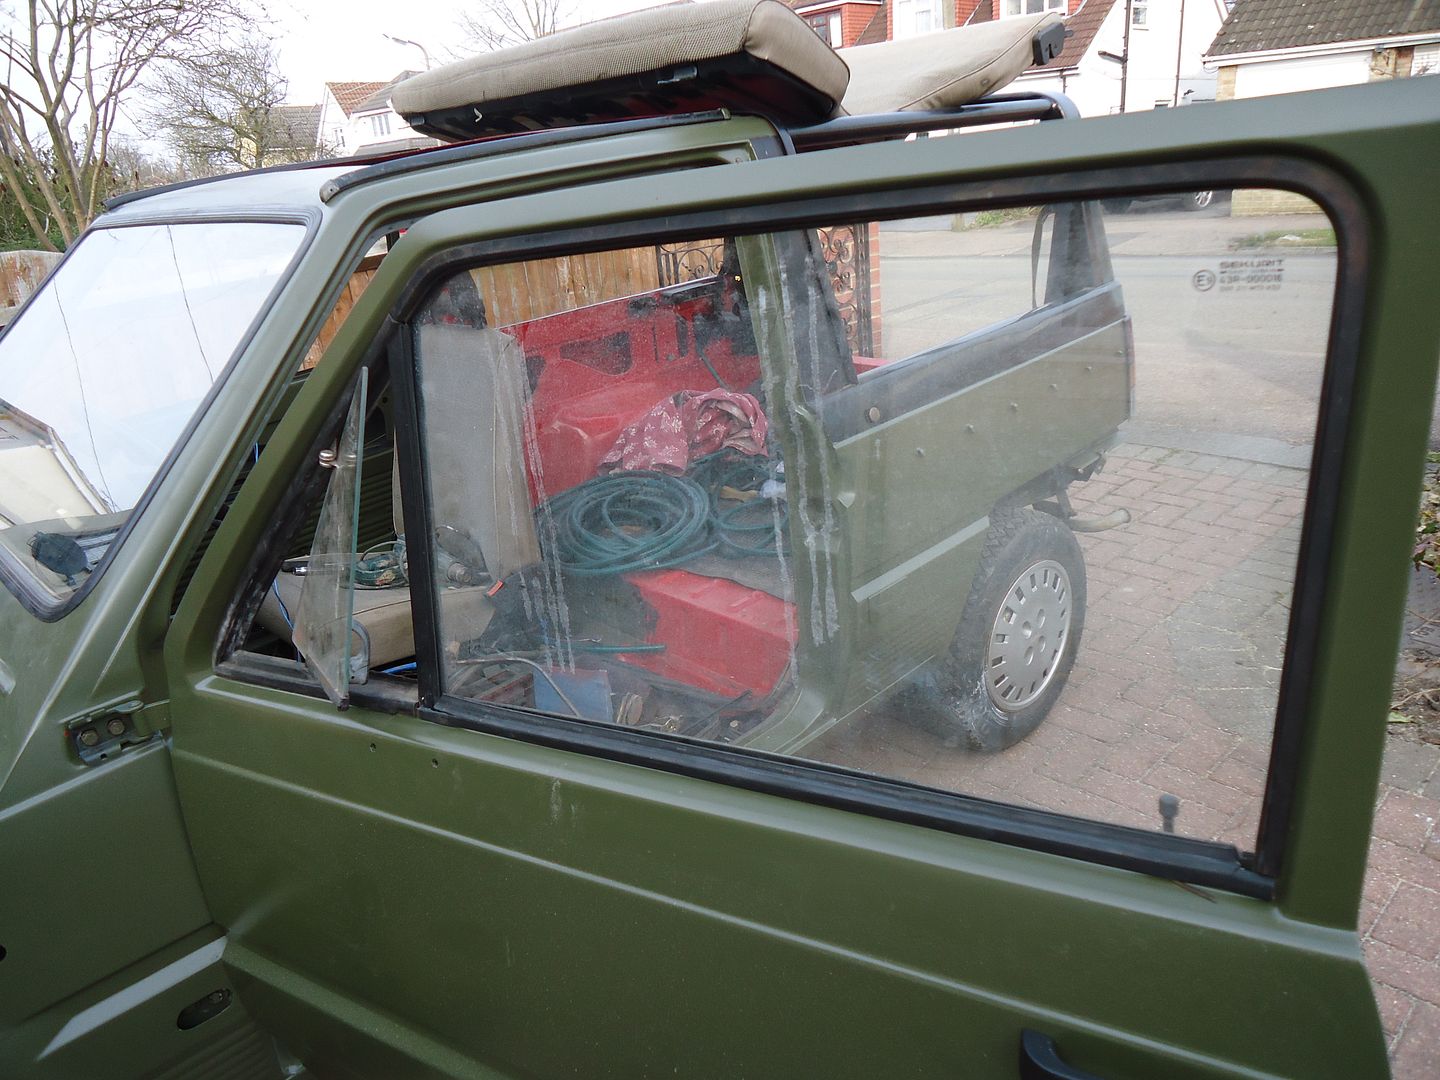
The trim is a bit pants but it took a couple of goes to realise how to remove that without damaging it as well. I'm sure I can find some better pieces in the future.
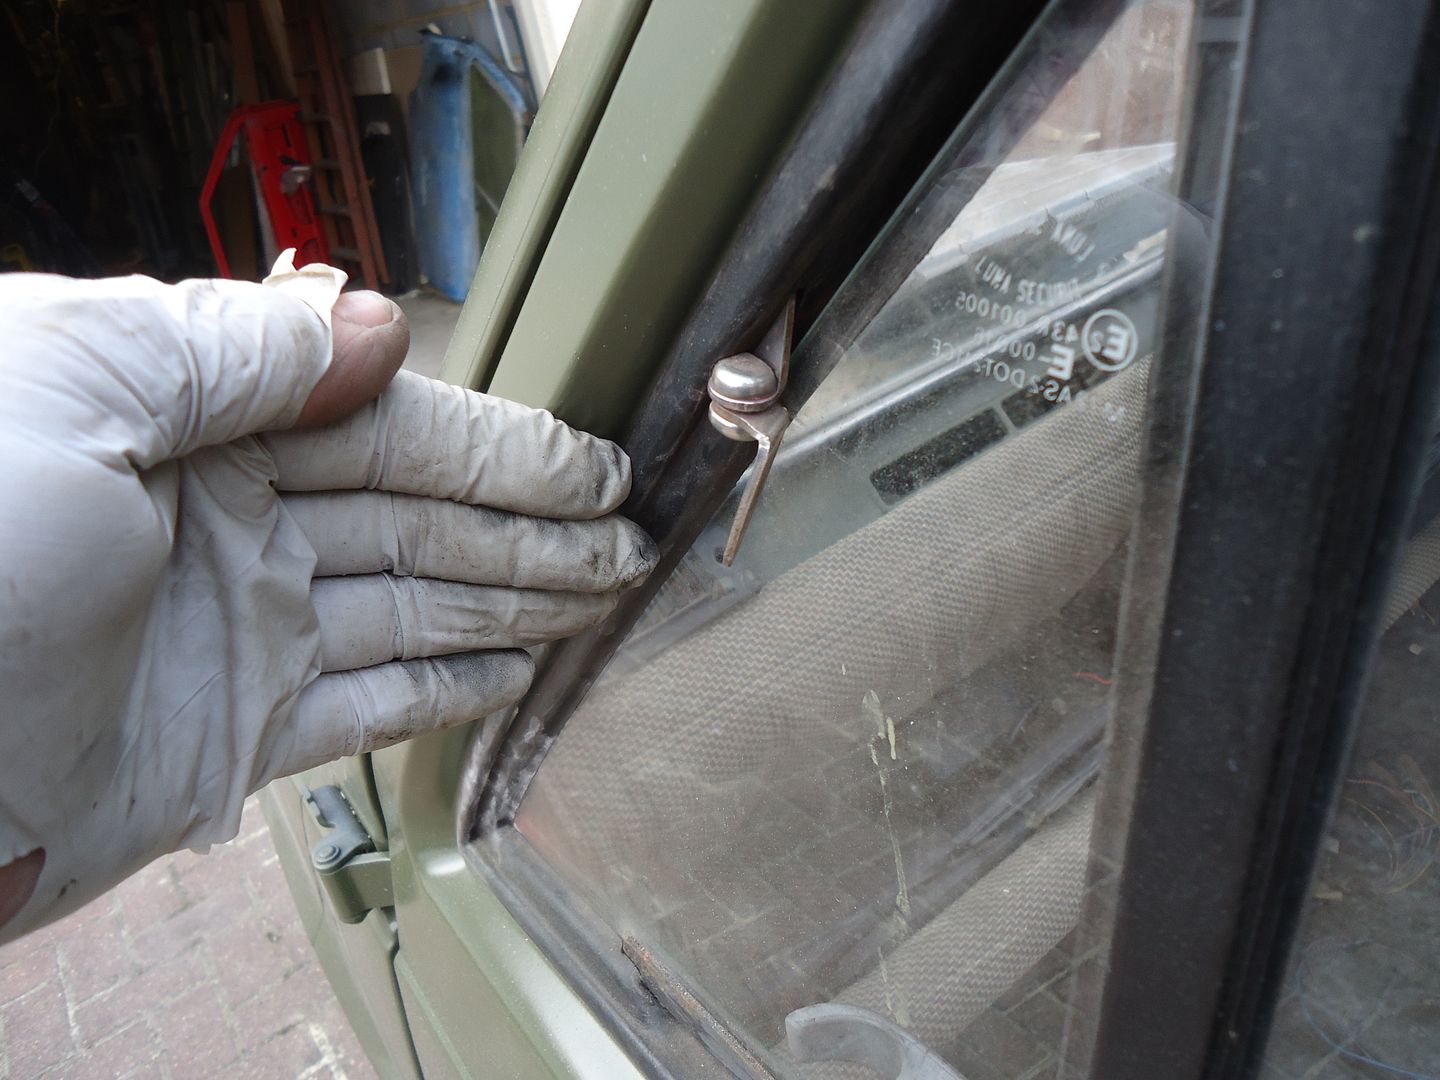
The sidelight top hinge has come unglued; as I gather they all do. Hopefully some kind soul on here can tell me which adheasive to use to stick it back on.
And here is the door painted, re-fitted, and with funny new handle. It works OK and is suitably tacky just as all plastic accessories should be.
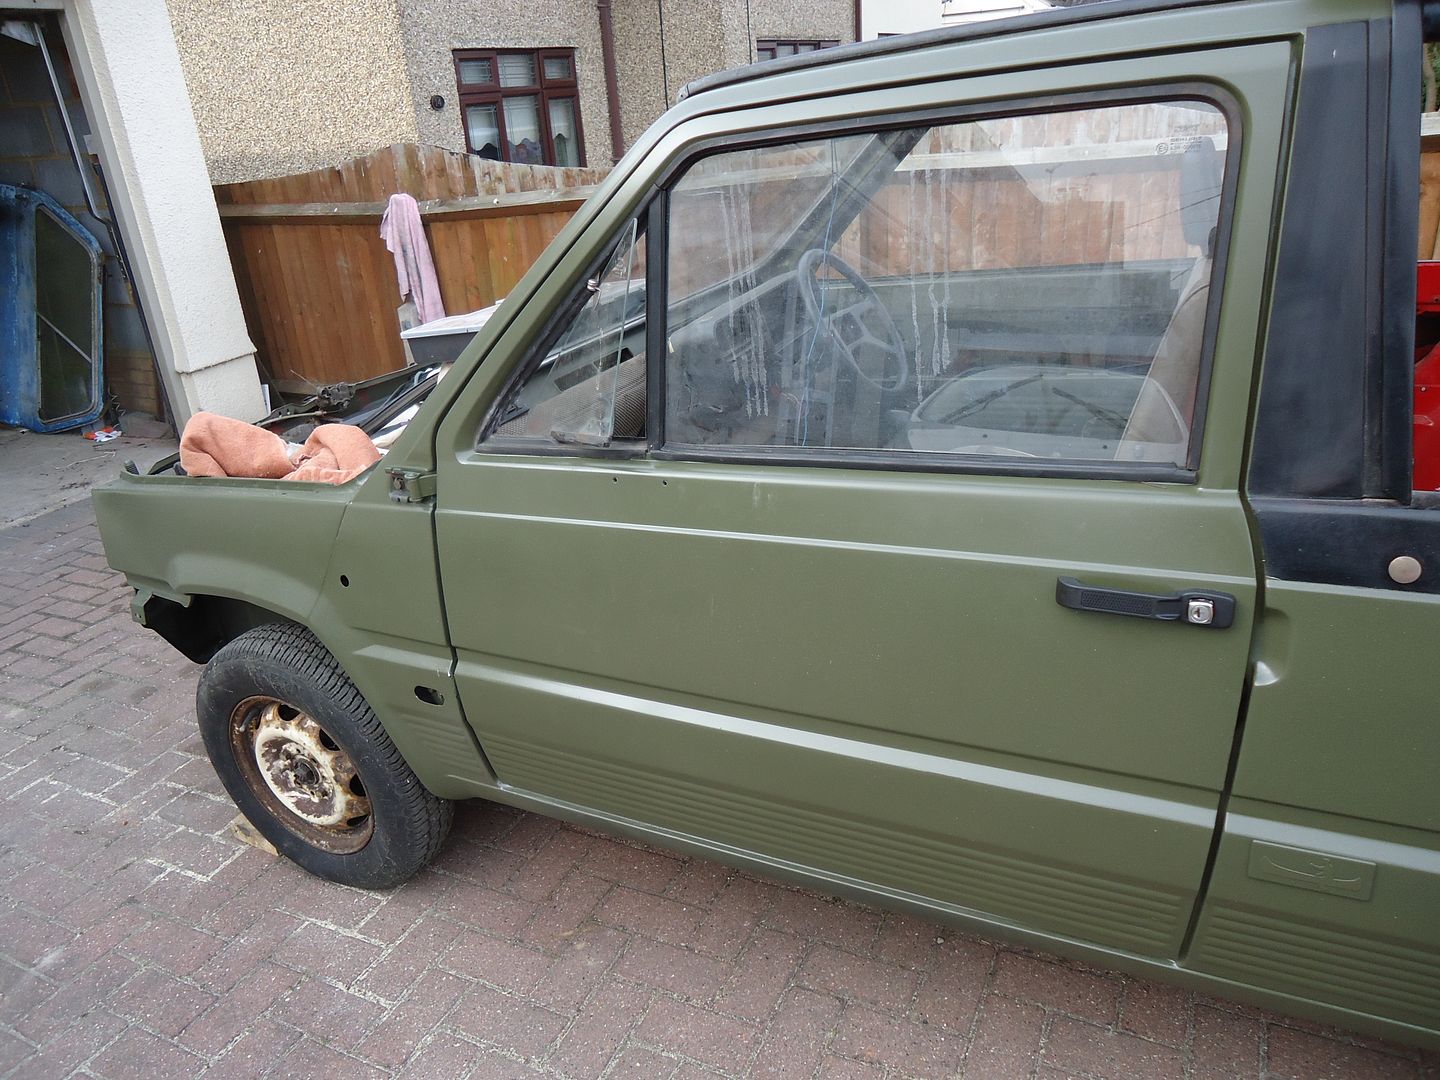
Very much in keeping and it makes me smile.
I also got the drivers door mounted.
Next job is to search my boxes for a passenger door mirror. I have one with the interior remote adjuster but I don't really want to drill a big hole in the door. That's where it cracked on the original one.
Anyone want to swop a remote mirror for a bog standard MK1 or SEAT Marbella one.?
As soon as I touched that corner to pop the rubber in it cracked. Ah well; good experience some would say.! Why is good experience always bad..?
However; undeterred I carried on and I reckon had the screen not had that chip to start with then I would have been ok.
So the score is one screen destroyed on removal and one on fitting. I reckon I have the hang of it now. The next one will be a doddle.
Better news on the passenger door glass.
My modifications to the Marbella door seem to have worked and the MK1 glass and quarterlight fitted easily.
The trim is a bit pants but it took a couple of goes to realise how to remove that without damaging it as well. I'm sure I can find some better pieces in the future.
The sidelight top hinge has come unglued; as I gather they all do. Hopefully some kind soul on here can tell me which adheasive to use to stick it back on.
And here is the door painted, re-fitted, and with funny new handle. It works OK and is suitably tacky just as all plastic accessories should be.
Very much in keeping and it makes me smile.
I also got the drivers door mounted.
Next job is to search my boxes for a passenger door mirror. I have one with the interior remote adjuster but I don't really want to drill a big hole in the door. That's where it cracked on the original one.
Anyone want to swop a remote mirror for a bog standard MK1 or SEAT Marbella one.?
Last edited:
Just a tip, the rear seats go IN the car not ON the car - even though you like to be different..
BTW a smidge of red paint is showing through too :devil:
Other than that really looking forward to seeing this in the metal
Last edited:
Just a tip, the rear seats go IN the car not ON the car - even though you like to be different..
That's why I 4x4'd it. This is the 'Safari' model
The sidelight top hinge has come unglued; as I gather they all do. Hopefully some kind soul on here can tell me which adheasive to use to stick it back on.
I had the same same problem on mine and used the 2 component epoxy glue from UHU:
http://www.uhu.com/produkte/2-kompo...r.html?cHash=7cccac02b5592e62bc0038becaa1054d
Don't know if available in UK but for sure you will find something similar.
When glueing you should pay attention on the gap between the glass and the black bar. Otherwise the upper edge of the glass gets stuck on the bar when opening and you can start from new...
On mine there was a certain pressure aiming to the bar so I used a simple wooden wedge for the distance plus lots of tape to keep everything fixed.
It hasn't fallen apart since repair 1 year ago
A tad more progress today. Some better than other bits.
I rebuilt the drivers door which went quite well, glass fitted and weather strips tapped in.
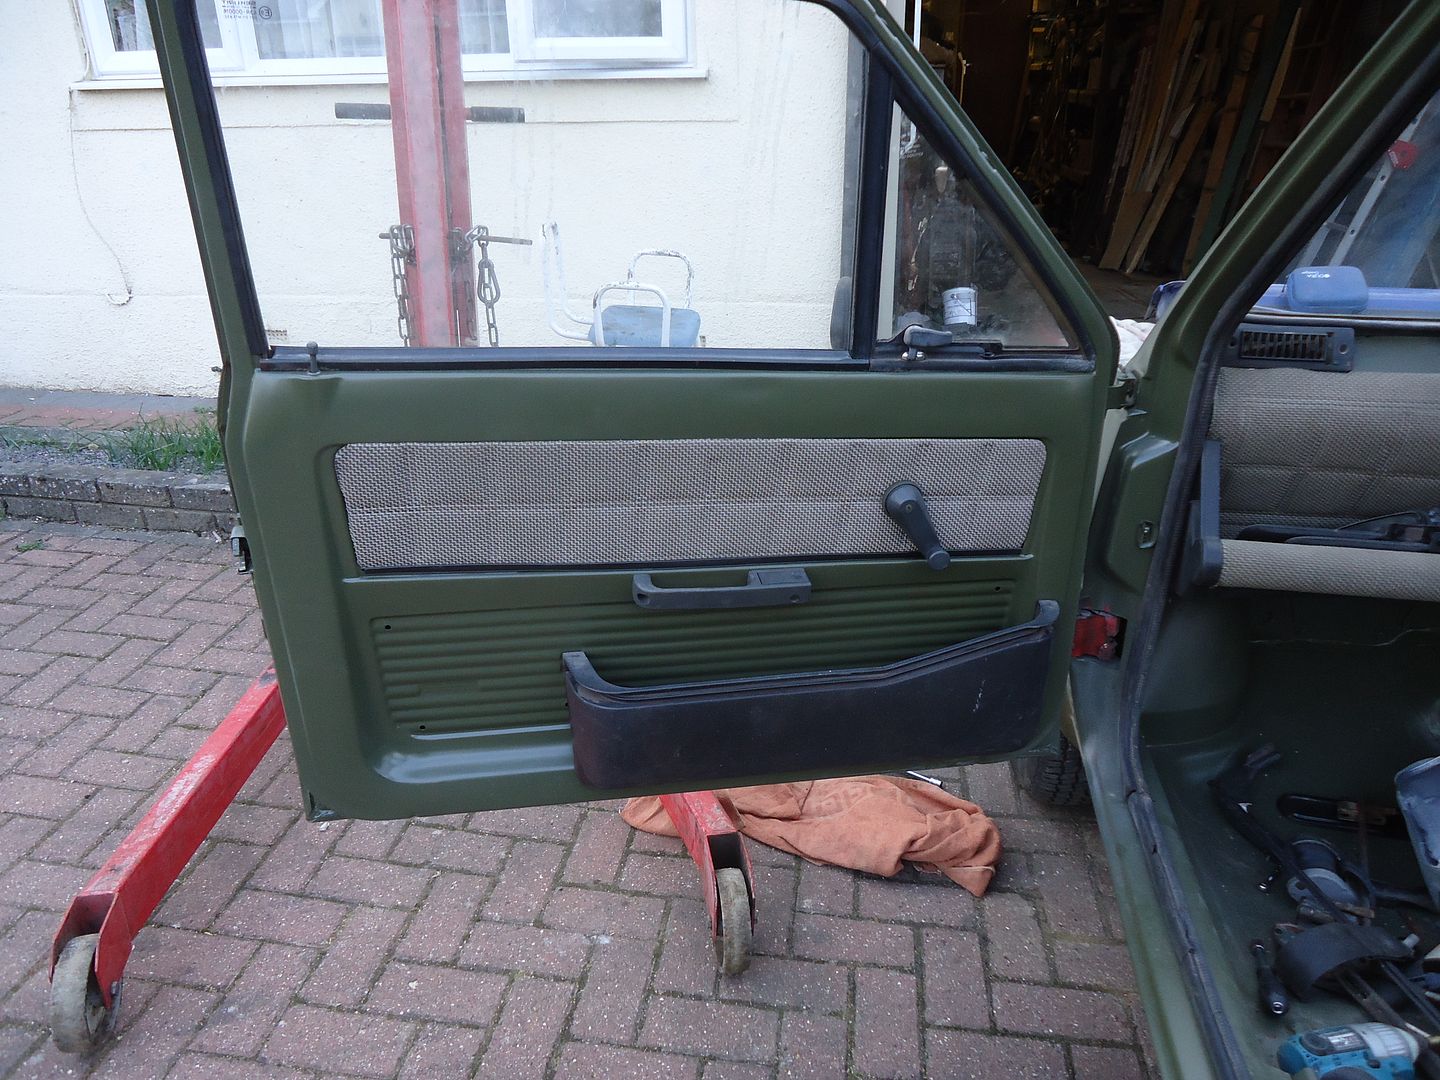
The passenger door however has never seemed to fit properly; at the bottom front edge by the hinge it wasn't level with the lower wing.
And when it was open fully it was digging into my new paint..!
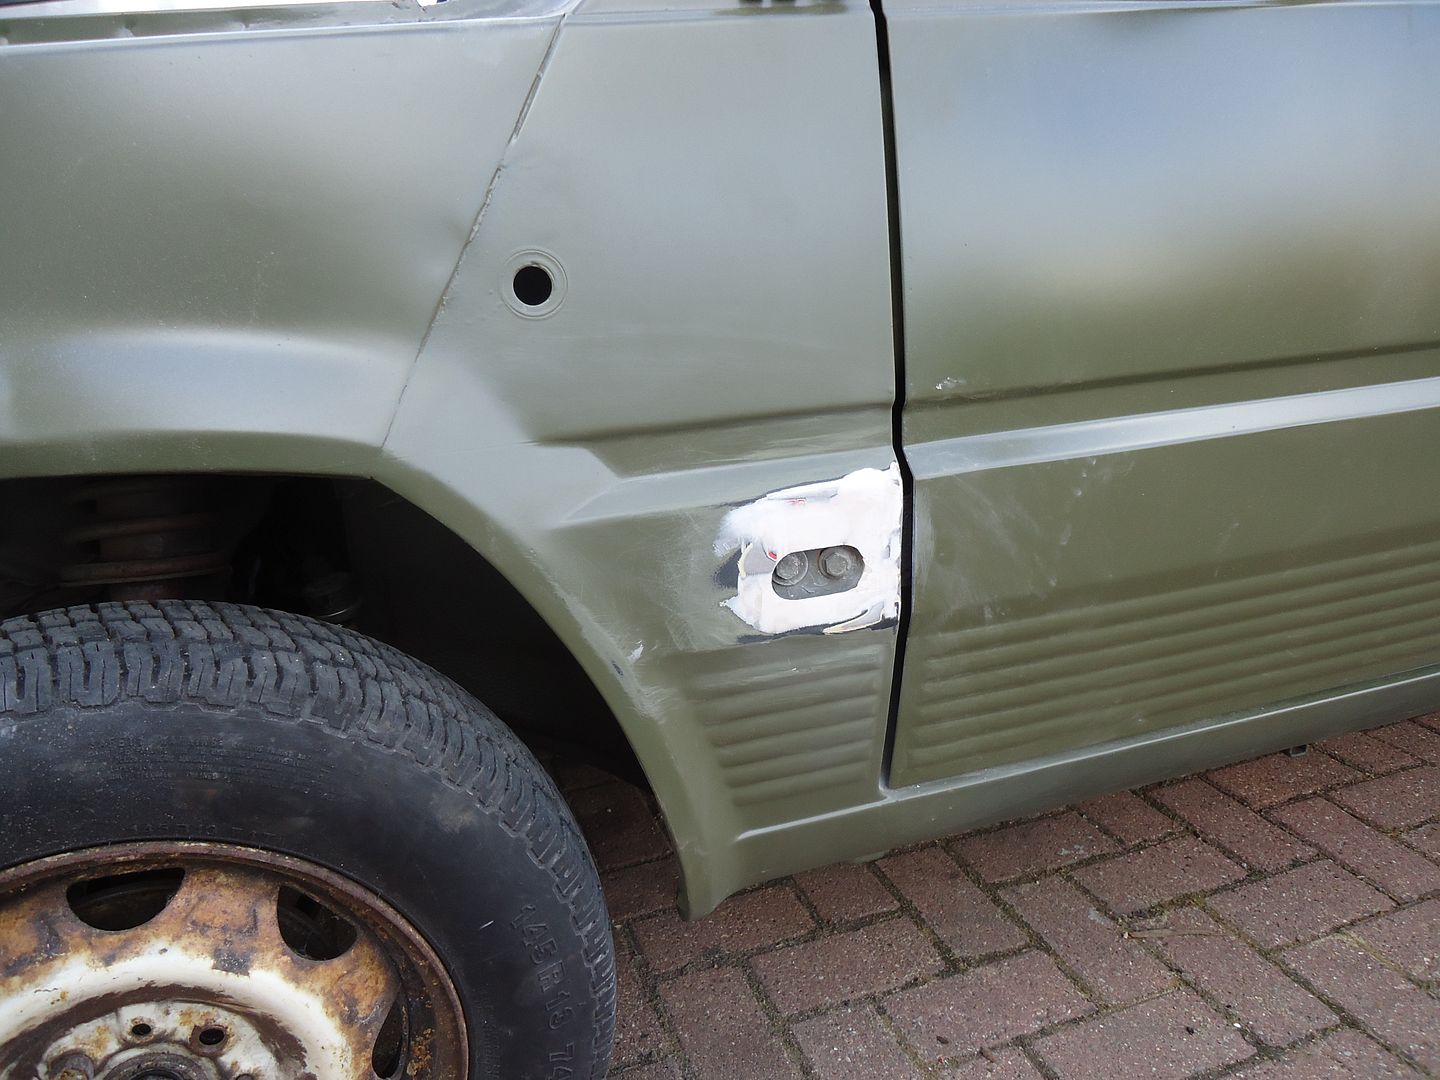
First off I found deep filler on the lower wing. I ground all that out and gently reshaped the wing so it didn't need as much pug.
The I took the door off (about four times) and found that the bottom hinge had been sort of repaired. After playing about with that for about half and hour I got bored and rumaged through my boxes and fortunately found another hinge.
It is better now, and doesn't foul the wing when it is open) but it still isn't right. Must have had a bit of a prang in that corner sometime. It will do for now.
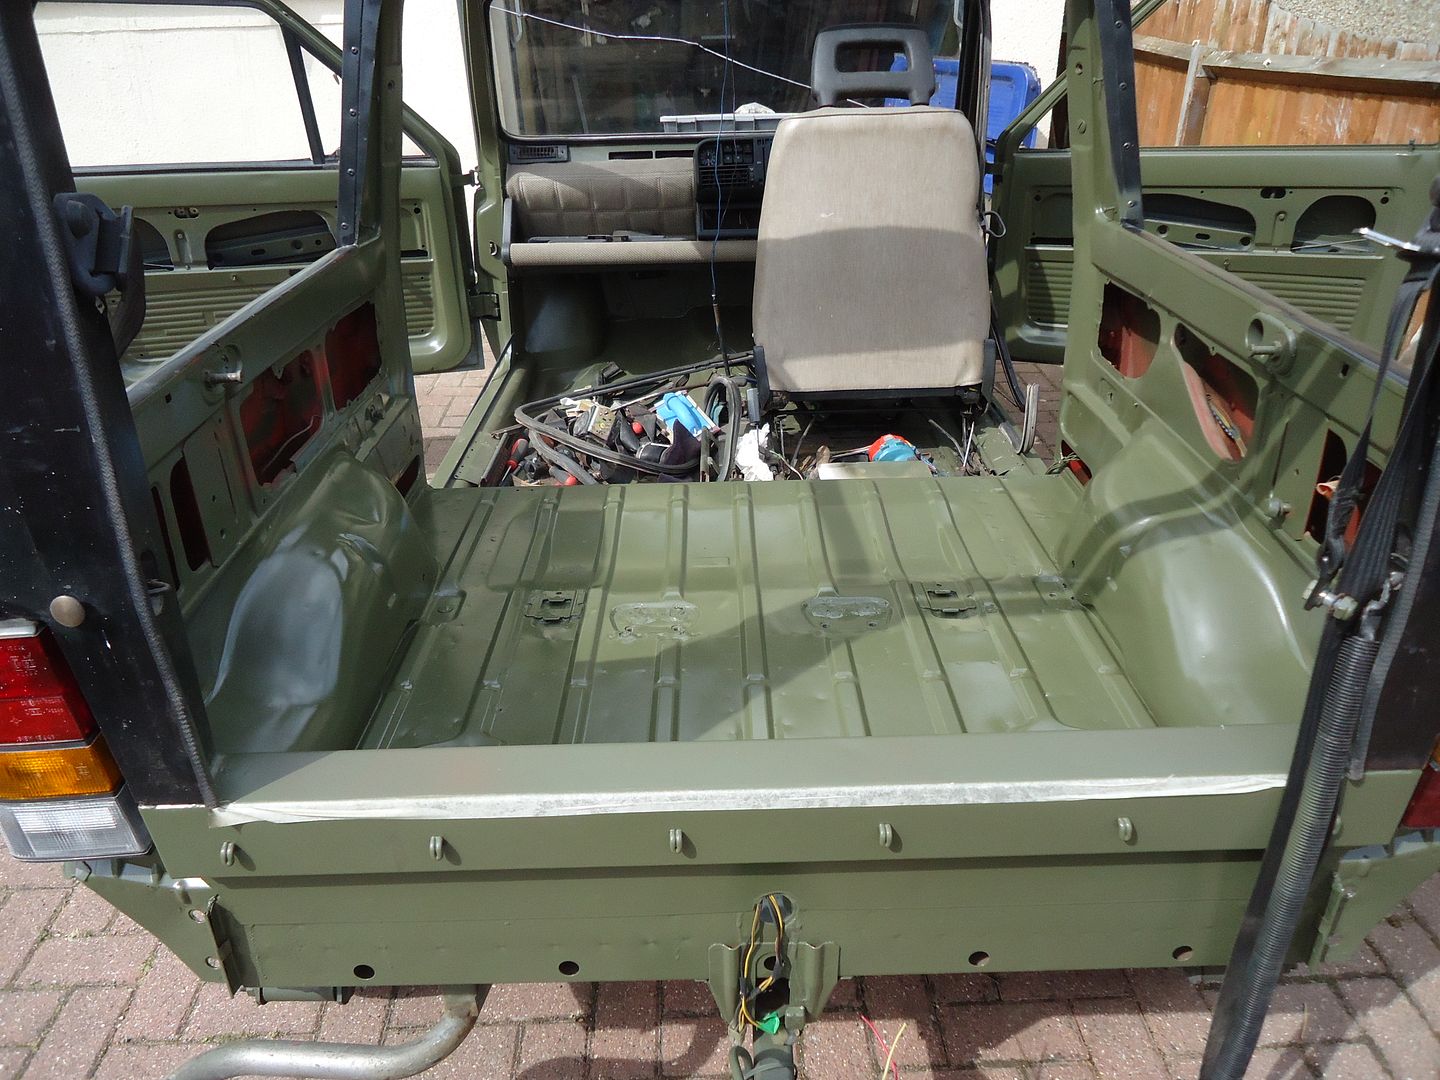
Finally got the inside painted
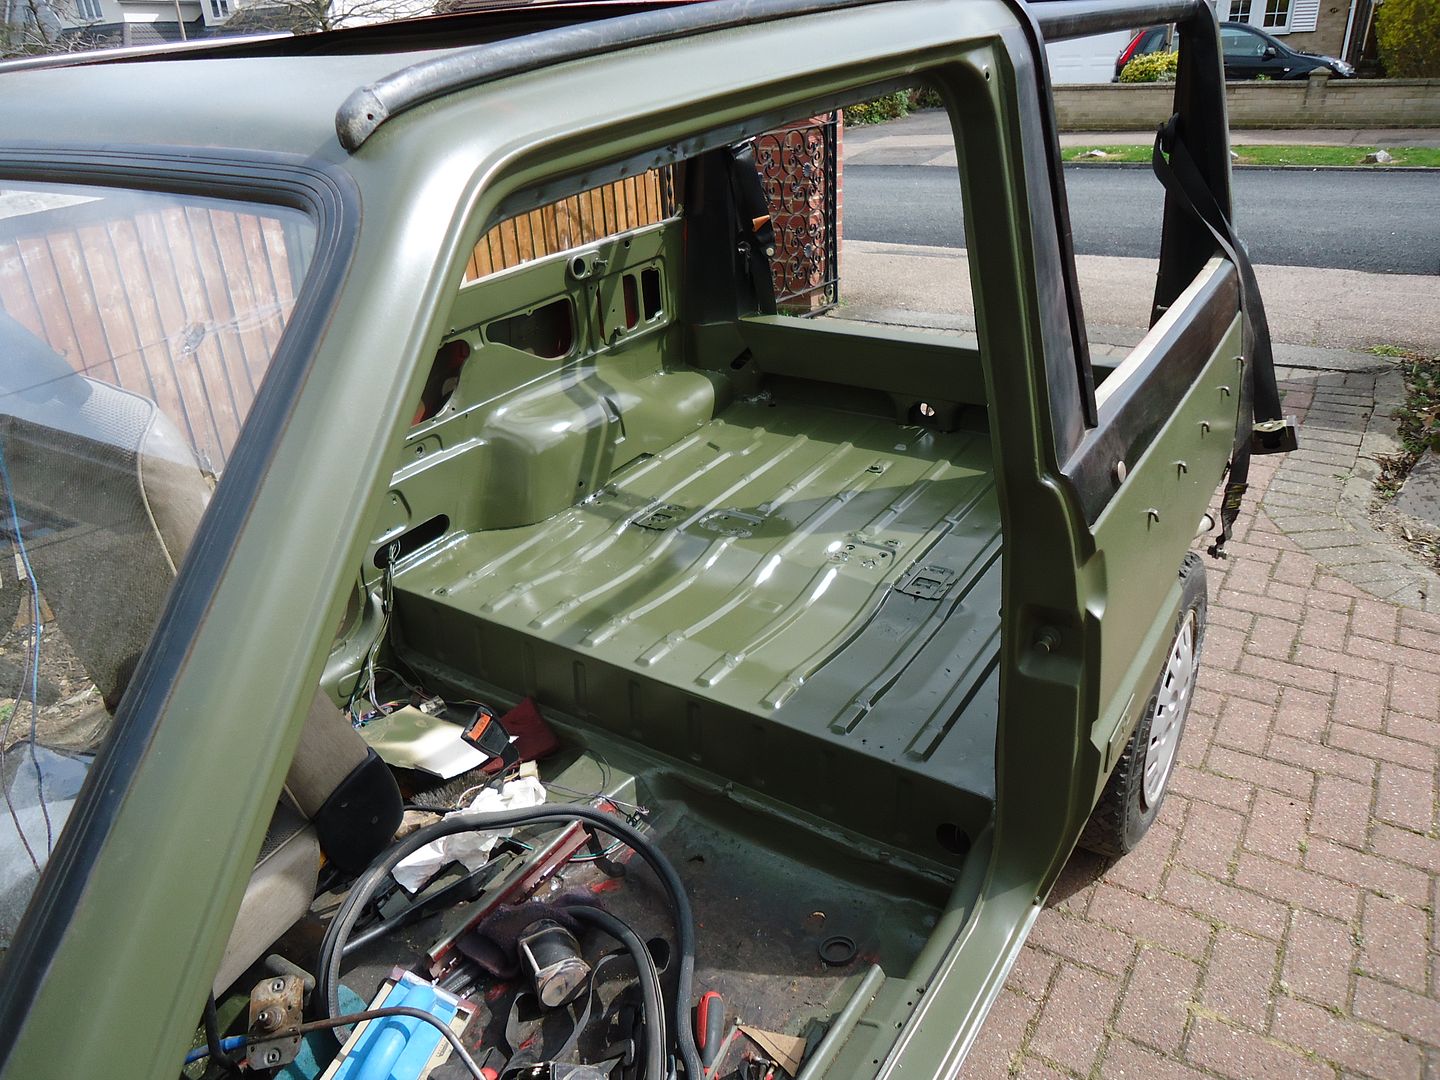
I took a chance and sprayed it on account of not having enough time to brush paint. Although I didn't have enough time to mask up properly either so it was a case of holding up bits of card 'n' stuff.
I was so pleased to get it done I finished up my can of paint doing it.... Only then did I remember that I haven't painted the bonnet yet.! Bug*er..
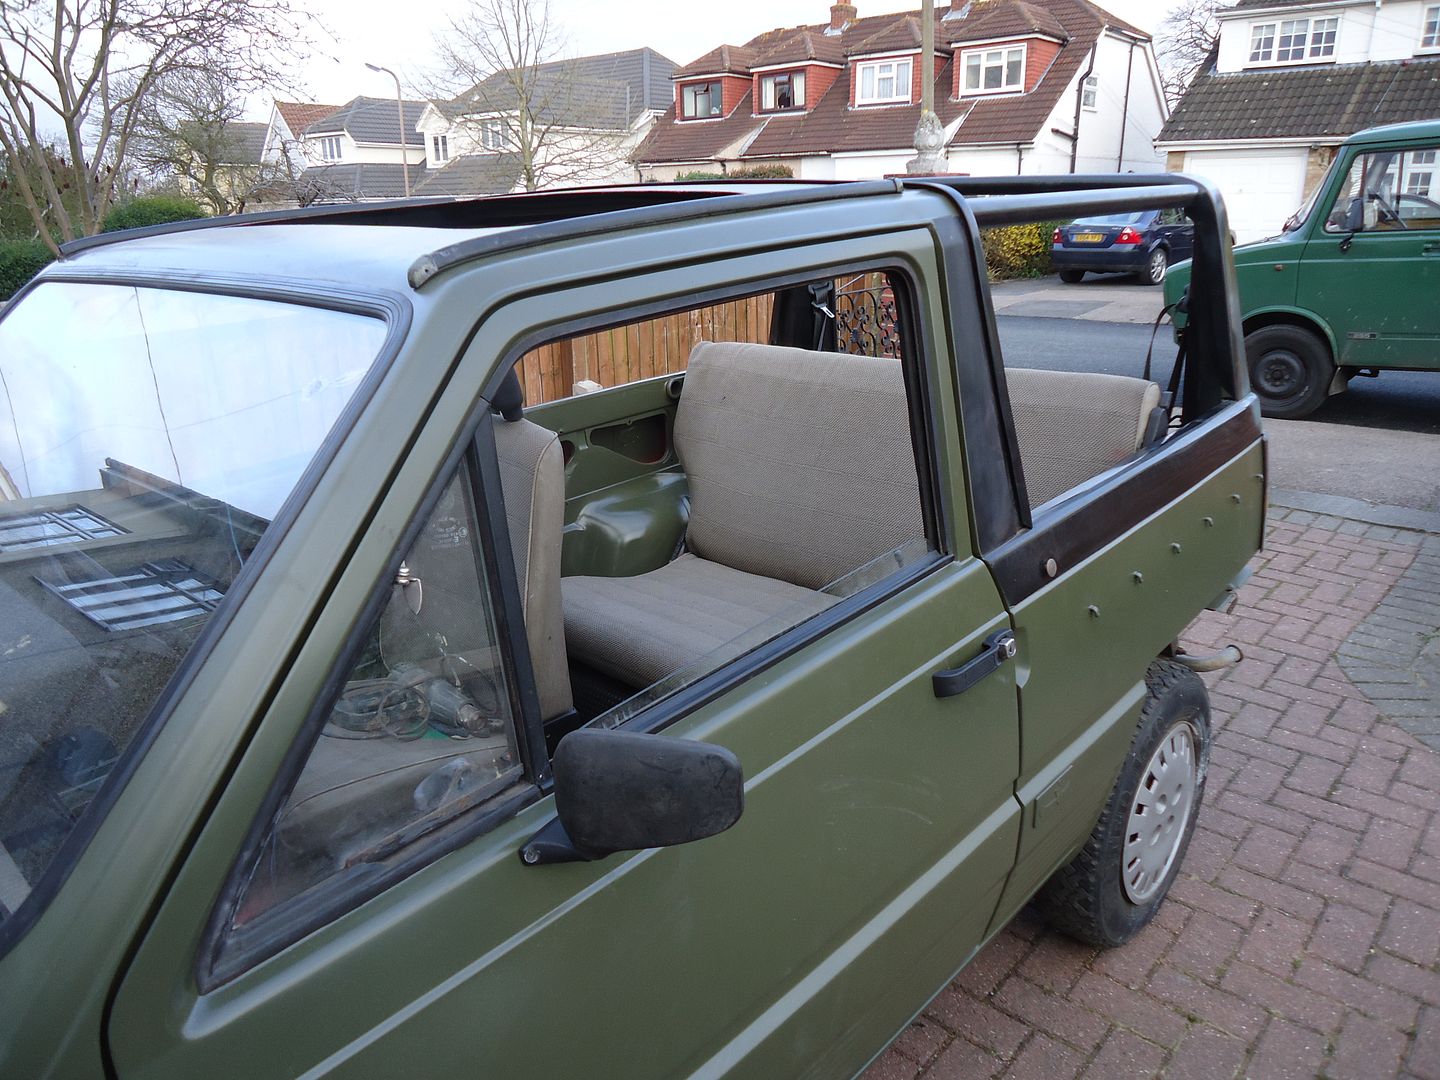
But it is getting there. Rear rubber mat is cleaned and refitted. The seat is in (place) and the seat belts are ready to bolt in.
Driver and passenger door rubbers are in..... Now if I could just find my nice new door handle for the drivers door.... Hmmm
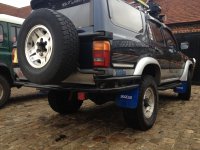
How about a tube rear bumper like the one I had made for my truck? Vern has rock sliders as well.
I did briefly think about that but there would be a lot of wet flying about off the back wheels if I don't fit something at the sides.
P.S. Do you like the colour yet.?
Just had a closer look on an enlarged view.. Nice bumper that. I like it lots
I did briefly think about that but there would be a lot of wet flying about off the back wheels if I don't fit something at the sides.
P.S. Do you like the colour yet.?
Always liked it...just needs that beige roof..:devil:
As you can see, I had the same "muck flying everywhere problem...then I discovered mud flaps..seriously, I know this guy in Scotland who made and sent it for £150.. Not bad I think.
Tube bumpers front and rear on the terra??..
Funny afternoon today. Like I said, I ran out of paint yesterday and so; Taking the empty tin to the paint shop I got them to mix half a litre of the same for the bonnet.
Off I rushed, prepped and sprayed the said engine lid and very pleased I was with the results. Although there is a very slight dilemma.
Should I sparay the rest of the car again but in 'gloss' to match the bonnet or should I resray the bonnet in 'satin' to match the rest of the car.!Yep they gave me the wrong paint..........
What is worse is that I quite like the gloss..........
Hmmm......like gloss...kinda different for that colour.
Could do patches of gloss to make a unique camo effect.
Only joking.
Only joking.
So why is it that just as the finish flag comes into sight I find something else daft to do, and in doing, dely things further.
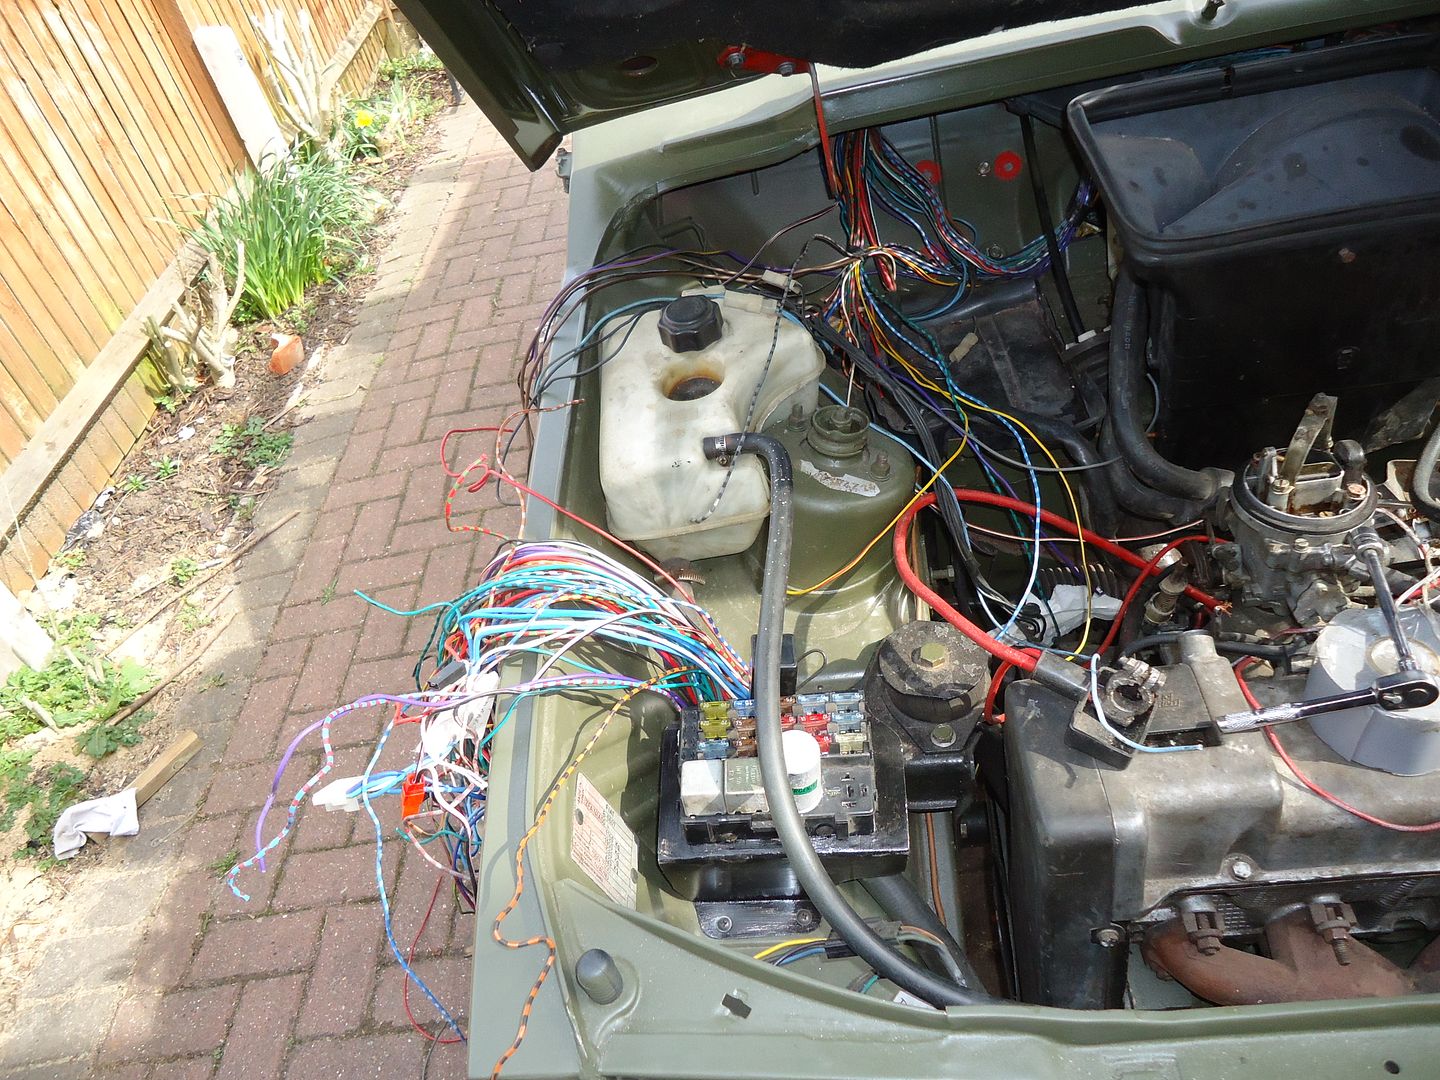
The fact is that I have never liked where Fiat put the fuse box in Panda's. There is so much room elsewhere.
Like under the bonnet.
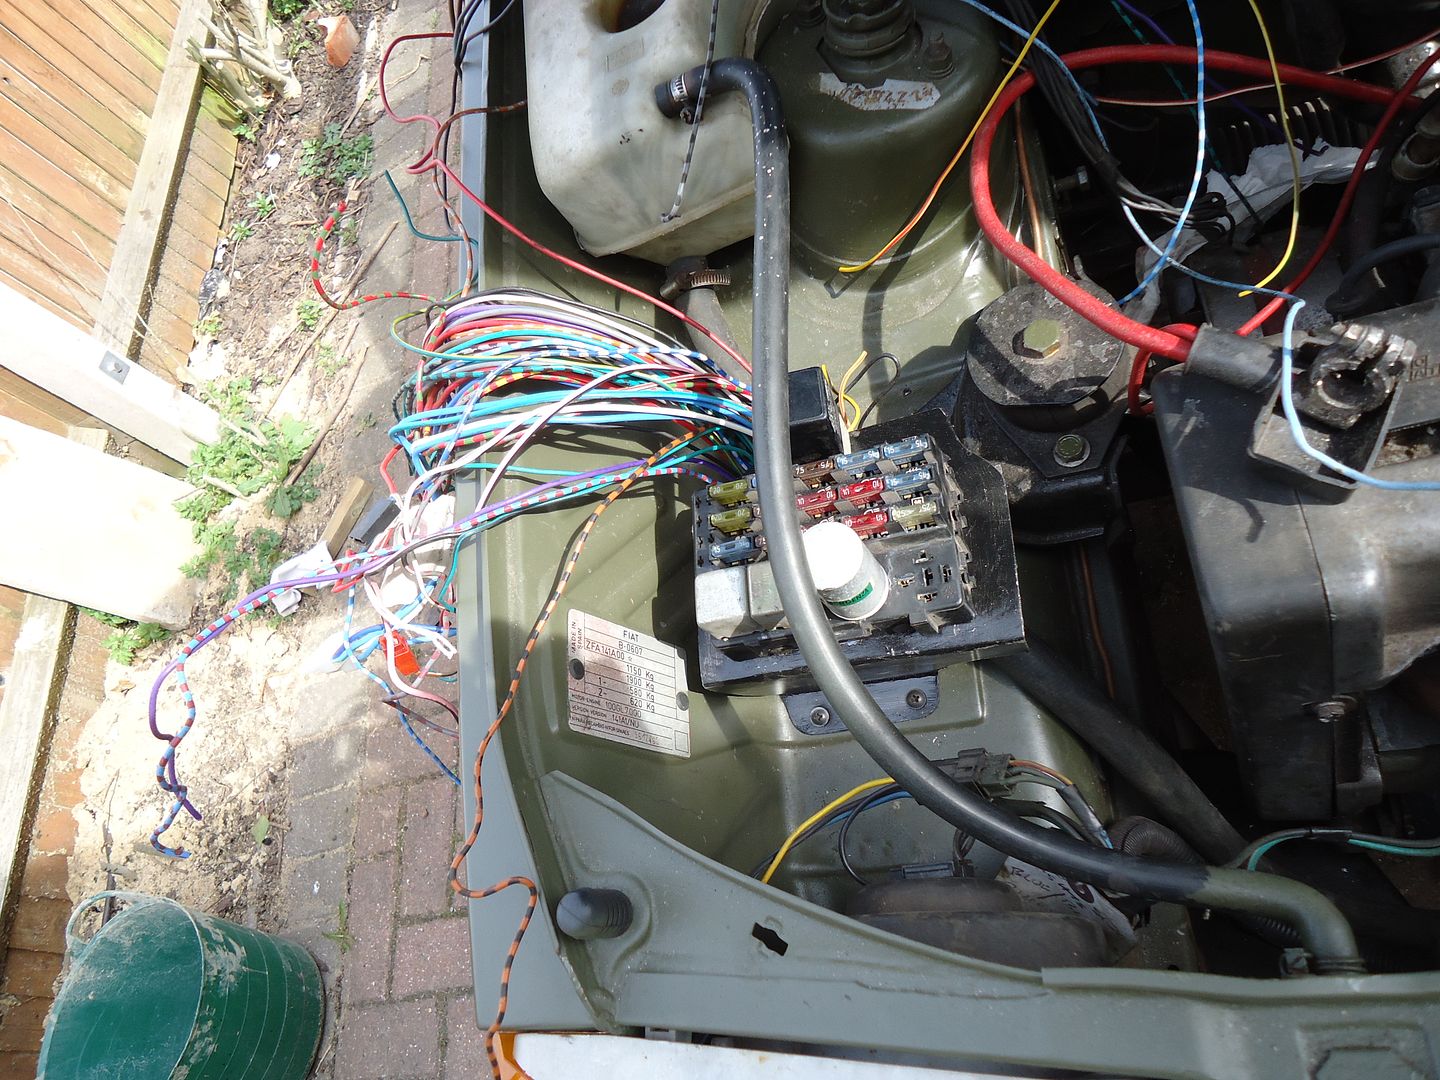
But first you have to do this
First off I made a cardboard template of the shape I wanted for the fuse board platform
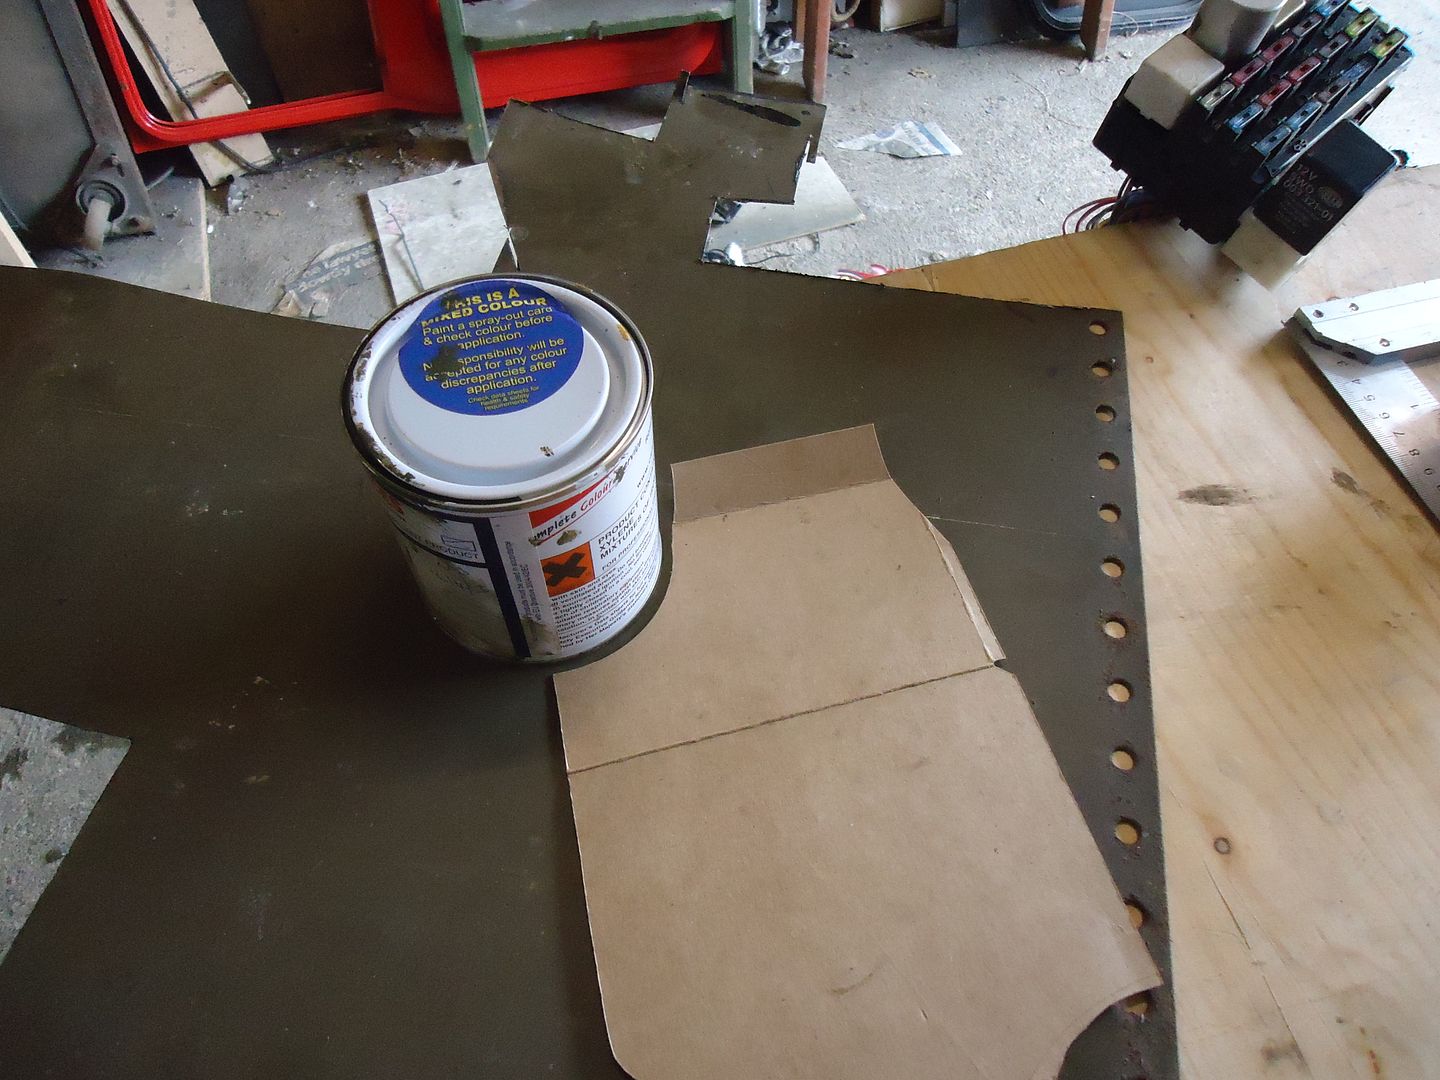
It easy to give it a nicer shape by cutting curves around a tin or summat
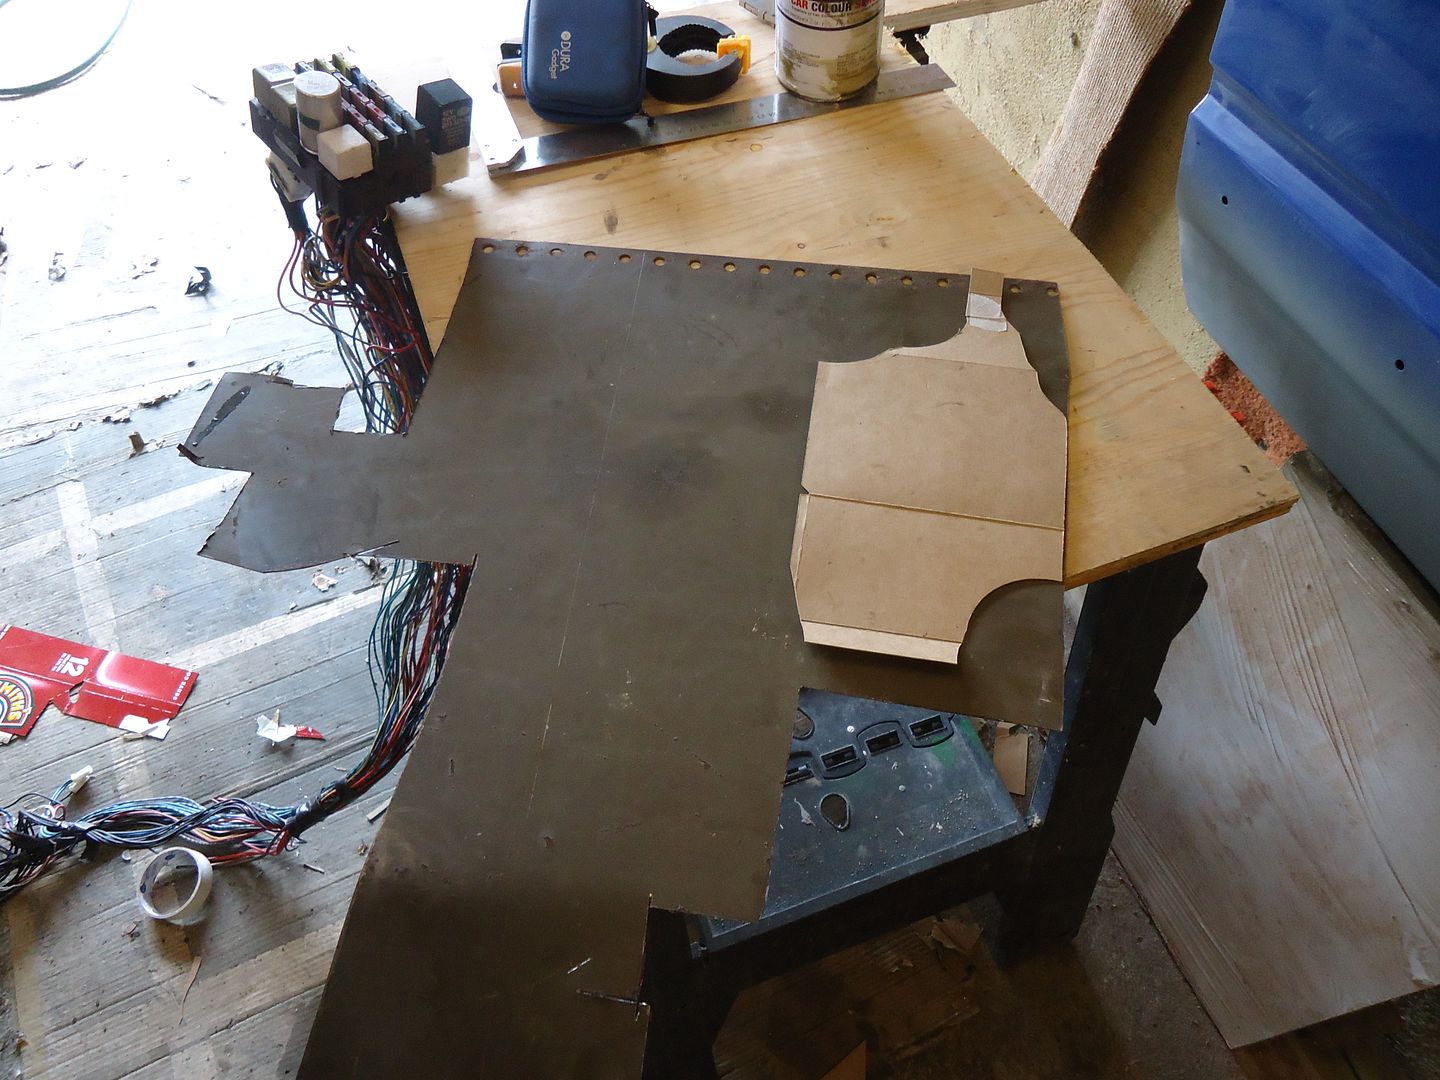
Lay the template on some sheet steel. Notice this is the right colour to match the car.... Once upon a time all filing cabinets were that shade of green.
Mark around the template and then cut the shape out very carefully.
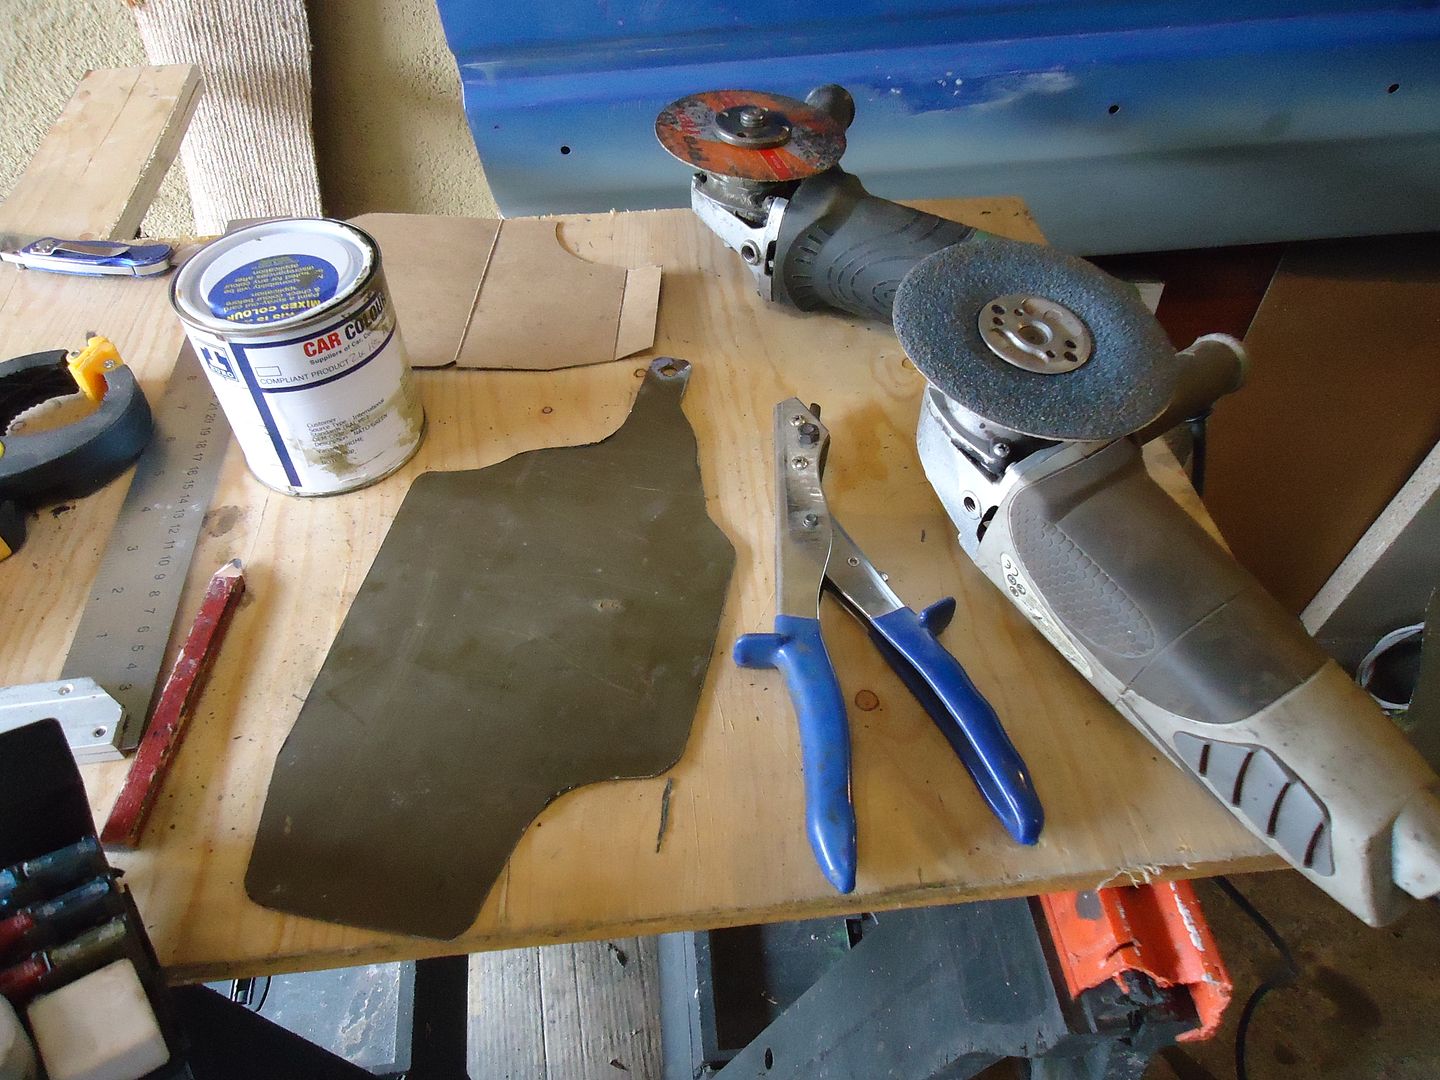
No I didn't use the 'nibblers' it takes too long. I used the grinder with a 1mm cutting blade and then the grinder with the flexible disc (36 grit)
Incidentally is you want to pick up a few backing pads for your flexi discs the Screwfix seem to be having a clear out. They used to be over 7 quid
. Now the are 70 pence. You don't want to know how many I bought.
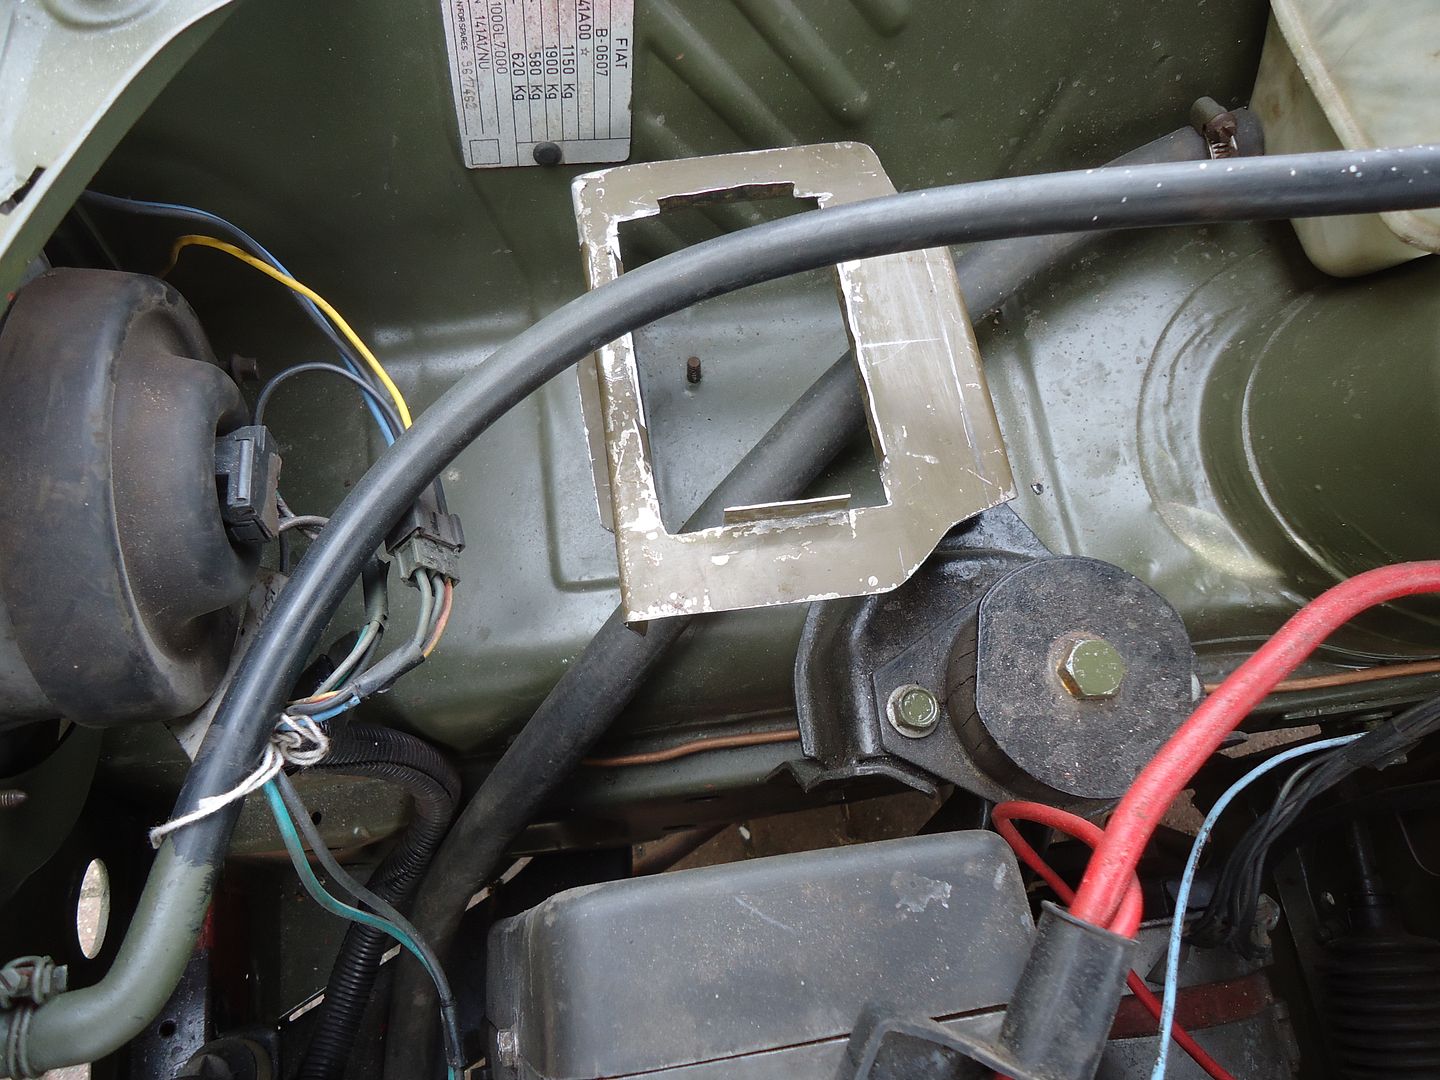
I transferred the bends from the template and folded it up in a vice.
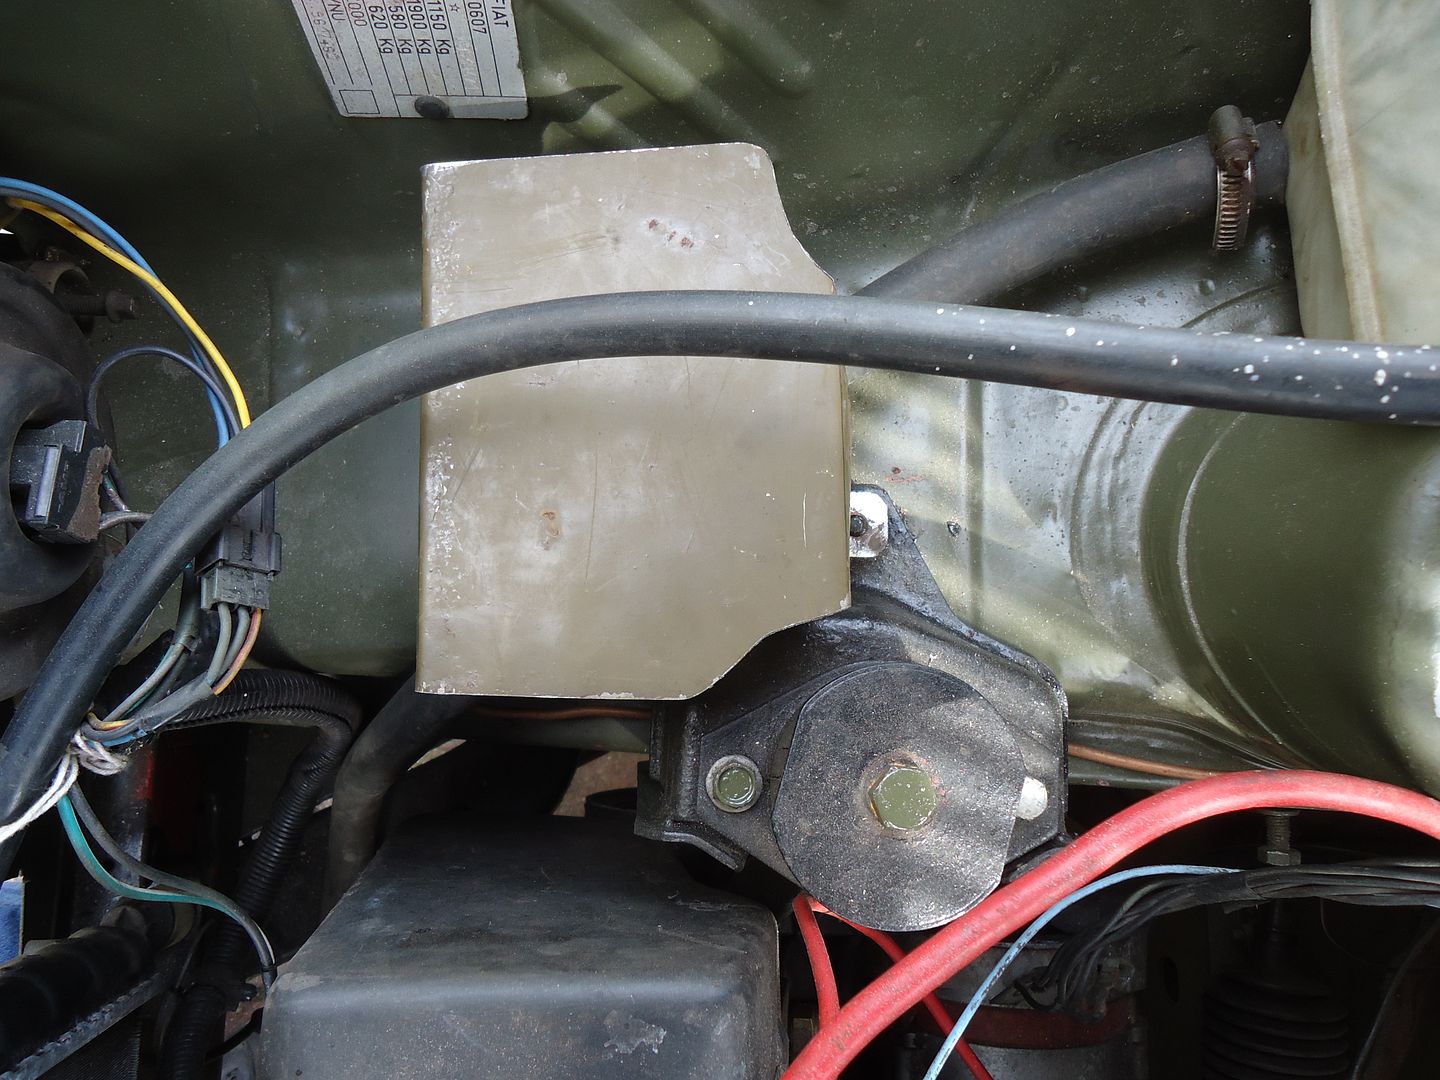
This is a trial fit. Note that it bolts onto one of the engine mount bolts.
Usually I mark my cutting lines with a 'White' pen (Tippex correction pen)
But of course I had forgotten this so I used masking tape onto which pencil lines are great.
I marked out the size of the fuse board and then drew 10mm around the inside of it and cut along those lines.
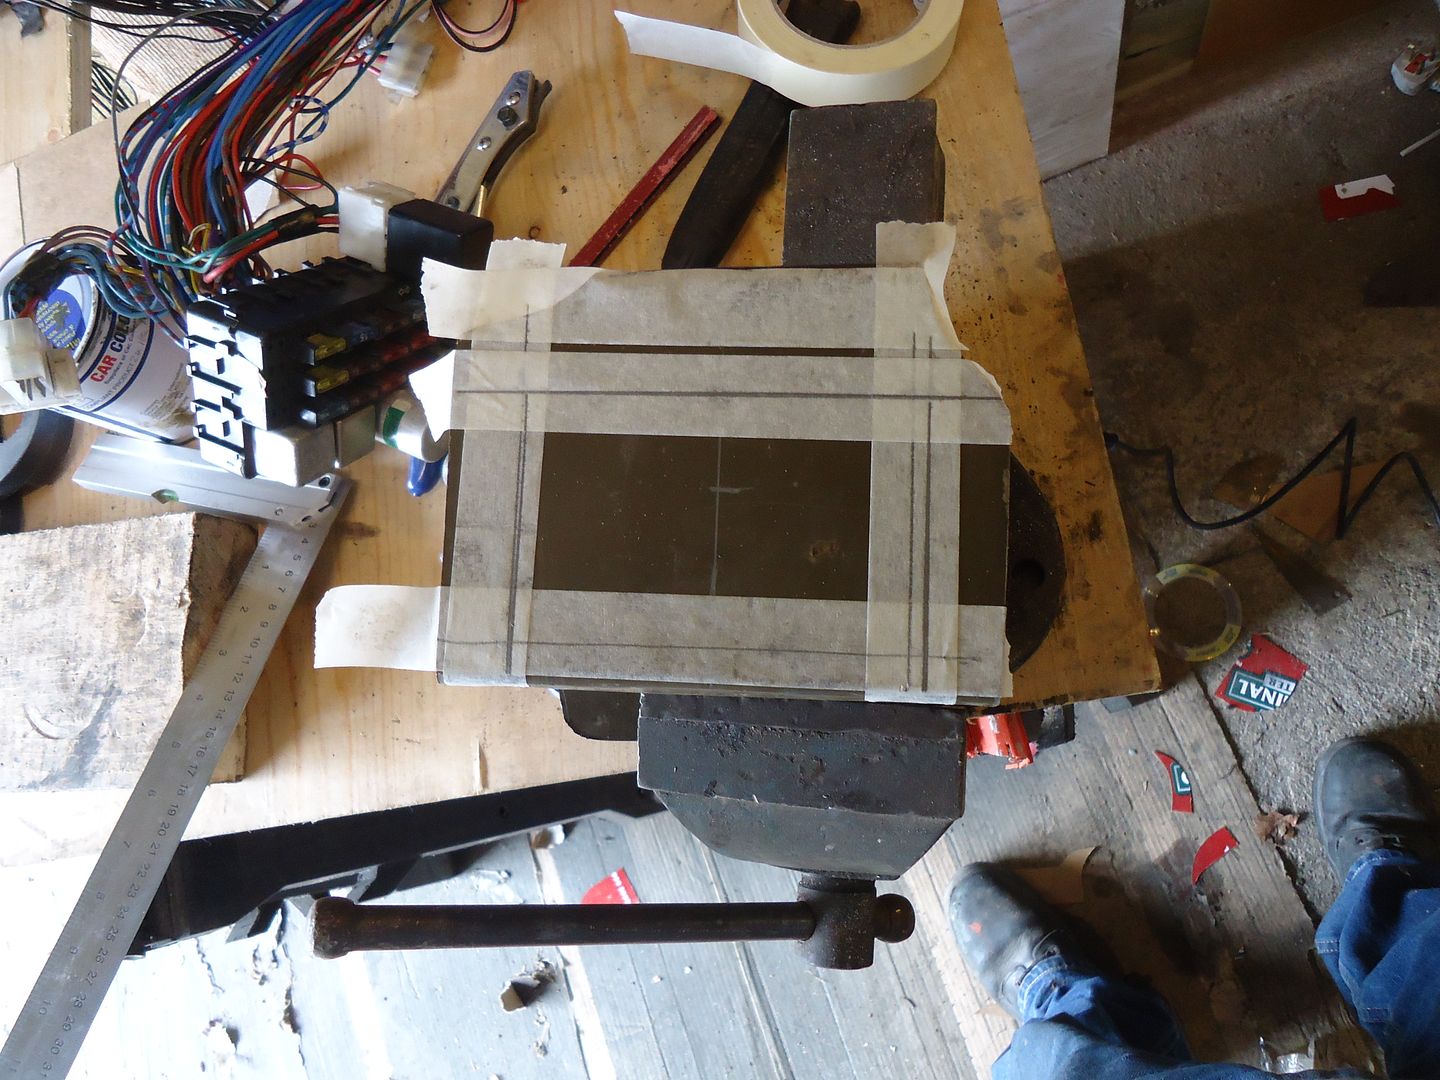
Then I folded up the edges
And this is how the fuse board attaches
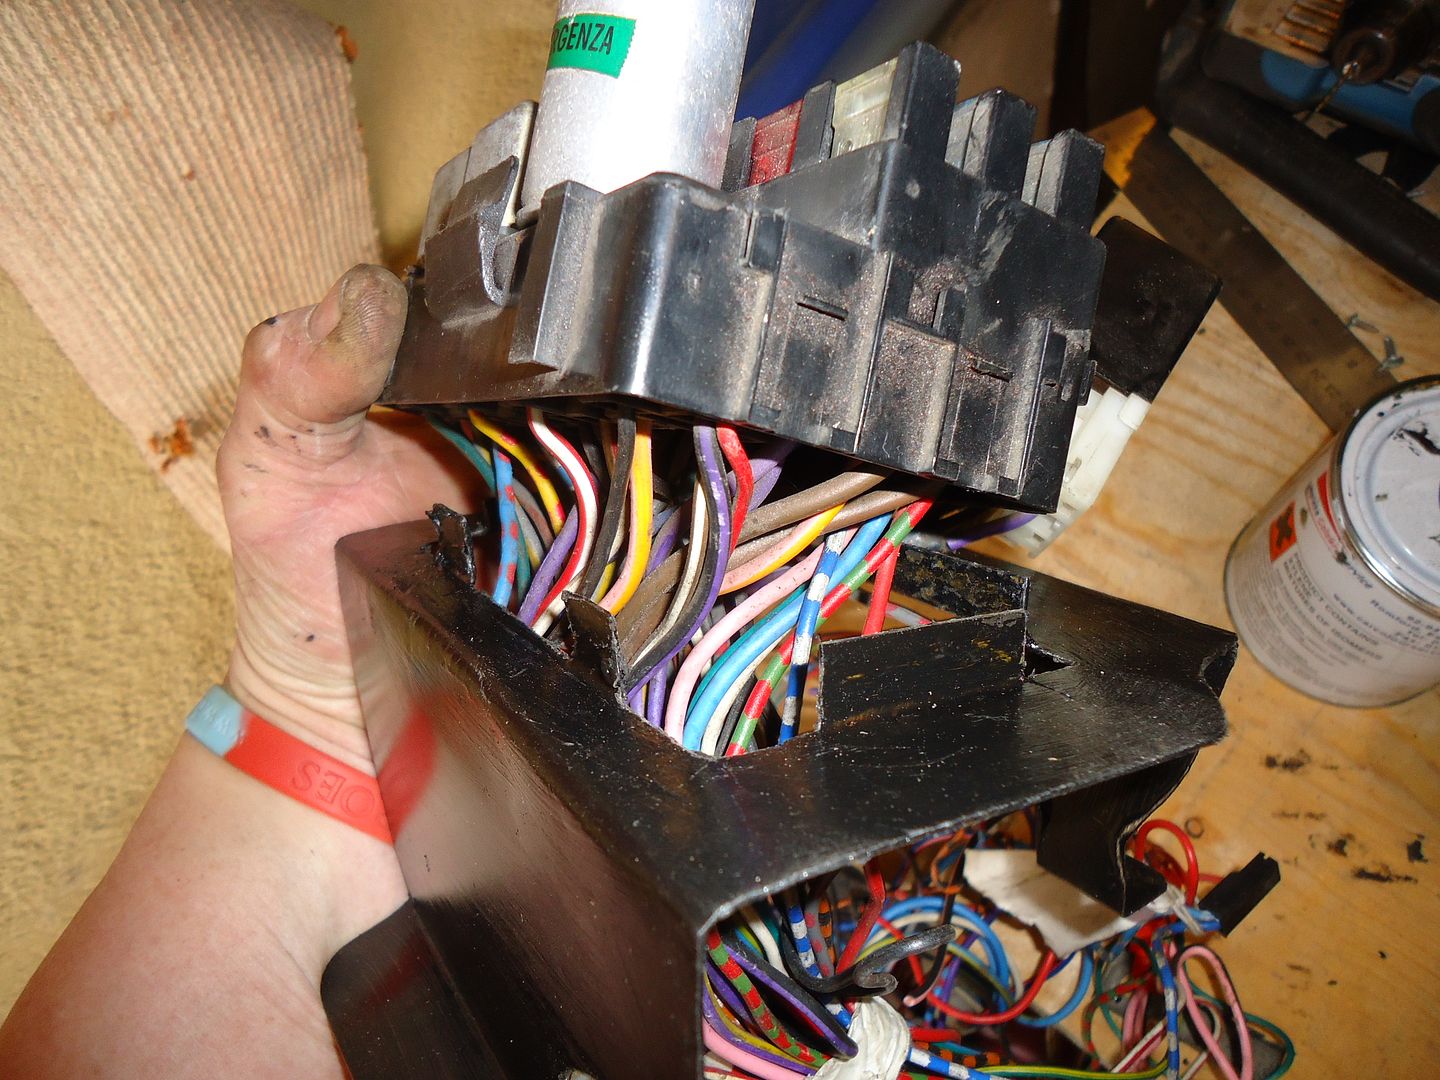
And here we are back to this point
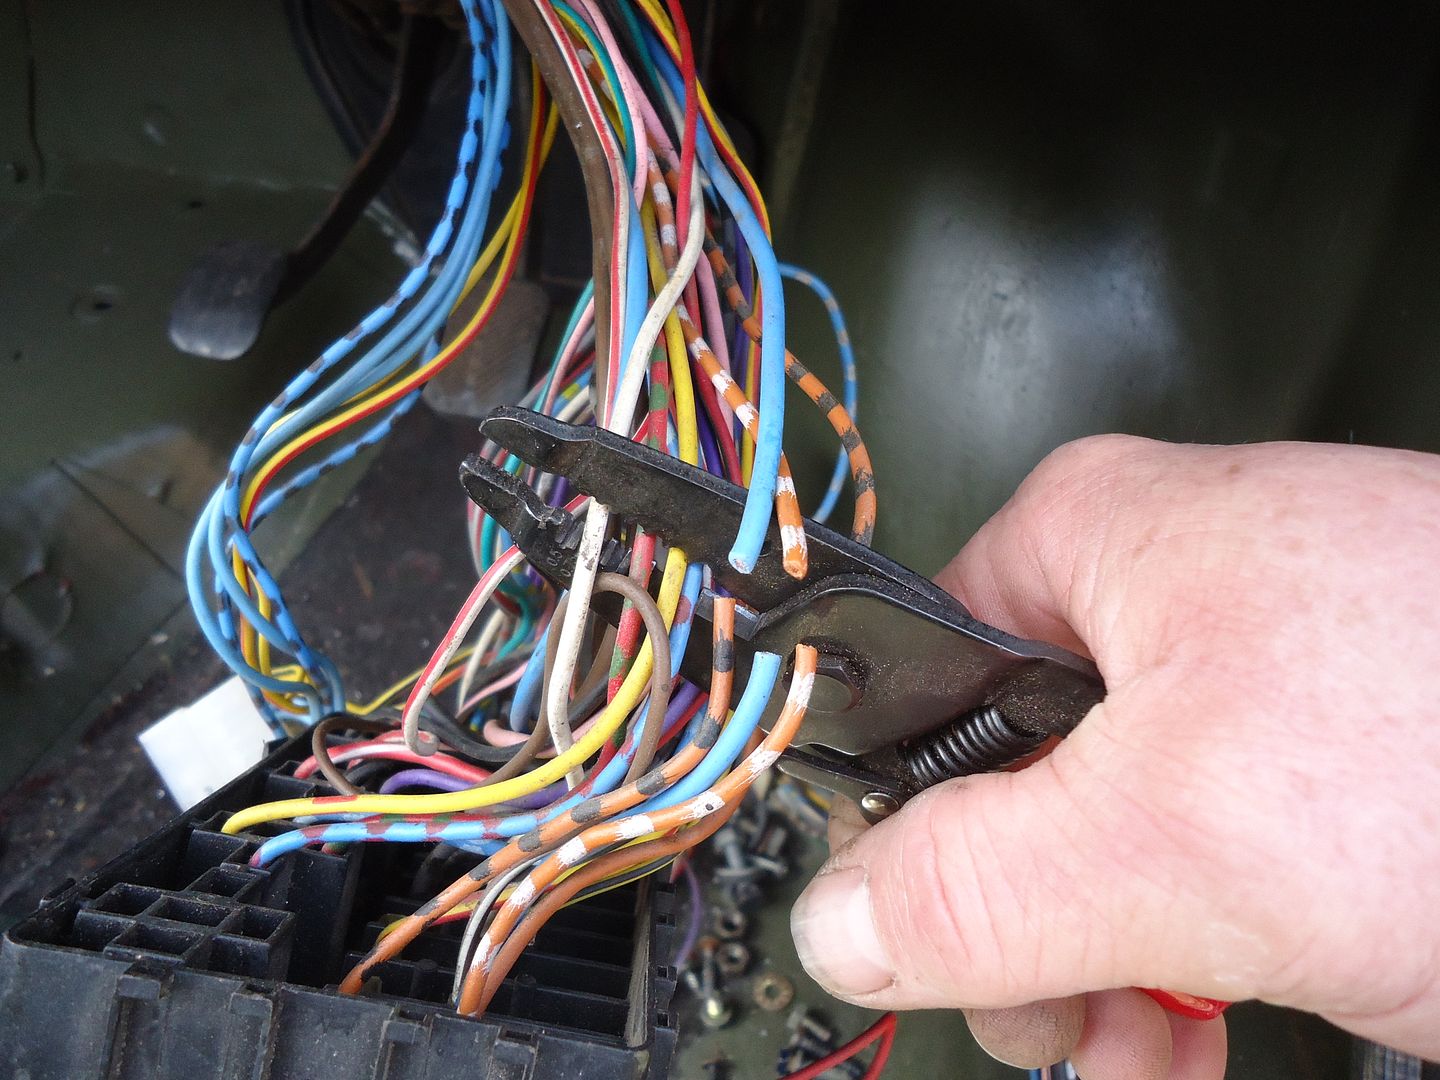
Just connect up the wires
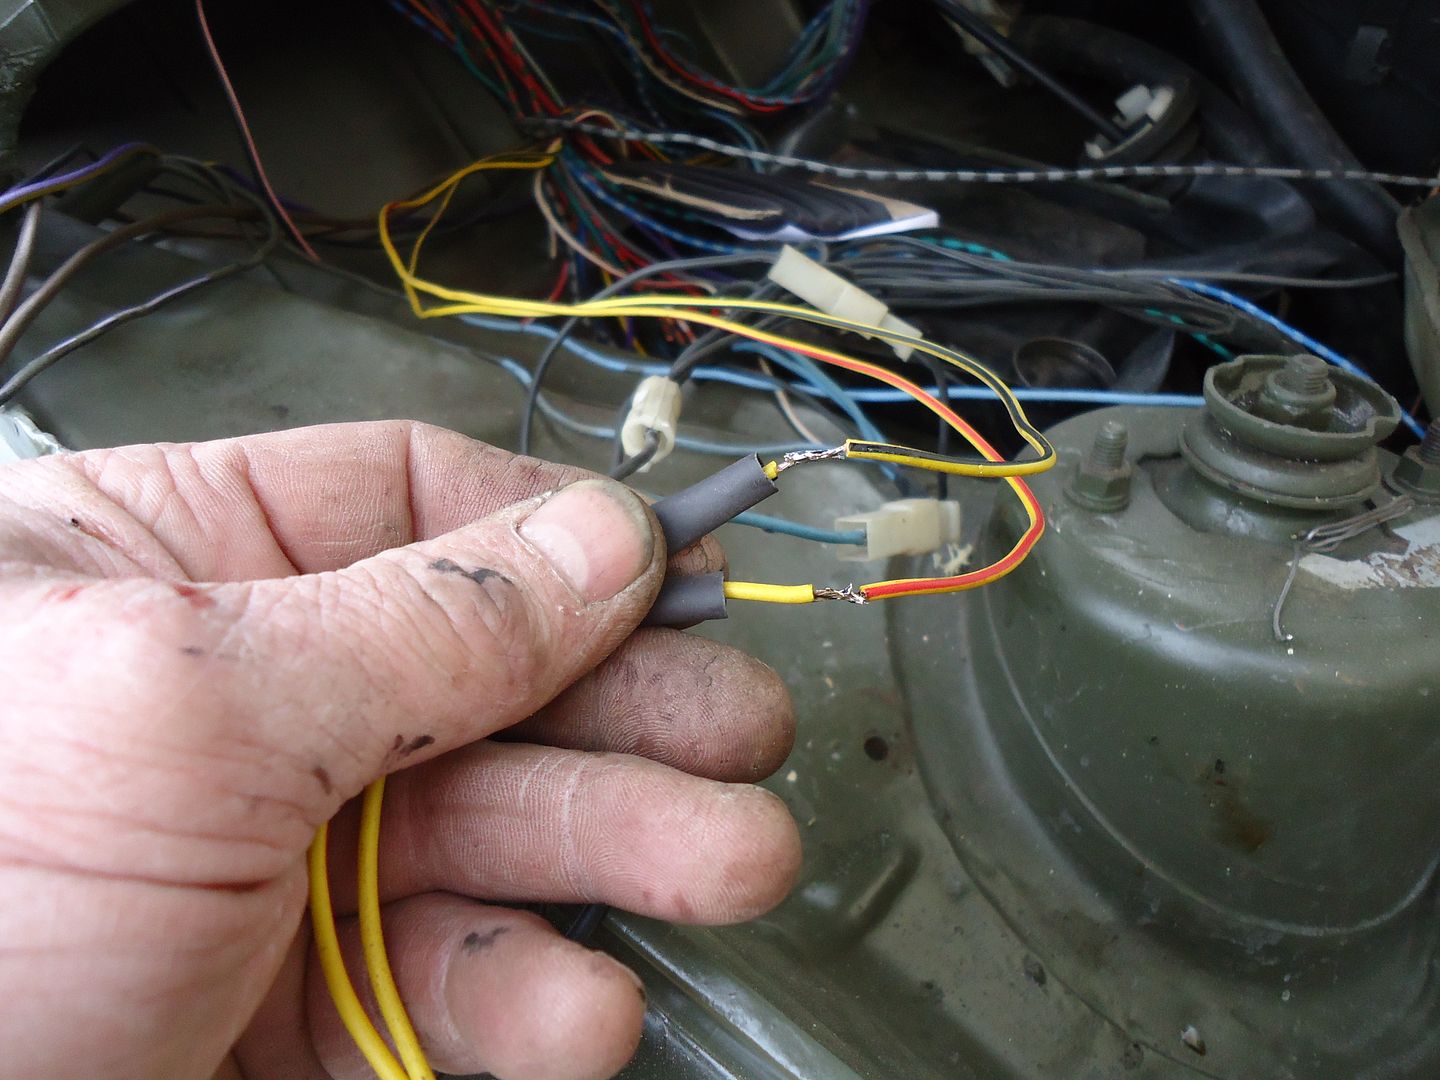
Nice soldered joints and then
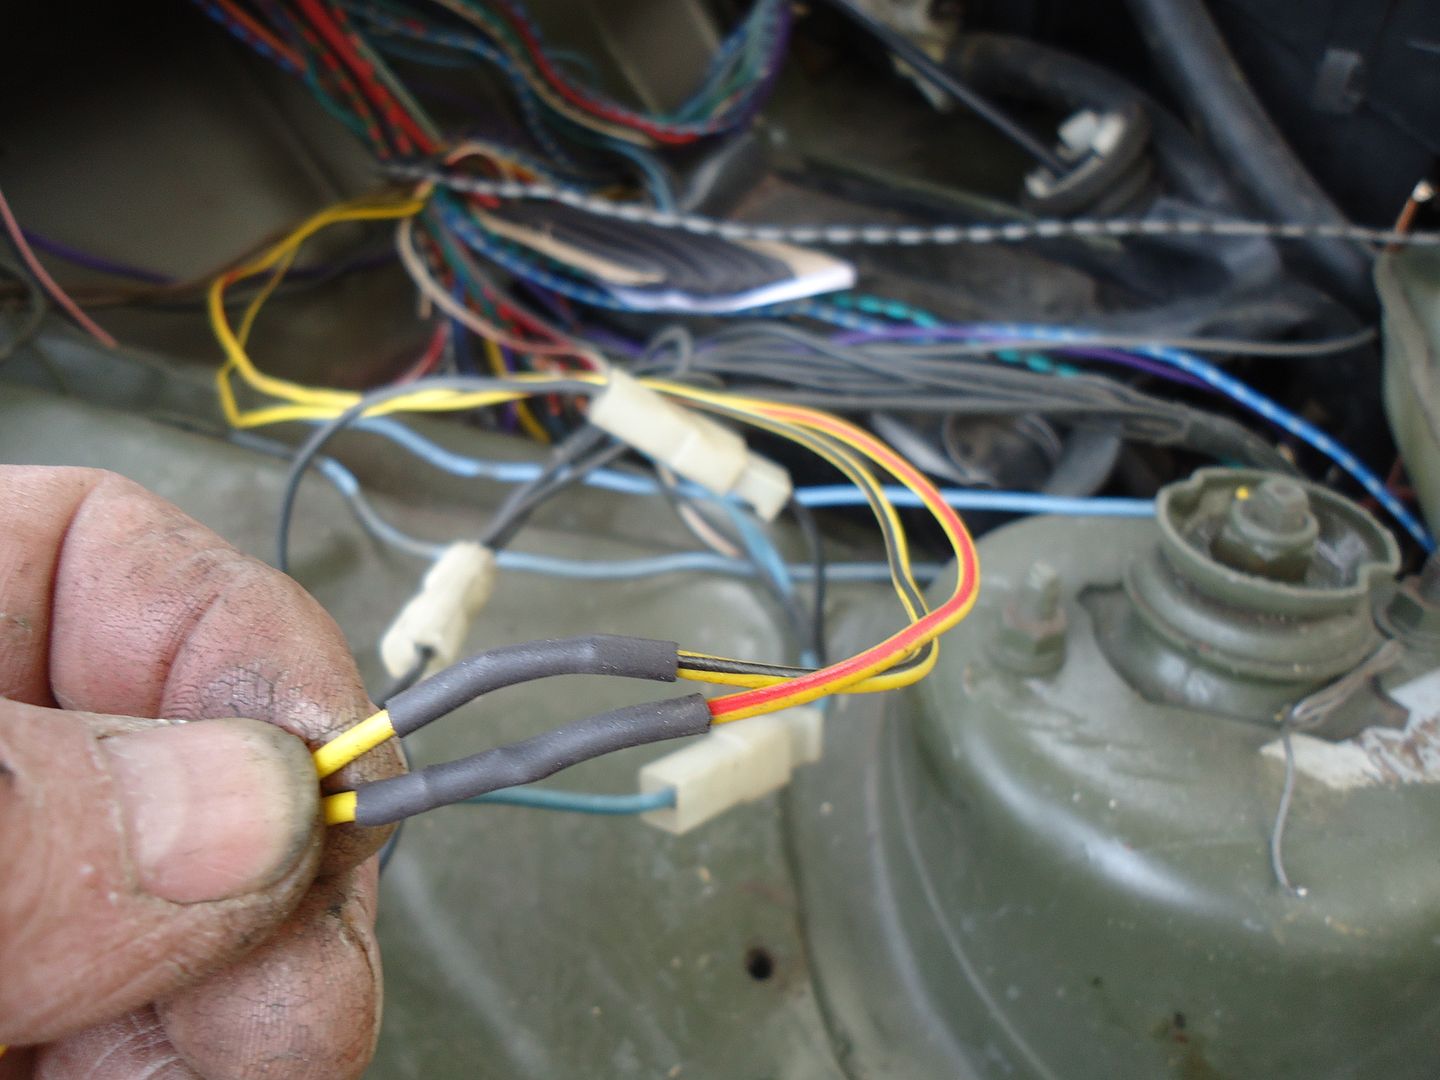
Heat shrink as an insulator.
Ah..... No I haven't finished soldering yet...........
The fact is that I have never liked where Fiat put the fuse box in Panda's. There is so much room elsewhere.
Like under the bonnet.

But first you have to do this

First off I made a cardboard template of the shape I wanted for the fuse board platform

It easy to give it a nicer shape by cutting curves around a tin or summat

Lay the template on some sheet steel. Notice this is the right colour to match the car.... Once upon a time all filing cabinets were that shade of green.

Mark around the template and then cut the shape out very carefully.
No I didn't use the 'nibblers' it takes too long. I used the grinder with a 1mm cutting blade and then the grinder with the flexible disc (36 grit)
Incidentally is you want to pick up a few backing pads for your flexi discs the Screwfix seem to be having a clear out. They used to be over 7 quid
. Now the are 70 pence. You don't want to know how many I bought.
I transferred the bends from the template and folded it up in a vice.

This is a trial fit. Note that it bolts onto one of the engine mount bolts.
Usually I mark my cutting lines with a 'White' pen (Tippex correction pen)
But of course I had forgotten this so I used masking tape onto which pencil lines are great.
I marked out the size of the fuse board and then drew 10mm around the inside of it and cut along those lines.

Then I folded up the edges

And this is how the fuse board attaches

And here we are back to this point

Just connect up the wires

Nice soldered joints and then

Heat shrink as an insulator.
Ah..... No I haven't finished soldering yet...........
That's a good move....the MK1 has fuses under the bonnet and I rigged up a separate one for the Toyota... You waterproofing it??
"You waterproofing it??"
I have allowed space around it to build a box. Just don't know what sort yet.
In the past I have built fuse boards into 'Tupperware' boxes. they are pretty watertight.
I have allowed space around it to build a box. Just don't know what sort yet.
In the past I have built fuse boards into 'Tupperware' boxes. they are pretty watertight.
It has just occured to me that I have absolutely no idea where my fusebox is :O thats worrying
Similar threads
- Replies
- 5
- Views
- 244
- Replies
- 0
- Views
- 66
- Replies
- 1
- Views
- 39