17717052334_1044bd2216_b.jpg

900 Bluebell the 900e Amigo

Introduction

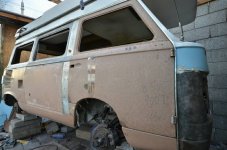
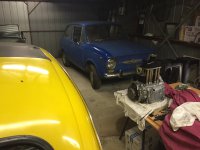
We have just taken on the ownership of this camper from Kelly and Karl and hope to have it on the road within the next six months.
17717052334_1044bd2216_b.jpg
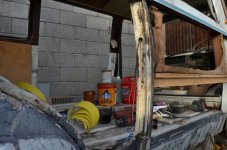
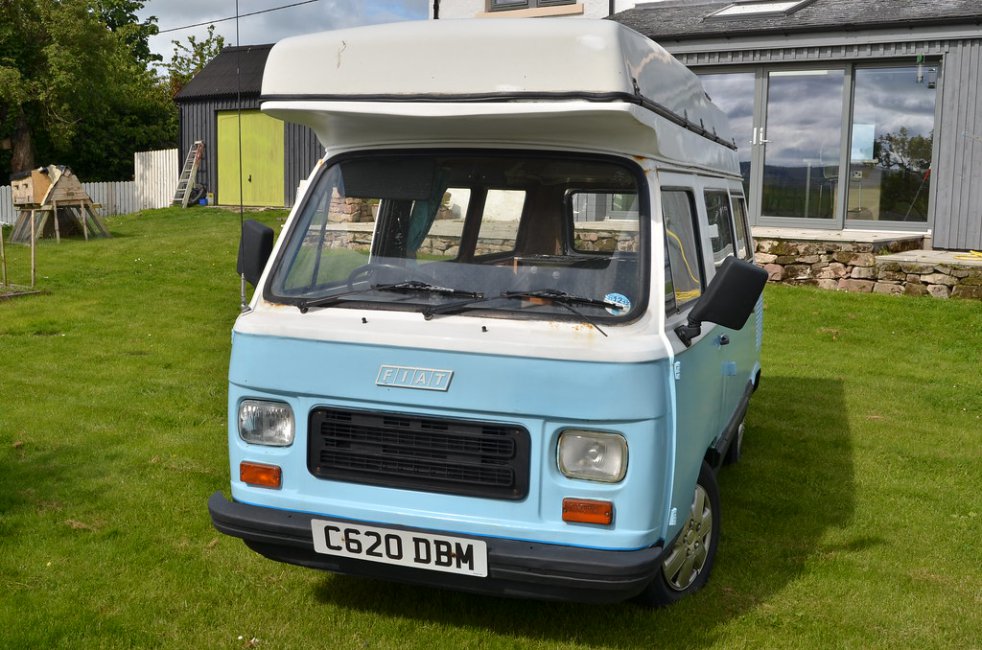
DSC_6177 by Peter Thompson, on Flickr
Not only is it a really lovely vehicle, it was also a pleasure to buy it from such a genuine and really nice couple. There was a huge amount of interest in the sale and I am really appreciative that I was favoured to be the buyer ; so many thanks Karl.:)
18335728502_1005bcd374_b.jpg
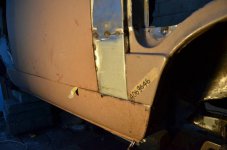
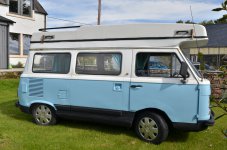
DSC_6176 by Peter Thompson, on Flickr
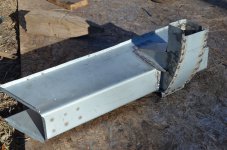
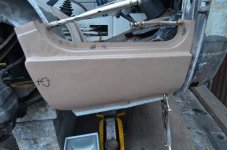
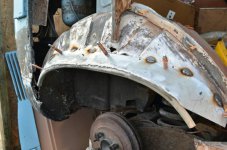
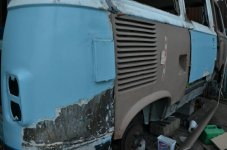
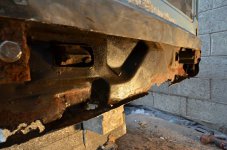
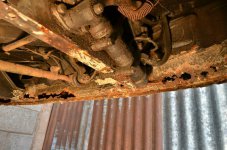
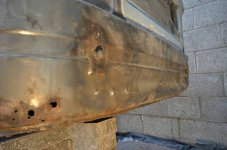
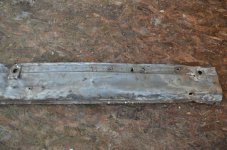
There is a certain amount of essential welding to do underneath, which will add to the welding that has been done in the past. It is currently pretty solid underneath but not as pretty as it could be. I hope to tidy as I go and then work around the bodywork. This has signs of a lot of filler and there is rust poking through in places, but it looks like we will be able to get using it soon.
There are a number of mechanical issue but nothing too onerous and it starts and runs really well.
So a rolling restoration to usable standards.
I just need to get the roof open now!
Watch this space as I document my progress.
Its getting serious with this huge chunk of chassis now re-made. I decided it was easier to align it in-situ then put in temporary rivets and remove. This allowed me to do most of the welding from the inside to make a tidy job and then I can spend some time rustproofing the inside before I fit it.
I have put some strengthening plates inside as I couldn't copy the original shapes 100%. but going on weight and rigidity, I think it will be OK.
Whilst I am quite pleased to have achieved this I am looking forward to some more straightforward stuff to follow this.
 

Attachments

  • COR_2295.JPG
    COR_2295.JPG
    8 MB · Views: 106
A tiny job this morning remaking the upstand between the front valance and the door sill. A small detail which had been eroded by rust and provides the flange to join the panels.
A trial fit of the sill seems good and after a coat of epoxy this front corner can have the wheelarch fitted and then on to the main sill.
 

Attachments

  • 1446659917078.jpg
    1446659917078.jpg
    77.7 KB · Views: 104
In the recent past, someone has done a reasonably good job of putting in some plain steel to act as inner sills. I decided to keep them with a bit of tidying up, but a section had to come out to get at the end of the rear cross-member. this had some sneaky rust above the jacking point that was hard to get at or to see. I chopped out the whole end and re-made it, which was tricky because there is a tube through the chassis for the fuel filler pipe. I removed the jacking point but had to keep the part of it that acts as a mounting for the petrol tank.
COR_2761 by Peter Thompson, on Flickr
After replacing the sill and connecting the body support pillar I realised that out of sight, that also needed repairs.
It all looks a bit rusticated but the welding was satisfyingly "buzzy" so I know it's strong. Most of it is obscured by the fuel tank and by the outer sill so I won't be grinding it smooth.
I am getting nearer to fitting some body panels.:rolleyes:
 
Last edited:
I now realise that because so many parts of this van have been crudely "modified" over the years, I have few datum points on the bodywork. I can't even weld on the sills until I have the side panel bottoms aligned and the panels around the door rely on alignments from the sill. So I will have to work towards having every replacement panel clamped in place before committing to weld.
So here is a mock-up after an initial attempt to rough check where it all goes.
COR_2769 by Peter Thompson, on Flickr
It goes well so my next job is to repair the outer parts of the rear wheelarch now that I have removed all the bad patches from the past. This will entail removing the rear wheelarch panel. So several days' messing should get me to I can make this side of the van look very tidy, very quickly:).
 
...but not that quickly as I have had other things to do including driving to Glasgow to help choose Sheila's new Fiat 500S.
But I now have a strong inner wheelarch which fits the outer. After tacking then welding in this panel I made for the lip, it was a matter of filling in the remaining gaps.
Now I have plenty of areas that need priming before they are hidden forever.
 

Attachments

  • 1447876272310.jpg
    1447876272310.jpg
    63.6 KB · Views: 98
I've never even seen a picture of 1 of these vans before, but it looks cool! :)

A massive well done on being able to save it, and I shall definitely be watching this thread with interest! :)
 
It's looking a bit bleak but I need to strip back this far to get at everything. The ugly grey drips are from the phosphoric which I keep dabbing on. It will all wash off leaving clean steel.
 

Attachments

  • 1448206274645.jpg
    1448206274645.jpg
    84.1 KB · Views: 106
It's here already; I drove over very light snow in the little Fiat earlier today. Time wasted? Still,as Sheila said, I will have the day to myself tomorrow to get stuck in a bit more. Meanwhile there was a post on the Fiat 600T, 850T, 900T Facebook page from someone wondering should he buy one with a bit of rust in a front outrigger! Ha!
 
Ooh I missed all this work. I'll keep an eye on this thread now going forward.

It certainly appears to have been a bit of a patchwork quilt on the underneath!

I know the seller was honest with you when you bought it, about what was wrong Bluebell, but is it worse than you and he probably imagined?????
 
Karl was really honest about it and I bought it on the understanding that it was no beauty. Note that my plan was to have it on the road in six months...haha!! I did no inspection and simply expected the worst.... and got it. :) After 19 owners it would be harsh to blame the last one.:)
 
I have now welded on the main sill, the short front sill and the door wheelarch. I also let in a patch which I made for the base of the door pillar. The photo shows it halfway there. The alignments and door gap are surprisingly good considering that I had almost no baseline to start from.
 

Attachments

  • 1448740545000.jpg
    1448740545000.jpg
    35.1 KB · Views: 94
As my welding gas ran out I looked at the front end problems. The inner part of the valance is very rusty at the bottom. The outer is less rusty but really out of shape due to front end bumps. So cutting the outer away lets me access all the welding more easily as well as making the panel beating much easier.
The mountings for the bumpers need pulling out and it's going to be a biggish job , but it will be good to get this one out of the way.
 

Attachments

  • 1450024071694.jpg
    1450024071694.jpg
    67.6 KB · Views: 92
  • 1450024213755.jpg
    1450024213755.jpg
    75.2 KB · Views: 94
  • 1450024263130.jpg
    1450024263130.jpg
    52.3 KB · Views: 93
  • 1450024300199.jpg
    1450024300199.jpg
    72.8 KB · Views: 88
Hi Peter

Although your six months is nearly up, I think you are doing a great job and am impressed at how you can bring these cars back to life.

I picked up an 850 sedan today. I looked at the floors and door pillars etc and unlike the cars you resurrect, there is very little rust. It has spent its life around Canberra. Well away from the coast, and has been kept undercover

I didn't need another car but....

I have to stay on track with my 500 engine rebuild and then possible respray then think about the 850...
 

Attachments

  • image.jpg
    image.jpg
    1.3 MB · Views: 43
Congratulations on the 850 and who ever needs another car when they already have a Fiat 500? :)
But I am finding that the 850 shares a few parts with the 500 and the underbody layout looks comfortingly familiar. I must admit that I would be very suspicious of any 30 year+ car in the UK which was within my budget, so I'm happier with the honest rust.
Still, it would be nice to live somewhere like Canberra where it is possible to buy a straightforward renovation car.
 
Back
Top