Wanted to ask, I think por 15 has a line of different products, what I've used is the black shiny stuff and Ive only used it on frames, floors, trunks ect, exterior stuff, is that what you used inside the tank? I'm not sure if it's OK with fuel, honestly I don't know but you better check....I've used the tank reliner from a different company once and it did work ok ...I bet that little little spider is getting pretty light weight and easy to move around now!


You are using an out of date browser. It may not display this or other websites correctly.
You should upgrade or use an alternative browser.
You should upgrade or use an alternative browser.
Technical 1978 124 Project
- Thread starter smahaley
- Start date
-
- Tags
- resurrection teardown
Currently reading:
Technical 1978 124 Project
OP
OP
smahaley
Member
Yes - it was a POR 15 just for rust removal which required a rinse and dry cycle too. I had the tank by a heater fan after the cycles and I think it’s a little better than it was (which wasn’t terrible). I’ll look again today and YES it’s amazing how light the car is - pretty effortless to push it in and out of my garage-shed!Wanted to ask, I think por 15 has a line of different products, what I've used is the black shiny stuff and Ive only used it on frames, floors, trunks ect, exterior stuff, is that what you used inside the tank? I'm not sure if it's OK with fuel, honestly I don't know but you better check....I've used the tank reliner from a different company once and it did work ok ...I bet that little little spider is getting pretty light weight and easy to move around now!
OP
OP
smahaley
Member
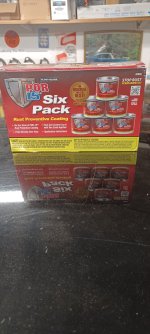
Cool - I saw that at the store as well. I may get some of that as I get into the sanding, cutting, replacing sheet metal. That's going to have to wait a day or two though. It's gotten cold again and the snow is falling. To chilly to be in the shed or outside....This is the por 15 I spoke of...works great on floors, it dry hard almost like glass and with each coat strengthens thin metal
On a different topic - do you have any knowledge of how one would test a heater core? Mine looks iffy - some rusty stuff around the tubes - and the motor is not functional so can't push any fluids through it and observe. I was thinking about just removing it, turning it on its end, and running some water in it and just waiting to see if there are any drips that occur...
That test might be a good start!, wonder if you could try plugging one inlet, and put a mild amount of psi from your compresser in the other inlet then submerge it in a bucket of water and look for the bubbles? I've only changed heater cores a couple of times and they were still in a closed system so there were obvious signs, steam, wet carpet ect...perhaps that crafty guy 124bc1 could chime in...I bet he knows a way...!
OP
OP
smahaley
Member
Meanwhile on a snowy day. Should I recreate the dash with 1/2 plywood and try to match the stain or do something else?


Looking at the face of yours with my (semi) old eyes on my phone it doesn't look too bad, is there a problem with moisture damage or something?
Currently there is one on ebay with free shipping for $35, my only concern with making your own although it would be fun, would be matching the rest of the dash finish....also I do have an extra one complete with all the guages execpt the clock thats in decent condtion I'm not using...by the way nearly every single dash including the one in my spider, a 60k always stored indoors car has a white clouded clock lens, it almost like the material used for the clock lens is different than the other guage lenses? A new clock runs about a hundred bucks...
Currently there is one on ebay with free shipping for $35, my only concern with making your own although it would be fun, would be matching the rest of the dash finish....also I do have an extra one complete with all the guages execpt the clock thats in decent condtion I'm not using...by the way nearly every single dash including the one in my spider, a 60k always stored indoors car has a white clouded clock lens, it almost like the material used for the clock lens is different than the other guage lenses? A new clock runs about a hundred bucks...
Also wanted to show you this, last 2 weeks here was snowing and below freezing also, wanted to do something easy and fast in the garage so I added these led headlights , there's tons of different styles and I don't have the halo top and bottom parts wired but...pretty cool for $35, ebay again... If you want led lights nows the time, I'm going to convert all of my bulbs to led, outside and in....


OP
OP
smahaley
Member
Wow - yes - I’ve got all my lights in a box and have been considering LEDs. I’m quite a ways from that but maybe I should start the Great Evacuation of Project Budget phase by buying some parts.
Regarding the dash - yes mine basically delaminated like apparently so many do. I found a YouTuber who did what I’m planning to do with some 1/2 inch maple (solid wood) and made his instrument panel, center console inserts and glove box door so they all match.
I might be doing that, but for the moment I’m going to be cleaning parts, sanding and cutting floors, welding and removing the motor with this giant thing a friend brought over :
Given that the clock lens has a hole in it for the adjuster, is it not made from a type of plastic? maybe this is why they deteriorate?---------------------------------------------------------------------------.by the way nearly every single dash including the one in my spider, a 60k always stored indoors car has a white clouded clock lens, it almost like the material used for the clock lens is different than the other guage lenses? A new clock runs about a hundred bucks...
$100 for a new one, Ya must be made of money (as we say over here
") ).
).I used to open them up to repair them when they stopped working - the usual problem was the adjustable bearing for the balance wheel used to unscrew and it then ceased to work, cure was a dab of thread-locker on the bearing screw adjusting thread. I would then clean the gauge lens (both sides) before re-assembly. A lot cheaper and quicker than ordering up a new clock!
The other gauge glasses benefit greatly from cleaning both sides of the glass - the bezels (rims) just unclip to release the glasses. I'd advise against touching the gauge dials, needles or dial fixing screws as they're so easily marked, just brush away any dust.
On a different topic - do you have any knowledge of how one would test a heater core? Mine looks iffy - some rusty stuff around the tubes - and the motor is not functional so can't push any fluids through it and observe. I was thinking about just removing it, turning it on its end, and running some water in it and just waiting to see if there are any drips that occur...
As Slotman has said apply slight air pressure and submerge in water, is probably the easiest way.That test might be a good start!, wonder if you could try plugging one inlet, and put a mild amount of psi from your compresser in the other inlet then submerge it in a bucket of water and look for the bubbles? I've only changed heater cores a couple of times and they were still in a closed system so there were obvious signs, steam, wet carpet ect...perhaps that crafty guy 124bc1 could chime in...I bet he knows a way...!
Here's a couple of homemade adaptors I made years ago (the valve was removed from an old bicycle tube so I could use a bicycle pump) to pressure test a car radiator (before I got a proper cooling system pressure tester with adaptors). You won't need anything like these for testing a heater rad, just do as Slotman suggests.
I'm only including them here in case you decide to try cleaning out your car main radiator and want to pressure test it before re-installing it.

Those heater rads didn't give much trouble, main problem was becoming choked with crud - I used to use some rad flush additive and then back-flush them with a garden hosepipe. However, the heater valve could develop leaks as could the 2 metal pipes that pass through the engine firewall to connect the heater unit to the engine. The perimeter of the heater rad should be wrapped in soft sponge foam to protect/seal it into the heater box. Ensure that the fresh air-intake flap in the heater box is free to move and also lube all 3 of the heater control cables to ensure easy operation.
OP
OP
smahaley
Member
Thanks @124BC1 - I am going to see about cleaning the lenses; also my speedo seems to rest at 8mph. Maybe the car *thinks* it’s always in motion because it is just that sexy. Or, maybe I need to figure out why no speed does not currently equal zero.Given that the clock lens has a hole in it for the adjuster, is it not made from a type of plastic? maybe this is why they deteriorate?
$100 for a new one, Ya must be made of money (as we say over here
I used to open them up to repair them when they stopped working - the usual problem was the adjustable bearing for the balance wheel used to unscrew and it then ceased to work, cure was a dab of thread-locker on the bearing screw adjusting thread. I would then clean the gauge lens (both sides) before re-assembly. A lot cheaper and quicker than ordering up a new clock!
The other gauge glasses benefit greatly from cleaning both sides of the glass - the bezels (rims) just unclip to release the glasses. I'd advise against touching the gauge dials, needles or dial fixing screws as they're so easily marked, just brush away any dust.
OP
OP
smahaley
Member
Aye - I will take that heater core out and flush it. The engine radiator is SO suspicious and clogged with junk that I do think I’m going to just buy a new one.As Slotman has said apply slight air pressure and submerge in water, is probably the easiest way.
Here's a couple of homemade adaptors I made years ago (the valve was removed from an old bicycle tube so I could use a bicycle pump) to pressure test a car radiator (before I got a proper cooling system pressure tester with adaptors). You won't need anything like these for testing a heater rad, just do as Slotman suggests.
I'm only including them here in case you decide to try cleaning out your car main radiator and want to pressure test it before re-installing it.
View attachment 461600
Those heater rads didn't give much trouble, main problem was becoming choked with crud - I used to use some rad flush additive and then back-flush them with a garden hosepipe. However, the heater valve could develop leaks as could the 2 metal pipes that pass through the engine firewall to connect the heater unit to the engine. The perimeter of the heater rad should be wrapped in soft sponge foam to protect/seal it into the heater box. Ensure that the fresh air-intake flap in the heater box is free to move and also lube all 3 of the heater control cables to ensure easy operation.
OP
OP
smahaley
Member
So…this. Heater hoses nearly completely blocked:Aye - I will take that heater core out and flush it. The engine radiator is SO suspicious and clogged with junk that I do think I’m going to just buy a new one.
So we’ll see what the core looks like.weather is nice so it was time to some paint:
I was about to give you instructions on how to reset the speedo needle - but then I vaguely remembered something, so I checked further and found:-Thanks @124BC1 - I am going to see about cleaning the lenses; also my speedo seems to rest at 8mph. Maybe the car *thinks* it’s always in motion because it is just that sexy. Or, maybe I need to figure out why no speed does not currently equal zero.
An image of a speedometer I found for sale online (ignore the fact that it's in kilometres) that shows the speedo needle doesn't return to zero when the car is stationary - this supplier also has 2 others for other model years and they're all the same.
Paint? In case you weren't already aware, the paint code for your car is at the bottom of the VIN plate at the top of this picture - it looks like 285?View attachment 461650
.weather is nice so it was time to some paint:
If so, the color is Fiat Safari Ivory 285
Had to chime in on the speedo, the one in my spider is at about 7 or 8, and the one in my extra guage panel is on 3...I've always wondered how most every speedo I've seen in a spider has a "twist" and doesn't look straight? Must have been intentional?

Last edited:
Maybe resist the temptation to buy any parts until you've got the floor and other welding repairs completed?maybe I should start the Great Evacuation of Project Budget phase by buying some parts.
I'm concerned that either:-
1) You'll start spending money (perhaps unnecessarily, remember what I said about repairing/refurbishing instead of buying new) and run out of money
before completing the resto or end up spending more than the car is worth when finished.
Or-
2) Spend a load of money on parts that you don't need yet, then find that you can't sort the welding work, bodywork and then can't afford to 'walk away' without taking a big hit (you are unlikely to get back what you paid for any new parts).
Fwiw, I've bought and stripped down cars to a bare shell and after poking and prodding to ascertain the full extent of repairs needed, drawing up a list of parts/materials required, reluctantly decided to scrap some of these project cars, before I got myself seriously 'underwater' financially - it was cheaper this way than to doggedly proceed. The cost of so-doing? - well, I comforted myself with the thought that education usually isn't free, and I had (hopefully) just learned something. I'm trying to give you the benefit of some of my 'education' and save you some money.
Maybe a cunning way to ensure the new owner brought his/her car back for the 1st service oil change and re-torqueing of the cylinder head bolts..Had to chime in on the speedo, the one in my spider is at about 7 or 8, and the one in my extra guage panel is on 3...I've always wondered how most every speedo I've seen in a spider has a "twist" and doesn't look straight? Must have been intentional?View attachment 461664
Iirc, the gauges/instruments are not positively located and can be re-aligned just by loosening the clamp nuts. It might be a visual thing, what looks correctly aligned with the gauge panel out of the car might not then look right when installed. I used to use a ruler/straight edge across all the gauges when re-installing them, usually lined up the maker's names on the dials.
Are those replacement chrome trim rings you have installed on your gauges?
P.S. If you want your car to feel even faster - loosen and rotate the tachometer so that the redline point is at the top, just like race cars..
(or so I've been reliably told by car 'experts' holding court in the local pub (bar)
)Again, wish I could have a pint with ya! they are just the snap on trim rings I bought back when international auto parts existed..I just saw them somewhere so they are still around...I still have 2 hold in your hand full color print parts catalogs from them....sure wish they still existed...always liked them.
they are just the snap on trim rings I bought back when international auto parts existed..I just saw them somewhere so they are still around...I still have 2 hold in your hand full color print parts catalogs from them....sure wish they still existed...always liked them.
Last edited:
Similar threads
- Replies
- 9
- Views
- 486
- Replies
- 2
- Views
- 708
- Replies
- 2
- Views
- 821