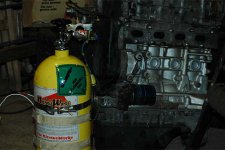
ahhh its started, good luck mate 
You are using an out of date browser. It may not display this or other websites correctly.
You should upgrade or use an alternative browser.
You should upgrade or use an alternative browser.
General Guess what i've gone and done now?! :D - stage 2 begins
- Thread starter randomizered
- Start date
Currently reading:
General Guess what i've gone and done now?! :D - stage 2 begins
- Joined
- Feb 16, 2005
- Messages
- 5,983
- Points
- 988
My engine.... You will be sorely missed

Hiya Kristian, sorry to hear that you are out of work :-(
My GF is now considering buying a new 1.4 500 so the plan of putting a 1.4 into mine has now become far more appealing!!! I currently have no problems outrunning Her Micra but I'd love to have a 1.4 600 that'll outrun her brand new toy instead, I'm looking forward to seeing your baby in the flesh once completed!!!
Although I'm not much of an experienced mechanic, if you ever need a hand with anything or want me to look out for any bits in Coventry scrappies gimme' a shout.
- Joined
- Feb 16, 2005
- Messages
- 5,983
- Points
- 988
Cheers mate 
What i recommend though, is I pop over, we pull your 1.1, and swap it for her 1.4 :devil:
She'll never know, she'll be smitten with her new car
Kristian
What i recommend though, is I pop over, we pull your 1.1, and swap it for her 1.4
She'll never know, she'll be smitten with her new car
Kristian
Yeah, but you have no idea what he's just stared.. :devil:
the 1.4 conversion is it not?
- Joined
- Jun 28, 2006
- Messages
- 719
- Points
- 123
Kris's Sei gets a 1.4, however this has the effect of getting me a 1.2 16v and should start up a rather interesting chain if events.
You know, Kris, the place where the air con pump was would be pretty much ideal for a Rotrex supercharger..............:yum:
Hope it goes smoothly -- after all the trials and tribs you had with the last one, you deserve it!
Hope it goes smoothly -- after all the trials and tribs you had with the last one, you deserve it!
The biggest issue is that I have MOT in Feburary :devil: So it'll have to be declared on the V5, running, tuned, and safe :slayer:
I'll be running the stock 100hp air intake with a rover throttle body, and it will needa fair bit of plumbing doing, hopefullly not too dificult though
Enjoy
Kristian
//edit.....oopppssss, looks like my lens was a bit greasy lol
Good stuff, glad to see its started.
Though curious why a Rover TB, I know we used one but that was because Jon, Emma's Dad had one "in stock" and we had a 1.2 16V alloy inlet manifold with no throttle body, the reason being have you seen how much the engine moves when under load, the bigger plastic inlet from the 1.4 may well be hard against the bulk head, it is really surpriseing how much things move when its on rolling road replicating load. I know on the 1.1 turbo the metal plenuim chamber comes to withi n3-4mm of strut brace bar, a movement of some 12-15mm!
Although a bonus of fitting the Rover K series TB did look much neater once fitted as the throttle cable quadrant is in different position to the cable opperated 1.2 16V TB, so Sei cable is more than long enough.
The reason I ask is the Rover TB is not a direct bolt on part, its a four bolt arrangement to the 3 bolt arrangment on the inlet manifold, Jon made an adaptor plate that not only allowed fitment of throttle body, but was tappered as well to go from 46mm TB to 43ish inlet manifold.
Good luck with it all, and as always need to ask anything feel free.
Aaron.
- Joined
- Feb 16, 2005
- Messages
- 5,983
- Points
- 988
I chose the Rover TB as it was:
cheap
TPS is much better electrically than the ones on the (at least) punto's and sei's.
I likes the fact you used the mpi cable and it did look tidier
it has an outlet for the idle control valve
a few mm bigger than the stock 100hp throttle body...not excessivly large
It will also need an adapter plate but, on the 1.4 inlet, it is 4 bolt, so i think i will get away by using just a thin piece of alu machined....only about an hours work i hope.
Think there were some other reasons, but i can't recall them. Tbh, I was thinking of getting the "trophy" throttle body, 52mm, but the cost and potential problems of fitting swayed me away.
My 1.2 inlet went with GoBe, but i do have a spare, albeit in not very good nick. I will try the 1.4 inlet, I don't even care about the rear fluffy stuff too much, and can easily extend or reduce the pipes. If its obvious its not going in, then I'll just go the route you took, but i think it may have a performance benefit, and I think it will look good in the bay.
@ fingers - It would be a great place .. problem is that the whole assembly and mounts for it all are bolted onto the back of the block, but also where "our" engine mount goes, and that leaves no way to fit it too a cento body
I had to mount the 1108cc alternator, brackets, belt, crank pulley etc. And again, I'll have to make a crank sensor adapter plate to shift it further out. I don't like doing it, its an ugly hack, but its best of a bad bunch. I can't see a simple way to do it all.
Box is moving to the garage tonight, and they are being joined up tomorrow, and hopefully get the engine hanging back in the bay Gonna be tough on my own with trolley jacks lol
Kristian
cheap
TPS is much better electrically than the ones on the (at least) punto's and sei's.
I likes the fact you used the mpi cable and it did look tidier
it has an outlet for the idle control valve
a few mm bigger than the stock 100hp throttle body...not excessivly large
It will also need an adapter plate but, on the 1.4 inlet, it is 4 bolt, so i think i will get away by using just a thin piece of alu machined....only about an hours work i hope.
Think there were some other reasons, but i can't recall them. Tbh, I was thinking of getting the "trophy" throttle body, 52mm, but the cost and potential problems of fitting swayed me away.
My 1.2 inlet went with GoBe, but i do have a spare, albeit in not very good nick. I will try the 1.4 inlet, I don't even care about the rear fluffy stuff too much, and can easily extend or reduce the pipes. If its obvious its not going in, then I'll just go the route you took, but i think it may have a performance benefit, and I think it will look good in the bay.
@ fingers - It would be a great place
I had to mount the 1108cc alternator, brackets, belt, crank pulley etc. And again, I'll have to make a crank sensor adapter plate to shift it further out. I don't like doing it, its an ugly hack, but its best of a bad bunch. I can't see a simple way to do it all.
Box is moving to the garage tonight, and they are being joined up tomorrow, and hopefully get the engine hanging back in the bay
Kristian
tripod hoist is still here if you want it mate. aint used it since you last had it
For got to add with 6" wide wheels they will catch the 6 speed box badly and if noticed will fail an MOT.
Even though we used 5.5" wide Fiat wheels and restricted the lock ours still catch just, and that's with standard 10mm spacers so ET 26 (36-10). Therefore you will either need to fit bigger spacers for MOT time but still keeping the wheel inside the arch, or reduce steering lock further.
Alternative is a friendly MOT station who realise that as you built it you are hardly likely to have the tyre rub off the gearbox so much it becomes a safety hazard.
- Joined
- Feb 16, 2005
- Messages
- 5,983
- Points
- 988
Yeah, I was suspecting that it would rub a fair bit. I was thinking 15mm may help it out a bit. It will put them very close to the outer arch, but will hopefully be ok, or at least make it less noticeable.
I hope I do get a friendly MOT guy. I'm gonna go and have a chat with a few beforehand...see what kind of guys they are I know of one already that may give a kind overview.
Also as you pointed out, I'll chat with them, and also mention the fact there are no marks of scubbing, obviously means I'm not causing a problem.
MOT is def gonna be interesting though. The V5 may not be back (sent off today), I have no CAT, I'm running MS who's installation looks a mess at the moment, although it is wired up safely. Fingers crossed lol :devil:
Reducing the lock requires?? Stripping down the part where the rods go into in the engine bay, and fitting some kind of washer?
Kristian
I hope I do get a friendly MOT guy. I'm gonna go and have a chat with a few beforehand...see what kind of guys they are
Also as you pointed out, I'll chat with them, and also mention the fact there are no marks of scubbing, obviously means I'm not causing a problem.
MOT is def gonna be interesting though. The V5 may not be back (sent off today), I have no CAT, I'm running MS who's installation looks a mess at the moment, although it is wired up safely. Fingers crossed lol :devil:
Reducing the lock requires?? Stripping down the part where the rods go into in the engine bay, and fitting some kind of washer?
Kristian
Last edited:
- Joined
- Feb 16, 2005
- Messages
- 5,983
- Points
- 988
Lots of pictures for you all tonight  not much typing though as i'm knackered lol
Here is a side by side of the the two boxes, six speed at the front:
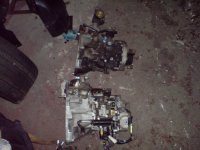
To get the 6 speed fitted you need to:
There may be more that i forgot though
I couldn't figure out how to remove the drive shaft cups, so i stripped both of the differential gears out of the boxes. I later figured it out (shown later).
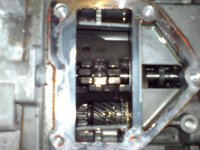
Here is the internal underneath the selector mechanism....make sure you get this and the selectors in the right position, or your heading for trouble
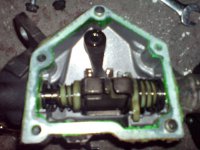
This is the inside of the selector plate you have to swap:
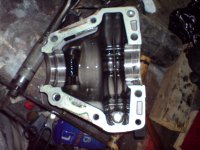
This is the inside of the differntial casing. This is the 1008cc mpi one (electronic speedo etc) so you can see a worm cog and hall effect sensor on the left hand side. I removed this and put it into the 6 speed casing, simply as that was cleaner
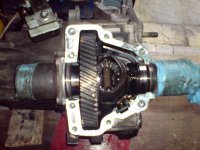
This is the 5 speed differential in the gearbox....plan was to swap it into the 6 speed and not remove any cups, but the gearing is different and it wouldn't fit:
The 5 speed diff removed:
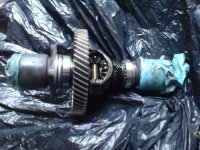
The gearbox without the diff in, the final drive shaft can be seen:
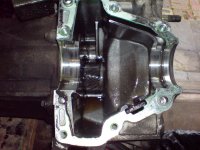
The speed sensor and worm drive ready to fit in to the 6 seed diff casing:
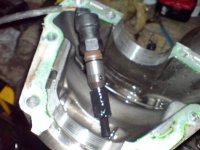
Two sei cups, and the larger 6 speed cup. Its only the cup itself thats different. The shaft diameter is the same as is the splined end. Note the circlips, just before the end of the splined shaft. These hold them into the diff:

The six speed diff. Looks the same as the 5 speed but it has more or less teeth.....forgot which now:
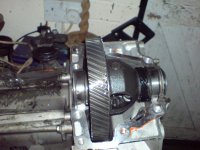
To remove the cups, you actually have to use a big flat screwdriver.
You slide it right into the gap between the casing and shaft, careful not to damage the seal, and then lever hard. They will pop out. Make SURE the circlip is on the end still.....if not its in the box, and you'll have to do what i've done and open the diff to find it. Refitting is easy. just use a soft mallet to tap the back in. You'll feel the circlip click in place, and you won't be able to remove them by hand again:
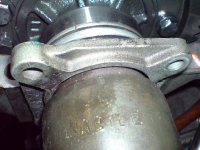
The casing has no gasket. You MUST use a sealant, else it will leak! Make sure its clean and free of oil before doing so. I also added sealant to the rubber seals. Better safe than sorry
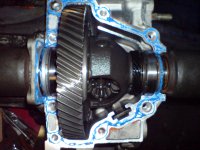
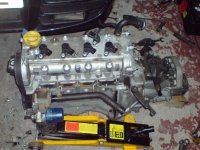
The engine and gearbox are now back as one I just kept the 1.4 flywheel and clutch, didn't bother getting it lightened etc at the moment as funds don't allow it:
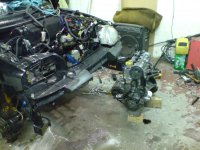
Here is another shot of it without the bumper etc:
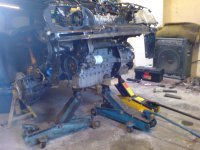
It's coming along nicely now and the Friday target looks set
 unless i just jinxed myself
Any questions or comments, just shout!
Kristian
Here is a side by side of the the two boxes, six speed at the front:

To get the 6 speed fitted you need to:
- Swap the drive shaft cups as the 6 speed are too big
- Swap the whole selector mechanism
- Swap the clutch arm, as the 6 speed is smaller due to the hydraulic clutch
- Swap over some of the mounting brackets
- Junk the rear gearbox mounting and fit the sei one
There may be more that i forgot though
I couldn't figure out how to remove the drive shaft cups, so i stripped both of the differential gears out of the boxes. I later figured it out (shown later).
Here is the internal underneath the selector mechanism....make sure you get this and the selectors in the right position, or your heading for trouble

This is the inside of the selector plate you have to swap:

This is the inside of the differntial casing. This is the 1008cc mpi one (electronic speedo etc) so you can see a worm cog and hall effect sensor on the left hand side. I removed this and put it into the 6 speed casing, simply as that was cleaner

This is the 5 speed differential in the gearbox....plan was to swap it into the 6 speed and not remove any cups, but the gearing is different and it wouldn't fit:

The 5 speed diff removed:

The gearbox without the diff in, the final drive shaft can be seen:

The speed sensor and worm drive ready to fit in to the 6 seed diff casing:

Two sei cups, and the larger 6 speed cup. Its only the cup itself thats different. The shaft diameter is the same as is the splined end. Note the circlips, just before the end of the splined shaft. These hold them into the diff:

The six speed diff. Looks the same as the 5 speed but it has more or less teeth.....forgot which now:

To remove the cups, you actually have to use a big flat screwdriver.
You slide it right into the gap between the casing and shaft, careful not to damage the seal, and then lever hard. They will pop out. Make SURE the circlip is on the end still.....if not its in the box, and you'll have to do what i've done and open the diff to find it. Refitting is easy. just use a soft mallet to tap the back in. You'll feel the circlip click in place, and you won't be able to remove them by hand again:

The casing has no gasket. You MUST use a sealant, else it will leak! Make sure its clean and free of oil before doing so. I also added sealant to the rubber seals. Better safe than sorry

The engine and gearbox are now back as one

Here is another shot of it without the bumper etc:

It's coming along nicely now and the Friday target looks set
Any questions or comments, just shout!
Kristian
Cheers mate
What i recommend though, is I pop over, we pull your 1.1, and swap it for her 1.4:devil:
She'll never know, she'll be smitten with her new car
Kristian
Would be the best idea, the way She drives I could probably swap the 1.1 & fit somebody's 899 & She'd still be perfectly happy!!!
- Joined
- Nov 30, 2005
- Messages
- 2,181
- Points
- 365
Lookin good mate as ever! Hopefully get to see it in the flesh at some meets this year!

Now that's what I call a garage radio! :slayer:
Now that's what I call a garage radio!
Last edited:
- Joined
- Feb 16, 2005
- Messages
- 5,983
- Points
- 988
@ col7104 - The actual radio in there is REALLY old. Its AM/MW/SW only and has valves that take about 1 min to warm up. The volume also changes massively by itself, and i can pretty much only get 5 live. I don't like sport that much though 
On a lunch break at the moment
The engine is in :slayer:
WARNING -- DO NOT USE MY ENGINE HOIST TECHNIQUE UNLESS YOUR A DUMBASS -- I ACCEPT NO RESPONSIBILITY IF YOU SQUISH YOURSELF!
Now thats over, you can see how one wimpy man and 3 jacks can install and engine! It was a bit hairy, and I knew the risks. I hasn't stupid enough to go under it and was prepared to swear if it fell off.
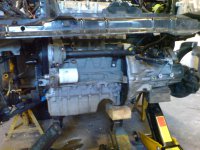
On my own it took about an hour to get it securely mounted in the bay, but the hardest part is now over :slayer:
Heres one of it fully installed:
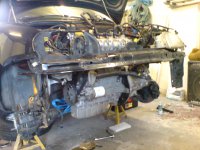
New rad arrives tomo, Selenia, and exhaust gasket so they are tomorrows jobs.
Later today I'm putting in the gearbox oil (praying for no leaks), connecting the driveshafts, fitting the hubs back, and whatever else i can find to amuse myself
Maybe an update later if i have anything interesting to show!
Cheers,
Kristian
On a lunch break at the moment
The engine is in :slayer:
WARNING -- DO NOT USE MY ENGINE HOIST TECHNIQUE UNLESS YOUR A DUMBASS -- I ACCEPT NO RESPONSIBILITY IF YOU SQUISH YOURSELF!
Now thats over, you can see how one wimpy man and 3 jacks can install and engine! It was a bit hairy, and I knew the risks. I hasn't stupid enough to go under it and was prepared to swear if it fell off.


On my own it took about an hour to get it securely mounted in the bay, but the hardest part is now over :slayer:
Heres one of it fully installed:

New rad arrives tomo, Selenia, and exhaust gasket so they are tomorrows jobs.
Later today I'm putting in the gearbox oil (praying for no leaks), connecting the driveshafts, fitting the hubs back, and whatever else i can find to amuse myself
Maybe an update later if i have anything interesting to show!
Cheers,
Kristian
Nice progress there 
Jordan
Jordan
dragging this one out a bit aren't you Kristian, get a move on will ya 
- Joined
- Feb 16, 2005
- Messages
- 5,983
- Points
- 988
I knew it was going all too well 
I filled the gearbox....no leaks, good stuff
Put the driveshafts back in
connected up all the gear linkage, that went ok
lots of other bits and bobs.
The problems are with the intake manifold.....it IS too big to fit. It clears the bulkhead by about .75cm, so once in motion it would be smashed to bits.
It almost hits the sound shield runner, the part at the back where its straight:
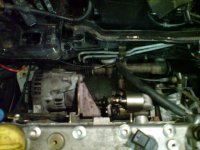
That was expected, and i knew i had a spare 1.2 intake. Sadly I now have no head studs, I only have bolts that are too long (used on the panda intake). Last time fiat were so expensive i waited a few days to have some machined up. Not something I can afford or have time for now.
I should be able to find some shorter bolts somewhere, so hopefully thats fixable.
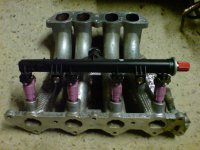
My bigger problem is the fuel rail.....i don't have one :bang: It went with the engine. The panda rail is the right dimension, and the injectors line up with the intake, but there is no way to mount it down anymore So i have to source another 1.2 16v fuel rail, make some brackets somehow to bolt it down, or some other unknown idea i may have later.....boo hoo.
Kristian
I filled the gearbox....no leaks, good stuff
Put the driveshafts back in
connected up all the gear linkage, that went ok
lots of other bits and bobs.
The problems are with the intake manifold.....it IS too big to fit. It clears the bulkhead by about .75cm, so once in motion it would be smashed to bits.
It almost hits the sound shield runner, the part at the back where its straight:

That was expected, and i knew i had a spare 1.2 intake. Sadly I now have no head studs, I only have bolts that are too long (used on the panda intake). Last time fiat were so expensive i waited a few days to have some machined up. Not something I can afford or have time for now.
I should be able to find some shorter bolts somewhere, so hopefully thats fixable.
My bigger problem is the fuel rail.....i don't have one :bang: It went with the engine. The panda rail is the right dimension, and the injectors line up with the intake, but there is no way to mount it down anymore

Kristian
Similar threads
- Replies
- 0
- Views
- 173
- Replies
- 2
- Views
- 239
- Replies
- 4
- Views
- 299


