Perfect pics ta Vern. more news later.


You are using an out of date browser. It may not display this or other websites correctly.
You should upgrade or use an alternative browser.
You should upgrade or use an alternative browser.
General Seat Panda Terra
- Thread starter Alixcompo
- Start date
Currently reading:
General Seat Panda Terra
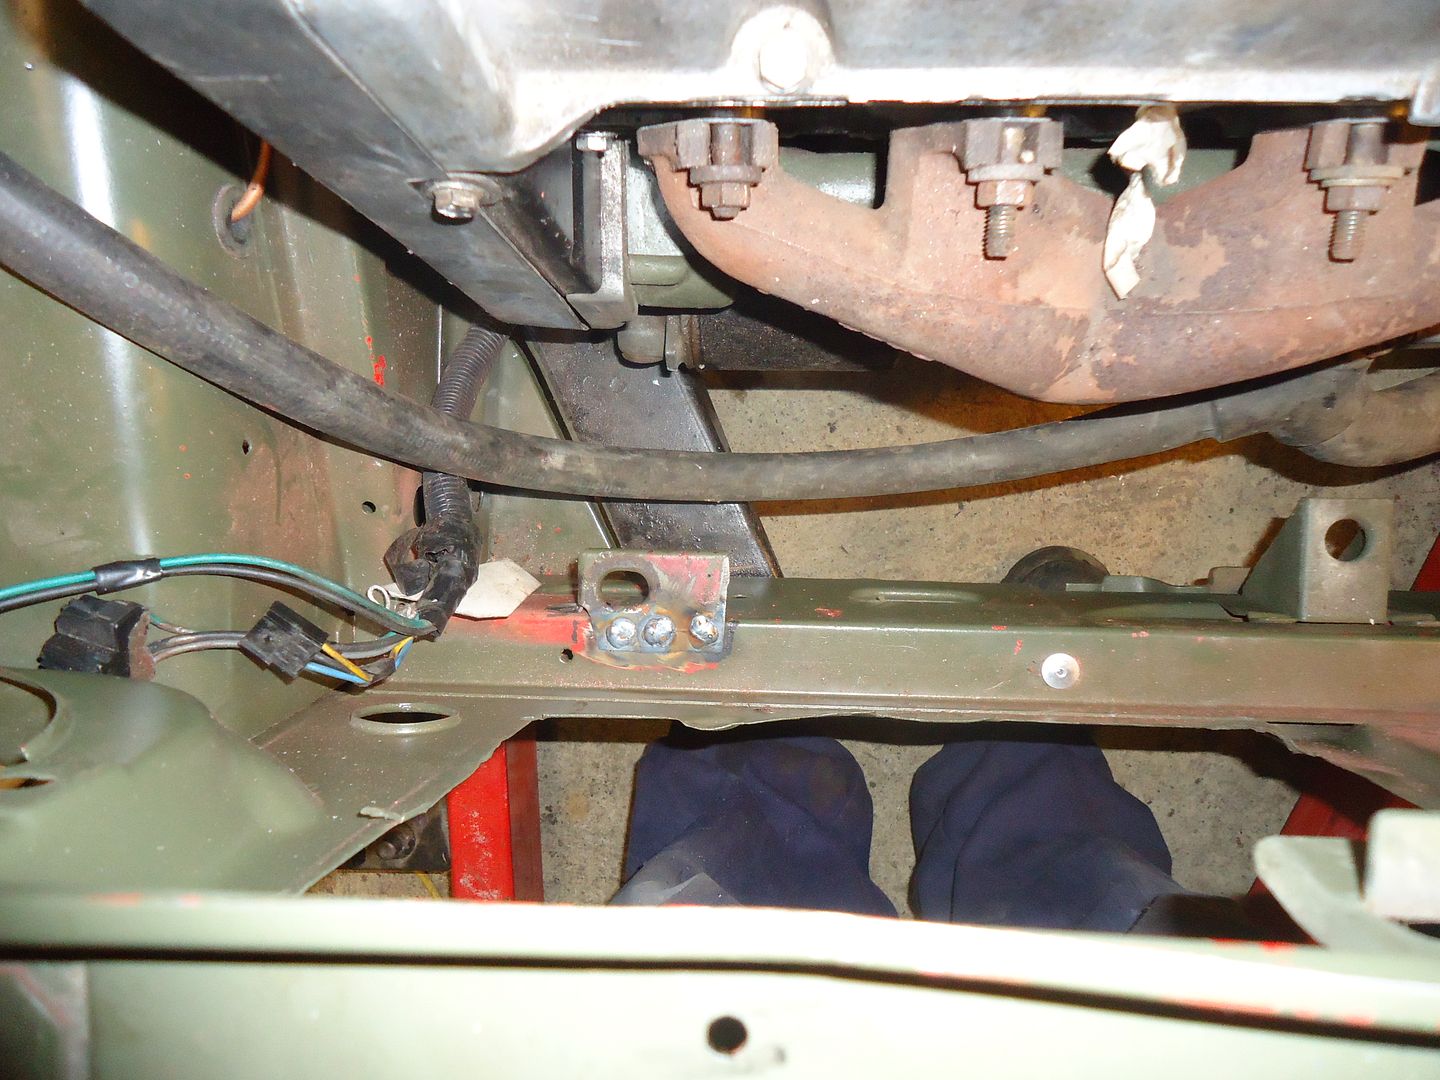
Due to the efforts of others I have a fully installed 4x4 full width radiator.
There were no lower mounts other than those cut bodily from a donor vehicle by the previous owner.
Taking my favorite spanner (angle grinder) I dressed these back to being minimal, drill 10mm holes in them and welded them in place.
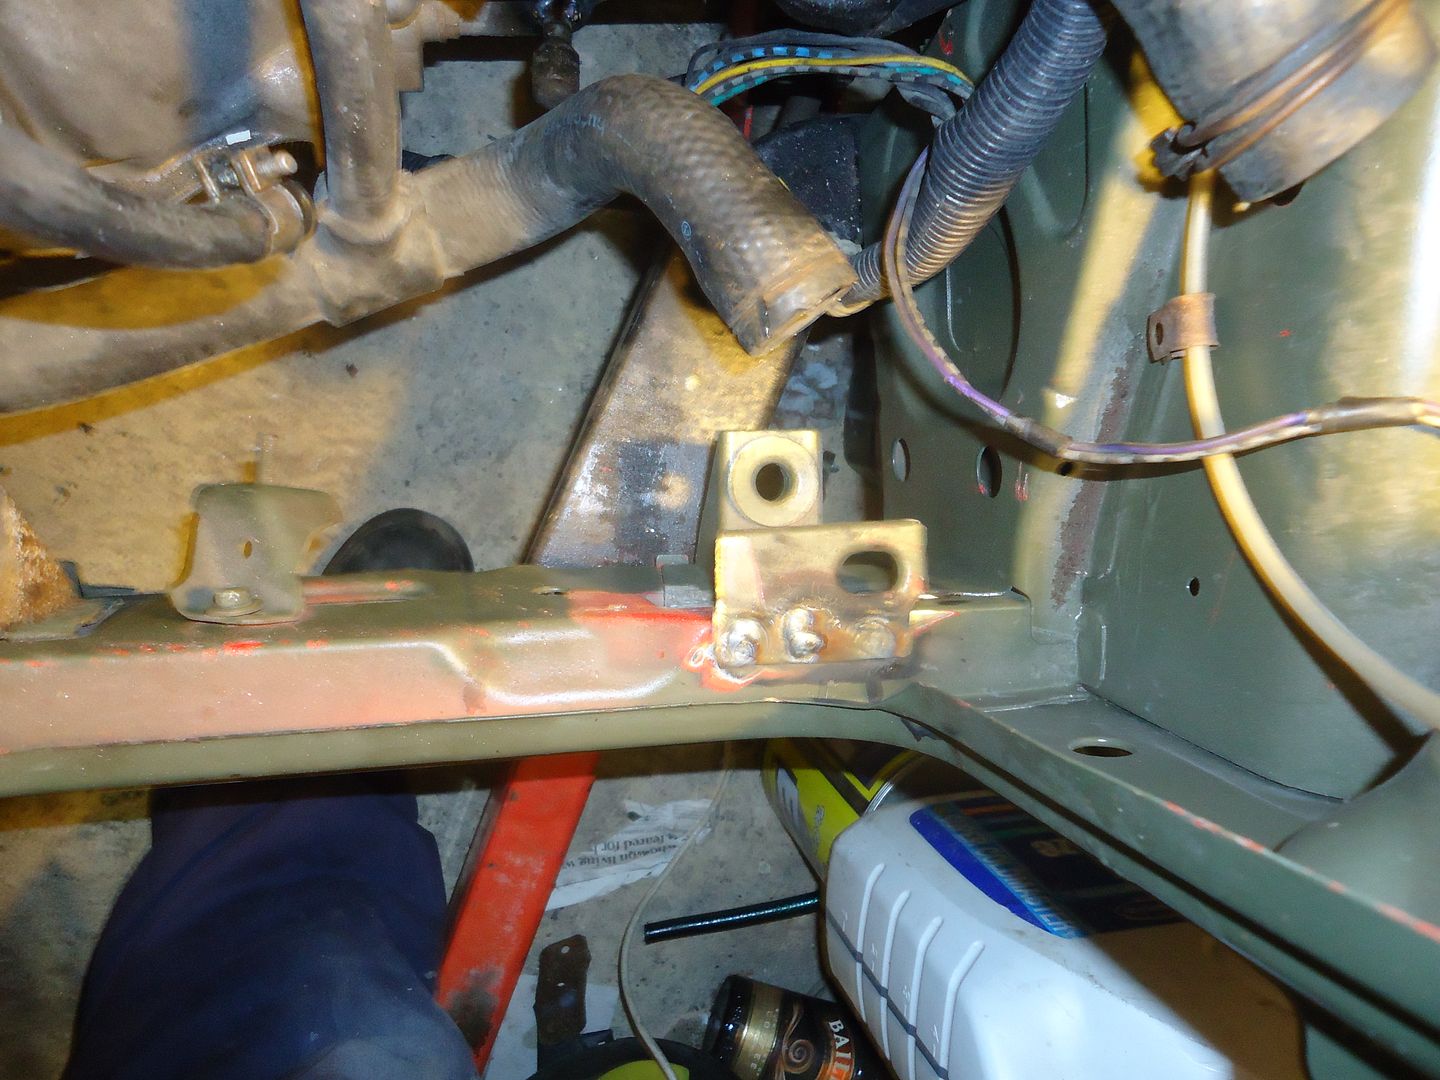
Rubbish photo but you can just see an original MK1 bracket as well. I wouldn't remove that. One day some sad misguided soul may want to return this to original so who am I to sabotage the future.
Incidentaly it wasn't me who crudely chopped out the front panel. But I don't see it as making any odds so it stays as is.
These were the bits that I was struggling for yesterday.. Or more exactly.........
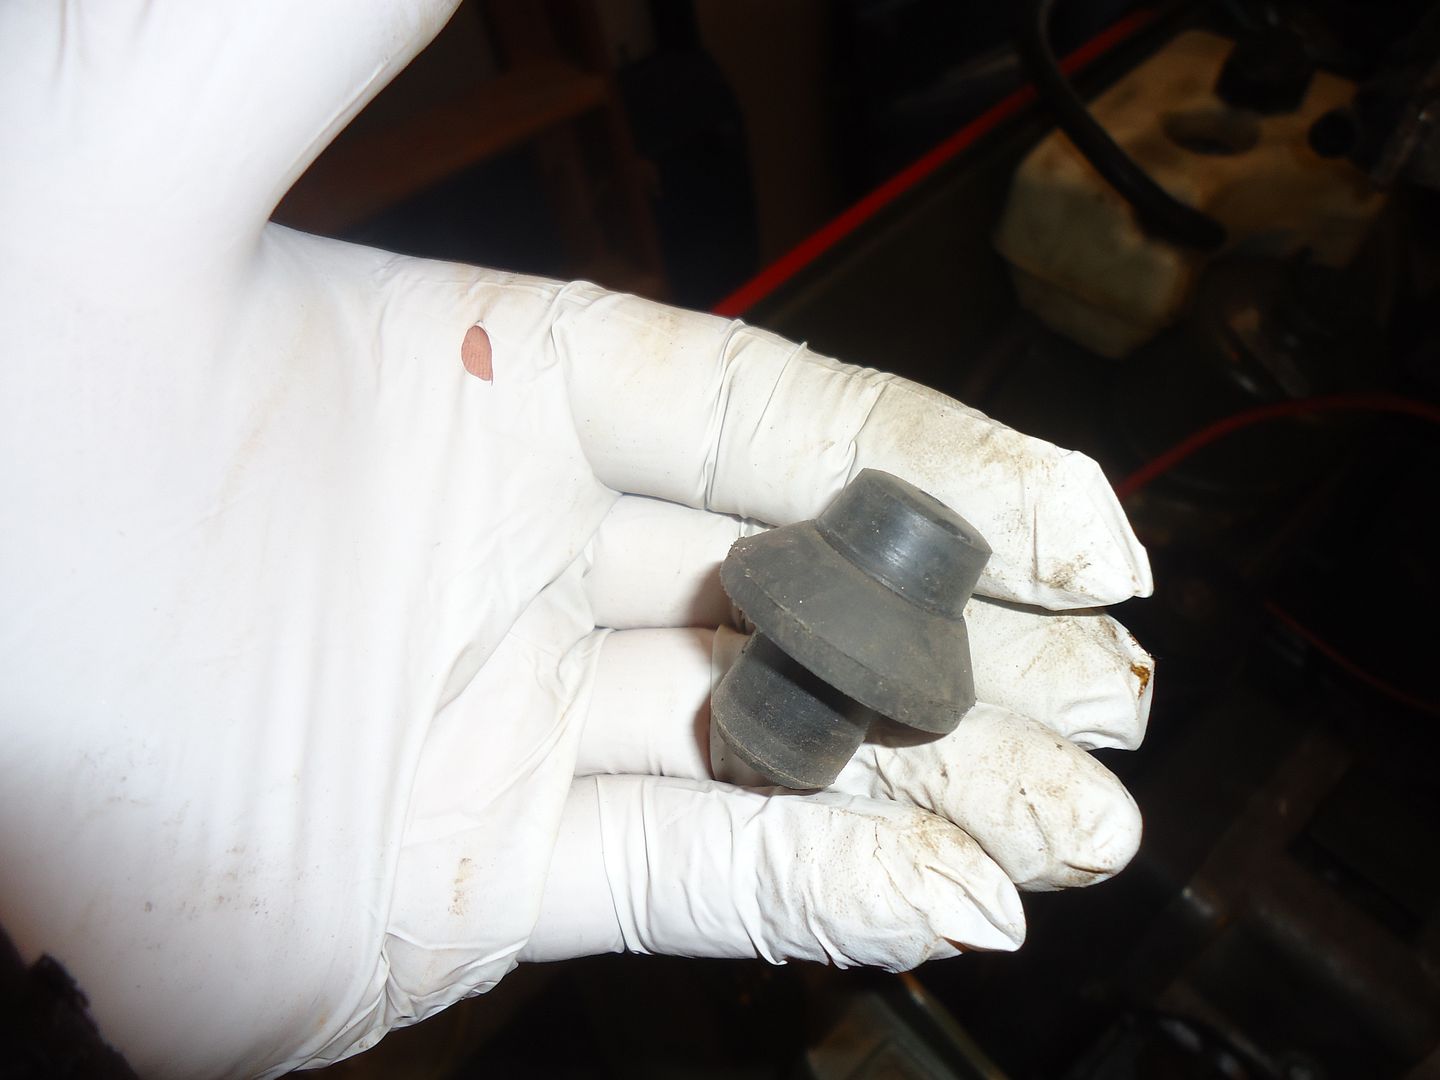
I had one and so did Pandasport. But now he hasn't got any..... Although I promise that it is only a loan.
The white plastic bit goes into the mounting on the chassis, The rubber pad fits into that and the rad sits happily on those.
Having had a chance to look at one in the flesh and some pics I realised what I was after.
I popped to my regular exhaust wholesaler this morning and ordered a new center section. Today is friday and it will be in 1st thing Monday. Not bad huh. 35 quid mind and I am assured that's trade.
I did fancy getting a new rear silencer box as well but I am mean and bought those nice Marbella doors and discovered Ebay Italy and stuff.
The back box came out at about £60..... And so
I first thought this was really bad but for 60 quid it can wait until next month. And so
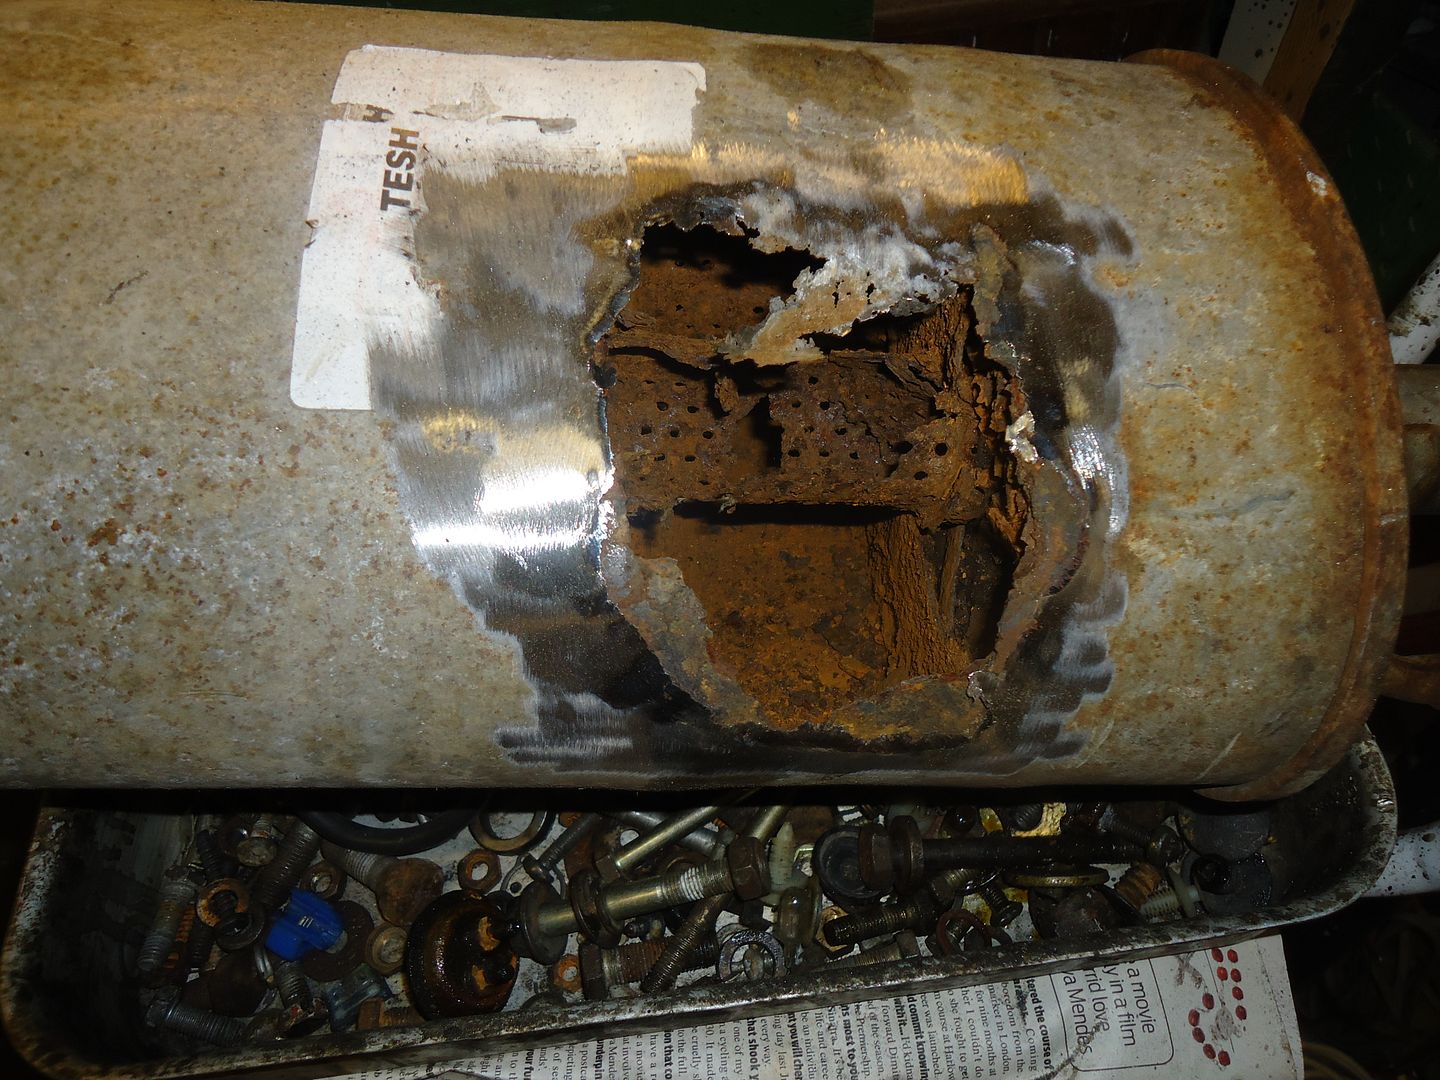
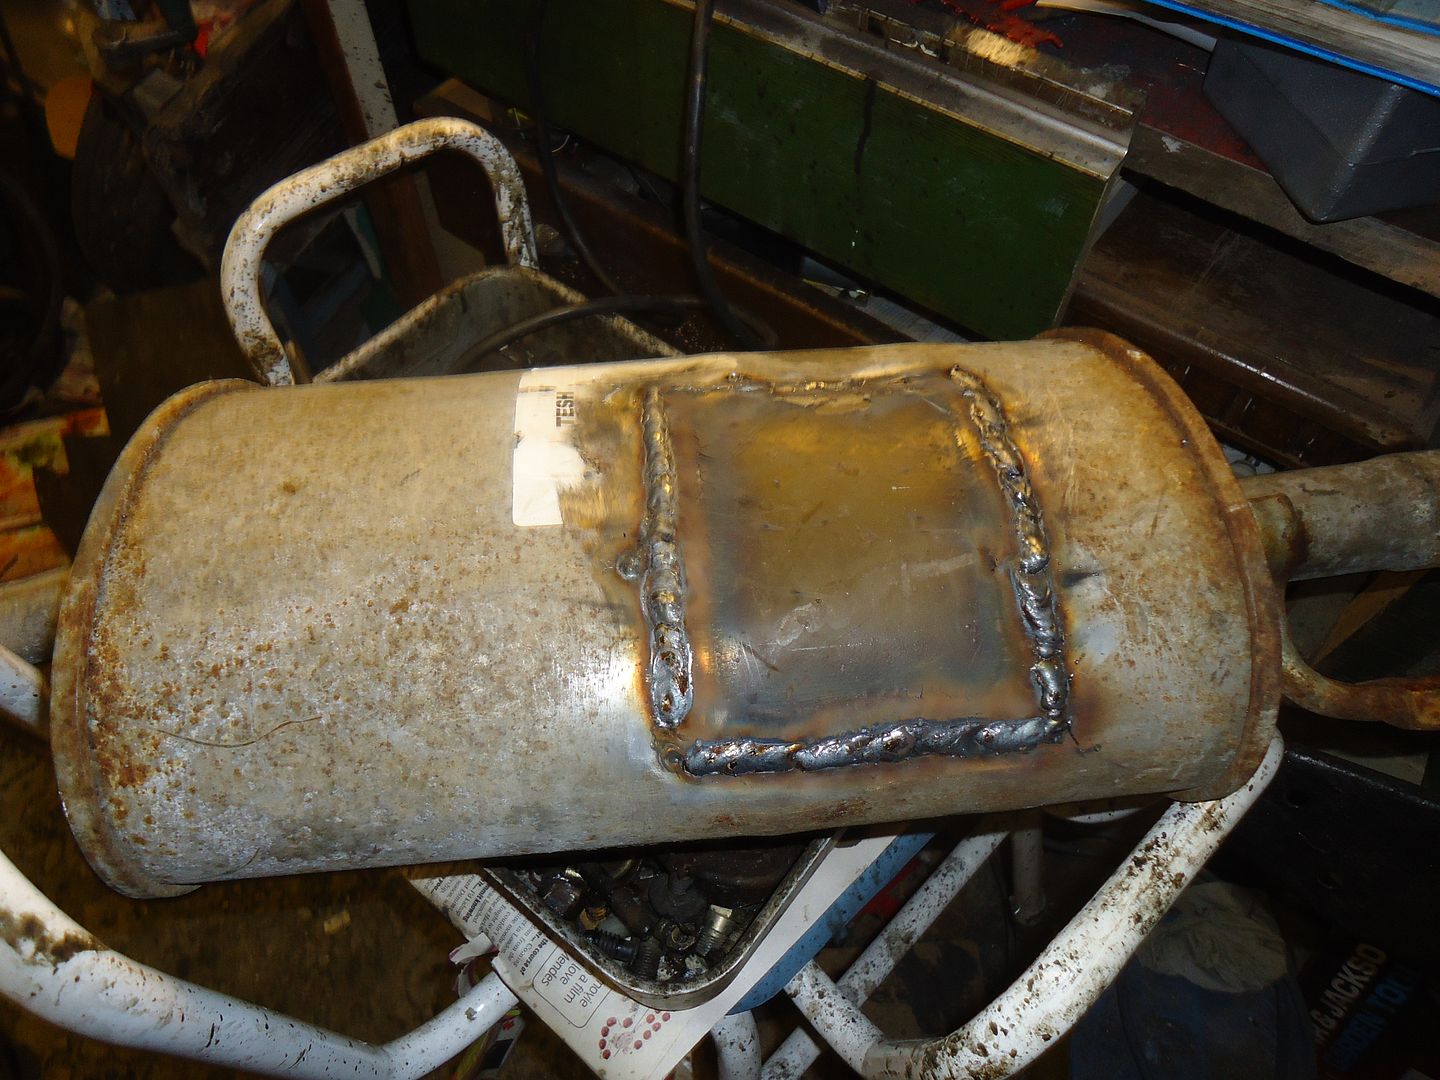
Amazing what you can do with an old filing cabinet.
If you try this at home then weld in a very well ventilated area or hold your breath.
The original box was made of galvanised steel which despite assiduous grinding to clean still produces a new Pope like white smoke.
Us old sweats like to call that smoke 'CYANIDE' you might of heard of it.
Galvanised is an arse to weld; mostly cos it spits and is full of poison.
Got lots of little bits and boring bobs done today. Added a screen wash bottle which also holds my authentic screwdriver and wheel brace and the spare wheel. And forgot to take update pics.
Next up will be filling the cooling system, exhaust and organising the correct fuel supply. Then it will be run the engine up for a prolonged period (cook it up a bit) whilst liberally purging the fuel sysytem with arosol carb cleaner. Great stuff.
But all of that will be next week some time when I get a chance.
High on my priority list is to swop some bits with our Vern so that I can start to assemble the dash. On which note........
Has anyone got a pic of the heater to screen vents on a MK1. The plastic inserts I have don't seem to fit.............
There were no lower mounts other than those cut bodily from a donor vehicle by the previous owner.
Taking my favorite spanner (angle grinder) I dressed these back to being minimal, drill 10mm holes in them and welded them in place.
Rubbish photo but you can just see an original MK1 bracket as well. I wouldn't remove that. One day some sad misguided soul may want to return this to original so who am I to sabotage the future.
Incidentaly it wasn't me who crudely chopped out the front panel. But I don't see it as making any odds so it stays as is.
These were the bits that I was struggling for yesterday.. Or more exactly.........
I had one and so did Pandasport. But now he hasn't got any..... Although I promise that it is only a loan.
The white plastic bit goes into the mounting on the chassis, The rubber pad fits into that and the rad sits happily on those.
Having had a chance to look at one in the flesh and some pics I realised what I was after.
I popped to my regular exhaust wholesaler this morning and ordered a new center section. Today is friday and it will be in 1st thing Monday. Not bad huh. 35 quid mind and I am assured that's trade.
I did fancy getting a new rear silencer box as well but I am mean and bought those nice Marbella doors and discovered Ebay Italy and stuff.
The back box came out at about £60..... And so
I first thought this was really bad but for 60 quid it can wait until next month. And so
Amazing what you can do with an old filing cabinet.
If you try this at home then weld in a very well ventilated area or hold your breath.
The original box was made of galvanised steel which despite assiduous grinding to clean still produces a new Pope like white smoke.
Us old sweats like to call that smoke 'CYANIDE' you might of heard of it.
Galvanised is an arse to weld; mostly cos it spits and is full of poison.
Got lots of little bits and boring bobs done today. Added a screen wash bottle which also holds my authentic screwdriver and wheel brace and the spare wheel. And forgot to take update pics.
Next up will be filling the cooling system, exhaust and organising the correct fuel supply. Then it will be run the engine up for a prolonged period (cook it up a bit) whilst liberally purging the fuel sysytem with arosol carb cleaner. Great stuff.
But all of that will be next week some time when I get a chance.
High on my priority list is to swop some bits with our Vern so that I can start to assemble the dash. On which note........
Has anyone got a pic of the heater to screen vents on a MK1. The plastic inserts I have don't seem to fit.............
Last edited:
Not much to report.
Picked up the exhaust center section today. It fitted OK but the tail end kick up, kicked up too much. So that was a cut 'n' welded. Then the back box that I'd repaired had the 'hanger' on the wrong side. So I cut and welded that.
Last time I ran it it the engine would only run at revs (on main jet) so I gave the carb a good soaking with an aerosol 'Carb Cleaner' . This is just fantastic stuff. In the bad old days it would have been, take the carb off, strip it down (always in the kitchen where it is nice and clean) go through each piece religeously scrubbing etc etc. And then when it came to re-assembley there was always a part missing, gasket torn etc etc.
So I started the engine and it ran perfect, idled beatifully etc etc.
That carb overhaul in a can took all of 30 seconds.......
Yes it ran quiet as well. No smoke no rattles. (as yet) The exhaust is pretty good. I will adjust it in time but for now it is great.
I filled the cooling system while the engine was ticking over. The electric fan isn't wired in yet (there is no wiring connected to anything yet) but I wanted to 'cook-it-up-a-bit'. So far so good.
By sitting on the floor I did drive about a foot backwards and then forwards. 1st time the car has moved under it's own power in 20 years.
The plan from now it to reassemble the car as quick as poss and when it is all in one bit and drivable I can go through everything one job at a time.
Wiring next, then some interior I think.
Has anyone got a pic of the heater to screen vents on a MK1. The plastic inserts I have don't seem to fit.............
Has anyone got a pic of the heater to screen vents on a MK1. The plastic inserts I have don't seem to fit.............
Si is the man you want to contact for that info..
")
Si is the man you want to contact for that info..
How do I find him........ Is he listening.......?
How do I find him........ Is he listening.......?
Si is pandamoneus maximas...the mk1 fan...
Has anyone got a pic of the heater to screen vents on a MK1. The plastic inserts I have don't seem to fit.............
Nooo, sorry I missed this. Not sure which bit you are talking of though. Below are some pictures of the interiors (with brown plastic trim on the 4x4 and with the vents exposed on the panda 45) but let me know if this does not show it clearly. Thinking you might mean the actual heater box assembly but I don't think I have a picture of this. I do have one out of the car somewhere in the garage though so could take some pics later. This was from a mk1 4x4 as well.
Si
Attachments
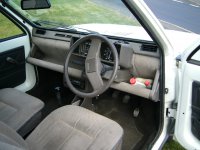

Hi Si. Thanks for posting. In my boxes of many things I have 2 plastic screen vents which look like they clip into something but the are too short to cover the metal dash holes.
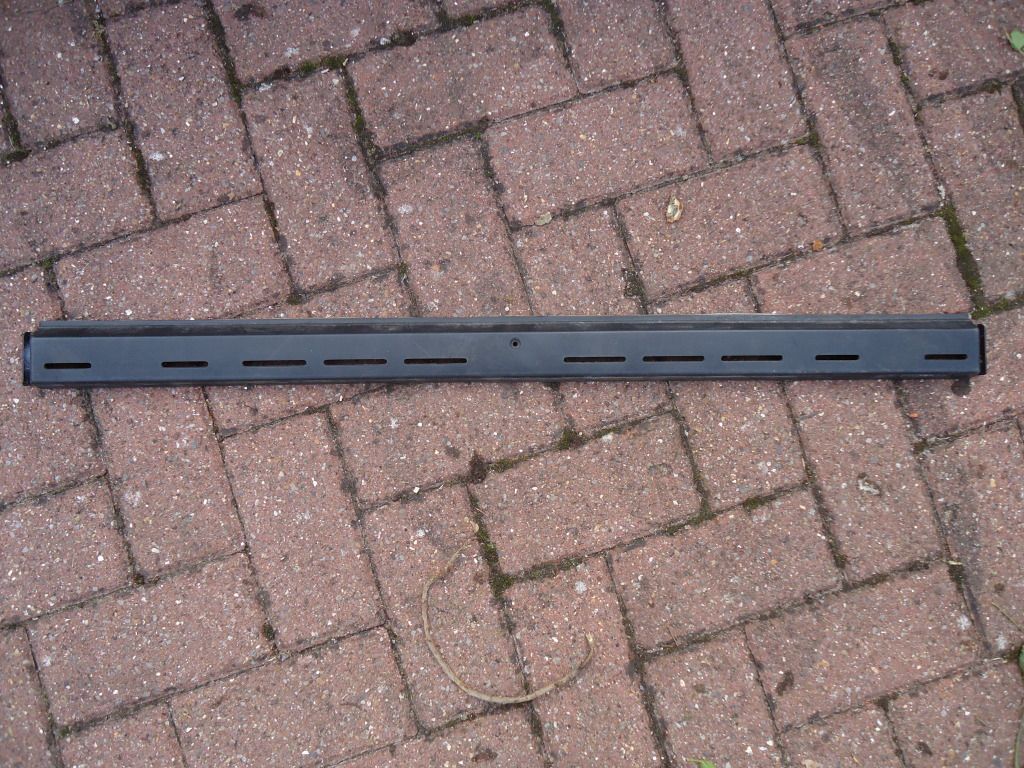
I have 2 full width (dash) covers. How do these work. What are they off?
I'll take some pics and post them probably Friday night. Then hopefully all will be revealed
I have 2 full width (dash) covers. How do these work. What are they off?
I'll take some pics and post them probably Friday night. Then hopefully all will be revealed
They are off the Sisley. If it fits stick it on.
They are off the Sisley. If it fits stick it on.
Are these precious parts? I was thinking about blocking the slots from beneath and the cutting out a couple of sections to fit my 'clip in' screen vents..?
Last edited:
They are nothing special. The super, 4x4, Sisley, fizz all had them.
They are nothing special. The super, 4x4, Sisley, fizz all had them.
Did they actually direct air at the screen or was there something else as well.?
That's as good as it gets!
They are nothing special. The super, 4x4, Sisley, fizz all had them.
Not fitted to my Fizz
Hmmm....I must of dreamt it..
Now I want one, and an inside panel for the boot too
Now I want one, and an inside panel for the boot too
I will bring a choice of back panels to panda camp..
Hi Si. Thanks for posting. In my boxes of many things I have 2 plastic screen vents which look like they clip into something but the are too short to cover the metal dash holes.
I have 2 full width (dash) covers. How do these work. What are they off?
I'll take some pics and post them probably Friday night. Then hopefully all will be revealed
Ok got ya now
well I think leave that trim off. The SEAT wouldn't have had it anyway probably and bare metal looks way cooler anyway :devil:As Kev says it's mk2 panda trim. I'd have thought it would just screw on using the same screw holes across all pandas though (even the budget early panda's had the holes there for it but with a bung put in to tidy it up a bit).
Similar threads
- Replies
- 5
- Views
- 266
- Replies
- 0
- Views
- 102