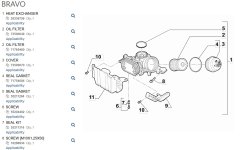
Technical Looking for oil filter location on 2010 Bravo 1.4 t-jet with pic

Currently reading:
Technical Looking for oil filter location on 2010 Bravo 1.4 t-jet with pic

Just seen your photo - shouldn't the o-ring be in the groove below where you have it?? I think that might be a problem....
I took it off from there and Fiat videos show the same spot too.
If I try stretching it just below edge, it will be even wider and doesn't have groove to sit in.
I've checked the net quickly and all show the seal should sit in the same groove.
Thanks trying to give advice anyway.
 
Just seen your photo - shouldn't the o-ring be in the groove below where you have it?? I think that might be a problem....
Okay I've removed the o-ring and the cap now goes on very easily, so the issue is the o-ring.
I'm gonna apply some gentle heat on it and try again.
 
I've been researching this a lot, and most info came back with this being the location.
View attachment 460806

The cap shown above with the red arrow, is rather on the top of the engine, and that cap is upside-down, also a coolant hose is completely on top of it, so if that is the oil filter housing, that coolant needs to be drained?
Of course I'm speculation at the moment, I plan on changing it tomorrow, I'm just trying to put the infos together. Cheers
Hi
I have been changing my oil a countless times, thats why I know this position very well. I have even done a top ovehaul on the T-jet. I even broke that cap at one point and bought a new replacement.
 
Hi
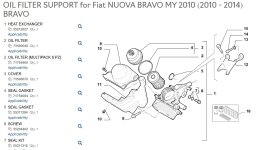
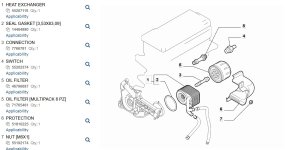
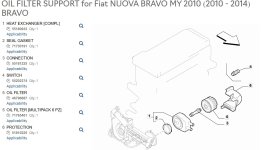
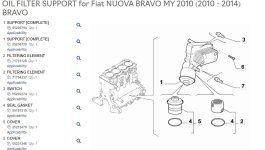
I have a 198A1000 motor, which is the 1,4 T-jet 150 BHP. I have checked in the manual and these are the available iterations, so one needs to check which one applies to them.
 

Attachments

  • Bravo 2.jpg
    Bravo 2.jpg
    172.6 KB · Views: 13
  • Bravo 3.jpg
    Bravo 3.jpg
    133.6 KB · Views: 17
  • Bravo 4.jpg
    Bravo 4.jpg
    137.2 KB · Views: 17
  • Bravo 5.jpg
    Bravo 5.jpg
    165.2 KB · Views: 20
  • Bravo.jpg
    Bravo.jpg
    141.5 KB · Views: 18
I know this is a Punto, but look closely at the video - The O-ring is in the lower position on the cap.
I have been changing my oil a countless times, thats why I know this position very well.
The ring sits in the right spot, I've checked Autodoc and other websites too, but I've found the real issue, and why it was making the springy-noise.
20250216_172653.jpg

The new oil filter is the issue. They look very similar, but the new one is a bit longer and narrower than the previous one, which mean the valve that's opening the oil flow, was pushed down by the narrow filter diameter.
If I'd forced it on, the oil wouldn't have flown into the engine much, which would have been very bad...

I'll buy another filter and make sure it's exactly the same.
Thanks for the input guys.
 
Last edited:
I've done the oil change, fortunately the shop nearby had the correct sized filter, I also got a new housing, the rubber seal sits at the same groove in both. The seal was still sticking out a bit, so I had to apply some force, I've only turned it until it felt okay, but not too much force. It was still a bit of headache due the angle, and now there' like side-size of coint isn't touching the edge.
Screenshot_20250217_150759_Gallery.jpg

The rubber seal had all gone inside, but there's definitely a bit of gap.

After running the engine for 30min, the filter housing had warmed up, so the filter isn't pushing down the oil-valve underneath , and I see no leaks and no warning lights. I'll check it tomorrow as well, just to be sure.

I'd make a how-to if people are interested, the videos on YT only show the verison where the filter is by the off-side wheel.
 
This might be the same?

The oil filter design is similar and the positioning, but on 1.4 tjet it's burried under 3 different hoses and reaching from the sides is very limited.
Also he didn't screw the housing in all they way either like me, his replacement filter was also longer than previous one, I got another one, needs to pay attention to sizes for sure, only 3mm shorter diameter and didn't fit properly.
All in all, the Bravo's oil change probably has been the most difficult one I've done, took me 2 hours just to remove the housing.
But next time I'll remove the heat shield, so should be a tad easier.
 
Back
Top