Technical Koalar random thoughts

Currently reading:
Technical Koalar random thoughts

Clutch, gearbox problem

You can see the pessure plate here


IMG_20231107_133731.jpg


And from further back

IMG_20231107_133749.jpg


The inside is normally covered in oil if the input seal/bearing has gone
 
Testing for the common problem of thermostat seal perished, over cooling

This hose should stay cold for several minuites from a cold start

Temperature gauge should be about a third before there is any flow

It's the bottom of the hose you need to check

You don't need anything fancy to measure it. Cold for a couple of minuites the seal in the thermostat is not your problem,

IMG_20231107_151218.jpg


Top and bottom of this hose should be hot at idle and the temperature gauge midway

If it's not you have a air lock, low coolant,or head gasket problem. It's also the location of the main bleed screw

IMG_20231107_151615.jpg
 
Can you see the clutch on the fiat 500?
Yes that is a 500 gearbox fitted to my panda, they are virtually the same

You can only see the pressure plate from top,
IMG_20231107_175448.jpg


it you want to see the fricton plate or input shaft seal you will need to use an endoscope


The simplist test is with the engine Off to feel the inside if it's oily changing just the clutch will not permanently fix any problem. Worth doing even if your not doing the job yourself as it save a lot of heart ache later
 
Looking through some Chrysler documents today for fiat 500 repairs

I was surprised to find

Screenshot_20231220_122551.jpg

Screenshot_20231220_122426.jpg

No doubt it's the same for the pandas with flyby wire throttle bodies

In the procedures it asks for a relearn when either the throttle body or accelerator pedal is changed.
 
Here's how I deal with rusty brake pipes

First try with a nice fitting spanner, don't cheap out you need a nice fitting one.

I don't use any oil at this point. If I does not budge and I resort to heat, it will catch fire.

Here a fairly typical pipe

IMG_20240106_155915.jpg

In this case it didn't budge

So a add some brass behind it to protect the paint

IMG_20240106_155938.jpg


And heat to cherry red

IMG_20240106_160051.jpg


In this case it started to move after the first application of heat


It's started to move, it will move back and forwards a few degrees

Now I add oil and work it in. Don't force it out. Tighten up, unwind. Tighten up, unwind a bit more and walk it out

 
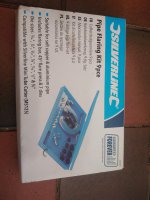
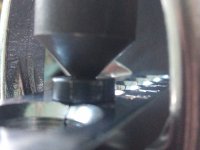
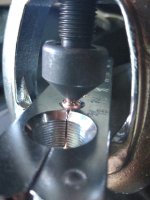
You don't need expensive fancy tools to make a new pipe like this
IMG_20240109_131630.jpg

This will get the job done, yes it's easier with more expensive tools

IMG_20240109_131504.jpg

It's best to remove the old pipe in one piece, but it's not always possible. Here is one the goes across the bulkhead, behind a clutch cable, evap, fuse box and so on. I have cut the pipe in the middle and pre form half and feed the rest through and bend in situ.
IMG_20240109_122137.jpg

Measure around the curves with a piece of string and cut to length
IMG_20240109_122323.jpg

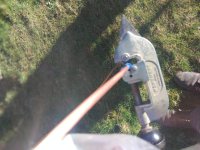
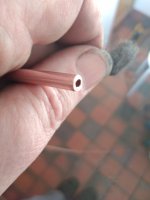
Pipe cutter dosnt leave any swarf and leaves a nice and square end
IMG_20240109_121601.jpg


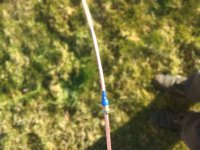
Don't forget to put the connectors on first, if you tape them a few inches back from the end it saves any heart ache later on

IMG_20240109_121933.jpg


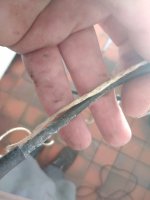
The pipe cutter will leave a little ridge in the center
IMG_20240109_123040.jpg

Which can be knocked off with a small drill
IMG_20240109_122712.jpg

And the sharp edge knocked off with wire wool
IMG_20240109_123634_1.jpg

Square, and no burs is the important
Should look like this
IMG_20240109_123650_1_1.jpg

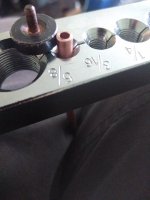
And ready to be clamped, For me trial and error showed just below the button height gave best results
IMG_20240109_133532.jpg

Make sure the button sits square and flush
IMG_20240109_135758.jpg


And mash it down until the there is no gap
IMG_20240109_135655.jpg


And it should look like this, You may have to remove the button with pliers
IMG_20240109_134010.jpg

One last step, but this is where it can all go wrong, push the cone in until the flare looks right. Don't just mash it down tight. For me it's one and a half turns of the handle
IMG_20240109_135543.jpg

Its better to be slightly too shallow than too deep, when you tighten the fitting down it will form and seat properly

IMG_20240109_134447.jpg
 

Attachments

  • IMG_20240109_121601.jpg
    IMG_20240109_121601.jpg
    7.3 MB · Views: 73
  • IMG_20240109_121933.jpg
    IMG_20240109_121933.jpg
    8.6 MB · Views: 265
  • IMG_20240109_122323.jpg
    IMG_20240109_122323.jpg
    2.8 MB · Views: 138
  • IMG_20240109_131504.jpg
    IMG_20240109_131504.jpg
    2.7 MB · Views: 124
  • IMG_20240109_135655.jpg
    IMG_20240109_135655.jpg
    1.5 MB · Views: 106
  • IMG_20240109_135543.jpg
    IMG_20240109_135543.jpg
    2.2 MB · Views: 208
  • IMG_20240109_123650_1_1.jpg
    IMG_20240109_123650_1_1.jpg
    2.3 MB · Views: 198
  • IMG_20240109_133532.jpg
    IMG_20240109_133532.jpg
    3.5 MB · Views: 1,610
  • IMG_20240109_122137.jpg
    IMG_20240109_122137.jpg
    3 MB · Views: 208
  • IMG_20240109_131630.jpg
    IMG_20240109_131630.jpg
    2.5 MB · Views: 213
  • IMG_20240109_135758.jpg
    IMG_20240109_135758.jpg
    3.1 MB · Views: 149
  • IMG_20240109_122323.jpg
    IMG_20240109_122323.jpg
    2.8 MB · Views: 78
  • IMG_20240109_134010.jpg
    IMG_20240109_134010.jpg
    3.9 MB · Views: 148
There are two types of flaring, effectively male and female, needs to be the right one when making it
 
There are two types of flaring, effectively male and female, needs to be the right one when making it
The bubble flares are almost identical to make just stop at photo 14 they tighten up fine

But it's better if the base is flat

IMG_20240110_223335.jpg


So instead use opposite side of the bar. Non shamfered side

Have slightly more sticking out, flush to the hight of the button

Then don't mash it all the way to the bar leave it about 1/2mm away

IMG_20240110_230629.jpg

Proper preparation is the key with these cheaper flare tool. If everything is nice and square. The failure rate is very low

This has been very good, you can hand form it around a socket, and takes a nice flare


IMG_20240110_233426.jpg

At the time I bought it, it was cheaper than most on Ebay, you could buy cheaper on aliexpress but I doubt the copper nickle content would be the same

The cheaper flaring tools are not for making steel brake pipes
 
The biggest problem I found with steel pipes is that you cant get enough grip on the pipe and it slides down when trying to compress it.
 
Pretty obvious but is take me decades to realise

If you put all you socket you are using on an extention bar or racket it much easier to find them

Especially if you are working by feel on grass or gravel under a car,

Here's all the socket for one job

IMG_20240219_154833.jpg


This has been I great tool for me
IMG_20240219_154854.jpg


It has a very sharp 90 degree bend which makes it very good where access is tight

Also you can work right up to flange as there is no overhang

IMG_20240228_111938.jpg


Jobs that mostly require two sizes of socket, I just put one on either end

IMG_20240228_112203.jpg
 
According to fiat the correct inlet manifold at idle is 290 mbar and 330 mbar for the 1.1 and 1.2

My tired old car is running fine at 350 mbar but seeing as it got damaged cylinders along with a glued head and block it seems feasible
 
Came across this

Not sure if it crosses over to the Panda

It probably does, very similar engine

The Linea was based on the Punto grande and built 2007–2018 the 1.3 JTD was an option

Warranty claims in india on broken timing chains are only honoured if the chain is replaced every 60K KM

Which is 37K miles, yes condition aren't the same in India

Service Bulletin.jpg
 
My 100HP did this after the lockdown layoff. It turned out to be a relay. The Body compute had no power. All relay and all fuses got (one-by-one) pulled and tested. All were ok but it started after that was done. Suggest start by swapping BCM relay with headlights relay (all are same spec) and see what happens.
Not just a fault found on Pandas. My old SEAT Cordoba became an "intermittent" starter - would start sometimes and not others. Repeated turning on and off would usually result in a start. I tried interrogating it with my VAG-COM (now VCDS) but it said it couldn't connect! Once the car started the VAG-COM connected as usual though. It got progressively worse so I asked our local VAG indy and he said "just fit a new 109 relay" Which I did and it sorted the problem completely. The VAG-COM couldn't "see" the car because there was no power going to the ECU - So obvious I should have thought of that. I dismantled the old relay and it's contacts were filthy burnt. Cleaned them up with some abrasive paper and it worked fine so kept it as a spare in case of emergency.
 
Got the car here for a few day

1.2 petrol 2011

Going to post a few pictures and video of some simple and basic tests

My well be a bit random as they pop into my head and might sort them into the proper order later
Just thought I'd record here how much I'm enjoying this thread. So much good info. The cam belt, done without slackening the pulley bolt is just how I do them and the extensive posts on brake pipe making - excellent! Doing brake pipes is one of my favourite jobs. Can be very challenging too when tube nuts won't undo or the pipes go behind stuff like fuel tanks etc. But sitting back afterwards looking at the lovely new pipes all carefully bent to fit, is just such a pleasure! Thank you koalar and all other contributors.
 
Italian translation of abbreviations

NBC. Body Computer Node
NFR. Brake node
NGE. Electric steering node
YRS. Slewing sensor - Hill holder
NCR. Robotized gearbox node
NCM. Engine management node
NQS. Instrument panel node
NCL. Climate control node
NCV. Convergence node
NAB. Air bag node
NSP. Parking sensor node
NRR. Radio receiver node
EOBD. Diagnostic connector

199002896 - KEY​

Every cable represented in the outlines electrical workers is characterized from a code (of one or two letters) that identifies its color, according the following table.
CABLE COLORCODE
BLACKN
WHITEB
LIGHT BLUEA
BROWNM
YELLOWG
REDR
GREENV
GREYH
PINKS
ORANGEC
VIOLETZ
BLUEL
767.png
In the cable with double colors, the first color is main one. Eg.RV= red cable with green stripes.
 
Keys

If you buy a car make sure you try and get both keys

If you only get one key, knock the price down

If you buy the car with one key sort a spare ASAP
Not only are you in a word of pain if it gets lost, but they do go faulty as well

Not 100% but most dynamics had remote locking (folding key fob) and most actives did not (mechanical key)

All I believe had central locking, that is you put the key in the divers door and the other doors unlock

As a general rule the active does not open the boot as well, the dynamic does but the boot latch micro switch is a common failure
 
Last edited:
Cloned key

The easiest way to get a spare

As of last year the going rate was around £35-75

The transponder is read, then copied the a new key

This is a key blank cut, and a mechanical key to open and start the car, it does not matter if the original key is the remote fob or a machinal key the process is the same

It's not difficult even Timpsons can do it for you

The equipment isn't that dear, here £35 china fake clone machine


The only downside is both keys are identical, the car them as the them the same, in the unlikely event of a key being stolen by someone how knows what car you drive, you have to get them all blacklisted

No key code needed

If you use an autolocksmiths they never need the code as it can be read directly from the body computer via the OBD diagnostic port


The only times you need the code are
If you are adding a preprogrammed key yourself
Or the Immoberliser light is on and you need to move the car
 
Last edited:
Adding remote locking to an active

There's three options, nothing easy

First of all, not all parts are there, it got the wrong boot handle, no boot micro switch, no motor in the boot or drivers door, not programmed into the body computer, missing something cables from the drivers door

Option 1
Add the missing components and splice in a third party remote locking mechanism, to operate the OEM system

Option 2
Add brackets and third party system to operate the door mechanism independently

Both options 1 and 2 will have a negative effect on you insurance premiums

Option 3
Find a donor car, if that's even possible, swap cables, handles, locks, motors, ECU, Body computer and anything I have missed


Option 4
Decide it's not worth it and not bother
 
You want a second key fob to open the car remotely

These can not be cloned

You can not buy a cheap key and get it to work easily, The only equipment to preprogram most of them is zedbull full at over a grand


It's a three part process
Cut the blank
Preprogram the key
Add key to the body computer


Option 1
Buy key from fiat and get them to add it to car

Option 2
Buy key from fiat and add via multiECUscan, or similar, you will need the key code

Option 3
Get a third party to cut preprogram and add. Going rate last year was £250+ no key code needed
 
Back
Top