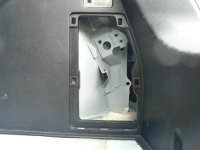
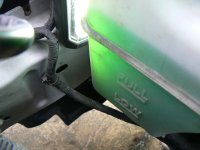
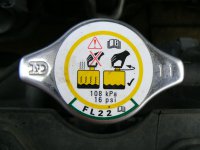
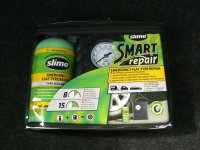
Thought I'd finished with the Mazda yesterday but then I remembered I was going to make a hold down screw for the spare wheel. You'll maybe remember the car had no spare when she bought it back in March, it just had a bottle of gunge and an electric pump kit:
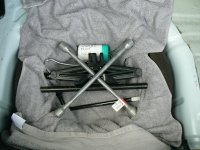
So I ordered one from a supplier in the midlands who deals in used, but good ones from cars which have been written off or scrapped. There was some confusion over the size and the supplier sent a 16" rim which didn't fit in the well. They were very good about it and immediately sent out a 15" replacement. Apparently they went to a 16" wheel at the model change in late 2014 and ours is a 2014 car but pre-facelift. Anyway we got the right one in the end. I opted for the kit which includes a generic jack and wheel brace with some trepidation as I didn't know what sort of quality it would be or whether the jack would properly fit the jacking points on the car. What arrived, in the same package as the wheel, was this:
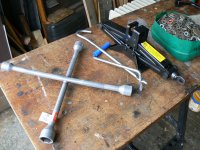
and quite honestly it's probably as good as you could expect for the money. I've tried it out and it works just fine.
What was with the car when bought, in addition to the "gunge" pack, was the wheel nut tool and tow adapter you can see here:
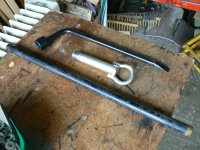
I looked out a length of suitable tubing to extend the tool so it would be more effective on tight nuts or for someone of less than average strength see here:
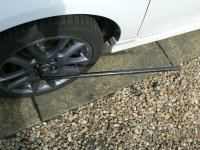
It's well worth carrying around a length of tubing if you have this type of wheel nut tool. But don't use the extension when tightening or you'll likely strip a thread or snap a stud
What I didn't do was order the restraining screw which screws into the threaded hole in the boot floor, reasoning that i could surely do that myself and save the £12/£15 quid they were asking. Please don't ever drive around with an unrestrained spare wheel in the car. A spare wheel is heavy and can be lethal if it gets loose in an accident.
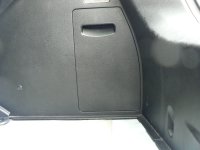
So out I went and opened the boot:
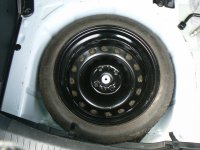
Spacesaver snuggled in very nicely with the threaded hole clearly visible in the middle:
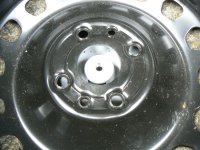
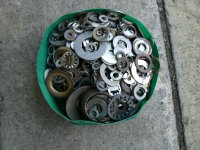
Looks like an M10 size? So out comes one of my many boxes of nuts and bolts, there we go, that's an M10, lets try it in the hole to check the thread. But oh dear, it only goes in about half a turn before it tightens up. Take it out and check both male and female threads, all Ok. So concentrate closely on the threads and immediately it can be seen that the thread in the hole is noticeably finer than the bolt - diameter is correct though. So what's going on? Try another bolt just in case, this time a brand new one. Still doesn't fit. Could it possibly be that it's not metric? Nah, no chance. Then I suddenly remembered that I've run into "metric fine" threads before. They're not common but do exist. could this be one? But I don't think I have an M10 fine threaded bolt. However I never throw away any usable nuts, bolts, washers, set screws, washers, spacers, etc, etc. Here's just a small selection of boxes containing my hoard:
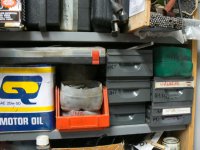
About ten minutes later, with fixings spread all over the floor, I find this:
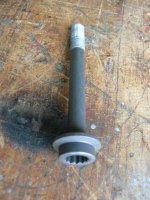
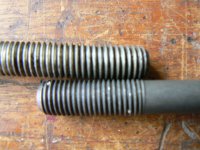
It's one of the used stretch bolts from when the timing belt was done on the Ibiza. Been used and stretched so can't be torqued again but very usable for this purpose and it fits the thread perfectly. Checked it with my thread restoring file and it's 1.25mm pitch The standard 10mm bolt is 1.50mm. You can clearly see the difference here:
Now I need a suitable washer to restrain the wheel and so out comes one of the containers with washers in it:
And here we are, just the very thing:
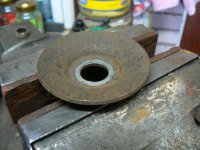
It's part of a shock absorber kit from my old Renault 20. The new parts were fitted to the vehicle but I kept the old bits and pieces and it really paid off now, maybe 30/40 years later!
Looked out a piece of one inch by eighth inch flatstock (steel strip) and cut off about two inches of it. Cut the bolt to length and slotted the end of it with my angle grinder and a cut off disc. By the way, Thank you George for not bothering to tell me you broke the mains plug on my angle grinder when I lent it to you recently:
Against my better instincts I lent it to him so he could cut off the bolts, which had rusted horribly, which were holding his garden gate to the house wall (Rawl bolts) I keep on saying to myself "don't lend tools" but somehow I don't always follow my own advice. At least it's only a plug - and I'm going to replace it with a rubber one!
Then a bit of hacksawing and filing to get the flatstock looking good - rounding the corners and deburring - and it's out with my very old but trusty stick welder:
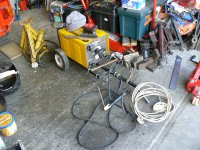
I would have reached for my MIG but I handed back my rental cylinder to BOC a few years ago due to the cost of rental. When I was running my community education welding classes I could justify the expense but it all gets a bit "silly" keeping it so you can do just a few jobs a year. If I get a big job on the go I'm going to get one of the rent free cylinders that SRS supply. In the meantime I'm managing with my good old MMA machine. I'll add a bit on at the end about it just for info, but on with the main subject now.
The flatstock is located in the small slot I ground in the end of the stud and locked up with a hand vice while I welded it to the stud. I must say I made a strong but not "pretty" job of it so had to do a bit of grinding to get it looking acceptable, I'm out of practice with the "stick welder these days, however after I derusted the washer and painted them with Lidl's best red paint it all turned out looking pretty good - Or I think so anyway!

And here it is doing it's job of restraining that space saver:
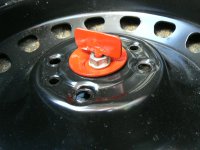
The nut is doing nothing except acting as a spacer - because the washer isn't flat.
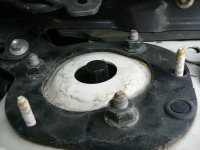
So that's really everything done that I set out to do while they are away. I did a last levels etc check under the bonnet and noticed that the thread protecting plastic cap is missing from the O/S strut top mount:
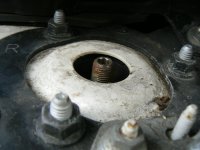
The one on the N/S is still there. This ties in with the MOT invoice I found which details the O/S top mount was changed last year due to it "groaning". I took the N/S plastic cap off into the workshop to look through my tin of plastic bits and pieces for a similar one to put on the O/S, but didn't have anything suitable so I painted some Copa slip on both sides to give some protection (yes I know, Me and copa slip, what am I like?) I was looking more closely at the cap on the N/S one:
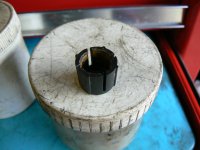
and noticed it's slotted down it's sides. Not a very good design for keeping the moisture out?
One last observation. If you've been following this thread you'll know that the hubs were quite rusted under the discs. In fact, after I'd removed the caliper carriers, I couldn't get the disc off the hub - on either side, N/S being the worst. I don't like smashing ten shades of **** out of a siezed disc with a big hammer. Yes it usually shifts the disc, but I worry that the shock of hitting it very hard with the likes of a 2lb hammer might cause damage to the bearings. I was delighted to find that these discs had tapped holes which you could insert a suitable bolt into and jack the disc off:
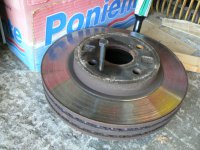
In fact the O/S one freed up completely with this technique and could then be pulled off by hand but the N/S needed a wee bit of extra help with a hide faced Thor. I think all manufacturers could take a leaf out of Mazda's book on this one.
Oh, just remembered i was going to say something about MMA (stick) welders? They can be bought so cheaply these days there's really no excuse not to own one. It does take a lot of practice to acquire the skill to use one really competently on safety critical repairs (perhaps suspension etc) but you can quickly learn how to do rough jobs satisfactorily and you can always grind away the excess! Most people don't find it easy to teach themselves from a standing start but a few evening classes soon sorts that and once you have the basics under your belt it's just a case of practice makes perfect.
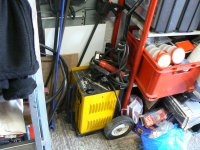
You'll find there are always machines at autojumbles because people buy them, don't take any instruction and find it more difficult than they thought so give up. If you buy one second hand then be aware these machines are operating at pretty much the limits of what you can pull out of a 13 amp socket so good connections and mains supply is paramount. If you look at my picture you'll see a white extension lead:

It's 2.5 cable and a shade over 20 ft long. The machine has about another 5 ft of cable attached and I find it's about as long as you can go before voltage drop starts to become a problem. You are not going to hitch one of these up to your lawnmower extension lead, take the machine to the bottom of the garden and weld repairs to your angle iron fencing! My machine is rated tops at 140 amps and it claims it can weld with 3.2 mm rods. Yes it will but only without any extension lead - so machine's existing wire only - and it'll only do it for a very short duration before it overheats and the safety cuts it out. Then you may be waiting for 20 minutes or so - depends how cold the weather is - before you can do a wee bit more. Better to use 2.5mm rods which you'll find rarely make a machine of this capacity to cut out. Also I'd avoid very low powered machines - 90 amps? - as they swill cut out much sooner even with the smaller rods. You cam buy 1.6mm rods and many do thinking they will generate less welding heat at the arc and so they'll be able to weld car bodywork. Well, I'm not saying you can't but you need to be very skilled indeed to do this with a stick welder. If you want to do this just buy a MIG. Lot more expensive of course, both to buy and to keep running with consumables. If you buy a used machine then take the top cover off and check where the transformer windings are bolted to the output terminals. Better quality machines will have copper windings whilst cheaper ones are often aluminium. I prefer the copper wound machines for a number of reasons, but they are not so common if you're looking for a cheap machine. Nothing wrong with the aluminium ones, mine is aluminium, BUT, they tend to corrode with that white powder corrosion where the windings bolt to the terminals inside the casing. It's pretty easy to just undo the bolted together terminal and clean up where they meet. The improvement, especially when trying to strike an arc, is remarkable. I've also modified mine by installing a "flat" fan (like a computer fan) inside the back of the casing and blocking off the cooling louvres at the sides of the machine so that air is drawn in at the front and over the transformer exiting at the back. I can now weld for ages without it ever cutting out.
Build yourself a wee wheeled transport dolly as a project and make it so the machine can be stored on it's end and you'll find you can tuck it away in the smallest of spaces:
So there we are. Think I'm done with my new little friend, for now anyway, and hope you enjoyed the wee exhortation for you all to get into welding - it's amazingly good fun once you've got the knack but can be very frustrating if you don't properly know how to set your machine up and strike an arc at will. Instruction will help greatly with this and also, hopefully, stop you setting fire to your house, shed, car, or whatever - you need to be very aware of fire risk, but it's all common sense really.


