Technical Fuel pump replacement 79 spider

Currently reading:
Technical Fuel pump replacement 79 spider

To be clear,when doing the timing belt is it necessary to remove the crank pulley? I'm going to need to come up with a 38mm socket but it will be handy to have one anyway for turning the motor over.., also can muratic acid be used to clean the inside of the radiator ? For perhaps 30 minuites? Then flushed out? I have a jug I've been looking to use up for 20 years, would like to get rid of the darn stuff...thank you in advance for relpys!
 
Last edited:
To be clear,when doing the timing belt is it necessary to remove the crank pulley? I'm going to need to come up with a 38mm socket but it will be handy to have one anyway for turning the motor over.., also can muratic acid be used to clean the inside of the radiator ? For perhaps 30 minuites? Then flushed out? I have a jug I've been looking to use up for 20 years, would like to get rid of the darn stuff...thank you in advance for relpys!
No you dont need to remove the crank pulley. Twist the belt through 90 deg and you should be able to feed it behind the crank pulley if you do this first!
 
No you dont need to remove the crank pulley. Twist the belt through 90 deg and you should be able to feed it behind the crank pulley if you do this first!
Once you get the belt behind the pulley wiggle it back and forth and you will feel it locate in the teeth. Keep the tension in the front side of the belt until its located on the cam pulley. The slack side is taken up by the belt tensioner. If you locate the belt this way it stops the pulleys moving and the timing being out.
 
Thanks! I was concerned if I had to remove the crank pulley it might move my timing marks...sounds good, it will be my method!
Before you remove the old belt manually turn the engine so the crank and cam timing marks are aligned and use tipex or white paint to mark the position of all the timing pulleys including oil pump/dissi drive.
If you are a bit unsure I have seen cut through the belt lengthways so that half the old belt remains to keep the pulleys aligned while you slide the new belt on. Once the new belt is on cut off the remaining old belt. I have not tried this myself because it looked too much if a faff about.
 
To be clear,when doing the timing belt is it necessary to remove the crank pulley? I'm going to need to come up with a 38mm socket but it will be handy to have one anyway for turning the motor over.., also can muratic acid be used to clean the inside of the radiator ? For perhaps 30 minuites? Then flushed out? I have a jug I've been looking to use up for 20 years, would like to get rid of the darn stuff...thank you in advance for relpys!
As @Twink80 has said, there's no need to remove the crank pulley if just changing the t/belt - however I would add that you should ensure that the area the new belt will be threaded through is very clean, don't want to get dirt/grit on the new belt. Also, check that the front crank oil seal is not weeping, if it is, it'll need to be changed, which will require removal of the front crank pulley.

Re- the 38mm socket. This is virtually the same size as 1"1/2, (1"1/2 is 1.500", 38mm = 1.496", only 0.004 difference), so maybe you already have or could borrow this size?

All 38mm sockets I've seen are 3/4" sq.dr. so a step-down adaptor would be need to turn it with a 1/2" sq.dr. swivel-bar or ratchet - might not be enough space to use this combination when the engine is back in the car (iirc, the rad would be in the way). The Fiat factory tool was like a flat bar welded to the bi-hex part of a cut down socket, so that it could be used when the engine was in situ. (the flat bar was thick enough to be struck with a hammer to loosen the big crank nut, and it often was!).

Just be aware that from about 1983 on the 2000 engine, Fiat changed to a smaller hex head crank bolt which has a left-hand thread instead of the 38mm nut with a normal r/h thread. So if your older than '83 car has a later, post '83 2000cc engine, be careful.
 
-------------- also can muratic acid be used to clean the inside of the radiator ? For perhaps 30 minuites? Then flushed out? I have a jug I've been looking to use up for 20 years, would like to get rid of the darn stuff...thank you in advance for relpys!

A search using the terms ' 'can muriatic acid be used to clean car radiators' gave lots of answers :-

Screenshot_20-3-2025_235747_www.bing.com.jpeg
 
Wow! Your right! All kinds of opinions..I might just try vinegar...after 12 years it's still holding coolant..just looking for a reason to use up the muratic acid but perhaps I should just try to recycle it..thanks! P.s. I picked up a 1/2 drive black deep 38mm socket today for $14, thanks for letting me know about the r/h thread for my 79
 
Last edited:
Wow! Your right! All kinds of opinions..I might just try vinegar...after 12 years it's still holding coolant..just looking for a reason to use up the muratic acid but perhaps I should just try to recycle it..thanks! P.s. I picked up a 1/2 drive black deep 38mm socket today for $14, thanks for letting me know about the r/h thread for my 79
Remember that the radiator tanks and tubes are brass so whatever you use needs to be harmless to brass.
I've used Caustic Soda (check i/net for alternative names) with good results, essentially any deposits in the cooling tubes are likely to be mainly limescale build-up from the water used, so anything that can dissolve limescale should work. Some just use some commercial car radiator cleaning product.

Well done for finding a 1/2" drive 38mm socket, I suppose being black it's an impact type, hadn't thought about checking what's available in impact type, good to know.

Just to clarify - the 38mm nut has a normal righthand thread.
 
Thanks! The socket is an impact, I grabbed it as I wanted a deep...just wanted to mention the advice you gave about when replacing a part to consider the reinstall is very true, removed the fuel pump yesterday, from the top per twink80s advice which I'm convinced is the best way to go...removal took 5 minutes, install of the new one today took 2 hours with finding what tool combo fits the tasks and the tight squeeze on everything, great advice to always consider!
 
Thanks! The socket is an impact, I grabbed it as I wanted a deep...just wanted to mention the advice you gave about when replacing a part to consider the reinstall is very true, removed the fuel pump yesterday, from the top per twink80s advice which I'm convinced is the best way to go...removal took 5 minutes, install of the new one today took 2 hours with finding what tool combo fits the tasks and the tight squeeze on everything, great advice to always consider!
The reason I kept talking about needing a shallow socket and describing the factory wrench was I am more familiar with Euro spec. engines, these have a shallower pulley without the extra V belt grooves that drive the ac compressor and air pump (if fitted) on U.S. spec cars. The factory crank pulley nut wrench was designed to allow the engine to be turned over in situ and with the radiator still in place, including when replacing the timing belt. (In the Fiat Dealership where I worked, we usually didn't remove the radiator when replacing just the t/belt, just disconnected the top coolant outlet from the head to allow removal of the timing belt cover).
Here's some views of the early Euro style shallow crank pulley :-
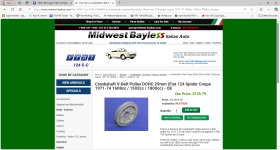
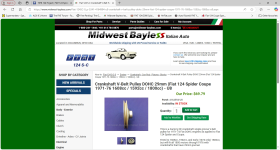
Crank V pulley early_screenshot-1742599200876.pngCrank pulley early side view_screenshot-1742599260019.png


And here's a pic of the U.S. spec. crank pulley which is much deeper due to the additional V belt drive grooves :-
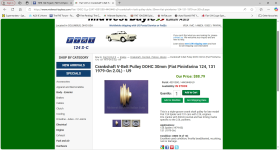
Crank pulley later type side view_screenshot-1742599335334.png


I've only worked on a very small number of 124 Spiders imported here from the 'States and usually all the 'smog' gear then gets removed pronto. Plus, much of this experience is now 40 - 45 years ago (i.e. in the last century), so apologies if my memory sometimes fails me or I misremember some things - I'm always happy to be corrected, :) as I wouldn't want to inadvertently continue to spread incorrect information.

One tip about refitting parts e.g. fuel pumps in a confined space would be to possibly attach the fuel hoses to the pump before refitting it, ensuring that you position the hose clamps so that they can be re-tightened if necessary (i.e. think of where the screws heads will be pointing when installed, can they still be easily accessed?).
Another possible tip, I prefer to use 3/8" sq. drive socket etc. for jobs such as these, they're strong enough to cope and not so big as to risk over-tightening fasteners (i.e. BOLTS & NUTS :giggle:)('cos I'm so strong 💪).
I also make use of 'stubby' wrenches if the fasteners are unlikely to be too tight.
 
Last edited:
Back
Top