I can remember being charged £80 for a single full break line, fitted by the garage front to back. Its not recently so what are we talking today?


You are using an out of date browser. It may not display this or other websites correctly.
You should upgrade or use an alternative browser.
You should upgrade or use an alternative browser.
Technical Brake pipes repair or replace?
- Thread starter John202020
- Start date
Currently reading:
Technical Brake pipes repair or replace?
Less than a £5 in parts and what ever they want to charge you in labour
It's a bit like how long is a piece of string, it going to be garage dependent
An hour is reasonable time allowance
It's a bit like how long is a piece of string, it going to be garage dependent
An hour is reasonable time allowance
It really depends on the route it takes , some go above the fuel tank, behind subframes etc.I can remember being charged £80 for a single full break line, fitted by the garage front to back. Its not recently so what are we talking today?
A 25ft roll of Kunifer brake pipe is around £35, tin of brake fluid, labour charges of around £50 per hour depending in where you live, two people to bleed the brakes.
Plus the odd plastic pipe retaining mounts that snap and the knowledge to route the pipe safely away from any chafing points and avoiding sharp kinks, that is without the odd snapped bleeder etc
")
Double and bubble are not a problem in copper nickel, with cheap toolsSorry, but another vote for no, John.
Pure copper is a no-no for brake lines; for safety, you need to use copper nickel alloy (Kunifer) pipe. This needs better quality flaring tools than you're going to find for a few quid on ebay.
99% copper pipe work hardens under normal braking pressure and at some indeterminate point in the future, will almost certainly burst, most likely during an emergency stop.
If it's the same as the panda it will be bubble
The preparation work has to be right though
Last edited:
OP
OP
Well some progress the company on ebay that supplies ready made ones that go on the rear axle say the can make one to any length for front to rear if I can work out how long it is,
Use a bit of string to measure itWell some progress the company on ebay that supplies ready made ones that go on the rear axle say the can make one to any length for front to rear if I can work out how long it is,
You can just order the correct part from fiat, be expensive though
Work some lubricant in, and when loose, walk it out
Last edited:
Are you intending to replace the whole pipe or just the rear section.
Pretty sure there's a join under the floor, hidden by a plastic cover, (there definitely is on Pandas, as that's where I join replacement pipes when changing rear beams, and I'm pretty sure the 500 is the same, but not current got one here to look at). This joint is normally fine, and unscrews without drama.
Still pretty long, but less bends than whole pipe run.
(I would measure these, but they are from a 2004 Panda, so could be different enough to matter)
Attachments
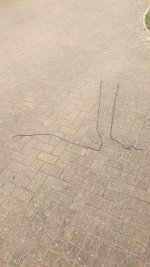
Good advice, and also tape the string to the line at various points.Use a bit of string to measure it
Sorry I'm late to "the party" here but I've been down at my deceased brother's house for the last couple of days trying to get into the roof space so the valuation can take place for probate. Very complicated hatch which was jammed, but, hurrah, we, my ex marine no1 son and I got there in the end! And we didn't bring the ceiling down either!
There's been so much very excellent advice given here that I've little to add. If you're just attending to this one pipe and you can get the old one off - which can often be quite a struggle - then getting a new pipe made up by a local factor (if they offer this service) or an obliging local wee garage is most likely the best solution for you. The big problem is often that the old tube nut will be so corroded into the fitting that rounding off the flats on the nut is likely. You can reduce the likelyhood of this happening by using a proper tube nut spanner (split ring they're often called) It's like a single hex ring spanner with a gap in one side just big enough to slip over the pipe. It grips on all flats of the nut rather than just the two sides an open ender does. Another way of doing it is simply to cut the pipe off flush with the tube nut and then use a single hex socket. Of course you're 100% committed once you start cutting pipes but I've had considerable success with this method. Be very careful if applying heat to the fitting as it can affect the rubber of any flex hose.
If you're likely to be doing more brake work in the future then buying your own flaring tools is absolutely the way to go. However there's a large choice of tools available some of which I'm not very keen on - like the one Mike commented on above. Somewhere on the forum is a detailed post I did on my brake flaring tools, been searching for it for half an hour and can't find it so here's a more brief version:
Here's my wee collection of flaring tools bought over the years:

There are 3 tool kits here. The one in the middle is the oldest and was bought probably some 50 years ago from a wee spares shop near Chiswick bridge in London. It's the one with the loop shaped red handle and can make both single and double flares (single flares are sometimes referred to as "bubble flares") It's an absolutely excellent tool and has even managed the occasional flare on a metal pipe (which most DIY quality flaring tools can't manage being as how they are intended for use on copper or cupro nickel tubing which is softer)
The tool at the top, also with a red handle, was bought in desperation when I had an emergency job to do and had "lost" the other tool! eventually found it in my garden shed some months later and still have no recollection of ever taking it into the shed! It works, but not as good to use as my "old pal" which really does make a very nice flare indeed.
You'll have noticed a third tool at the bottom of the picture? This is my latest purchase. The die end looks very similar to the one above it doesn't it? So why did I buy it? Well, the two above it make imperial sized flares whereas the new tool makes metric flares and most cars now a days use metric format flares. The two older tools make both single (bubble) and double flares whereas the new metric tool only makes bubble flares. This troubled me a little when I bought it but then I realized I've not had to make a double flare for a metric fitment yet?
Here's a couple of pictures of it in more detail:

this one just after the flare was formed and the tool dismantled to remove the pipe:

My experience is that this type of tool makes a good flare and is especially handy because it can be used "hand held" on an existing pipe working on the car where bigger "professional" tools are intended for bench mounting. I've read there are poor copies of this tool around made from sub standard metals so beware if buying from other than a trusted source. Here, for instance, is a company you can trust: https://www.frost.co.uk/4-75-mm-din...zThhn8ivmpc7Xj7rwpUMdD5vpD5kEuTxoC3ecQAvD_BwE
Someone has mentioned above in this thread that copper pipe is a big No-No. Although copper is a very attractive option for brake pipes not only because it's easy to work with and bend to shape but also because it doesn't rust like steel pipes do. However there are two big problems with pure copper pipes when used for brake work. Copper work hardens and becomes brittle when subjected to repeated working - just think how much vibration a copper pipe is subject to mounted to a suspension arm! and it inherently has a lower bursting pressure when compared to either cupro nickel or steel. It is outlawed and illegal to use in quite a number of countries, USA and Australia I believe just for starters? however not here and is sold in many spares and factors outlets. Here's the spec sheets for my current rolls of cupro nickel and copper pipe:


And here's the cupro nickel:


I have to say though that I've used the copper pipe most of my working life - because that was what was supplied to us in the workshop - and I've never heard of a problem and all the wee garages around here seem to use it. My local factor is always surprised when I tell him I want cupro nickel as he sells mostly copper to the trade and has to search his shelves for the stuff I want! These days I use the Cupro Nickel wherever I can but do keep the copper pipe for especially difficult and "bendy" applications. I would always use the cupro nickel for longer runs, ie front to rear pipes, as the copper tends to sag on longer runs and really needs more fixing clips to be successful.
There's been so much very excellent advice given here that I've little to add. If you're just attending to this one pipe and you can get the old one off - which can often be quite a struggle - then getting a new pipe made up by a local factor (if they offer this service) or an obliging local wee garage is most likely the best solution for you. The big problem is often that the old tube nut will be so corroded into the fitting that rounding off the flats on the nut is likely. You can reduce the likelyhood of this happening by using a proper tube nut spanner (split ring they're often called) It's like a single hex ring spanner with a gap in one side just big enough to slip over the pipe. It grips on all flats of the nut rather than just the two sides an open ender does. Another way of doing it is simply to cut the pipe off flush with the tube nut and then use a single hex socket. Of course you're 100% committed once you start cutting pipes but I've had considerable success with this method. Be very careful if applying heat to the fitting as it can affect the rubber of any flex hose.
If you're likely to be doing more brake work in the future then buying your own flaring tools is absolutely the way to go. However there's a large choice of tools available some of which I'm not very keen on - like the one Mike commented on above. Somewhere on the forum is a detailed post I did on my brake flaring tools, been searching for it for half an hour and can't find it so here's a more brief version:
Here's my wee collection of flaring tools bought over the years:
There are 3 tool kits here. The one in the middle is the oldest and was bought probably some 50 years ago from a wee spares shop near Chiswick bridge in London. It's the one with the loop shaped red handle and can make both single and double flares (single flares are sometimes referred to as "bubble flares") It's an absolutely excellent tool and has even managed the occasional flare on a metal pipe (which most DIY quality flaring tools can't manage being as how they are intended for use on copper or cupro nickel tubing which is softer)
The tool at the top, also with a red handle, was bought in desperation when I had an emergency job to do and had "lost" the other tool! eventually found it in my garden shed some months later and still have no recollection of ever taking it into the shed! It works, but not as good to use as my "old pal" which really does make a very nice flare indeed.
You'll have noticed a third tool at the bottom of the picture? This is my latest purchase. The die end looks very similar to the one above it doesn't it? So why did I buy it? Well, the two above it make imperial sized flares whereas the new tool makes metric flares and most cars now a days use metric format flares. The two older tools make both single (bubble) and double flares whereas the new metric tool only makes bubble flares. This troubled me a little when I bought it but then I realized I've not had to make a double flare for a metric fitment yet?
Here's a couple of pictures of it in more detail:
this one just after the flare was formed and the tool dismantled to remove the pipe:
My experience is that this type of tool makes a good flare and is especially handy because it can be used "hand held" on an existing pipe working on the car where bigger "professional" tools are intended for bench mounting. I've read there are poor copies of this tool around made from sub standard metals so beware if buying from other than a trusted source. Here, for instance, is a company you can trust: https://www.frost.co.uk/4-75-mm-din...zThhn8ivmpc7Xj7rwpUMdD5vpD5kEuTxoC3ecQAvD_BwE
Someone has mentioned above in this thread that copper pipe is a big No-No. Although copper is a very attractive option for brake pipes not only because it's easy to work with and bend to shape but also because it doesn't rust like steel pipes do. However there are two big problems with pure copper pipes when used for brake work. Copper work hardens and becomes brittle when subjected to repeated working - just think how much vibration a copper pipe is subject to mounted to a suspension arm! and it inherently has a lower bursting pressure when compared to either cupro nickel or steel. It is outlawed and illegal to use in quite a number of countries, USA and Australia I believe just for starters? however not here and is sold in many spares and factors outlets. Here's the spec sheets for my current rolls of cupro nickel and copper pipe:
And here's the cupro nickel:
I have to say though that I've used the copper pipe most of my working life - because that was what was supplied to us in the workshop - and I've never heard of a problem and all the wee garages around here seem to use it. My local factor is always surprised when I tell him I want cupro nickel as he sells mostly copper to the trade and has to search his shelves for the stuff I want! These days I use the Cupro Nickel wherever I can but do keep the copper pipe for especially difficult and "bendy" applications. I would always use the cupro nickel for longer runs, ie front to rear pipes, as the copper tends to sag on longer runs and really needs more fixing clips to be successful.
Last edited:
with reference to my last post in this thread - about metric flares. People may be asking themselves "what's the difference?" Well, there may be very small differences in dimensions between the two dies but the "biggie" is the shape of the head of the "bubble". Look at the shape formed into the backside of the flare. You can clearly see this on the shape of the dies:You'll have noticed a third tool at the bottom of the picture? This is my latest purchase. The die end looks very similar to the one above it doesn't it? So why did I buy it? Well, the two above it make imperial sized flares whereas the new tool makes metric flares and most cars now a days use metric format flares. The two older tools make both single (bubble) and double flares whereas the new metric tool only makes bubble flares. This troubled me a little when I bought it but then I realized I've not had to make a double flare for a metric fitment yet?
The first image is of the imperial die and the second of the metric one. It can be clearly seen that the imperial die produces a conical chamfered shape to the back of the flare and the metric one is a sharp right angle. The relevance of this is how the pipe nut bears on the back of the flare as it's tightened up. I have to say though, that I've used the imperial flaring tool to form a flare used with a metric tube nut and never had a problem. I think the nut just slightly distorts the flare as you tighten it - because, with the copper being soft it takes up the shape of the nut quite readily. Feel a lot happier now I can use the metric tool when needed though.
The Panda Nut
Nutty about Pandas Infected by Panda virus and OPD
Yep, they did it all. From re-coringd radiators and repairing them, to brakes and engine spares and the guys were a great source good knowledge unlike the average person these days who knows its seems sweet fanny adams about anything engineering or even car. You might as well talk to a brick!Edmunds Walker was a good trade place sadly long gone.
Yes, a case of "The computer says no".Yep, they did it all. From re-coringd radiators and repairing them, to brakes and engine spares and the guys were a great source good knowledge unlike the average person these days who knows its seems sweet fanny adams about anything engineering or even car. You might as well talk to a brick!
They were like many of the storemen I knew in the past at different Dealers, you could put a part in front of them, they would take one look, quote the part number disappear out the back and return with the new part you wanted.
Now a days, if you haven't got the reg. or vin number you are flogging a dead horse!
Pipe routing, oh yes. I remember when I was just starting to work on Land Rovers - series type - being given a brake pipe MOT failure to do. Well, with a separate chassis, that'll be an easy one I thought. Huh! the damned pipe ran along the top of the chassis rails between the chassis and floor! Pipes running above fuel tanks between the tank and the floor or on the "wrong" side of subframes - obviously installed on the production line before the tank, subframe or whatever was fitted are all par for the course. Being able to cut new pipe to the correct length so you don't have to "loose" part of it and learning how to quickly and smoothly form radiused bends without kinking to say nothing of remembering to slip the tube nut over the pipe before you form the flare - go on admit it, we've all done it!It really depends on the route it takes , some go above the fuel tank, behind subframes etc.
A 25ft roll of Kunifer brake pipe is around £35, tin of brake fluid, labour charges of around £50 per hour depending in where you live, two people to bleed the brakes.
Plus the odd plastic pipe retaining mounts that snap and the knowledge to route the pipe safely away from any chafing points and avoiding sharp kinks, that is without the odd snapped bleeder etc
Making and fitting a brake pipe for a first time DIYer in the driveway is often a massive challenge whereas it's an everyday activity on the shop floor. We all struggle from time to time with seized tube nuts though. Just avoiding cross threading the nut into the flex hose/wheel cylinder/ or whatever is a big thing for the DIYer and I'd advise never fully tightening down the component it's being screwed into so it leaves you "wiggle" room. What does this mean? well, don't tighten wheel cylinder retaining bolts/nuts or hose clips. That way, providing you've bent the new tubing to approximately the right shape, you'll have enough slack on the wheel cylinder/flex hose/etc to tilt or twist it which helps a lot with getting the tube nut started in the thread. Run it in as far as possible using your fingers (less chance of cross threading that way) and then tighten the wheel cylinder/whatever nuts/clips before finally nipping up the tube nut for a leak free fit. Sometimes though you've just got to go for it if you're not able to loosen the component. Big thing is to always get the tube nut screwed in a couple of turns with your fingers if possible and very gently if you have to use a spanner. Cross threading it and continuing to try to tighten it always ends in tears and often having to buy a new wheel cylinder/flex hose etc.
A while ago I was convinced I couldn't change the front subframe on my EVO. The people on here and being under the car changing the starter motor recently has convinced me I can.It's the front suspension, I've order a new upper wishbone, replaced the other side only 6 weeks ago for the mot, but have a really bad feeling it's also the lower rear front control arm, that requires the whole engine subframe dropping to replace not a job I can do.
I can't be without two working cars so this means i'll be buying a third banger punto (which hopefully doesn't instantly break down) while the EVO is up on stands for a week or two.
The one on the left in your picture was a very common one and I've worked in several workshops were this was used. Never seen the one on the right though. Usually used locked in a bench vise but we found that you could use it on the car but it really took two people to work it. We did it by locking a very large pair of Mole grips to the yoke of the tool and while one person held the tool the other worked the forming punch. Cumbersome but saved having to make complete front to rear pipes when only a small section at the rear was rusted.My brake pipe tools (I have two) are both old school Sykes Pickavant around 40 years old or more they have OP1 and OP2 flares in 3/16 and 1/4 (basically convex and concave) I use Kunifer brake pipe(copper and nickle) as it is strong, doesn't rust yet still easy to form.
The 1/4 inch pipe was handy for when I had a 1947 Karrier Bantam Series 2 lorry and made up the brake lines for that. The main thing is to make sure your new brake nuts are the same design as the original ones as there are lots of choices.
There are probably easier ones to use on the market these days, but the main thing is to practice a few times on some spare pipe to get the flares right.
I have just dug in my garage to check as I have not used them for some time, I used to boast that I have everything except money
Aye, Eddy Walker we called them. An excellent outfit.Edmunds Walker was a good trade place sadly long gone.
Yes I have used them many times with Mole grips under cars , but usually on my ownThe one on the left in your picture was a very common one and I've worked in several workshops were this was used. Never seen the one on the right though. Usually used locked in a bench vise but we found that you could use it on the car but it really took two people to work it. We did it by locking a very large pair of Mole grips to the yoke of the tool and while one person held the tool the other worked the forming punch. Cumbersome but saved having to make complete front to rear pipes when only a small section at the rear was rusted.
Good advice as usual Jock, for those still picking up the tricks we learnt 40-50 years ago and yes I have called my self a few names when realising I had left the union off after flaring a pipe, just glad I had been a bit generous in the pipe length to allow reflaring.
I've never had an issue with copper and the some arguments are weak in my view. They claim copper goes brittle with themal cycling, yet I've never come across brittle central heating pipes.Pure copper is a no-no for brake lines; for safety, you need to use copper nickel alloy (Kunifer) pipe. This needs better quality flaring tools than you're going to find for a few quid on ebay.
99% copper pipe work hardens under normal braking pressure and at some indeterminate point in the future, will almost certainly burst, most likely during an emergency stop.
I'd choose copper pipes over steel pipes and steel just rots away. The copper pipes will outlast your ownership.
Copper over steel brake pipes yes, but Kunifer (copper & nickel) is the far superior solution overall.I've never had an issue with copper and the some arguments are weak in my view. They claim copper goes brittle with themal cycling, yet I've never come across brittle central heating pipes.
I'd choose copper pipes over steel pipes and steel just rots away. The copper pipes will outlast your ownership.
I don't know about thermal cycle issues, however I have used it for nearly 50 years in the motortrade with complete satisfaction.
Where I have had to replace brake cylinders etc. I have often found the brake unions that give the most trouble with pipes twisting in the union and trying to snap off due to them being softer and welding themselves to the union have always been the pure copper ones. Pure copper may be easier to form around tight bends etc. but to me that is it's only advantage.
Also as has been mentioned Kunifer will withstand higher pressures.
In the late 60s all we had was the steel brake pipes, in the 70s I came across pure copper on Russian cars that used it for the harsh climates, so shortly after that I saw the issues with replacing brake cylinders when undoing those pure copper pipes as when they did twist off etc. we always replaced them with Kunifer.
The only reason pure copper is used is price in my eyes.
Similar threads
- Replies
- 4
- Views
- 274