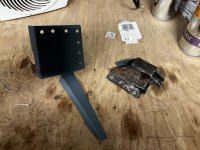
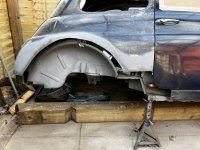
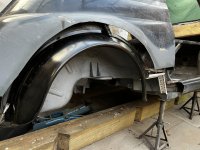
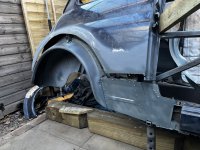
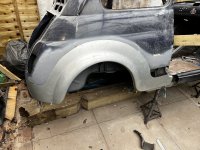
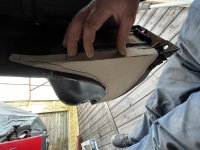
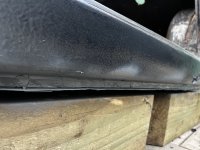
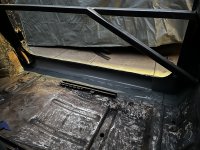
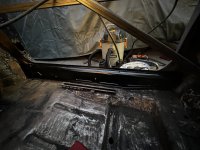
IMG_7594.jpeg

500 (Classic) '65 RHD F Restoration

Introduction

Hi guys :)

My name is Steve, and I'm a rusty-old-car-aholic :p

I've been quietly browsing the forums for a while, and slowing collecting knowledge while looking out for a 500 project. A few weeks ago I took the plunge and bought a project, it's definitely not the best starting point, but it's also far from the worst.

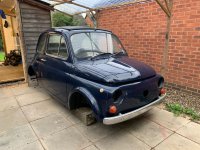
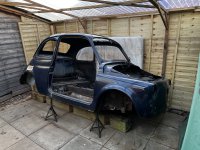
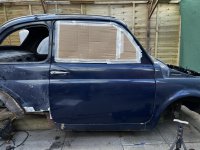
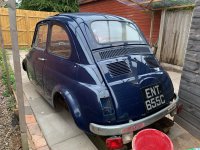
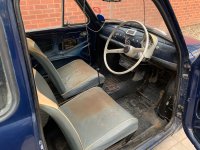
It's a RHD 1965 500F in dark blue. It appears to have been off the road since the mid 80s, and was recently purchased by a trader who was clearly looking to getting running and flip it for a profit before he realised just how much was wrong with it (and there is quite a lot wrong) beneath the surprisingly shiny paint job.

This means it's come to me already mostly disassembled. I'm aware this is a bad idea, especially as this is my first 500 and so I'm not familiar with how it all goes back together... It can't be that complex though can it?! :p

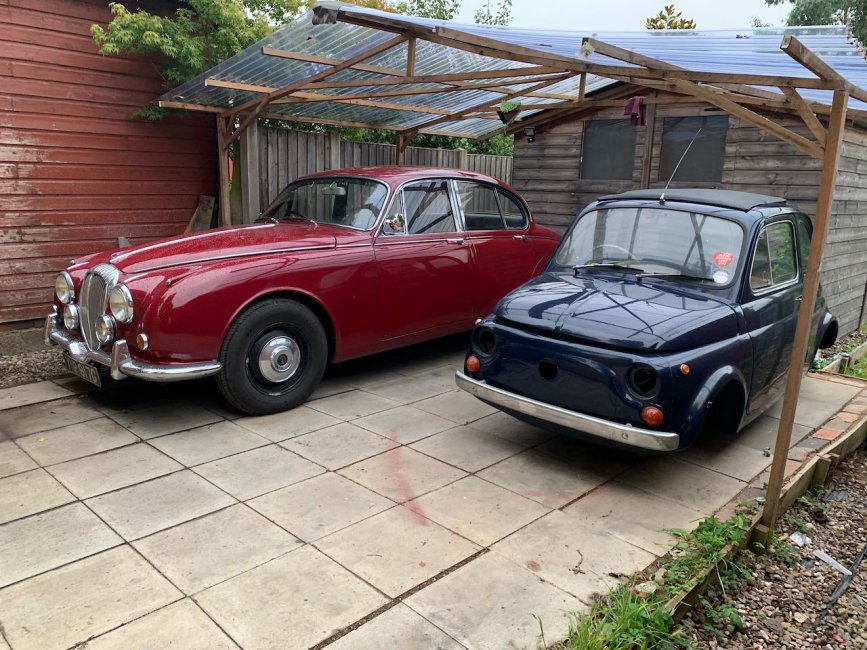
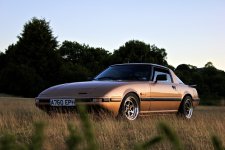
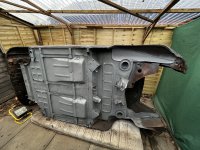
In the photos you can see how it looked as delivered to me, and also how my other classic (also resurrected from a 30+ year lay up period) dwarfs it!
IMG_7589.jpegIMG_7588.jpegIMG_7586.jpeg
Thanks everyone. 🙂

I did manage to get my first few spare minutes to work on the car today. If I can just keep finding half an hour here and there to keep chipping away rather than letting the project completely stall, then that will make me feel a lot better about it.

I started by finishing up cleaning up the welds that I did back in December before the girls arrived.

Then I welded in the spring cup and bump stop, both of which I’d prepared in the previous session. Nice quick wins.

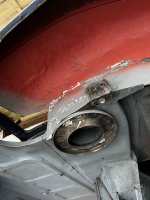
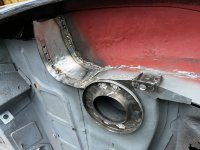
After that I started making a panel to fill the gap in the front edge of the arch, which meant starting from scratch with card templates, then cutting out a steel patch, shaping it and drilling for plug welds, so not quite as quick progress.

As you can see I didn’t get it all welded in before I ran out of time. Its a bit of a bigger patch than the other side, so needs a bit of compound curve to it, which with my basic metal working tools is generally less tidy than the more simple patches. Once it’s all in it will do the job just the same.

You can also see that I ran out of grey primer! So rather than leave it exposed I used a bit of red I had left over, which spoils the nice consistent look underneath! Still it’s only primer and will obviously be covered at some stage. I shall buy more grey before my next session!
 

Attachments

  • 05E6F755-59C1-42AA-A367-A32C57D36354.jpeg
    05E6F755-59C1-42AA-A367-A32C57D36354.jpeg
    1.1 MB · Views: 153
  • DBC3661D-AA8E-4BFF-9D96-2AFCA8CCA4C2.jpeg
    DBC3661D-AA8E-4BFF-9D96-2AFCA8CCA4C2.jpeg
    1.1 MB · Views: 134
Thanks everyone. 🙂

I did manage to get my first few spare minutes to work on the car today. If I can just keep finding half an hour here and there to keep chipping away rather than letting the project completely stall, then that will make me feel a lot better about it.

I started by finishing up cleaning up the welds that I did back in December before the girls arrived.

Then I welded in the spring cup and bump stop, both of which I’d prepared in the previous session. Nice quick wins.

After that I started making a panel to fill the gap in the front edge of the arch, which meant starting from scratch with card templates, then cutting out a steel patch, shaping it and drilling for plug welds, so not quite as quick progress.

As you can see I didn’t get it all welded in before I ran out of time. Its a bit of a bigger patch than the other side, so needs a bit of compound curve to it, which with my basic metal working tools is generally less tidy than the more simple patches. Once it’s all in it will do the job just the same.

You can also see that I ran out of grey primer! So rather than leave it exposed I used a bit of red I had left over, which spoils the nice consistent look underneath! Still it’s only primer and will obviously be covered at some stage. I shall buy more grey before my next session!

Your welding is good....better than most; I wouldn't even bother grinding it down. :)
 
Thank you @fiat500! In the past I haven’t bothered grinding it down where it’s out of sight, on my Daimler for example.

But with this build I set out to try and enjoy the journey a bit more, rather than just rushing to the finish line, and so im trying to make every patch look as neat as possible. My aim is that once it’s been coated in stone chip and painted underneath, that you won’t see it’s been patched. Gotta have something to aim for anyway…

I’ve managed a couple of hours on the car over the past week, and have been chipping away on these underfloor repairs.

I started by finishing off welding the patch at the front of the wheel arch from last time, which was closely followed by cutting out a pretty agricultural patch that had been previously done to the rear of the arch and making up a replacement.

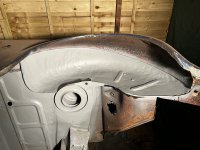
This was fairly straight forward to weld in and with a fresh application of grey primer things were once again looking tidy!

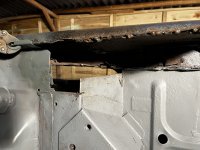
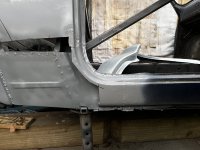
The last section to deal with on the underside (for now…) is the jacking point. When the floors were replaced they were cut round the original jacking point, and as such it’s not really attached to anything strong. I removed it and the rusty remains of the old floor.

I should point out, at this stage I’m ignoring the state of the inner and outer sills, and the closing panel that joins them to the inner arch. That I will tackle at a later date, coming at it from the side rather than from below, when the car is back the right way up.

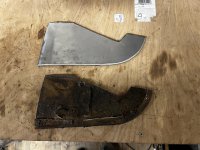
Finally I made up a little repair piece to fill the gap and to give the jacking point something to mount to. The original jacking point was ok on this side so I’ve just given it a quick clean up.

And thats where I ran out of time for this week. From here it should be fairly straight forward to weld in those repairs to the jacking point and then I’ll be ready to roll the car back over so it’s right way up! After a bit of finishing work on the floors from inside the car, the next chapter of the repairs can then start, with the major work on the rear quarters & wheel arches. Thankfully for that I’ve bought panels, so I don’t have to try and create any of those complex shapes myself!
 

Attachments

  • 98A5B3A1-653B-4099-BD0B-E975A6427022.jpeg
    98A5B3A1-653B-4099-BD0B-E975A6427022.jpeg
    4.1 MB · Views: 131
  • 248E2673-6CF7-4DD5-B0FC-6BB231CDFA1D.jpeg
    248E2673-6CF7-4DD5-B0FC-6BB231CDFA1D.jpeg
    2.2 MB · Views: 144
  • 494F03A8-B5BC-409C-93FB-530988707A59.jpeg
    494F03A8-B5BC-409C-93FB-530988707A59.jpeg
    2 MB · Views: 122
  • 693D2150-C6F9-4E0B-A9CF-95309A74E46B.jpeg
    693D2150-C6F9-4E0B-A9CF-95309A74E46B.jpeg
    2.6 MB · Views: 121
I was a lot more cautious with my metal work in my earlier projects, and with some of them like my Rx7, picture below, repair panels weren’t available so it was just a case getting stuck in and trying something. Then possibly throwing it away and starting again!!

I had a couple of hours on the Fiat this weekend, and made a small bit of progress, but it does feel like a mini milestone.

I started by welding in the jacking point repairs that I prepared last time.

Which means that the underfloor welding is done for now! So after a bit of a pause to a tidy up, I could flip the car back the right way up.

It was really nice to see it back the right way up, reminds me I’m working on a car, not just a chunk of metal. :)

I probably should have spent the rest of my time inside the car tidying up various bits and bobs on the floor I couldn’t get at while the car was on its side, but I’m impatient and so wanted to start on the first of the arches…

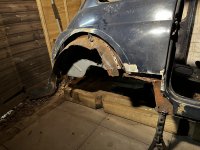
What a lovely mess there was to greet me under the shiny paint. I got the outer arch cut off and have started drilling the spot welds for the inner arch.

Sorting the arch itself shouldn’t be toooo bad, as I have the repair panels, but the structure behind the rear edge of the sill is a bit more complex. It’s not helped by the previous ‘repairs’.. I think I’ll need to put some bracing in to help keep things strong so I can cut out the back of the sill area. I’m also thinking I should put the door back on so I can make sure the door aperture doesn’t shift while im working on the sills.
 

Attachments

  • FE8C02A1-F9D3-458F-985E-ABD2C20F5555.jpeg
    FE8C02A1-F9D3-458F-985E-ABD2C20F5555.jpeg
    745.7 KB · Views: 113
  • B6C79940-6CA2-4B6E-BB62-BBE203857B09.jpeg
    B6C79940-6CA2-4B6E-BB62-BBE203857B09.jpeg
    2.2 MB · Views: 114
  • B9AB396A-68C6-495C-A2F9-46A84E2A1BB2.jpeg
    B9AB396A-68C6-495C-A2F9-46A84E2A1BB2.jpeg
    2.1 MB · Views: 120
  • 2832F604-AF49-412C-A005-AAADFF222B30.jpeg
    2832F604-AF49-412C-A005-AAADFF222B30.jpeg
    1.7 MB · Views: 112
I had a decent chunk of time of the car yesterday, and made some good progress. Picking up where we left off, I’d decided I needed to get the door back on and brace up the shell…

As I was refitting the door, I remembered that the drivers door had hung a bit low when I bought the car. I presumed it would be wear in the hinges or just a case of adjusting or shimming the hinges, as it is on my Daimler.

But when I put it back on I found that the was no play in the hinges and very minimal adjustability. I tried shimming the lower hinge to bring up the door, but this brought the back edge of the door too far over and it rubbed the frame.

After a bit of head scratching, I decided that the most likely cause was that the previous person who repaired this car didn’t bother to check the door alignment / brace the shell, and so the door frame itself had shifted when the floors or sills were done.

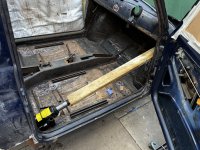
So to try and rest this idea I applied a bit of pressure, nothing drastic, with a bottle jack and a bit of wood at various angles and places, to see if It improved the door alignment.

With the jack pushing the bottom edge of the sill out, the door came right back into alignment and latched very nicely. Nice even shut lines all the way round, or certainly nice enough for me!

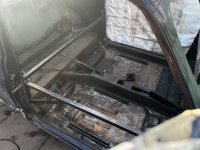
So that was good news to have found the issue, and realistically it was only a very minor adjustment. I could now add some bracing to hold the car in the right position while I rebuild the rear quarter and sill to the correct shape.

Confident that the car wasn’t going to fold in half when I start chopping away the rust and previous ‘repairs’, I broke out the angle grinder and got busy.

Soon after I had a slightly daunting looking pile of rusty bits on the floor and a car with some big holes in it! But it’s always a nice feeling to know I’ve got to the bottom of the rust and can start to rebuild now.

Lastly for this week I spent a few minutes offering up the new inner arch and trying to line it up so it will meet up with the outer arch repair section.

As you can see I also started on the first of many small card templates needed to fill in the areas I haven’t bought repair panels for.

So a good chunk of progress there, feels like quite a step forward. :)
 

Attachments

  • 7CEE16DD-33FC-450A-84A7-462B7C50FE04.jpeg
    7CEE16DD-33FC-450A-84A7-462B7C50FE04.jpeg
    2.7 MB · Views: 146
  • 8ACB0550-0824-402C-8C41-136C92E8B75D.jpeg
    8ACB0550-0824-402C-8C41-136C92E8B75D.jpeg
    2.1 MB · Views: 149
  • CF610526-3505-44D4-A104-D16D45950CC6.jpeg
    CF610526-3505-44D4-A104-D16D45950CC6.jpeg
    2.1 MB · Views: 174
  • 8B163A30-ABBC-4AC8-8FB5-48F46A681A8E.jpeg
    8B163A30-ABBC-4AC8-8FB5-48F46A681A8E.jpeg
    2.4 MB · Views: 216
  • F8F40D1C-D83C-4165-B055-DB412CEDE139.jpeg
    F8F40D1C-D83C-4165-B055-DB412CEDE139.jpeg
    1.8 MB · Views: 151
I managed another session on the Fiat yesterday. I made good progress, but didn’t stop to document much of it and I was just pushing on making the most of the time I had.

I started by filling in a couple of small patches needed to the lower edge of the rear inner arches and by turning the cardboard template for the outer edge of the rear seat base/inner sill into steel.

Once that was done I could fit the rear inner arch. I spent some time offering up both the inner and outer arch sections, clamping both in place and making adjustments till I was happy with how things line up.

Once I was happy with the alignment I marked the positions and then prepped the arch for welding by cleaning off the paint along the flanges, drilling for plug welds and then recovering it with weld through primer. Finally I could weld it in.

The penultimate piece of inner structure to go back into this corner was the closing panel/middle sill. While repair panels are available, it’s a fairly simple piece, so I made my own up. This all got welded into place tying lots of the other elements of the sill together.

I said that was the penultimate piece of inner structure, I have also got to add the ‘lifting support bracket’ behind that middle sill, but I might wait till after I’ve got the outer wheel arch on first. Access won’t really be any different, and this way I’ve got a bit more flex in the bottom of the inner arch to help it line up with the outer arch.

Speaking of which, my last job was to offer that up again and start clamping it in place to work out where I’m going to need to trim it back to to fit it.

The pressing for the bottom edge of the door frame is nowhere near where mine is, but it lines up nicely on the inner arch, jacking point and rear seam. So I don’t know if it’s just an issue with the repair panel (the one I have for the other side of the car is the same, or if there’s some weirdness with my car. Possibly with the car being an early 8 bolt F the door frames are different? I don’t know if D sills are a slightly different profile?
 

Attachments

  • 369AA22F-DBD1-48CD-B44E-106344ED0140.jpeg
    369AA22F-DBD1-48CD-B44E-106344ED0140.jpeg
    2.1 MB · Views: 134
  • AB47019D-98B8-418A-9BD9-D77704D7F6EF.jpeg
    AB47019D-98B8-418A-9BD9-D77704D7F6EF.jpeg
    2.5 MB · Views: 138
Rule 1 with restoring 500s.. none of the repair panels will fit properly.....
 
I was expecting the usual softer than factory corners and body lines, and the rough edge trimming with crumples where the metal has stretched in the pressing stage.

I wasn’t expecting the sill section of this repair panel to be over an inch deeper than it is on the car, and the sills themselves I’m sure are replacement panels…
 
Time for anther welding progress update. It doesn’t necessarily look much further along that last time, but it’s been a surprisingly large amount of work/time.

The last piece to go on before the outer arch was to refit the door frame corner that I had removed in order to get at the middle sill strengthener. It needed several small repairs and then aligning with the door to maker sure the shut lines were ok.

Not very visually impressive, but it needed doing and it needed some care and attention.

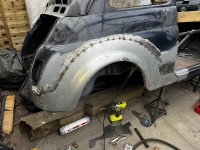
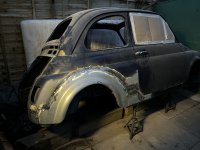
Much more impressive was finally fitting up the outer arch repair section.

It’s easy to underestimate just how much time and work there is in aligning a repair section like this, and working out how it needs tweaking to fit the car right.

But it’s nice to see the hard work pay off when it’s tacked in place finally and things are lining up nicely. Obviously the next stage was to slowly but surely work my way through welding it in and cleaning the welds down.
As you can see, night was falling by the time I’d finished that task! It’s not perfect, but with a bit of hammer and dolly work, a thin skim of filler (and I mean thin, 1-2mm not the bucket load I’ve chipped off many cars) and some paint you’ll never know it’s there.

I’ve just got two more repairs to make on this rear quarter, to replace the closing panel that fits underneath the car behind the wheel arch and to weld in the lifting point repair section that goes behind the back edge of the sill. So hopefully get those two done in my next session out there :)
 

Attachments

  • 4121DEFA-5791-4EA9-A863-6985864E32FF.jpeg
    4121DEFA-5791-4EA9-A863-6985864E32FF.jpeg
    1.6 MB · Views: 132
  • 502BC39D-B4C4-470F-A2D6-8F19C0D3D082.jpeg
    502BC39D-B4C4-470F-A2D6-8F19C0D3D082.jpeg
    2.4 MB · Views: 136
  • C66B19C6-2076-4B9A-BB81-D2DD60EFA593.jpeg
    C66B19C6-2076-4B9A-BB81-D2DD60EFA593.jpeg
    1.5 MB · Views: 141
This week, I once again managed a couple of hours on Saturday afternoon working on the car. :)

As mentioned in the last update, I had two small jobs to finish off on the drivers rear quarter. Firstly I needed to weld in the lifting support bracket, behind the end of the sill. I had bought repair panels for this, so it was pretty straight forward, and can be seen now taking the weight of the car.
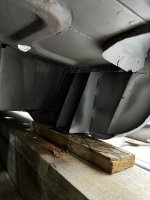
The second job was to make a closing panel for the gap between the rear of the wheel arch and the engine bay. On this point I failed, as I had underestimated how much sheet steel I had left. But I did get a card template made, and will order some more steel on Monday.

As this was my one chance to work on the car for the week, I wasn’t going to let the lack of steel stop me in my tracks there, I had plenty of grinding discs so I knew I could start cutting out the next area of concern!

That next problem area is the sill. The outer sills have been replaced, and poorly welded in, but the inner sills have been extensively patched, it’s ugly and it’s been done in a way that retains very little strength, so it had to go.

Before I could start chopping the inner sill out, I thought it best to fix the outer sill more securely to the floor pan. A nice line of fresh plug welds along the lower seam should do the job much better than the odd tack along the bottom edge that I had originally found.

Now the real challenge could begin of unpicking the patches and removing the remains of the old inner sill, without cutting into either the floor pan or the outer sill.

Removing the inner sill revealed a bunch of rust flakes and crud, but thankfully no more hidden surprises. There were a few more tack welds holding the outer sill in hidden inside here, but I still think it was worth the time to plug weld it properly.

After a quick clean up and splash of primer and it didn’t seem so bad.

Lastly for today, I was able to offer up the replacement inner sill. It looks promising to me, and shouldn’t need too much work to get it fitting on there nicely.

So a good couple of hours of progress, and hopefully next time I’m out there I can wrap up both of these little jobs :)
 

Attachments

  • F225DAEE-BFBE-4266-AB24-618CE9F4D2C0.jpeg
    F225DAEE-BFBE-4266-AB24-618CE9F4D2C0.jpeg
    1.6 MB · Views: 124
  • 95E2A757-1F5D-4F1C-B014-BBBACEE2FFA2.jpeg
    95E2A757-1F5D-4F1C-B014-BBBACEE2FFA2.jpeg
    3 MB · Views: 122
  • 485E9FC7-6177-4D82-818A-643173201B58.jpeg
    485E9FC7-6177-4D82-818A-643173201B58.jpeg
    2 MB · Views: 125
  • FB540EB3-5AF5-495C-A648-507B81F912B9.jpeg
    FB540EB3-5AF5-495C-A648-507B81F912B9.jpeg
    1.9 MB · Views: 153
  • 9EFA96FD-3B98-49AD-9C9D-0F07A26A2940.jpeg
    9EFA96FD-3B98-49AD-9C9D-0F07A26A2940.jpeg
    1.3 MB · Views: 170
I managed a couple of hours the past couple of Saturdays and steady progress continues.

Picking up where we left off, I got some more steel delivered so I was able to turn the cardboard template I had made, for the closing panel behind the rear wheel arch, into steel. Clearly the lack of sleep was showing, because I managed to make a mirror image of the panel I needed on my first attempt, so I had to throw it away and start again! The second attempt was more successful.
Not the neatest welding, but welding upside down never is. It really brings home to me what a help it was to be able to roll the car in its side when I did the underside welding.

D328B944-0328-43B4-8D18-19DE3CF8270B.jpeg


Speaking of awkward welding, the other piece I got welded in was the replacement inner sill. In itself this was comparatively straight forward, the repair panel was a decent fit so it was just a case of plug welding it in and making a couple of little patches to the bottom of the inner A and B pillars to meet up with it. In practice, folding myself up into the small confines of the Fiats interior, whilst avoiding the various brace bars I’ve welded in was decidedly awkward. I think I will have a stiff neck tomorrow!

4064EB89-543E-4171-96FD-9CDAF34F9C36.jpeg

And with that, a mini milestone was reached. I have now completed all the welding rear of the A pillar on the drivers side. Sadly the next task is now to do it all again on the passengers side… ah well, at least I know what to expect!

Like before the first step was to fit the door, it has dropped a bit, but not as bad as the drivers side. Once again I welded in some box tubing to brace the shell to correct this and to hold things in the right place while I chop this side of the car up.

02F6A0D0-F66D-44A3-B974-29D546D2149F.jpeg

And then with the last few minutes of my time today, I started the dreaded task of chopping lumps out of the car.

70D1D2AC-B790-4AD6-8B4B-2AA8FC0B9077.jpeg

It’ll require all the same work as the drivers side did. I’ve got the repair panels here, just gotta get out and get on with it!

P.s I finally figure out how to put my attached photos in the thread properly! Much easier to follow this way :)
 
Wow you Classic 500 guys really do produce some great content!

As with @Noah500 beauty, I've also converted this thread to a garage thread. It works in the same way as a normal thread, but you can now (if you want) use the garage updates feature to separate updates from general posts :)

Just wrote a mini guide here > https://www.fiatforum.com/threads/it-has-begun.493198/post-4632032

Oh and if you're interested in seeing the other Classic 500's we have, here is a direct garage link filtered :) > https://www.fiatforum.com/garage/categories/fiat-cars.2/?prefix_id=13

Can't wait to see what you've got planned next (y)
 
This is my first update, to the new garage format of this thread. So if anyone is reading this in the garage, there’s a whole heap of other updates in the discussion thread that covers the months between introduction and this post!

I’ve had a couple of days off work this week, and so had a bit more time than usual to push on with the welding. I’m really grabbing every moment I can on it, as if possible I’d like the welding done before the heat of summer comes. It’s no fun being bundled up in overalls on a hot summers day.

I won’t bore everyone by going into the same levels of detail as with the other side, it’s all been very similar just mirrored, and it’s taken me less time as I’ve not needed as much thinking time.

The first job was to finish cutting back all the rot and poor repairs.

87C1BA9B-D62B-4A8B-B19A-B47D1324E26E.jpeg


There was some lovely deep filler over multiple patches on this side.

D34EE01C-7DA4-427C-BF5C-3A07AD615D06.jpeg

Anyway, that’s all gone now, after that it was a case of fitting the new inner wheel arch, rebuilding the back of the inner sill structure and repairing the rear lower corner of the door aperture.

1B3E38BC-7C98-4225-8D96-C8A96E0F1EF7.jpeg

So that’s really good progress, it took me several weeks to get to this stage on the other side.

The next step is to fit the outer arch and then to deal with the closing panel, as with other side, but then before moving forwards, I need to look at this panel in the left hand side of the engine bay.

CF45FB02-D925-496D-A0DB-2CDAE5465582.jpeg

I had bought what I thought was a repair panel for it, but it is actually a very different shape now it’s here! I think it’s an under tray of sorts instead. Any of you folks know if this panel is available to buy or not?
Well a few weeks have gone past, and while I have not updated, I have none the less been busy! As the work has mostly been a mirror image of the previous rear quarter, there’s not been much to show really.

Picking up where we left off, I finalised the internal structure at the rear of the sills and then got the outer arch welded on.

828B9DC2-05AA-4CFA-A78E-FC1406CC8B11.jpeg


The closing panel behind the arch needed a similar repair to the other side.

976436B8-575D-497A-AF37-79ED327A2545.jpeg

The side panel for the engine bay was next. I take the silence in reply to my previous question to mean there was no repair panel available…

My metal shaping skills won’t win any awards here, but I did manage to make it from one piece, and it’s broadly the right shape!

25796C33-A975-4AD4-882B-31530ADD0D05.jpeg

And then, as before, I moved on to the inner sill.

CBC90EE8-E913-4DE3-A619-4FFEC54CCB67.jpeg


All of which makes several weeks of hard work seem very quick and simple! Anyway, the good news is that with this work complete I hit a mini milestone, all of the welding rearwards of the A pillars is complete!

So that meant yesterday there was nothing for it but to reposition the car…

4D9E086B-C225-41E4-9014-307E81166EB9.jpeg

And to break out the grinder to be rid of the poorly repaired, fibreglass, filler, pop rivets and underseal mess that was the front end.

5B053C58-F459-418B-87AB-FCE8A25AFC5F.jpeg

Eeek! It’s a little daunting seeing the car like that. Still I have all the new panels and such a nice feeling to know that the worst of the rust is now cut away and it’s all going forwards from here.

D51BBD78-AA6E-4740-9341-D91B8AB6FAFA.jpeg
E33345E2-5EFE-4F9F-82C4-8756586D52C0.jpeg

It’s good to see the A pillars are actually pretty sound. Much better than some I’ve seen in other restorations. A simple patch to the lower 6”, which I’ve started cutting back for on the drivers side, and a small repair where they’ve been buttered at the top when the last set on wing ls were fitted sill soon have them sorted.

What’s left of the inner arch isn’t so good, I still think I can patch them but it’s going to be a fair amount of work. They are available new, but as they hold a lot of the critical shape of the front end together, I fear that removing it entirely could lead to stuff getting out of alignment. I guess I’ll see how it looks when I start digging deeper into them behind the patches!
  • Like
Reactions: ben
Back
Top