Technical 100hp timing woes

Currently reading:
Technical 100hp timing woes

Replace the connector, it is the same for any fiat that used the same ignition coil as your panda.

Plus refit your cam belt covers
 
I do want to replace that entire loom. All the wiring seems to quite brittle though. On most of the offshoots of the loom the heat sheaths have broken off or melted.

Yes going to replace all the covers. Ran out of working time and i made the mistake of putting the aux belt and crank pulley on before putting the lower cover on. So i have to redo all that when i can... but of-course the weather doesn’t look like its going to play ball this weekend.

dave the kit you posted seems to come
With a crimping tool so will look at getting that... will it fit correctly though?
 
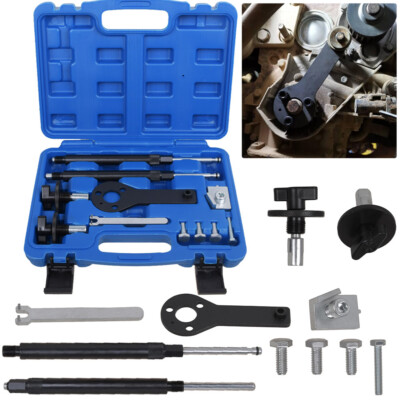
Dave the kit you posted seems to come
With a crimping tool so will look at getting that... will it fit correctly though?

I have similar pliers and the same connectors.

They are a fiddle to fit. You have to put the open side of the terminals into the slot in the pliers, then push the wire into the terminal. Use the old terminal as a guide. When you crimp, the end tags are rolled around and into the insulation, and around the copper wires. This locks the terminal to the wire. Don't expose more copper than necessary.

If the wires you are using are on the thin side (e.g. Fiat coil wiring), you could be advised to solder tin the copper end for a better grip when crimped. On thin wires, I tin the wire end crimp and then solder the crimp as well. Belt & braces with a tiny touch of solder. Too much heat spoils the insulation grip, but on fine wires (even with ends doubled back) there's only minimal grip under the crimp.

If you don't mind using just two colours, this high temperature silicone wire from a Yorkshire based supplier will do the job.
https://www.ebay.co.uk/itm/UL3135-Silicone-Rubber-Cable-High-Temperature-Wire-10AWG-to-18AWG/254049272309?hash=item3b268441f5:g:YC4AAOSwliFcK9nh

If you want multi colours, it will have to be from China. Oh Joy.
 
Last edited:
This post contains affiliate links which may earn a commission at no additional cost to you.
Managed to sort the rough idle out. Careful use of cable ties and some qbond on the vacuum pipe on the manifold.

I now have a strange issue on the dash. The engine light has cleared itself but I now notice the fuel gauge drops and the light flashes randomly... It will show i have half a tank and then it will drop, the light will flash and it’ll then pick up again. Any ideas what this could be? I heard it may be earths so i cleaned up the two earth points on the ecu and on the injector loom with some sandpaper...
 
Replace the connector, it is the same for any fiat that used the same ignition coil as your panda.

Plus refit your cam belt covers


I went back in to do this but I’m finding it difficult to place the cover in the correct location. Does it have to be fitted before the engine mount is fitted or can it be done with it in place?

At a loss here...
 
Hi guys

I know this is an old thread. But I'm trying to find out what locking tools I need ti change the Cambelt & Water pump on my 2007 100hp.

Can someone give me a link ti te correct tool (s) I'll need to get the job done please.

🐼
 
You need just any kit that contains these bits


1860985000

4000727.jpg


2000004500


s-l400 (1).jpg


2000015800

0004970_2000015800.jpg_540_2.jpeg

1860987000


images.jpeg


I haven't bought any recently so don't have a link I can recommend

Quality of china 1860987000 can be really bad, be careful not to snap the pins
 
Cheers mate for your reply. I've seen a few of those bits in some kits on Amazon and Ebay etc. I'll find the best one I can. The kits are only around 20 quid so we'll worth getting one. 👍🐼
 
Cheers mate for your reply. I've seen a few of those bits in some kits on Amazon and Ebay etc. I'll find the best one I can. The kits are only around 20 quid so we'll worth getting one. 👍🐼
As long as it's running correctly

It can be done without any locking tools by making your own timing marks, this makes it unessery to loosen the camshaft pulley, one less step, one less thing to go wrong

Mark a tooth on the crank and cam pulleys
Transfer them to the block and belt

Copy the marks onto the new belt

Align everything up and away you go


I would still use the lollipop pop camshaft one one as it sets all the pistons half way down the bores, I still use the camshaft lock to double check everything is correct
 
Last edited:
I used a lock on the exhaust cam. Inlet is connected by gears so you only need both locks when the cams have to come out.

Use this kit

I did not find an easy way to lock the crank. 1.4 does not have a timing hole for a pin to lock the flywheel like the diesel does. The black ring and stick lock plate is only usable with flywheel removed. Pretty useless for a service job on the timing belt.

(1) Set crank at mid up stroke on #1 cylinder. The two rods go into Cyls #1 and #2 plug holes. When they are level the pistons are all in line. Turn the engine clockwise so #1 will be on up-stroke.
(2) Lock the exhaust cam and Tippex paint mark the cam pulley against the engine.
(3) Note crank pulley position and mark that with Tippex paint. It's worth making a wire pointer but I used a casting rib.
(4) Remove the old belt, tensioner and water pump. #1 DO NOT ALLOW CRANK TO MOVE. That said a few degrees are ok its just to avoid piston/valve contact.
(5) Fit new tensioner and water pump and fit the new belt. Use the crank Tippex marks to be sure the crank has not moved.
(6) Tension the belt using the little pin wrench. You need to align pointers on the tensioner itself.
(7) Remove cam lock and turn the engine. Confirm the crank is running on the correct tooth. If belt tensioning has pulled it out by one tooth you will need to relock the cam and refit the belt with the crank set one tooth "out" to compensate. Repeat the belt tensioning and the crank should be pulled into the correct position.
(8) Box up the job.
 
This post contains affiliate links which may earn a commission at no additional cost to you.
That's a great write up mate on the job. Waiting for the parts ti come from AutoDoc. Went for a Dayco kit as this is the one that's on it already. Also came with a thermostat included. What's your thoughts on the quality of Dayco compared to SKF or INA kits.
 

Attachments

  • Screenshot_20250414_203031.jpg
    Screenshot_20250414_203031.jpg
    293.4 KB · Views: 1
Back
Top