General What did you do to your vintage spider today?

Currently reading:
General What did you do to your vintage spider today?

Joined
Dec 1, 2024
Messages
192
Points
149
Location
Usa
Hope I don't look dumb for starting this thread but many other automotive groups have a similar thread of "what did you do your (insert car) today? So just for fun thought I would see if it might be popular on this site..I did do a search first and nothing came up....sometimes when we mention what we did to our vehicle today it gives others the chance to chime in and ask questions , sometimes it motivates others to get back to work on their own project ,so here goes, what I did to my spider today after removing it from 12 years of dry storage was changing the old oil and filter, and upgrading the drain plug to a magnetic one that uses a socket rather than an allen wrench, then I removed my gas tank sending unit to inspect inside the tank, and was pleased with the condition I saw....
What did you do to your vintage spider today? :)
 
Last edited:
Hope I don't look dumb for starting this thread but many other automotive groups have a similar thread of "what did you do your (insert car) today? So just for fun thought I would see if it might be popular on this site..I did do a search first and nothing came up....sometimes when we mention what we did to our vehicle today it gives others the chance to chime in and ask questions , sometimes it motivates others to get back to work on their own project ,so here goes, what I did to my spider today after removing it from 12 years of dry storage was changing the old oil and filter, and upgrading the drain plug to a magnetic one that uses a socket rather than an allen wrench, then I removed my gas tank sending unit to inspect inside the tank, and was pleased with the condition I saw....
What did you do to your vintage spider today? :)
Progressed my respray! I have taken the shell back to bare metal over the winter, made a few discoveries of previous repairs. Have refilled and profiled, still blending and feathering, have applied etch primer from a rattle can and today had a go a spraying primer with gravity fed gun. Its not aimed to be a museum piece so I have limited patience for too much more sanding and I want the car back on the road by the end of April as the nicer weather is on its way!
 
What color will it be? Are you going with single stage or 2 stage paint? There's some great hvlp systems out there, I have the TP tools showtime series that heats the air before the gun eliminating moisture that I really like....would love to see some pictures!
 
What color will it be? Are you going with single stage or 2 stage paint? There's some great hvlp systems out there, I have the TP tools showtime series that heats the air before the gun eliminating moisture that I really like....would love to see some pictures!
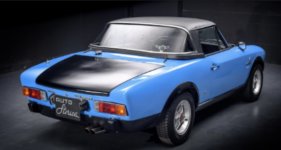
I’m recreating a Stradale without the hardtop so satin black hood, trunk, sills and blue bodywork somthing like this hopefully
IMG_4192.jpeg
 

Attachments

  • IMG_4191.jpeg
    IMG_4191.jpeg
    107.5 KB · Views: 13
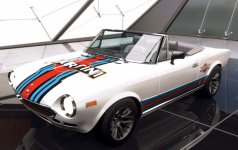
This is quite cool if you have a white car!
 

Attachments

  • be7b4aa1-0940-4036-b403-ca9970f6c2cb.jpeg
    be7b4aa1-0940-4036-b403-ca9970f6c2cb.jpeg
    142.2 KB · Views: 12
Thanks for starting this, @Slotman . Today I (finally) got the pillow bearing off of the driveshaft. Lights sanding and spraying with rust killer. I am now at a point where I can put the driveshaft back together and store it while I work on other things.

IMG_7867.jpeg
 
Would like to know more about the process since I need to do the exact same thing...was it hard to get the middle carrier pillow bearing off? Did you get a kit with the u joints, pillow center bearing, and the rubber one behind the Trans?, I already have new u joints and the rubber one behind the Trans but they are old NOS parts so I wouldn't rule out just getting a new kit...your making great progress on your spider!
 
Would like to know more about the process since I need to do the exact same thing...was it hard to get the middle carrier pillow bearing off? Did you get a kit with the u joints, pillow center bearing, and the rubber one behind the Trans?, I already have new u joints and the rubber one behind the Trans but they are old NOS parts so I wouldn't rule out just getting a new kit...your making great progress on your spider!
IMG_7866.jpeg

Hi - yes; I got a kit from Vick Auto here in the US. It has the pillow carrier bearing (all installed together), 2 new u joints with c-clips and a new rubber donut pre-compressed with ring that you cut off. Yes - the only real difficulty was with removing the carrier bearing: I ended up cutting the rubber off and the external frame came off with that. What you see in the photo is a slow process of penetrating oil, gear puller, tapping gently with hammer, repeat. It finally broke free - so I’ll be ready for reassembly. The kit was $90 before shipping costs.
 
Progressed my respray! I have taken the shell back to bare metal over the winter, made a few discoveries of previous repairs. Have refilled and profiled, still blending and feathering, have applied etch primer from a rattle can and today had a go a spraying primer with gravity fed gun. Its not aimed to be a museum piece so I have limited patience for too much more sanding and I want the car back on the road by the end of April as the nicer weather is on its way!
I'd urge you not to skimp on the preparation, you'll likely only be sorry later on, as the experts always advise : 'preparation is key'.
Use of a guide coat is your friend.

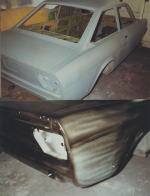
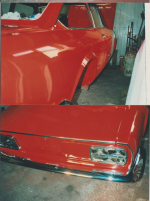
Here's a couple of pics of a 124 Coupe I did with very cheap 'equipment' at home many years ago, note the guide coat and the finished obtained by not skimping on preparation (and I was under severe pressure to get the car out of this borrowed garage as the house was being sold...)

Scan_20250206 (8).png Scan_20250206 (9).png
 
Last edited:
I’m recreating a Stradale without the hardtop........................
In the late 1980's, I helped a friend modify a roof from an early Fiat 127 2 door (2 door version so that we had a framed rear window complete with a hrw) to fit as a hardtop on his imported 124 Spider.
 
Thanks for starting this, @Slotman . Today I (finally) got the pillow bearing off of the driveshaft. Lights sanding and spraying with rust killer. I am now at a point where I can put the driveshaft back together and store it while I work on other things.
Before reassembling the driveshaft, I hope you made alignment marks on all relevant parts.
As I mentioned in a previous response on how best to remove the driveshaft, there should be 2 factory alignment marks (narrow v's) on the front sliding coupling (the location of these marks I've indicated with the blue arrows).

I hope you also made alignment marks (at the places indicated by the red arrows) to show how the u/j yoke attaches to the short front section of the driveshaft after the centre bearing has been fitted.
 

Attachments

  • IMG_7867.jpeg
    IMG_7867.jpeg
    3.3 MB · Views: 14
Last edited:
The was an episode of the tv series Wheeler Dealers on the Fiat 124 Spider and included coverage of how to rebuild the driveshaft (propeller shaft) and also replace the rear axle oil seals.
It was Wheeler Dealers No. 166, Series 15, Pt3, Episode 22. It went out on Quest channel over here but afaik it went out on Discovery Channel in the USA, it's worth a look if you can get access to it.
 
Would like to know more about the process since I need to do the exact same thing...was it hard to get the middle carrier pillow bearing off? Did you get a kit with the u joints, pillow center bearing, and the rubber one behind the Trans?, I already have new u joints and the rubber one behind the Trans but they are old NOS parts so I wouldn't rule out just getting a new kit...your making great progress on your spider!

The was an episode of the tv series Wheeler Dealers on the Fiat 124 Spider and included coverage of how to rebuild the driveshaft (propeller shaft) and also replace the rear axle oil seals.
It was Wheeler Dealers No. 166, Series 15, Pt3, Episode 22. It went out on Quest channel over here but afaik it went out on Discovery Channel in the USA, it's worth a look if you can get access to it.
 
Before reassembling the driveshaft, I hope you made alignment marks on all relevant parts.
As I mentioned in a previous response on how best to remove the driveshaft, there should be 2 factory alignment marks (narrow v's) on the front sliding coupling (the location of these marks I've indicated with the blue arrows).

I hope you also made alignment marks (at the places indicated by the red arrows) to show how the u/j yoke attaches to the short front section of the driveshaft after the centre bearing has been fitted.
Yes - and following your advice I marked (gold) the orientation of the parts so that I can reassemble with them in the correct alignment. At least I hope so!
 
Thanks for starting this, @Slotman . Today I (finally) got the pillow bearing off of the driveshaft. Lights sanding and spraying with rust killer. I am now at a point where I can put the driveshaft back together and store it while I work on other things.

View attachment 463005
Be careful the metal band doesn’t slip off the donut. Its actually compressing the joint so you can get the bolts back in. If the band slips off it makes the job harder under the car!
 
Yes - and following your advice I marked (gold) the orientation of the parts so that I can reassemble with them in the correct alignment. At least I hope so!
Oh and another fun game is reassembling the new needle roller bearings into the yokes! Its very easy to displace one of the needle bearings when you push the yoke in. If you can’t get the circlip in dont force it, take it apart and try again.
I held the main shaft in a large vice as its even more fun with a two piece shaft. If you can “phone a friend”! Good luck!
 
Yes - and following your advice I marked (gold) the orientation of the parts so that I can reassemble with them in the correct alignment. At least I hope so!

IMG_7867.jpeg


@smahaley
I don't want to cause you unnecessary worry but before you start assembling the driveshaft, I feel I should restate the importance of having made alignment marks on the u/j yoke and it's orientation where it attaches to the front part of the d/shaft as shown by the red arrows. This is very important as if these parts (which are splined together) are not refitted in their original positions relative to each other, then the balance of the d/shaft may then
be 'off' i.e the balance weight (arrowed in yellow) may now be in the wrong location.

I usually wouldn't rely on paint to indicate the correct orientation of parts, paint/white-out (Tippex)/ Sharpie etc. can be accidently removed in the cleaning process or when repainting. I'm 'old school' and rely on using a centre (dot) punch to mark original relative position of parts. Some might disagree with this practice - I am aware of the need to avoid causing 'stress-raisers' on critical/highly stressed parts.
 
Last edited:
A couple of other little bits of advice re. u/joints.

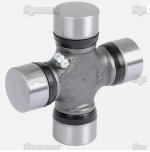
I don't see any sign of this in your pics of the new u/joints you intend to use but just in case they are the type that has a built-in grease fitting (often fitted with a blanking plug - see pic below) please ensure that the u/j cross, when fitted, still allows for access with a grease gun. (but I suspect your u/j's are the non greaseable type).

Screenshot_17-3-2025_231515_www.ebay.com.jpeg

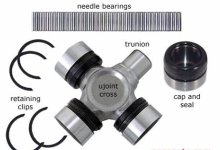
Here's a nice pic of a u/joint that shows the name of the individual parts :-

Screenshot_17-3-2025_231051_www.bing.com.jpeg


Re- circlips/snap rings used to retain the u/j cups in place.

There are variations in the type of snap rings used.
However, some are stamped from sheet material. If you carefully examine the edges of this type you'll notice that there is a rounded edge and a sharp edge - it's important that the sharp edge is always fitted uppermost, i.e. pressing against the groove in which it locates. This advice applies not only to d/shaft u/joint clips but also to piston pin (gudgeon pin/ wrist pin) clips and the clips used in Fiat transmissions - get it wrong and you may find the clip pops off in service (I've seen this happen on lots of Fiat manual gearboxes, after they've been 'worked on'...).

After fitting the new u/joints, I'd recommend hitting each u/j yoke with a mallet (soft-face hammer) in the vicinity of each cup to ensure each cup is now pressing against it's securing clip and also to centralise the cross between the eyes of the yoke. The u/joint should now pivot freely, if not hit it again. If it's not free, it can cause a vibration when refitted on the car.
 
The was an episode of the tv series Wheeler Dealers on the Fiat 124 Spider and included coverage of how to rebuild the driveshaft (propeller shaft) and also replace the rear axle oil seals.
It was Wheeler Dealers No. 166, Series 15, Pt3, Episode 22. It went out on Quest channel over here but afaik it went out on Discovery Channel in the USA, it's worth a look if you can get access to it.
I forgot to mention that this episode also demonstrated how to clean both sides of the gauge glasses to make them look like new.
 
Back
Top