Technical Valve stem seals replacement

Currently reading:
Technical Valve stem seals replacement

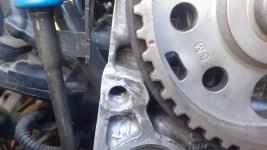
Well... I had an accident back in 2018. I crashed into the road saftety guardrails and the car's front crossbar (the one next to the radiator) broke and came inside and hit the original pulley, made a really big dent into it. After that I got this new pulley and rebuild the head and new HG and all. This new pulley wasn't easy to find and I had it ordered from Fiat Italia, the order was made by the VIN number and engine details, so it fits. That inside tooth might be slightly slimmer than the original one, but anyway, the first one is also narrower than the space in the camshaft, so it's kind of the same. After that first fit, when I put a new camshaft seal I was paying attention at how it is fit and it was with the tooth straight to the middle of that space. By the marks I made then, I think that the camshaft pulley was timed 1 or 2 teeth forward than normal, so I tried this time to set the timing bang on. Just I couldn't find the correct timing diagram for this engine yet and on the forum, all other users that mentioned this problem didn't come with the right answer. At my first attempt I set the camshaft as recommended with the locking tool at the other end if the shaft (not the one with the pulley) and that is no good at all. The engine didn't start and I had exhaust gas coming out of the intake, so timing is totally offset this way.
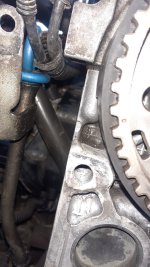
I think the right way to set it is with the crankshaft on no. 1 cylinder at TDC and the camshaft with that red dot (on my pulley) aligned with the mark on the head.
I'll see how it goes, it's just snowing here non stop for 3 days now, I barely could catch a break in between to put everything back on. I took the engine mount off again now and when the snow allows me, I'll time it right.
 
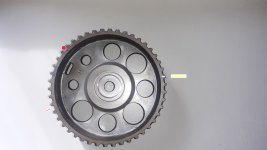
One mention: when the camshaft is locked with that locking tool, the red dot srands instead of about 8 o'clock (aligned with the mark) to about 11 o'clock, kind of 8 teeth off.
 
Question: it wouldn't be very wise to try starting the engine without putting the engine right hand side mount back on, would it?! With the engine supported on the sump, I mean.
 
Last edited:
If you are sure your oil sump support is stable (not sketchy, wobbly), you can start the engine without timing belt side mount. No problem.

 
Finally, it stopped snowing and I could set the timing. Engine fired up nice and runs nice.
So these are the timing settings for my engine:
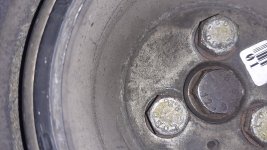
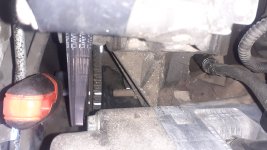
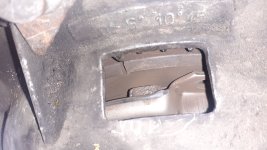
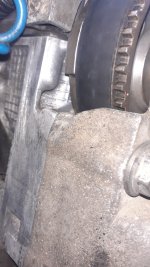
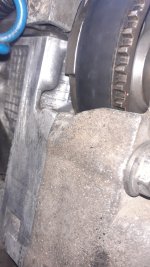
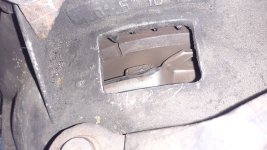
- crankshaft on TDC for cylinder 1 (and 4) - either set by the mark on the flywheel through the hole in the bell housing, either by the mark on the crankshaft gear, or as I did having the head taken off, making new marks when I could see directly when the cylinder 1 piston was leveled up
- camshaft with the sign on it's pulley aligned with the mark on the head; and also, as I've mentioned above, the camshaft pulley sits on the camshaft with that inside spur straight to the middle of the space on the camshaft.

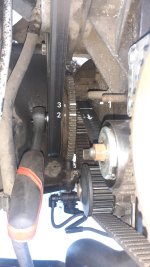
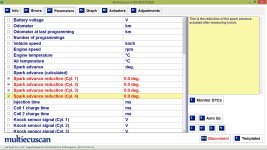
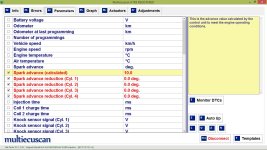
I made a mark on the engine block (no. 1 in the photo) and another on the crankshaft pulley (no. 3 on photo), those aligned is cylinder 1 TDC. The no. 2 mark is the one that I had marked before, on previous timing setting and it is obviously 2 pulley teeth off. Having the timing set like that before I remember I could see, using the MES, the spark advance reduction was on all 4 cylinders about 2.xx seconds. Didn't know then what it should be. I think it is 0 when timing is set bang on and if timing is a little off, like 1 or 2 teeth, the ECU can adjust the spark timing and that is what I had. The spark timing can get adjusted by ECU, but the moments when valve stems open still remains off-timed, so that is not the ideal setting for the engine. With the timing set I did today, the spark advance reduction is now 0 on all cylinders.

Before I started the engine I washed the cooling system with demineralized water as when I cleaned the engine block surface some substances and maybe bits of scuff pads got inside the engine. After that, I put new coolant.
Also, after first start of the engine I put new oil and oil filter, first added ~750 ml diesel into the oil in engine and ran the engine to clean mainly the engine block oil channels, the oil pump and sump. After that made the oil and filter change.

The fumes visible in the video are coming from the catalytic converter as I had it wash with diesel while it was taken down and when it got heated, traces of it burned. After a little while no fumes were coming out of it there.
 

Attachments

  • Crankshaft TDC.jpg
    Crankshaft TDC.jpg
    1.4 MB · Views: 14
  • 20250219_145204.jpg
    20250219_145204.jpg
    1.6 MB · Views: 13
  • 20250219_142358.jpg
    20250219_142358.jpg
    2.4 MB · Views: 12
  • 20250219_145754.jpg
    20250219_145754.jpg
    4.1 MB · Views: 14
  • Spark advance reduction 19 feb 2025.jpg
    Spark advance reduction 19 feb 2025.jpg
    272.3 KB · Views: 12
  • 20250219_145333.mp4
    35.8 MB
Yes, another win for the help of the forum and yes, big thanks for @GrandePunto PL and for you @PuntoHowTo, as well. Thank you, guys!
And yes, I'm totally happy and satisfied with the job well done.

Now it's interesting to watch and I will watch it. Couple of buddies insisted that I should also put new piston rings as I got most of this labor done, taking the head off, I mean. They kept telling me my oil consumption problem won't be solved by just putting new valve stem steals and problem is due to worn piston rings. Yes, the timing to put new piston rings would have been suited now, having the head off, but...
First of all, by the compression test readings I got, I really think the rings are good so it's no need to replace them now. Also, the other details point to rings being ok, too. I got blue smoke before on first engine start in the morning, then no blue smoke. Also, all the traces inside the engine pointed to the same culprit, worn seals. The stems were full of burned oil traces and also, the centre of piston heads. The sides of piston heads were all clear and the cylinder walls presented no sign of wear. And it probably helped that I'm using MoS2 oil aditive since a long time ago. Today I also put oil containing MoS2.
So a lot of oil got inside the combustion chambers through the seals, by the traces on stems and by the obvious wear of the seals. Also, pretty big discovery and fixing was the clogged oil channels up the rocker cover.

I'm sure (and hoping that) the engine won't consume oil now and I will monitor the oil level. I'm very happy with what I've done! Cheers!
 
I put this picture here to show the different positioning of camshaft if set with the locking tool or by the marks. Because here are at least 4 other threads where people struggled with timing it right and they never came back to say if they've managed to do it and how. With locking tool, the camshaft sits as in picture, with that white marked tooth around that marked yellow white line. This tools set could be use to set the timing on this engine only if the crankshaft locking tool locks the crankshaft in other position than cylinder 1 TDC. But I don't think it does, so it cannot be successfully used. So what's left to be used it's the old diagram, aligning the crankshaft on TDC and the camshaft with the mark on the head. At mine it came with the red dot backwards to the red line.
Camshaft pulley marks.jpg

Although the engine ran pretty smooth these last days, I kind of sensed a little "hiccup" if while driving and in gear, I would let loose the gas pedal. So I checked the timing mark on the flywheel, as I positioned the crankshaft by the marks I made (and piston stays up before beginning to go down again for the length of at least 3 teeth) and I was wondering if my marking was spot on. It turns out it wasn't, it was 5⁰ off, one tooth. So physically TDC is at the last tooth the piston is up, just before it starts coming down when revolving. So I've adjusted the timing, moving the camshaft backwards one tooth and now the engine runs better, that hiccup is no more. Here is a video on how to move a shaft backwards with the belt on. I'm not to kean on revolving the engine counter clockwise so I recommend to take note of which shaft you need to have backwards, cam or cranck, and place the phillips hex bit on crankshaft gear/camshaft pulley and rotate the engine forward.
20250224_140504.jpg20250224_141948.jpg20250224_142018.jpg

Another thing I was wondering if I was right is that presumption the "Spark advance reduction" is a tool ECU uses to adjust the spark timing in case of offset crankshaft/camshaft timing. I was wondering if the reason I read 0 deg. now isn't due to the fact that I haven't had the heat shield put back in place at the time. Turns out it wasn't related to heat shield and it is a way ECU adapts to incorect timing settings.
Now, having the timing set bang on and the heat shield on, the 'Spark advance reduction' it's still 0 deg. on all cylinders (was the same with camshaft forward 1 tooth!) and the 'Spark advance' is 10. With the more offset timing I had before, camshaft forward 3 teeth, the SPR was 2.something on all cylinders.
Spark advance 24 feb 2025.jpg
 
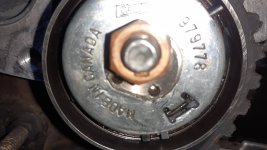
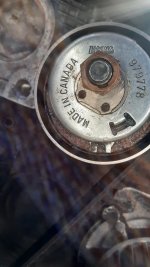
Is this setting looking right to you or is there space to move the camshaft backwards one more tooth? Or maybe let the belt a little looser. This time I tensioned it by aligning those pieces inside the tensioner. But it seems more tense this way, I cannot turn it sideways 90⁰, maybe 60-70.
 

Attachments

  • 20250224_142018.jpg
    20250224_142018.jpg
    1.4 MB · Views: 10
I did take another look at it, cause with that angled picture I was left wondering if this is spot on or not.
And it is, spot on!
Took the mounting down so I can see it straight and is really spot on. I also tuned the tensioner, inside bits aligned and I can turn the belt 90⁰ sideways.
So all is good.
 

Attachments

  • 20250304_104950.jpg
    20250304_104950.jpg
    4 MB · Views: 7
  • 20250304_105103.jpg
    20250304_105103.jpg
    2.2 MB · Views: 6
  • 20250304_110313.jpg
    20250304_110313.jpg
    1.1 MB · Views: 7
Back
Top