General Superspotter's Barchetta Project,well Doc's done it....

Currently reading:
General Superspotter's Barchetta Project,well Doc's done it....

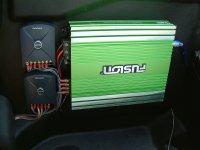
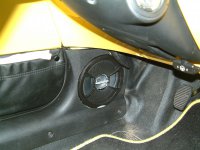
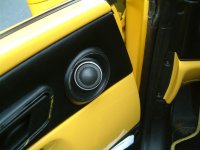
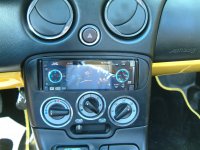
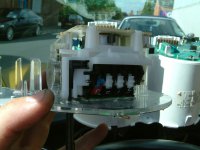
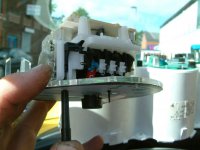
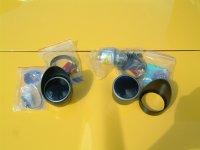
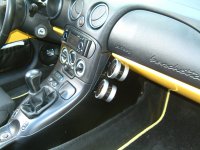
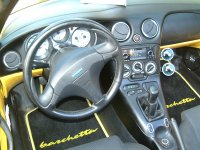
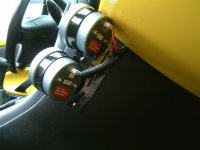
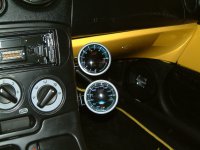
Will get the sound system finished today (Friday), it's only taking me 3 days:eek: :eek: It is an absolute pain in the butt especially fitting the tweeters. More pics tomorrow (sorry, later today) and also the trip meter fix:)
 
:yeahthat:

I have only had my B since May and have worked on it for at least a couple of hours every weekend (if I have been at home)...........and in every case there have been issues - rustly nuts :eek: , sheared bolts etc etc etc - but would not get rid of it - unless it was for a better one!
 
I think any Barchetta older then 3 years is going to start giving you problems with rusty bolts. I have replaced bolts a few years ago that have started rusting already. I paint all replacment bolts that I get from Fiat now and use copper grease on everything.
 
Last edited:
You seem to have a lot of issues in your life LRB..........rusty issues, trust issues............................................:eek:
 
Okey Dokey!
Finally got the amp and speakers finished:eek: I also decided to take my JVC DVD/CD/MP3/god knows what else it plays player out of my 4 X 4 and put my amp to good use in the B:) It now sounds very crisp and clear doing 100MPH(y) (on a private road m'lud).
You will see in one of the pics the crossovers placed next to the amp that I am using to run the speakers seperately. Then it was on to the trip meter fix:)
 

Attachments

  • amp final.JPG
    amp final.JPG
    477.3 KB · Views: 45
  • speaker 1.JPG
    speaker 1.JPG
    530.7 KB · Views: 51
  • speaker 2.JPG
    speaker 2.JPG
    427.6 KB · Views: 77
  • jvc.JPG
    jvc.JPG
    510.5 KB · Views: 54
So the trip meter fix. Pretty straightforward having read and followed Nick Lockes? guide. A little fiddly so just be careful where you put all the tiny nuts and washers and make sure you dont have any grease on your fingers when you handle the dials otherwise it will look rather messy when you put it all back together:eek:
However! I found a different reason as to why my trip meter had stopped working than the one mentioned in the guide. As you will hopefully see in my pictures, the reason mine had stopped working was not because the spindle had shifted but because, how to explain, the "axle" that the resetter sits in had jumped out of the cradle at the tip of the button you push to reset the meter. I concluded after playing with it that this had happened because I had pushed the reset button too hard causing the "axle" to jump out. You can clearly see the empty cradle in the pics with the "axle " nearby. Hope I have explanied this okay without the proper terminology to hand:)
 

Attachments

  • dash 2.JPG
    dash 2.JPG
    450.2 KB · Views: 49
  • dash 1.JPG
    dash 1.JPG
    356.9 KB · Views: 45
And onwards:D
Next, the oil gauges. They arrived today but then realised that I will need to buy an adaptor for the oil filter housing to enable these to work so that is my next task but in the meantime I fitted the gauges in place. As you can see in the pics, they look OK but I may buy a one piece housing for them rather than the individual ones at present just to make it a little neater. I am hoping to wire them up to the lights tomorrow and then track down the adaptor next week.
 

Attachments

  • gauge bits.JPG
    gauge bits.JPG
    440.7 KB · Views: 35
  • gauge 1.JPG
    gauge 1.JPG
    498.9 KB · Views: 44
  • gauge 2.JPG
    gauge 2.JPG
    534.8 KB · Views: 75
Good job SS - now stopping you now eh? ;)

I reckon you could have got away with mounting them in the air-ducts with a bit of fiddling - look OK where they are though! - Agree that they need a housing though...........

I am soooo itching to get on with mine but little hope yet - I can only get away with small cost items that the wife cannot spot and that are posted to work ;)

Doc's strut brace next week then I think I may go for a lower set of springs.........but I really want to change the sound system..............but I also want to do the ARB kit................but I still have the std exhaust so need a new system.............but I also need to sort the induction setup............:bang:..........

Need a lotto win or sumfink.............
 
I wired up the oil gauges this morning well, the lights anyway as I have had to order an oil filter housing adaptor to run the gauges, that should be with me in around 7 days. I must say though that I do like these gauges. They are a grey blank dial until you turn the ignition on then they light up nice and clear and the needles do a sort of self diagnostic sweep of the dial and then settle down!
 

Attachments

  • gauge 3.JPG
    gauge 3.JPG
    437.5 KB · Views: 34
  • gauge 4.JPG
    gauge 4.JPG
    476.1 KB · Views: 51
Well I'm surprised that none of you have commented on the dials:(
Let me know what you think, even if you dont like 'em:cry:
 
Sorry SS - been busy this weekend so have not had a chance to look!!!

Like them from the front on but the wires need to be hidden somehow....one question though.......? I enjoy an enthusiastic hoon through the countryside and have noticed that passengers often use their knees as a way of steadying themselves through corners (in the absence of over door grab handles), will the dials get in the way of your passengers knees in corners? :confused:
 
Simple.........I dont carry passengers:D

They are not too intrusive but its a question of compromise, I didnt want to sit them atop the dash so that was about the only place left:(
And actually, the wiring is quite neat:) I have used that black twisity stuff to keep it all bound together, theres only a little bit showing.
 
Back
Top