Tuning Mk1 Uno 1.4 T-Jet FIRE Turbo sleeper project

Currently reading:
Tuning Mk1 Uno 1.4 T-Jet FIRE Turbo sleeper project

thanks for the PM!!

Shame about the brakes!!

Was it service foot or hand brake?

If hand brake I'd go for the leavers at the end of the cable every time.. can be cleane up once removed... some pics here https://www.fiatforum.com/gallery/showgallery.php?cat=1909 - you will probs have the ones with the big round auto adjusters but the leaver principle is the same -thread somewhere here.

If front I'd have a look at the retention blocks that the caliper sildes across.. when they get too rusty the caliper won't slide to the effort is reduced.

remove the 2 blocks that hold caliper in, clean any rust and dirt off them and the bits they meet the calipers, bit of copper grease, check pads / discs / caliper boots.. if all good whack them back on

I remember doing one side on my 45 and going for a spin.... brakes didn't half pull to one side :salut:

test servo by pumping foot brake hard about 10 times with engine off, statr car with foot on brake... if your foot sinks the servo is good.

I wouldn't mess with the fluid TBH as you'll probs end up needing to replace the hydrallics after knackering a niple. perhaps just fit the new brakes :lol:
 
Thanks Louie, that is excellent advice. I have actually sorted it quite easily. The handbrake was just so out of adjustment that all the effort was going into bringing the shoes to the drum. Once tightened up (to the end of the adjustment no less), the brakes are generally much sharper of course. Can lock up at 60MPH now, so got to be OK. Boy, the tyres are awful.

Schoolboy oversight and a £17.50 bill for the retest as punishment.

The "Sparkomatic" cassette player is now working in both channels and will stay as the sound system with plans to modify it discretely to allow connection of my iPod/satnav. The problem was quite cryptic as I tested the wires leading to the speaker for continuity and it was good. I checked the output from the silent side with the known working speaker side and that was fine. I then thought to check the resistance, which was 8Ohm on the working side and 0 on the broken side- short circuit. So I bit the bullet and removed half the parts off the passenger door to get to the speaker and found that someone had plugged both wires to the same terminal as the speakers offer two connections for each pole! Can't believe the amp isn't broken on that side; what a tough bugger it must be.

Had a quick look at what the car might look like with the 14 x 5.5" wheels and a 15mm spacer.


Thought the original hub cap didn't look too bad actually!
 
I'm not convinced a loose cable is the cause, unless the handbrake lever was almost vertical - to stretch a cable to the end of the adjuster I'd still be suspecting seized pivots in the cable to shoe lever - or come to think of it, seized auto adjusters on the shoes - but as long as you get the test it don't matter for your project. (y) -

just dont try that reverse and slam on handbrake trick as they easily over adjust ;)


I take it you have checked for binding brakes - raise rear end to see if they turn freely with handbrake off :confused:
 
I hear you. The handbrake lever was going to near top. The rear shoes are clearly very worn. As you say, the quality of the brakes is academic to me after the test, but it would be annoying to go for a retest only to get a fail. I did jack up the rear to make my adjustments. The wheels span freely and stopped sharply on 3rd click of handbrake. I had a good pull on the shoe levers, which moved easily, but that doesn't mean that they aren't actually seized at the pivot I presume as the pivot is inside the drum, like Pandas. Perhaps I will go in and give them a proper look tomorrow. I've got some spare shoes somewhere, so maybe I should shove them in whilst I'm at it, even though they won't be used for a single mile!

Either way, the brakes feel fine to me, but I thought they weren't that bad before the test. Just depends what you are used to I suppose.
 
Ahh I hope you don't change the look :( it looks really nice like it is..

hope you keep the exterior original. :/ I like the stripes...
something that my uno DOESN'T have... it's only blue nothing else. It's disgusting.
 
Lewey

If you are planning on doing an engine and gearbox swop to this Uno would you be willing to part with the originals in exchange for some beer tokens?
Cheers
 
Lewey

If you are planning on doing an engine and gearbox swop to this Uno would you be willing to part with the originals in exchange for some beer tokens?
Cheers
Yes. I'll message you.

Took the car for MOT retest on Friday evening. Still a failure, but now just the left rear service brake only. It had only been on the rollers for seconds, so the guys there didn't charge, which was nice. It's a pretty hard thing to check for really. I mean how do you know whether a rear brake is putting a slightly sub-par performance in when braking?

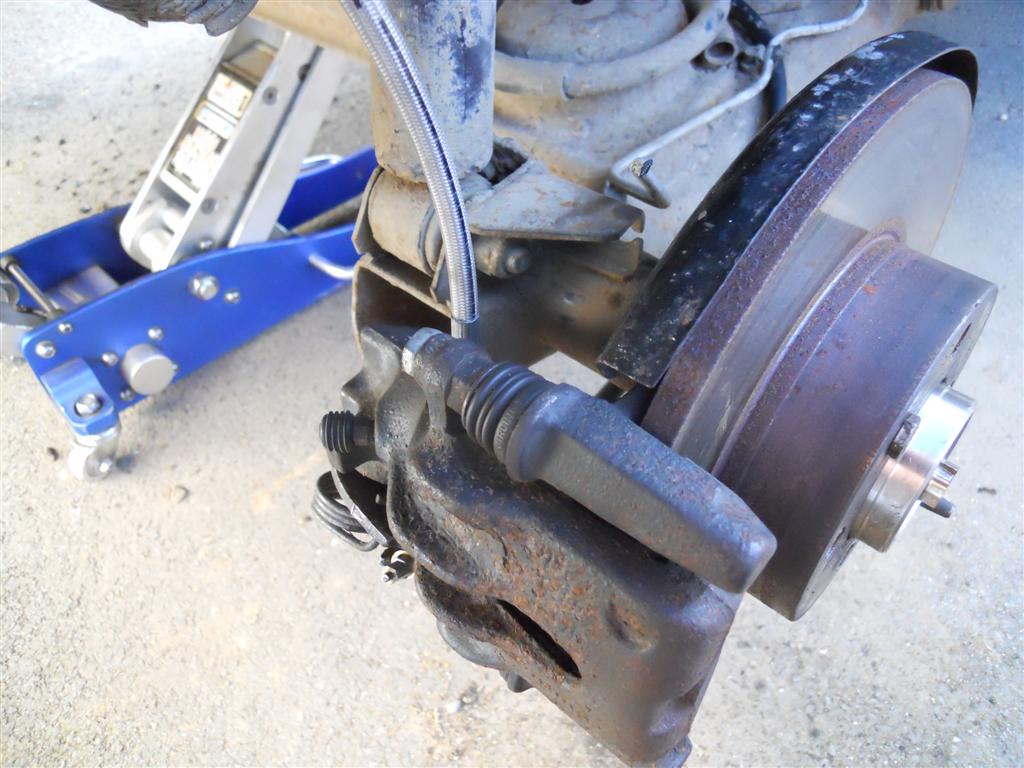
So I took the drum off again and the cylinder looked fine still and moved OK. A gentle pump on the pedal didn't seem to have moved the shoes much when I had a look afterwards, so I concluded there was probably a bit of air in the pipe nearby. Had a go at the bleed nipple and it snapped immediately. I decided pretty quickly that I didn't want these brakes any more and took the whole lot off.

uno_brake_upgrade_001_Large_.jpg


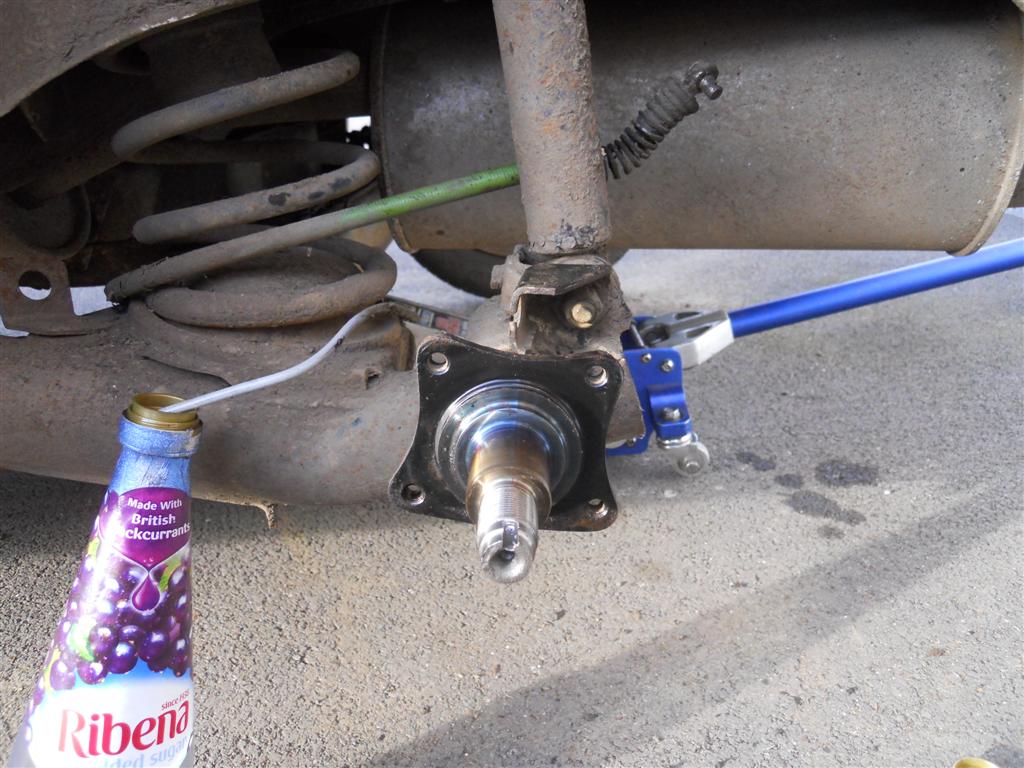
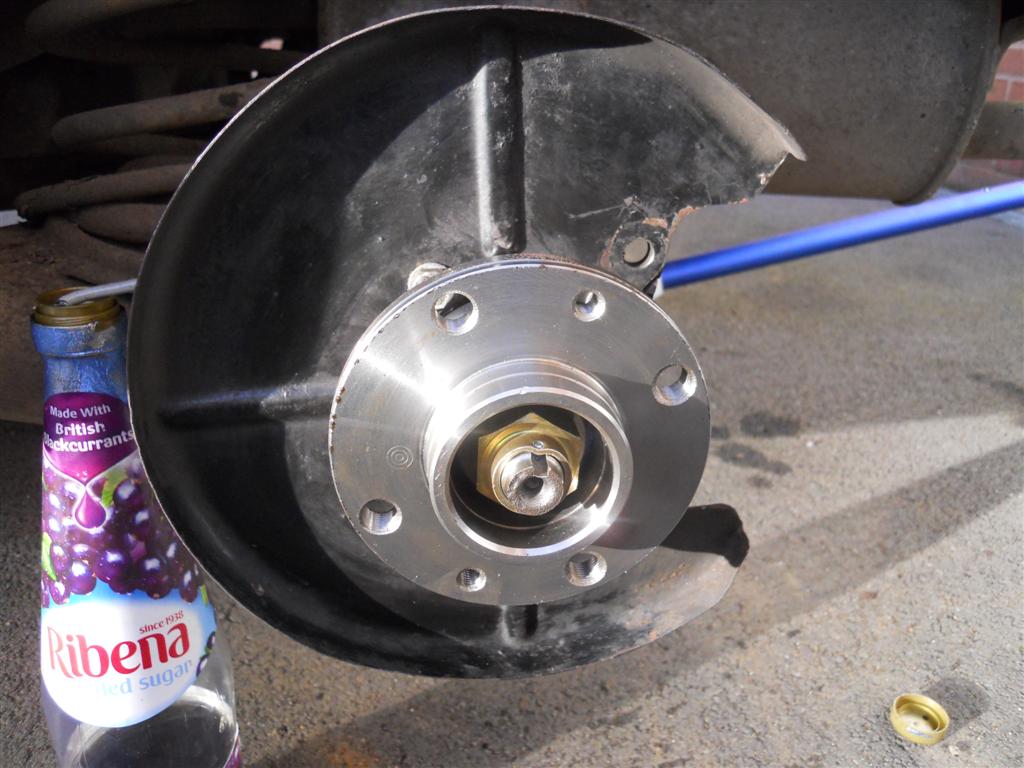
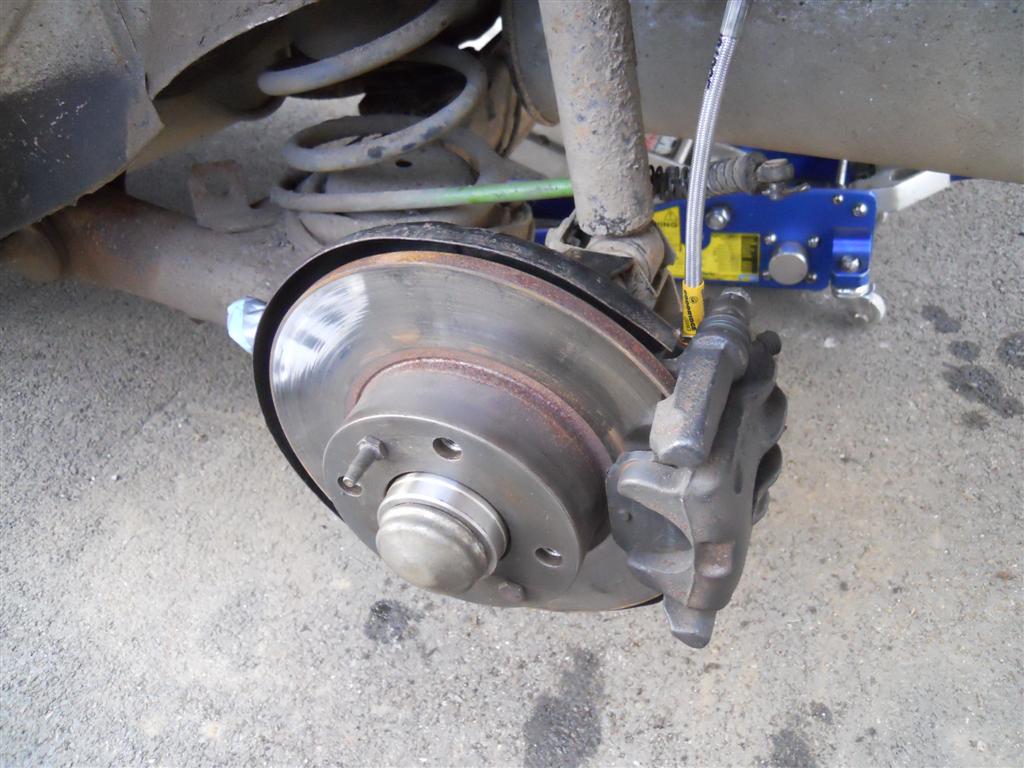
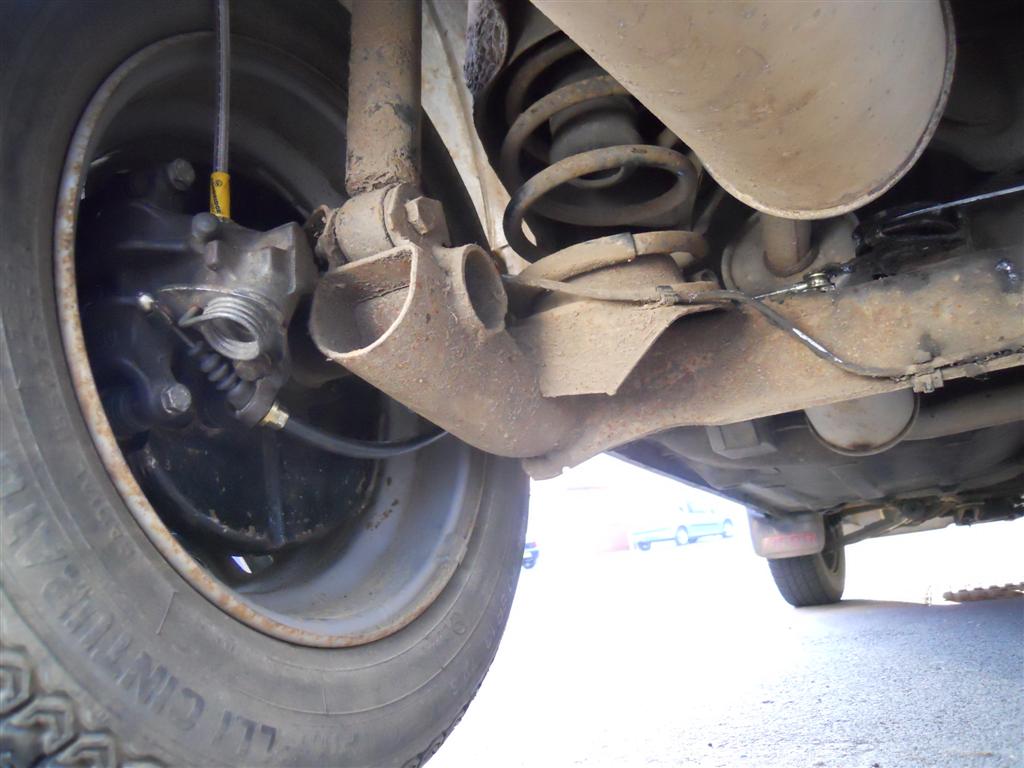
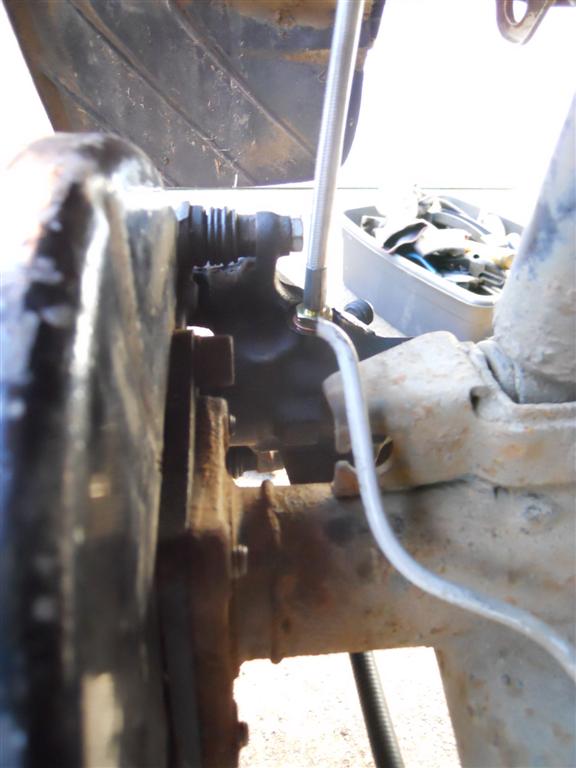
I removed the rear brakes from the track car and replaced with some Punto GT calipers (which are lighter, despite the obvious size difference). I bought them from someone on FF, who also provided brackets for them to go straight on. Started to build up the 55 with the turbo calipers, new turbo hubs, new hand brake cables and new Goodridge hoses that came as spares with the track car a while ago...

uno_brake_upgrade_002_Large_.jpg


uno_brake_upgrade_003_Large_.jpg


uno_brake_upgrade_005_Large_.jpg


uno_brake_upgrade_006_Large_.jpg


uno_brake_upgrade_007_Large_.jpg


I just need to flare the ends of the pipes and connect to the new hoses. Realised that the turbo cars have a slightly different bracket on the bottom shock mount to facilitate this. Would quite like a pair if anyone has some?

Can't put the bigger calipers upfront yet as I don't have big enough wheels with tyres to go on the car at the moment. I've got some older brake fluid that I can use, so there won't be money wasted in getting this MOT I suppose. Last chance retest on Saturday. The modifications have begun!
 
Passed the MOT today. The tester said the brakes were now "beyond ideal", which was nice. I honestly think he thought I was joking when I said it would be all right now because I put disc brakes on it instead. Begun to strip some parts off in preparation to clean everywhere and remedy small rust zones and touch paint up.
 
Can't tell if that’s a disc shaped cover trapping the rubber cover over the top of the ball.

I rather than drill I would use a soldering iron to melt the plastic. You have more to work with if you want to refit it later.

Then if the rubber cover is free at the top I'd give it a dunk in hot water to soften it up, and go for over the ball and downwards, maybe some fairy liquid to help it slip.

Then have a look at what is going on with the ball.. It may also be threaded I believe it is on the turbo, that is before people chop off the top of the leaver a few inch below the ball to make a shorter gear throw.
 
Last edited:
This project lives!

The 55s has been used for the last year as a runabout by my girlfriend. Unfortunately, whilst working on it in that time I have seen more and more rust in places I don't like, not least the doors which are not salvageable really as the outer skins are completely separated from the inner and significant passenger sill rust. It may end up being a parts car or a I may sell it as a project car.

Anyway, a curious Uno came up on eBay the other day so I crossed my fingers once more and bought it. It's a B-reg 3 door 70SX. A FIAT-based mirage indeed.

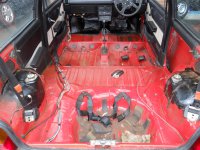
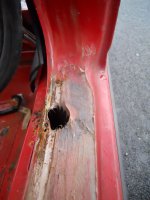
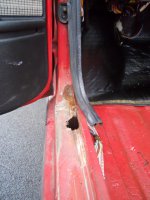
The seller was a pain to deal with and I had to go a long way to get it. He said it was in great condition, his pride and joy and it had only "slight rust under doors". The passenger sill trim was already removed and the carpet lifted, which made me suspicious. Sure enough, the passenger sill is a write-off. As well as the holes you can see, the outer part has holes under the plastic skirts too. I stripped the whole interior today to see what I could see. Significant repairs of both rear arches were revealed, but it seems OK other than the passenger sill. The exterior is very good and the paint is still shiny. It has clearly been restored chemically recently.

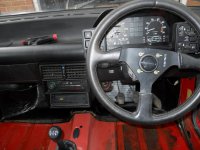
It has manual windows and no extended centre console, which is I am guessing is a oddity of the very early pre-turbo models. Once the turbo went on sale in 86, the 3 door SX model was dropped.

At the moment I am thinking of getting the sill and other little bits repaired, presuming I can get a passenger sill repair panel easily enough.
 

Attachments

  • Uno 70sx 023 (Large).JPG
    Uno 70sx 023 (Large).JPG
    416.7 KB · Views: 216
  • Uno 70sx 022 (Large).JPG
    Uno 70sx 022 (Large).JPG
    419.2 KB · Views: 162
  • Uno 70sx 015 (Large).JPG
    Uno 70sx 015 (Large).JPG
    455.5 KB · Views: 178
  • Uno 70sx 012 (Large).JPG
    Uno 70sx 012 (Large).JPG
    310.1 KB · Views: 158
  • Uno 70sx 010 (Large).JPG
    Uno 70sx 010 (Large).JPG
    346.4 KB · Views: 144
  • Uno 70sx 020 (Large).JPG
    Uno 70sx 020 (Large).JPG
    381.7 KB · Views: 166
That is an amazing find Lewey, I didnt even realise they did a 3-door SX! It doesnt even have electric windows, which I thought were standard on the SX.. Has it got locking?

Not sure I`d want to modify it personally, it could conceivably be unique, but its your call.

Why dont you get a rust free late Mk2 shell & re-panel it as a Mk1?

There is a 5-door sill on ebay for £40 at the moment which will give you the front section of the door step as well as the full length of outer lower sill if you chop the B & C--pillar sections off, item number 300874148358.
 
You get em all...

Like this and i've had a hole in the sill in the same place on my second MK1... just where the door seal joins. think I drove it for a couple of years with just fiberglass in it :eek:.

The base model 903 had the center console that stops after the stereo hole right to the end of MK1, not sure if it stayed with the MK2 until the base model got the punto box around about 1993. Could have been configured out along with the bottom shift box :)

Get your hand down the rear door cards and press inwards if you have not already.
 
Last edited:
Back
Top