DSCI1556.JPG

Panda (Classic) Mk1 4x4 Panda (Original)

Introduction

Here is Qing Qing, a rescued panda that came close to death
I completed the majority in less than a year and here she is now:

DSCI1556.JPG


Before she was a bit worse!

DSCI1559.JPG
  • Like
Reactions: albyhf
How long since you looked under the car?!

Yeah, the holes in the bottom sill I was aware of and may have been naughtily disguised to get through a previous MOT or 3...:eek: Shameful I know but she's had some adventures because of the time I saved so hopefully she won't sue for gross negligence. Also those holes have not gotten any bigger since I did that. The cross member under the jacking point was definitely showing signs of rust and deformation but I had no idea of the scale until the jack started to push into the sill! :eek:

I think we hit a few rocks in Morocco as well which probably did not help :eek:

Anyway, fortunately I am fully armed with welding gas and metal sheet and a can do attitude...so yeah, come on then rust...bring it on! :devil:

It might not be a week though David :eek:, I have been putting off building a car port for way too long so might get that done first (which will also mean I can work on the car in the dry no matter what the weather chooses to throw at us! Sill off cuts might be useful, definitely worth having a look at what bits you have. Not welded anything this structural on a Panda before.

Challenge is to get it back on the road in time for the snow....hope we get snow this year...getting withdrawal symptoms!
 
Glad you are happy with Freddie (the 127!) Gavin and your MOT man was impressed, never got round to sending you the photos I took, guess you don't need them now! I presume he flew through the MOT no problem?

John, feel free to send me a PM anytime(y)

Yes apart from a headlight problem - full beam extinguished one side!! Lots of bulb swapping, hitting things & wiggling wires did nothing. Turned out the fuse needed moving slightly (hi tech solution!) - still don't understand why everything else on that fuse worked, but it was a free fix so who cares?! (y)

I can get under the car while it's being mot'd, so had a chance to see it properly. Steve's verdict was that it wasn't planning to dissolve anytime soon & would see him out. :slayer:

Excellent(y) I did replace two of the fuses for the headlights as I had the same problem when I was checking all the lights after fitting the sidelights. The new fuses were slightly longer so were a tighter fit than the original ones and seemed to cure it, they may have been the dip beam though?

Perhaps best not clutter up Si's thread much more:eek:
 
Bit of an update on the sill rot and jacking point restoration. I have now cut out all the bad metal and got good access to the important bits to start welding in new metal. I ran out of time though unfortunately so only managed a couple of patches but hopefully finish it off this week. The tricky bit will be adding enough strength back in to the jacking point I think!!

So...

The work continued to escalate and extended to a welding job I had done in Swansea over 6 years ago which was beginning to show age! So cut out the rot here as well:
Photo2624.jpg


A lot of missin metal :(:
Photo2626.jpg


Inside view:
Photo2627.jpg


So the sill...

not much left now!!...
Photo2631.jpg


Photo2629.jpg


Photo2628.jpg


Photo2632.jpg


And the first patch on (of many :() goes on the inner seam. Was a nice easy access area so the weld is fairly neat. I didn't risk a continuous run to avoid blowing too many holes and setting fire to the car!!
Photo2635.jpg


Depressingly this is not even thinking about the rear of the sill towards the arch and a small patch required on the other side as well. Might be optimistic to be MOT'd before christmas I think!! :eek:
 
Last edited:
Just a thought, but doesn't the wiring for the rear run down the inside of one of the sills, so be careful welding.
Dave
 
Just a thought, but doesn't the wiring for the rear run down the inside of one of the sills, so be careful welding.
Dave

Might just be a mk1 thing but all mine run under the carpet in he corner...I did almost cut through them with the angle grinder though :eek: I was cutting from underneath and forgot to check what was above haha...at least I removed the carpet :D

I am getting panda withdrawel symptoms, need to drive one again. Not driven it since October I think :eek: How can you own 4 pandas and not have one that drives haha!! :eek:
 
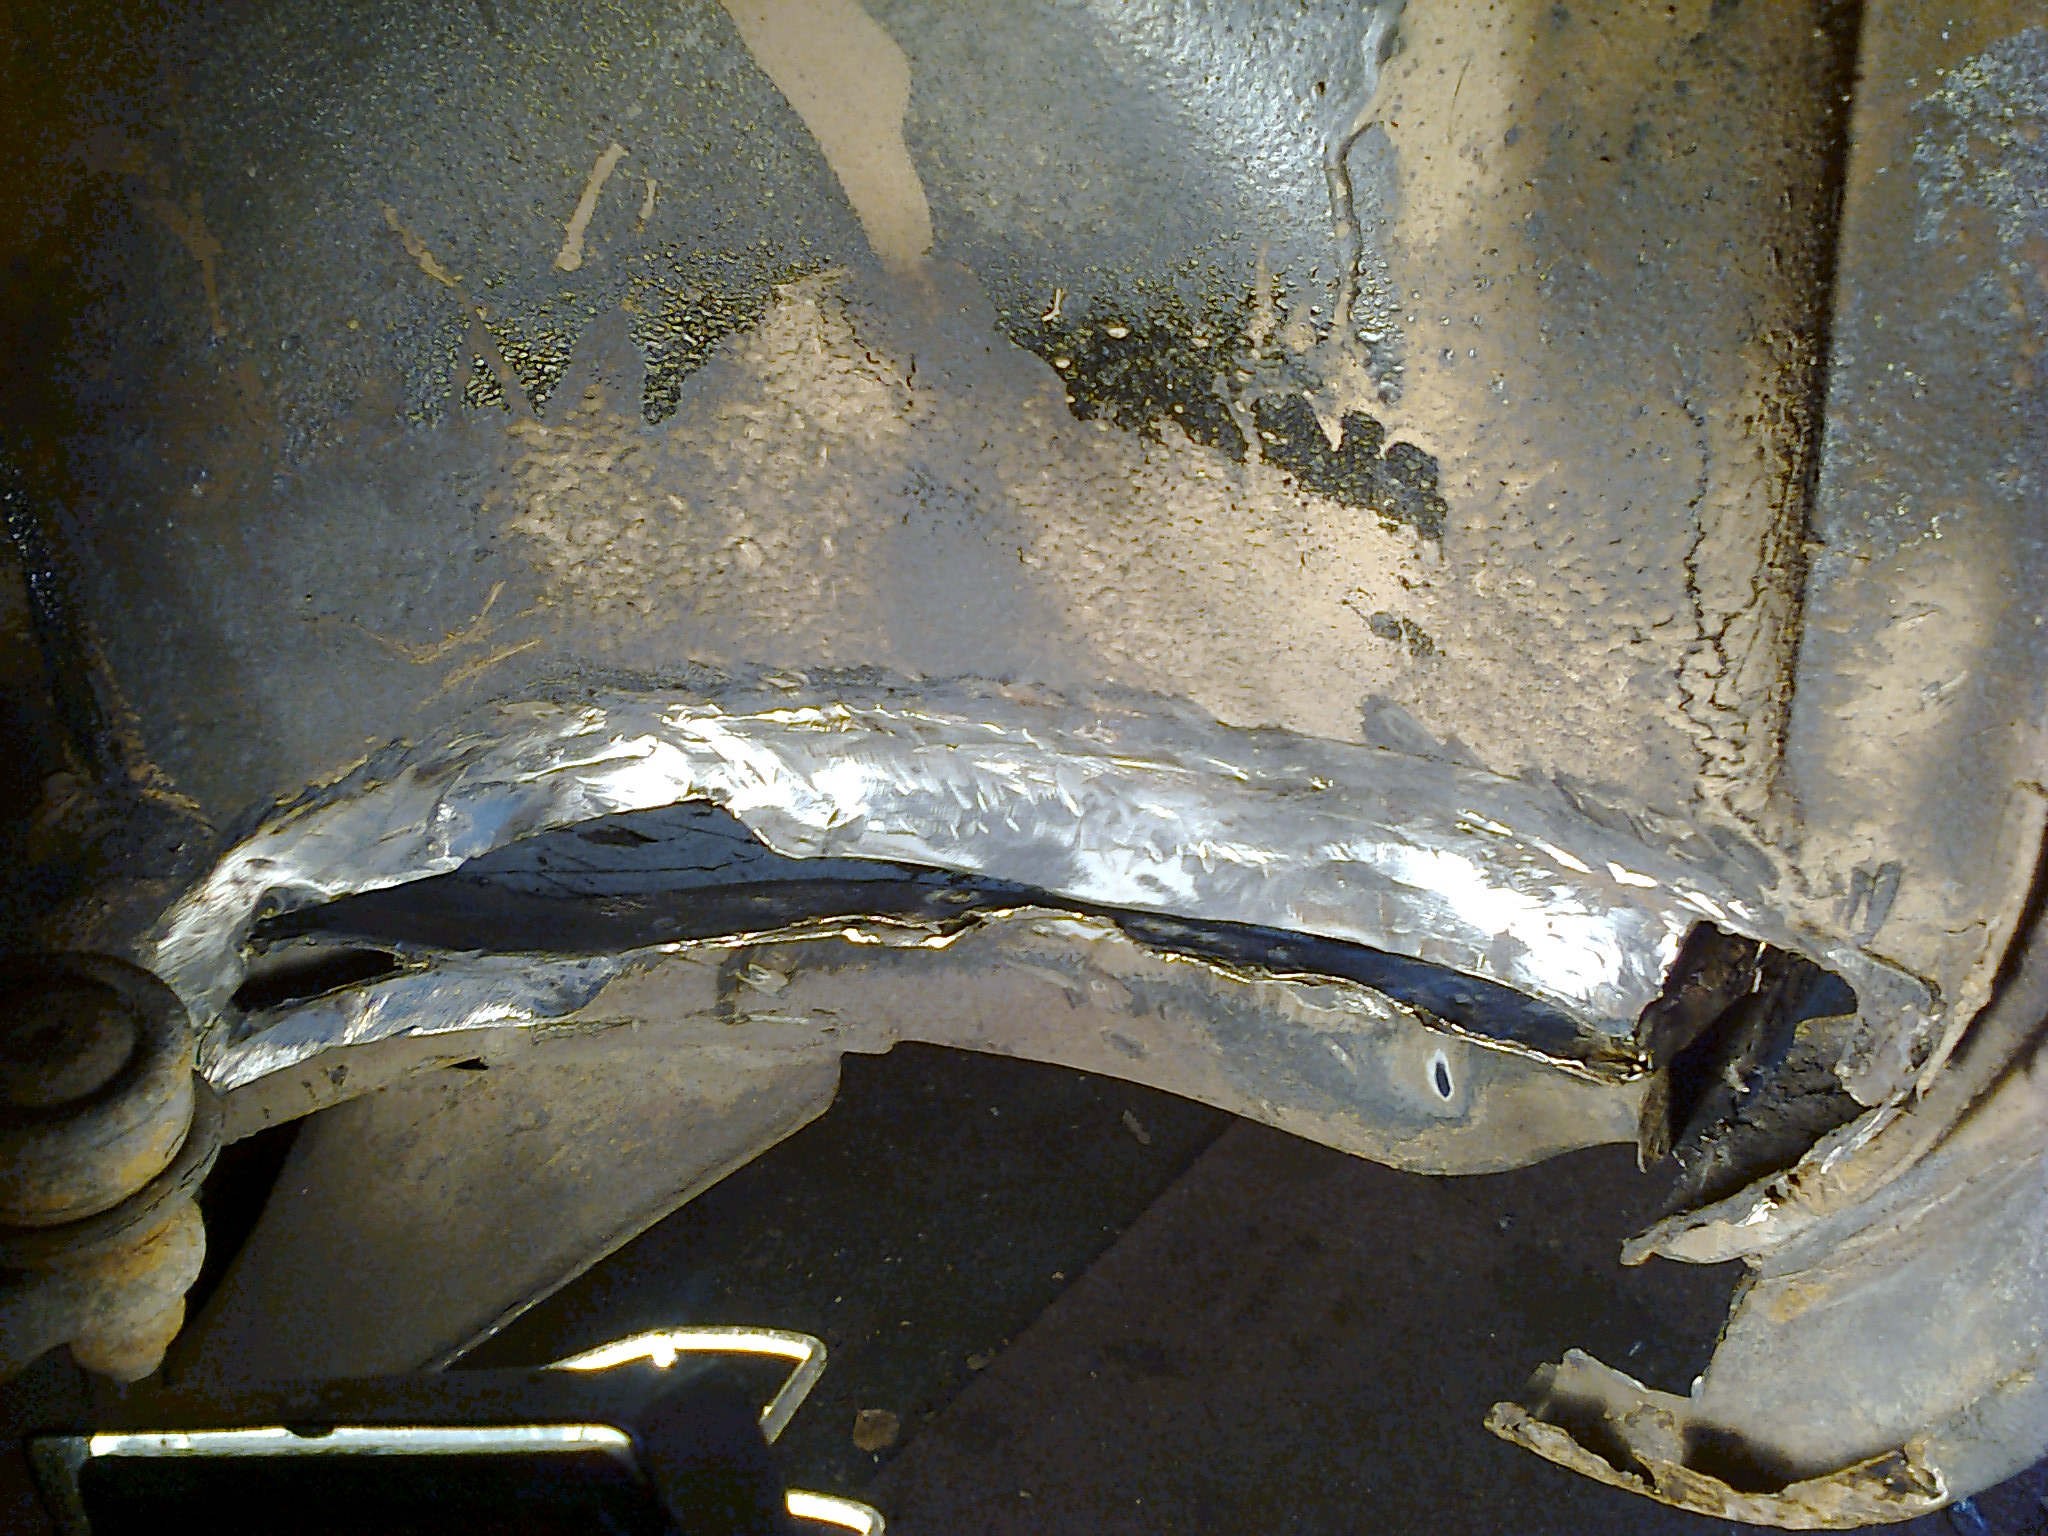
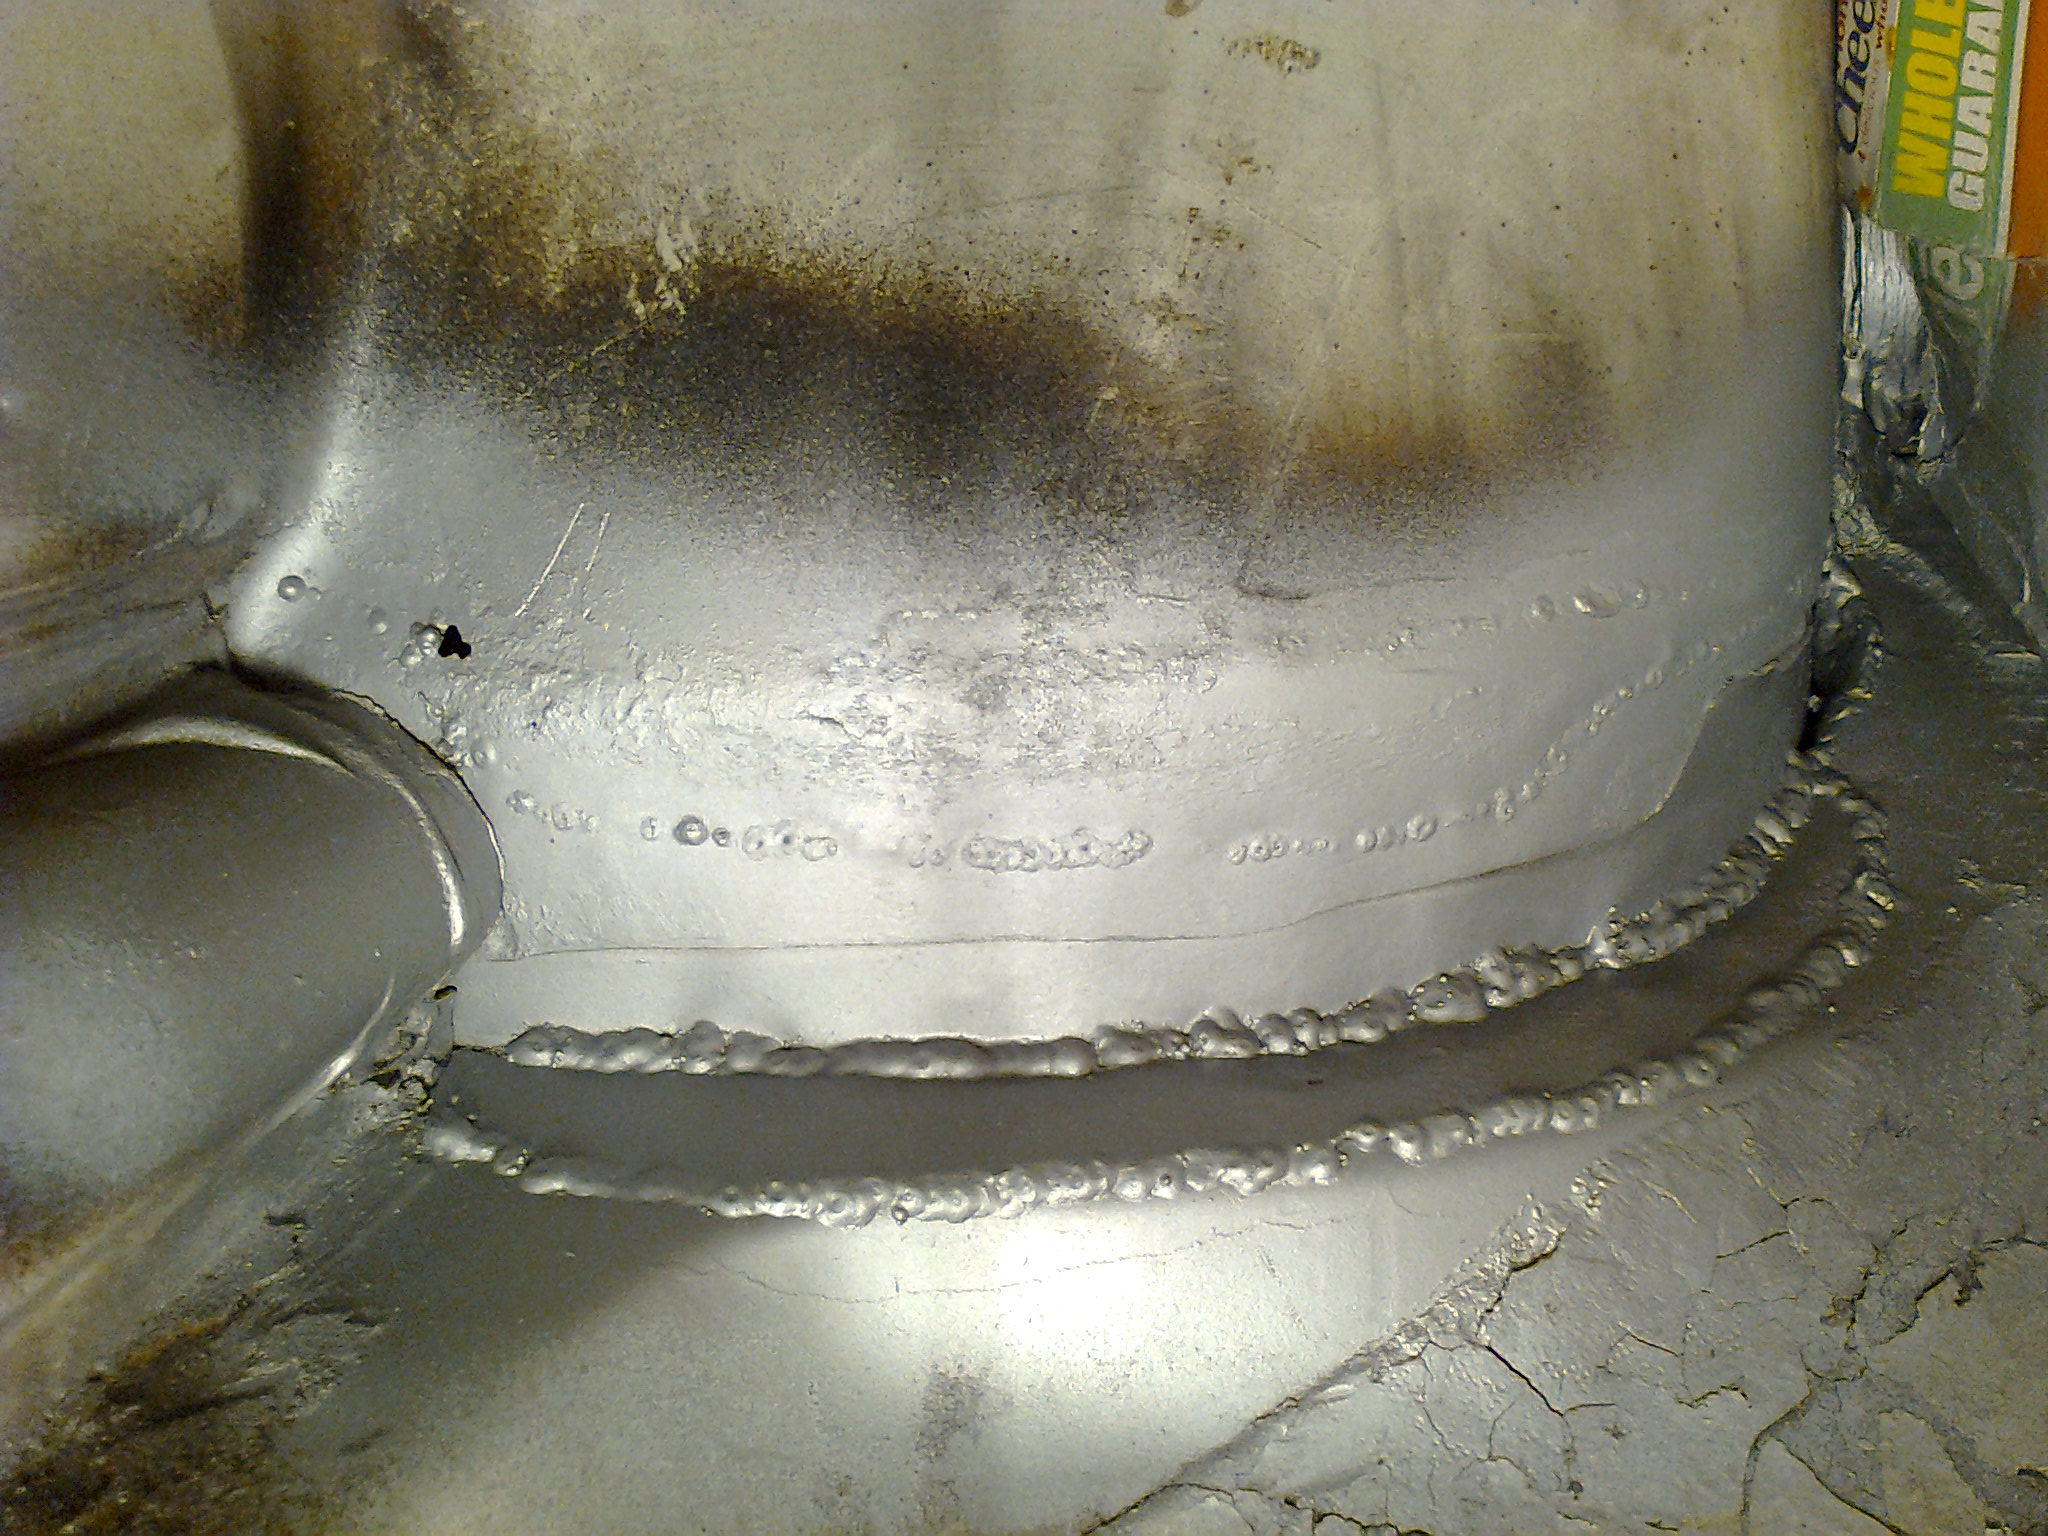
Ok, another busy week / weekend and almost done on the front of the sill / wheel arch area.

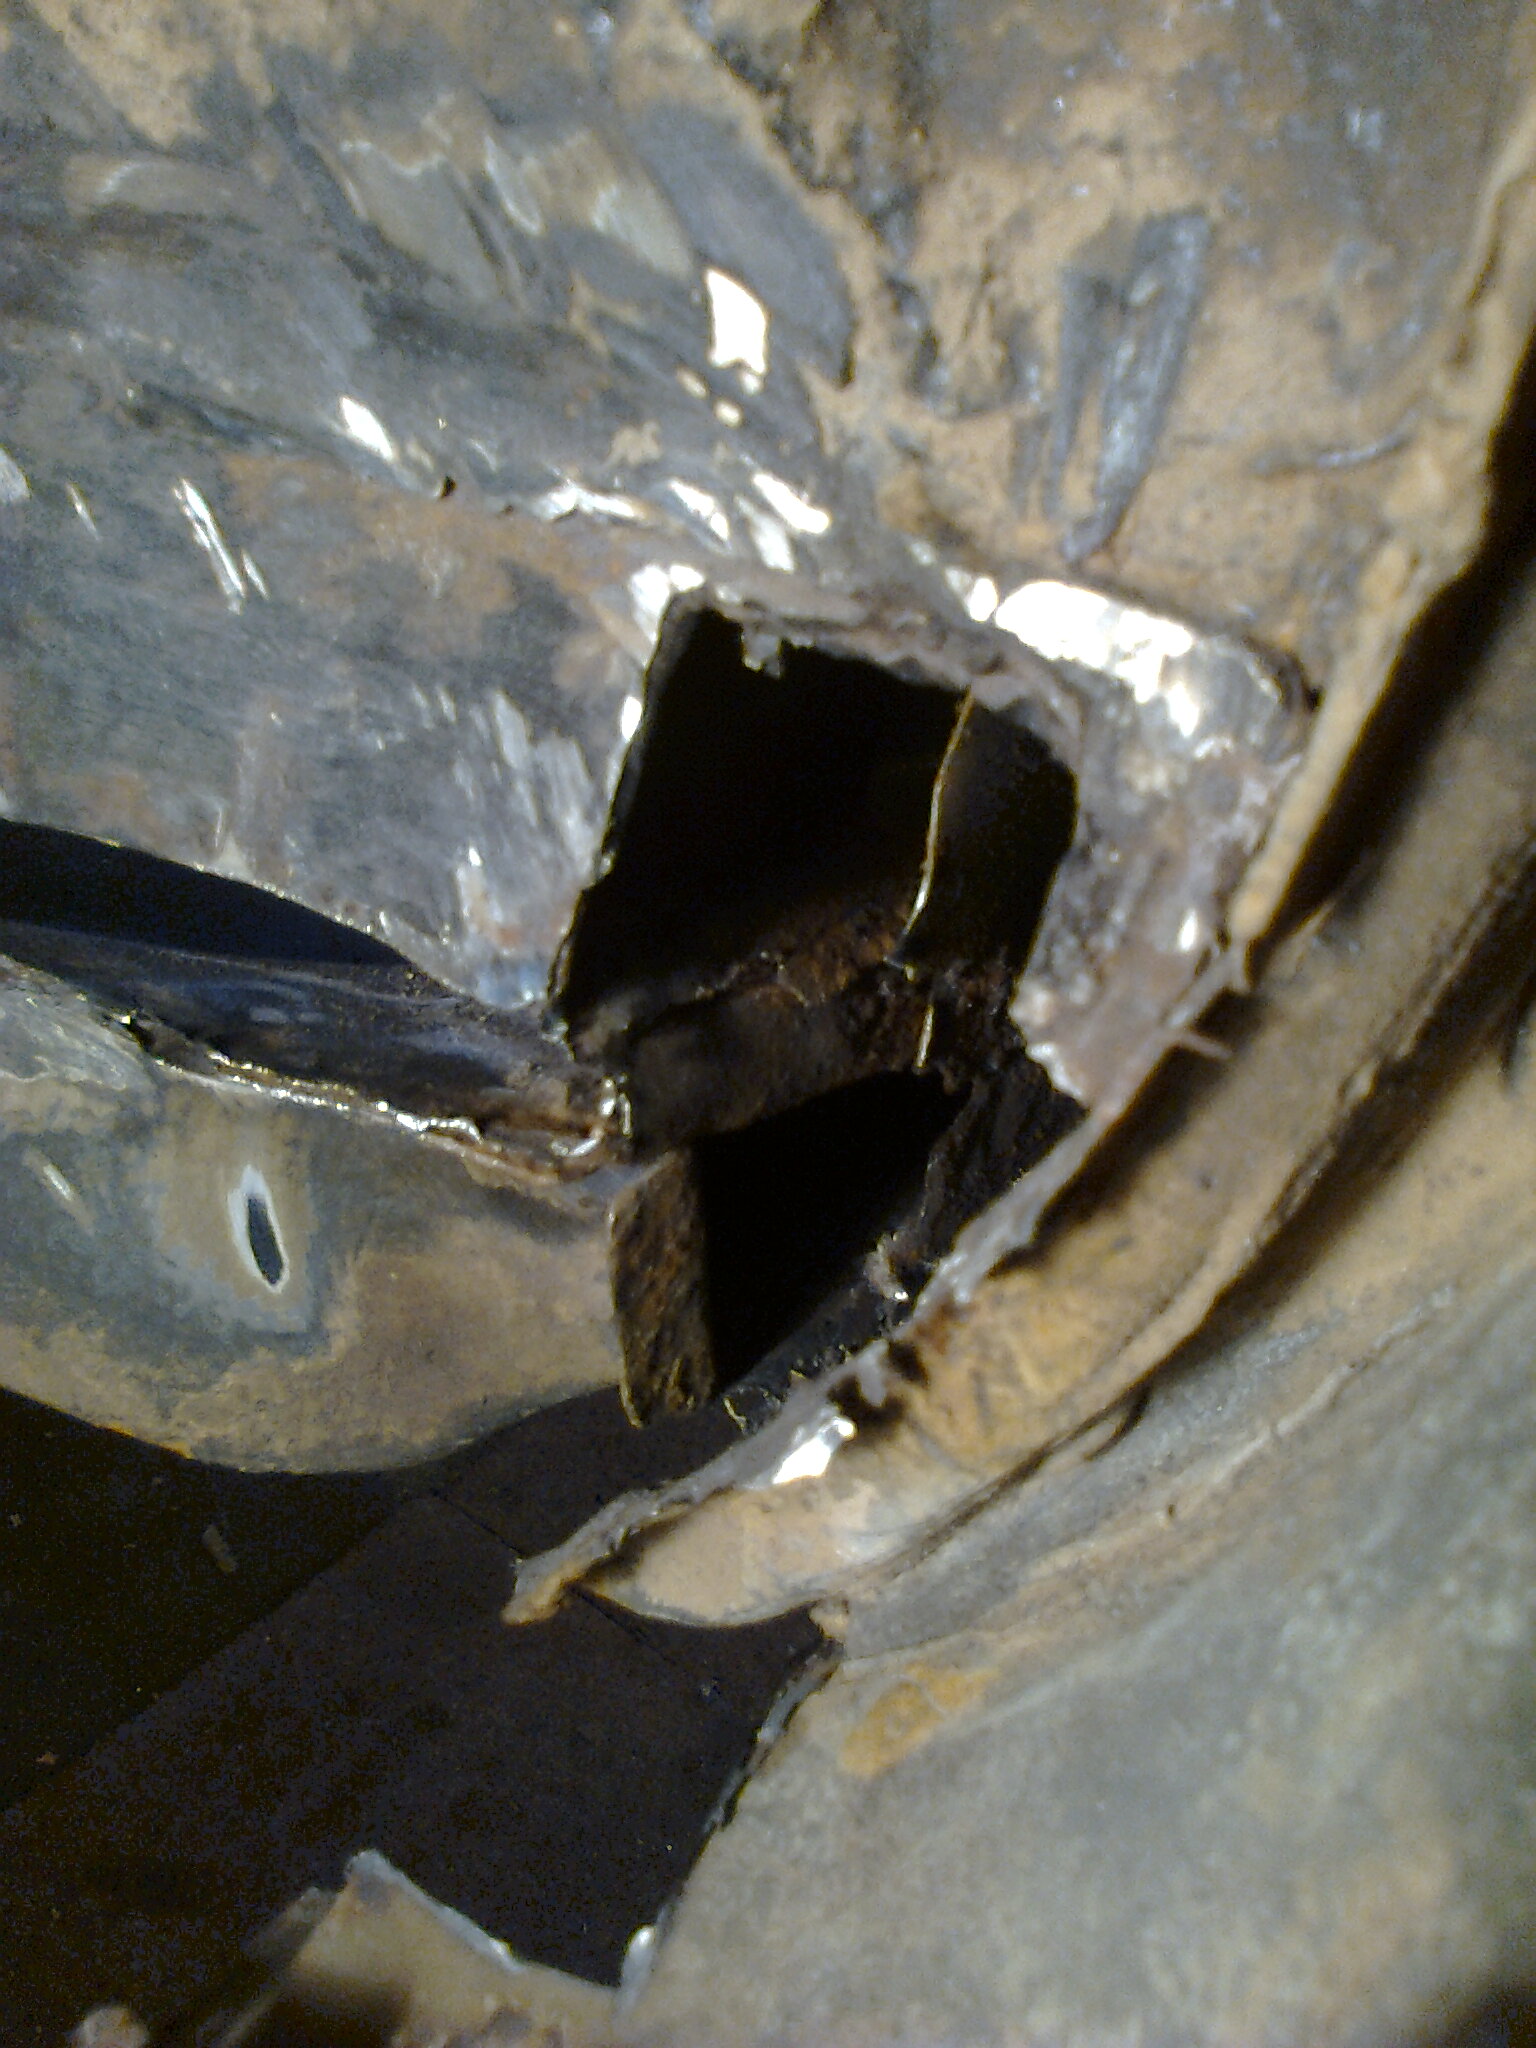
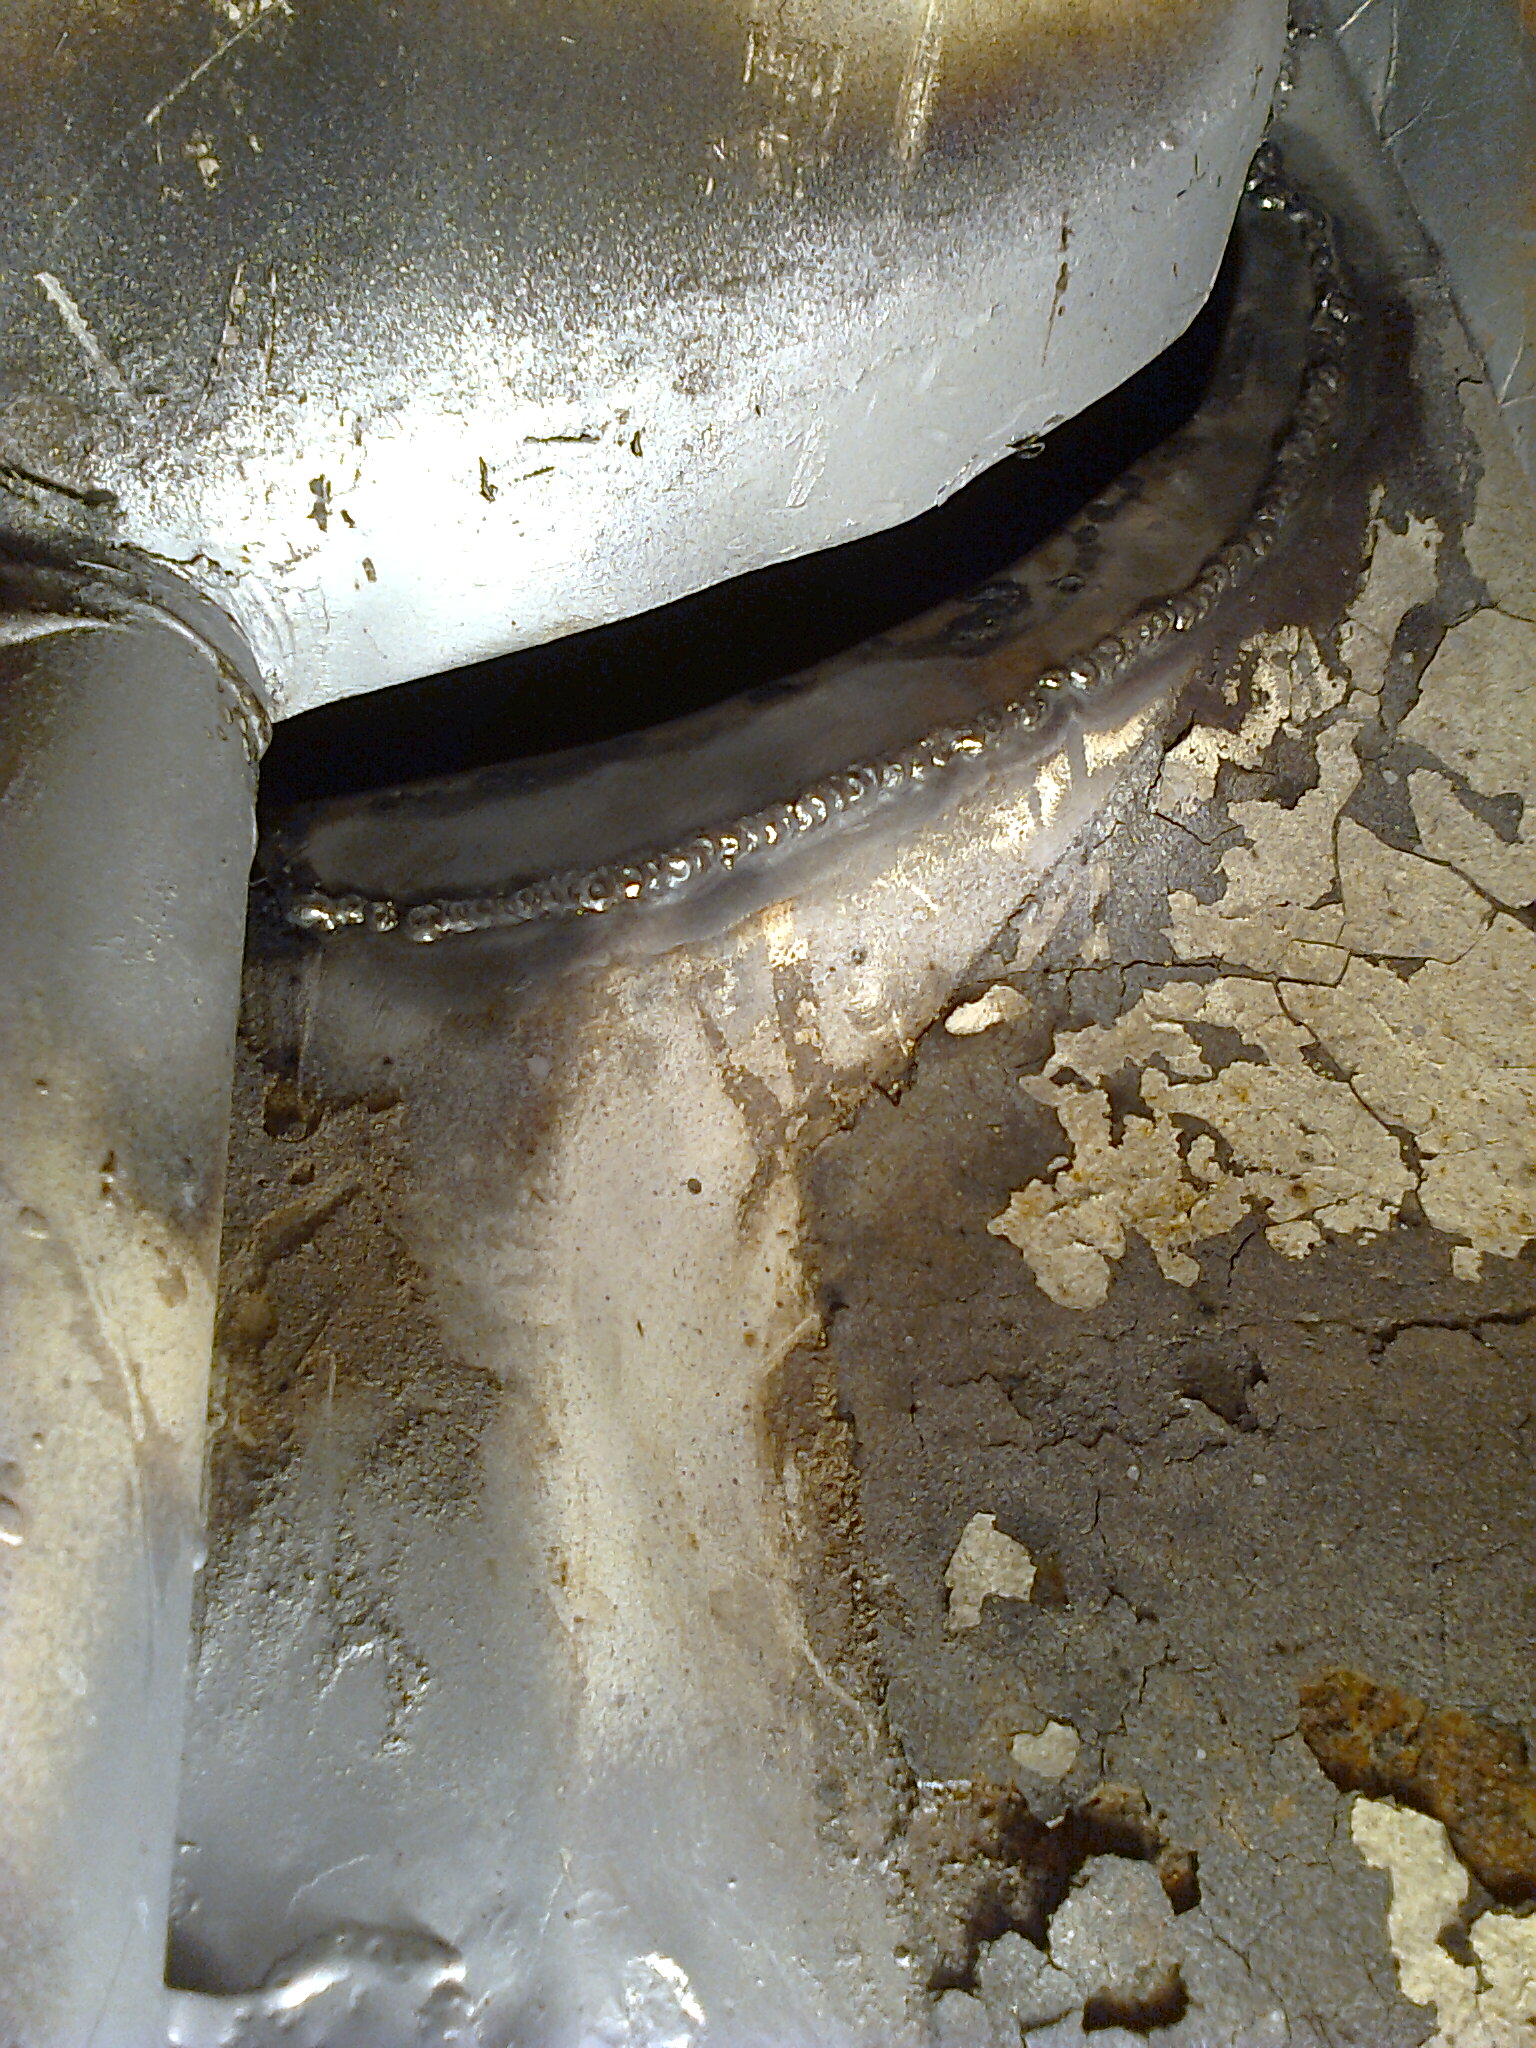
Had to repair the seam before I could add the repair patch...something the MOT place in Swansea didn't do first time round...
Photo2639.jpg


A difficult place to weld though...narrow space and upwards...great for setting fire to your clothes :(
Photo2637.jpg


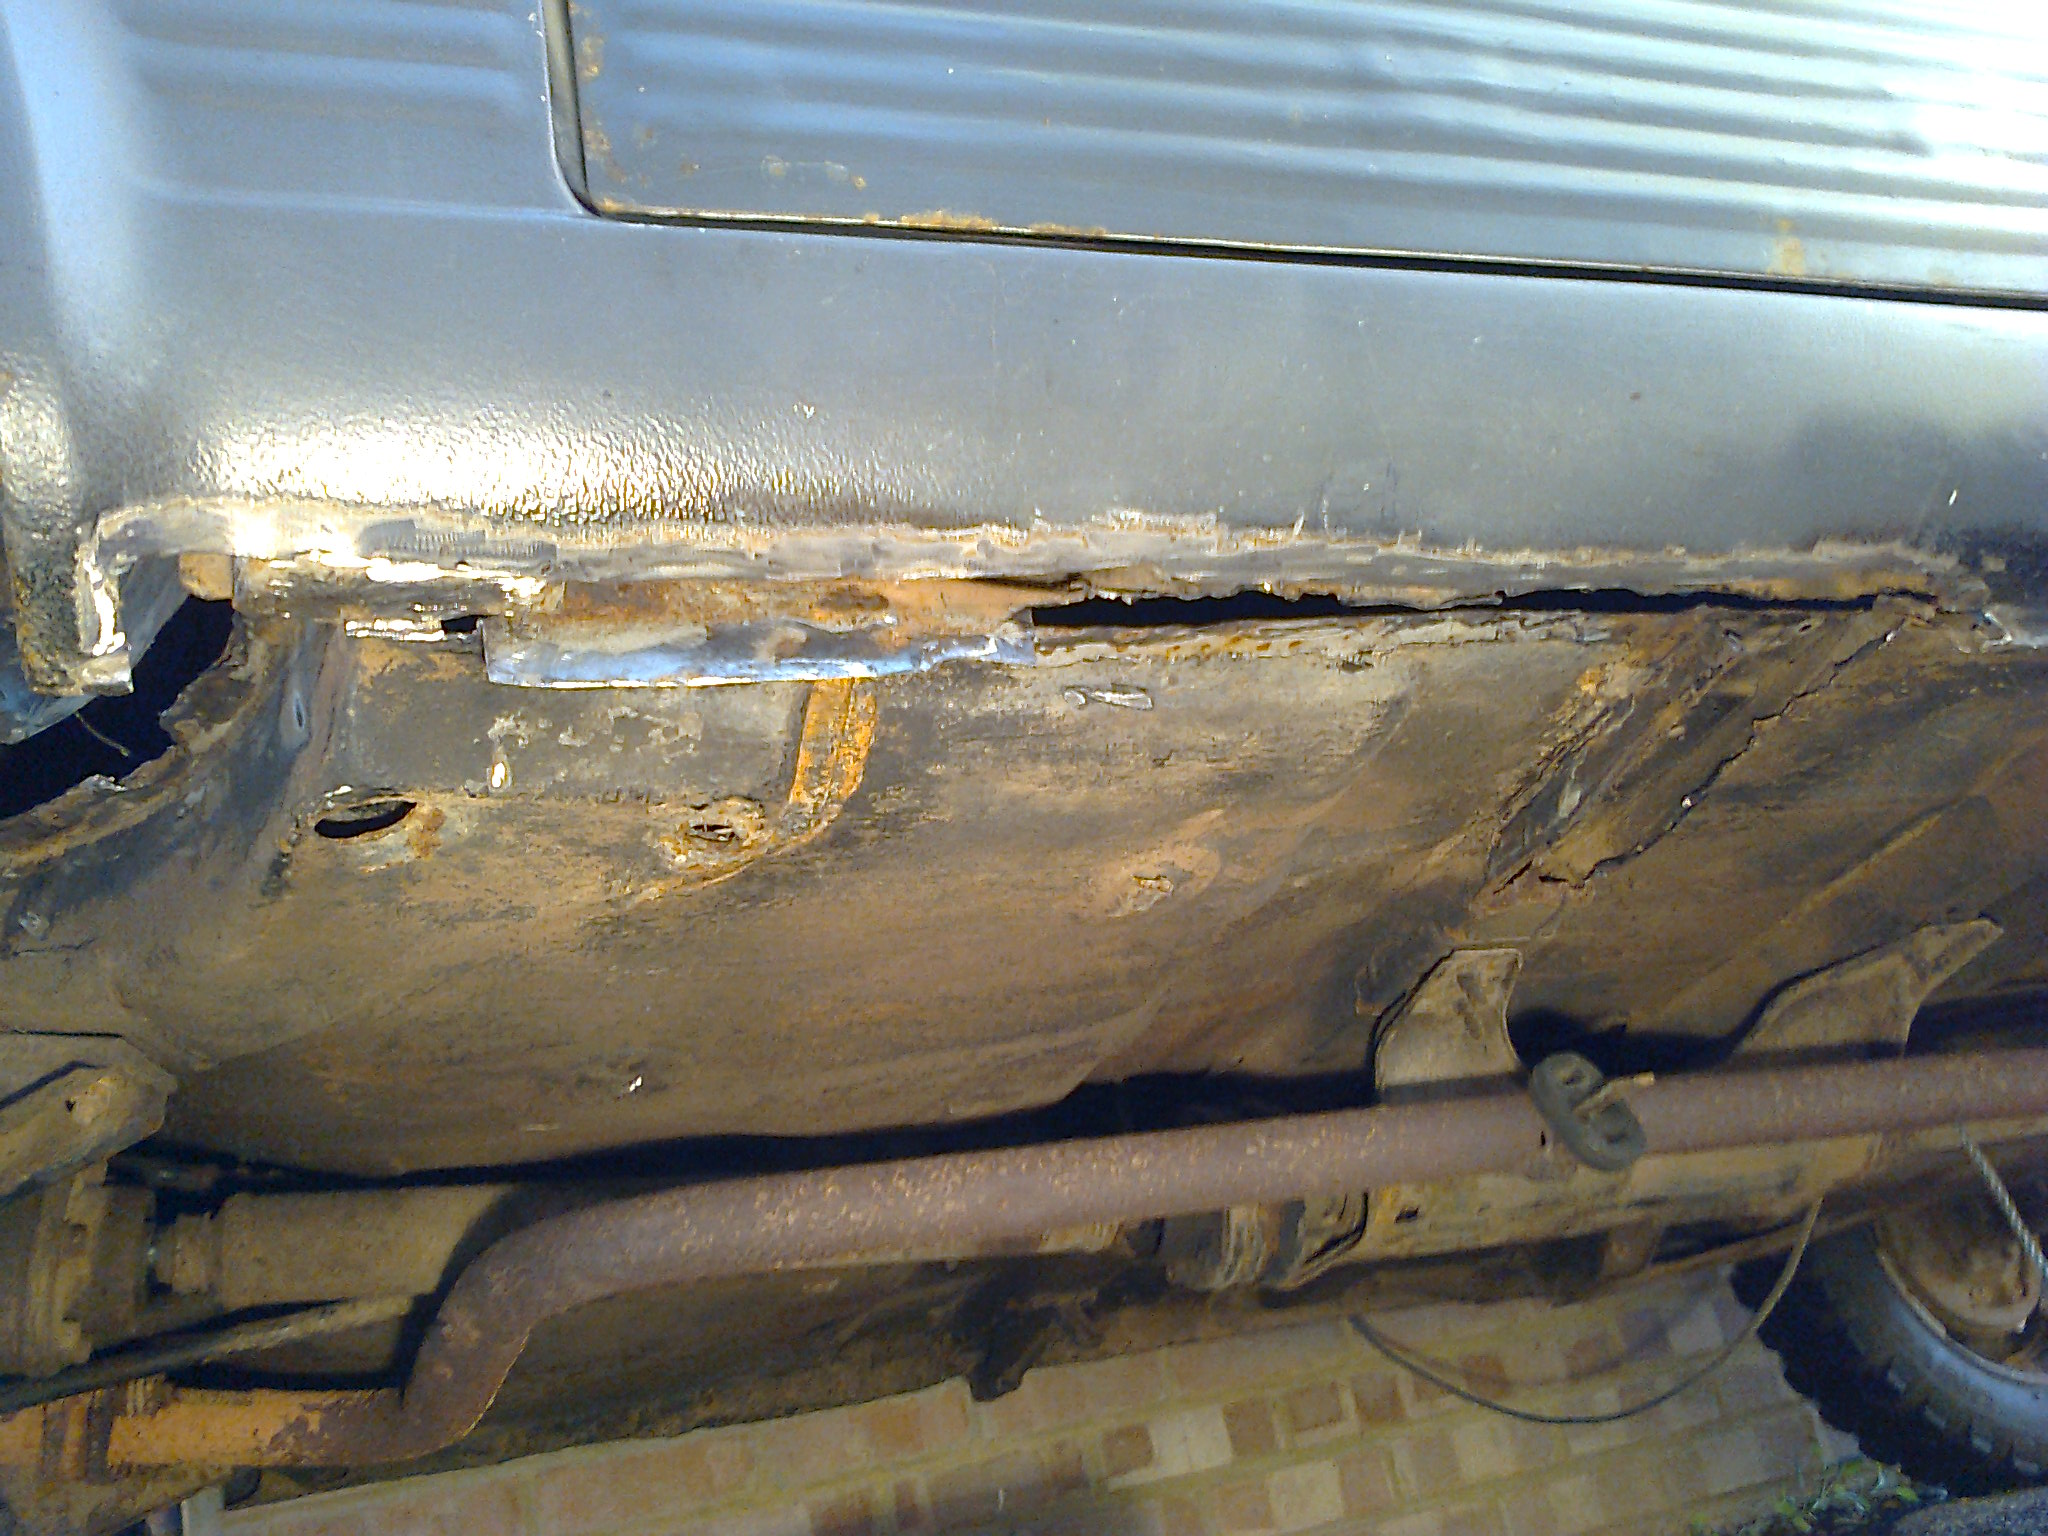
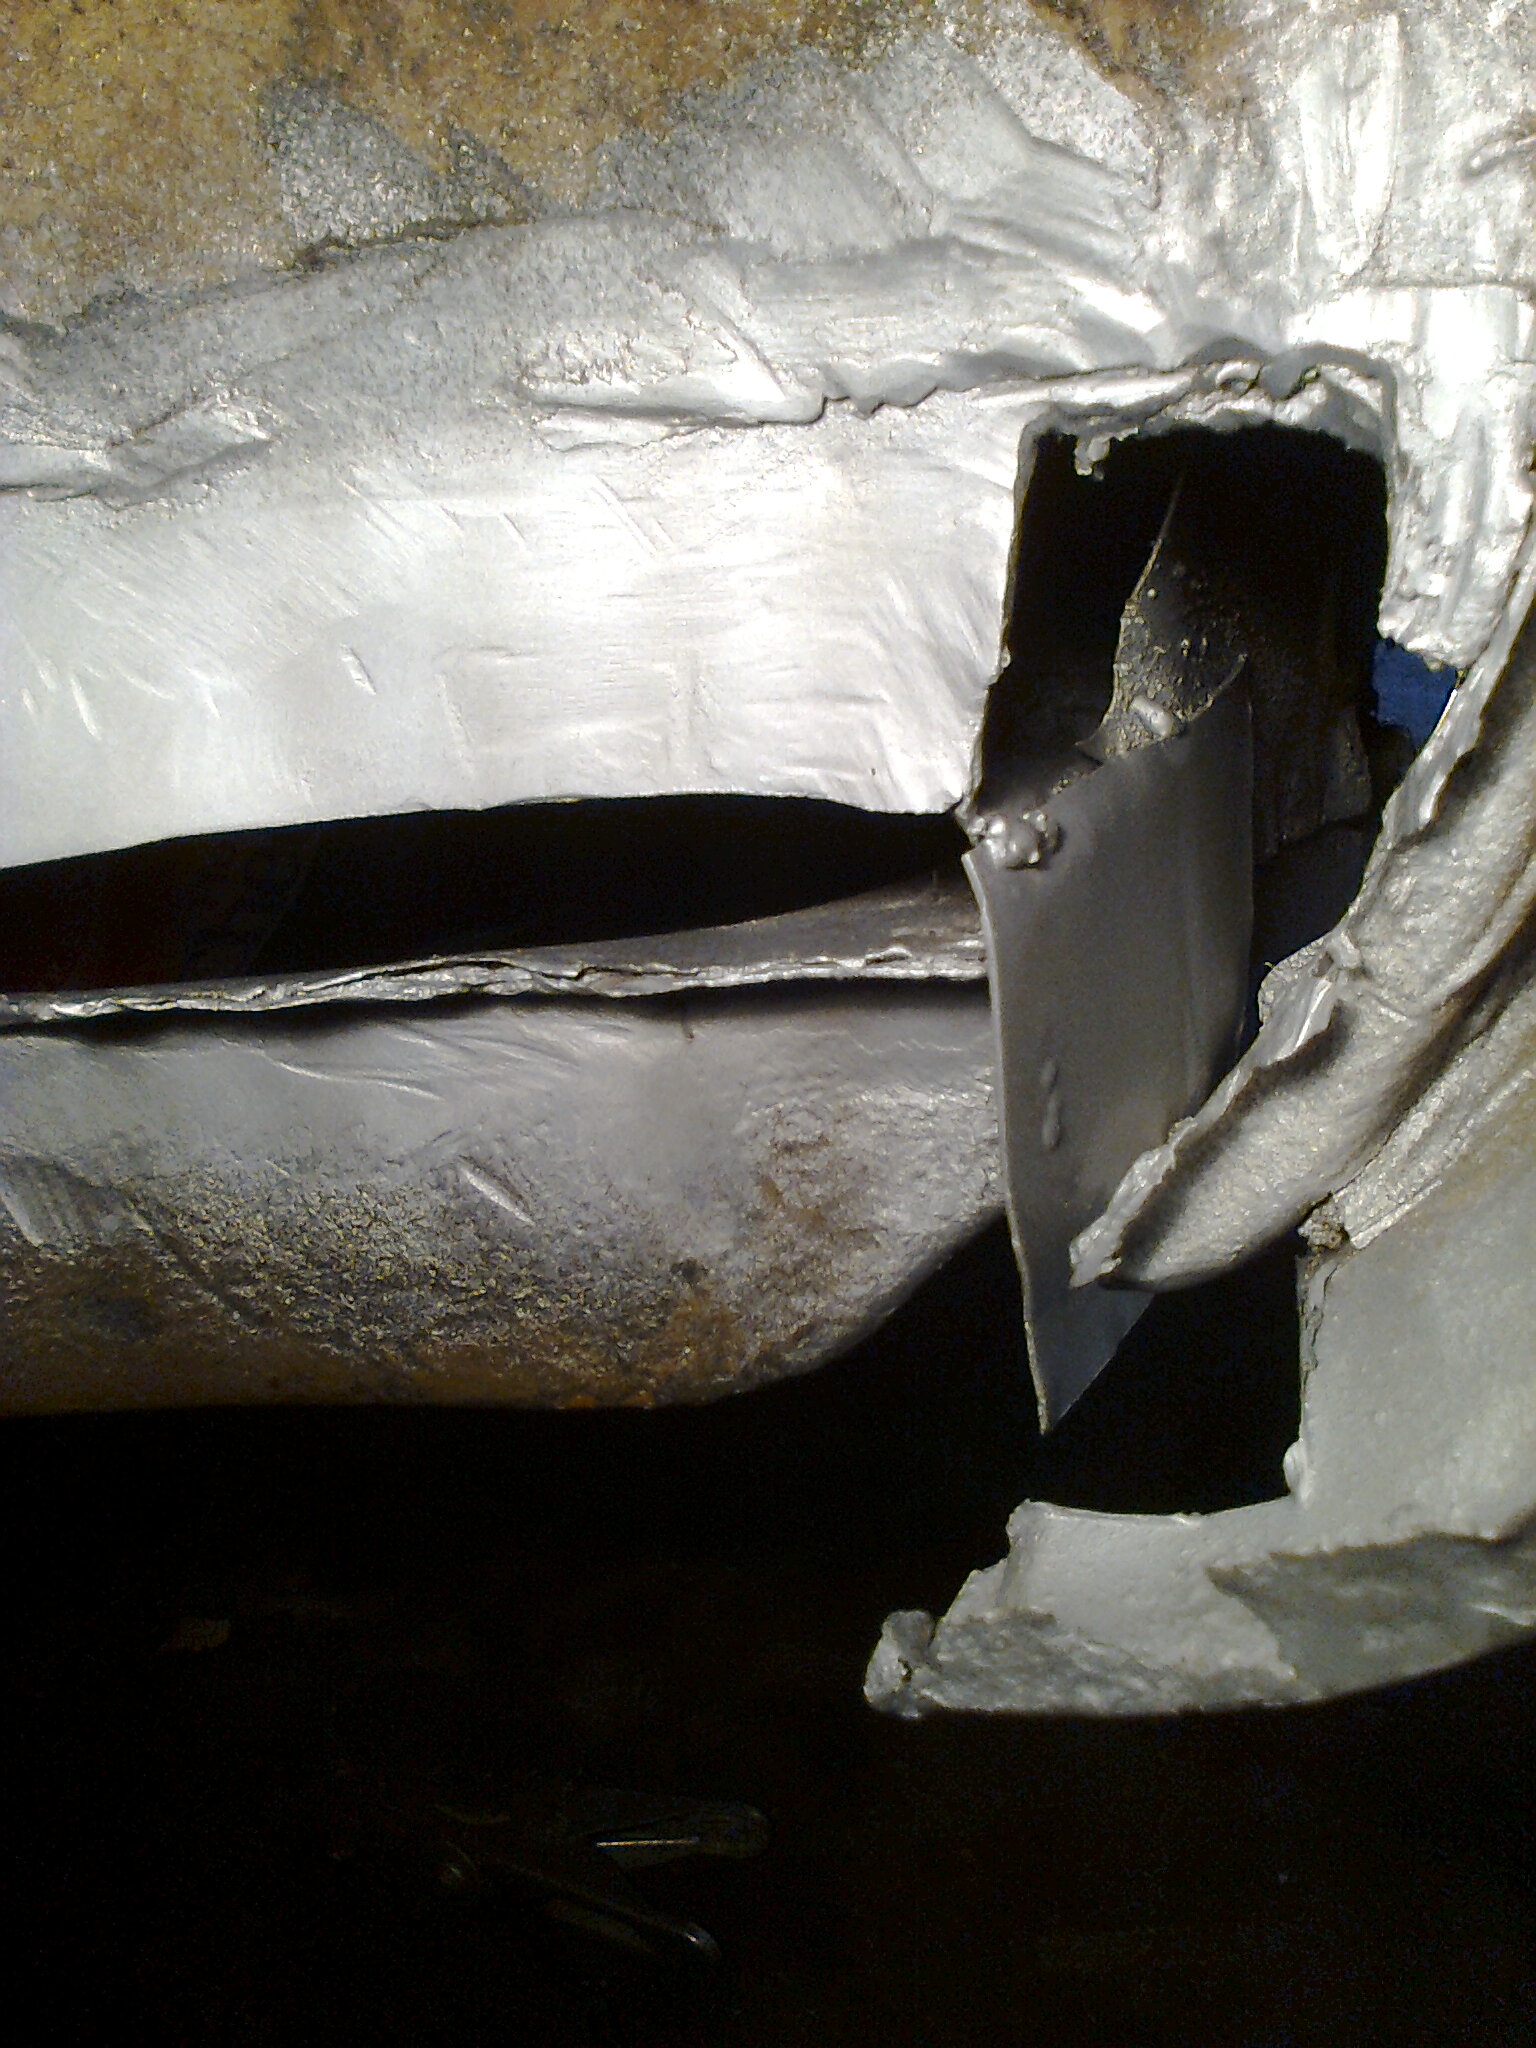
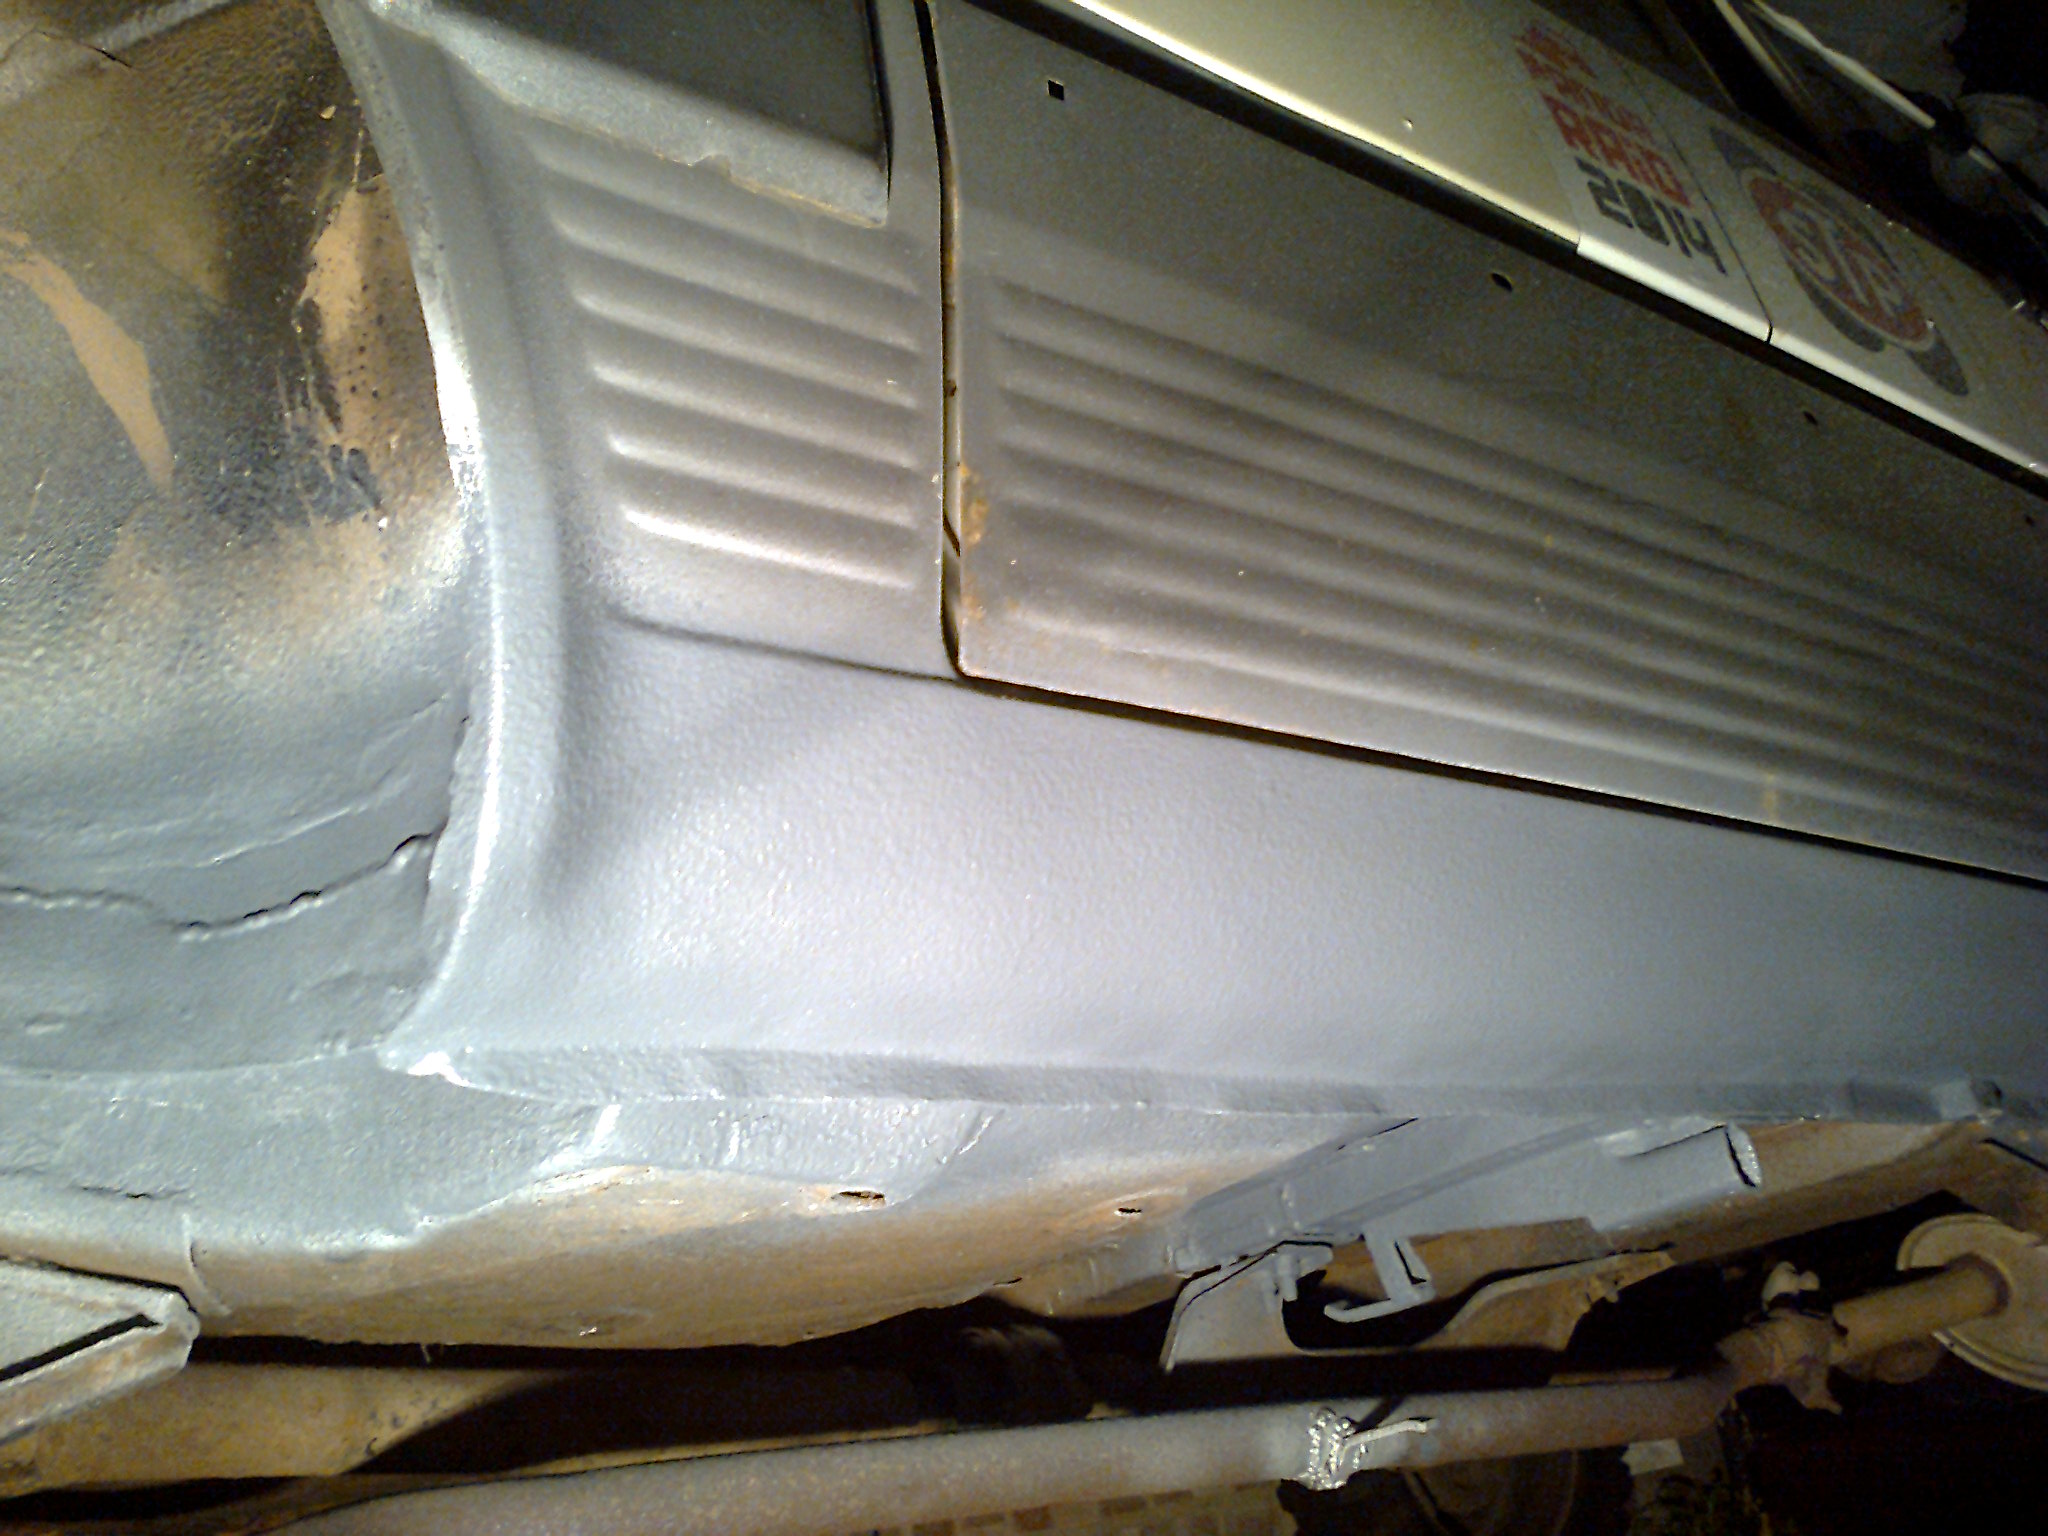
Then it was the outer sill which I patched up with reasonable success...

Photo2645.jpg


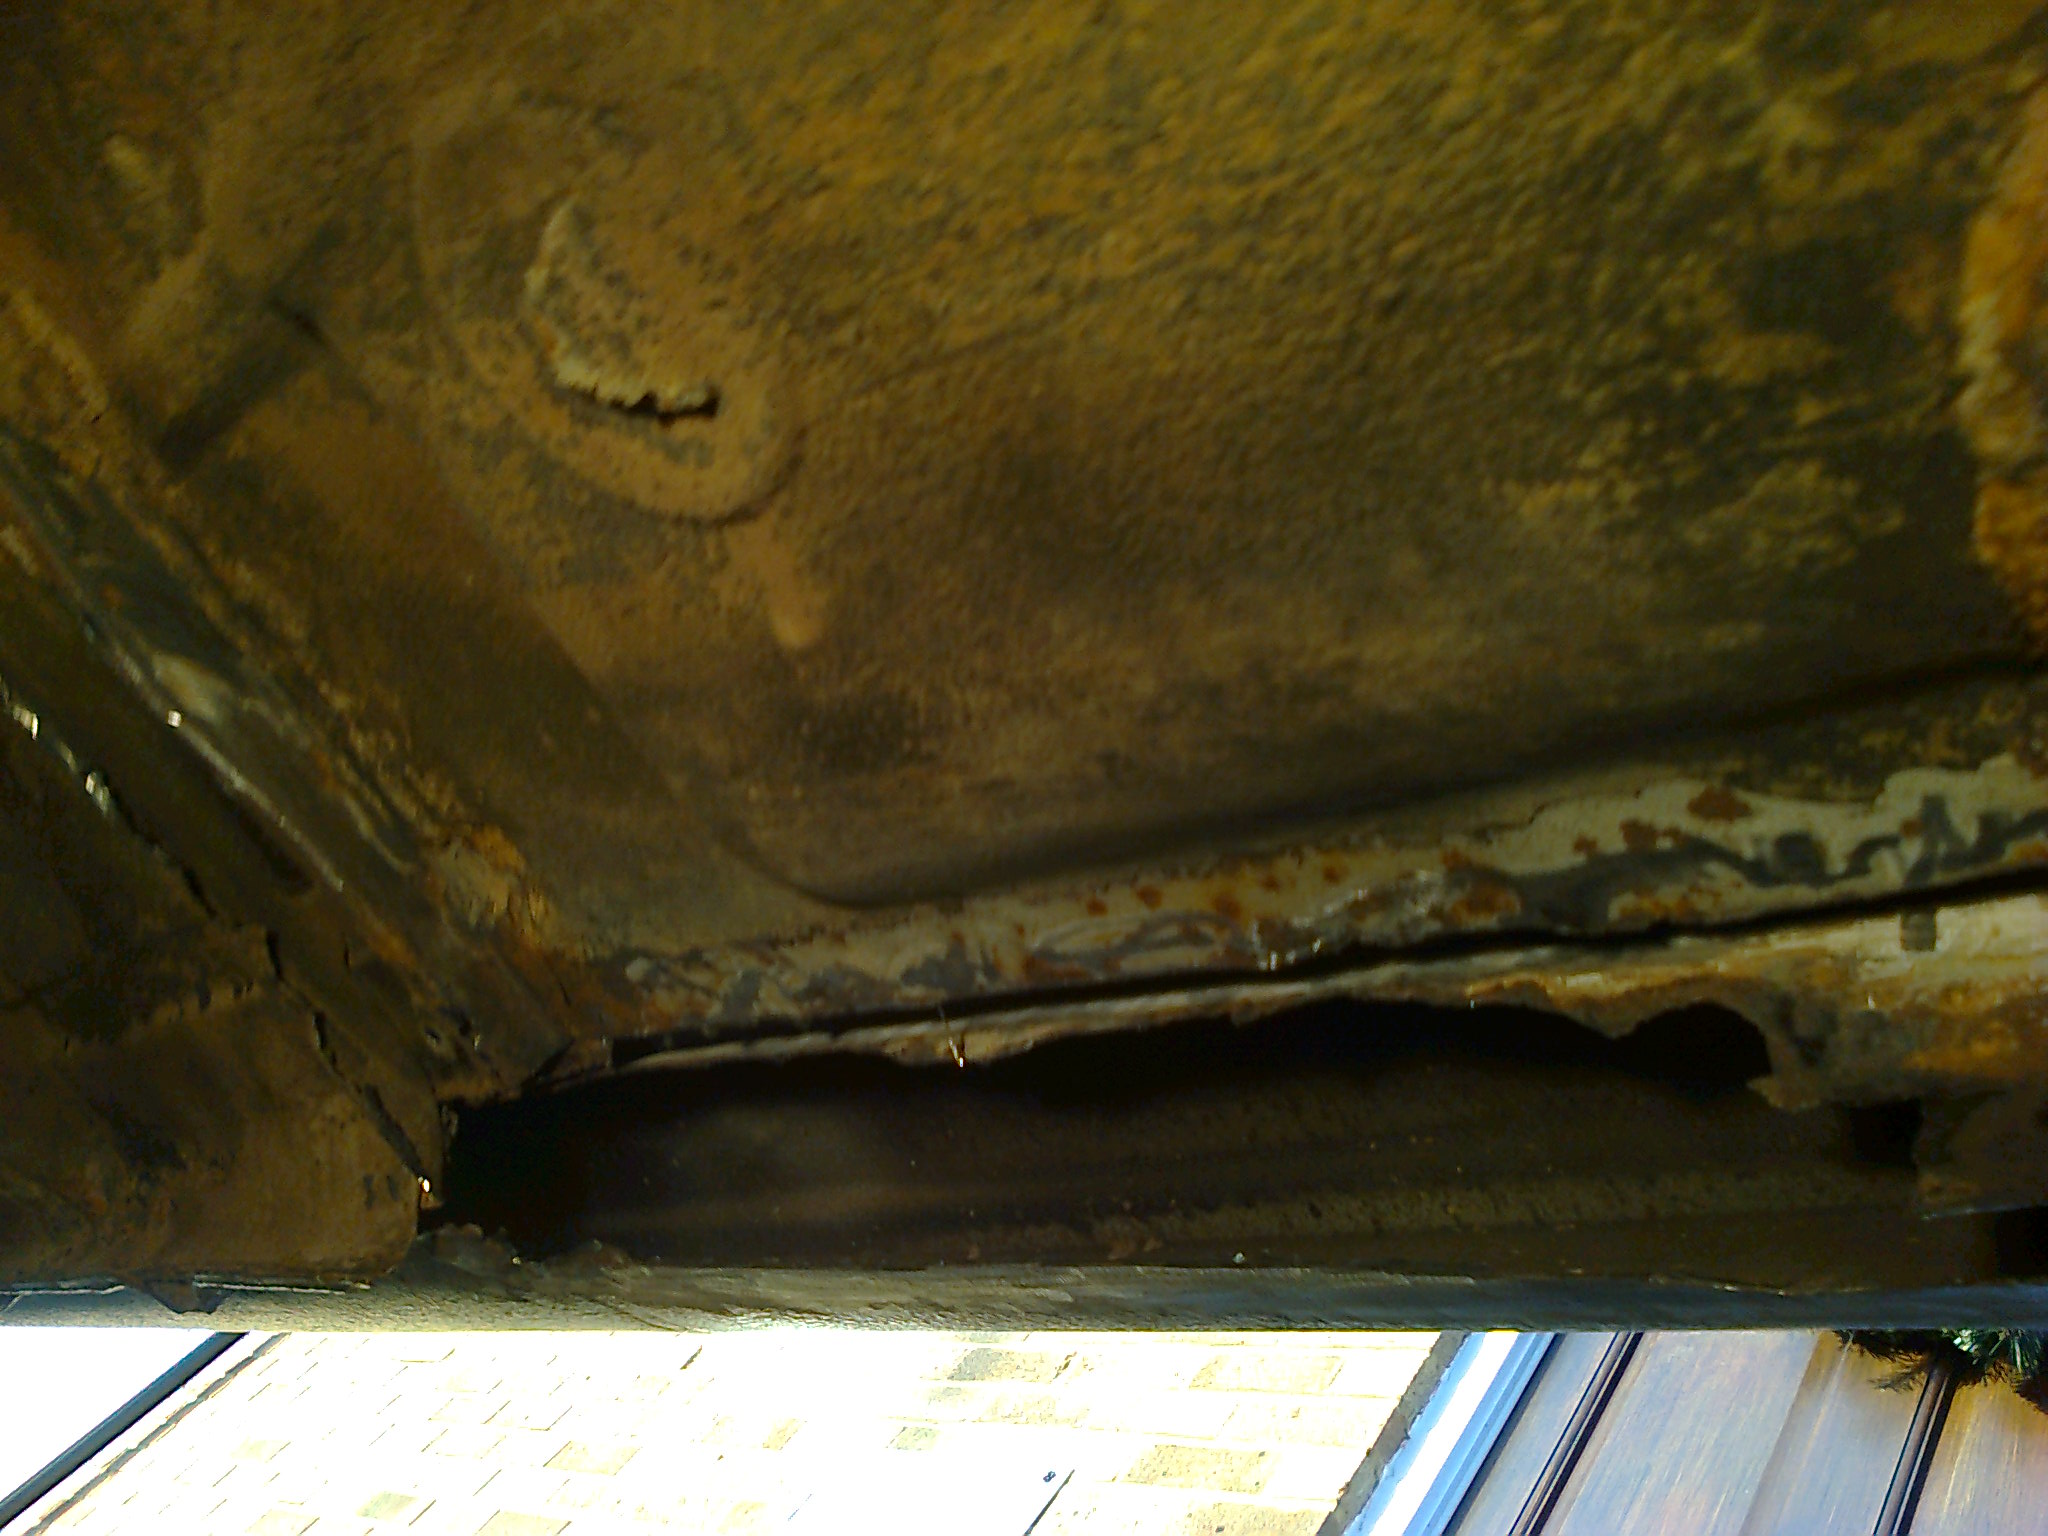
Still a big hole on the inner sill though :(...

Photo2647.jpg


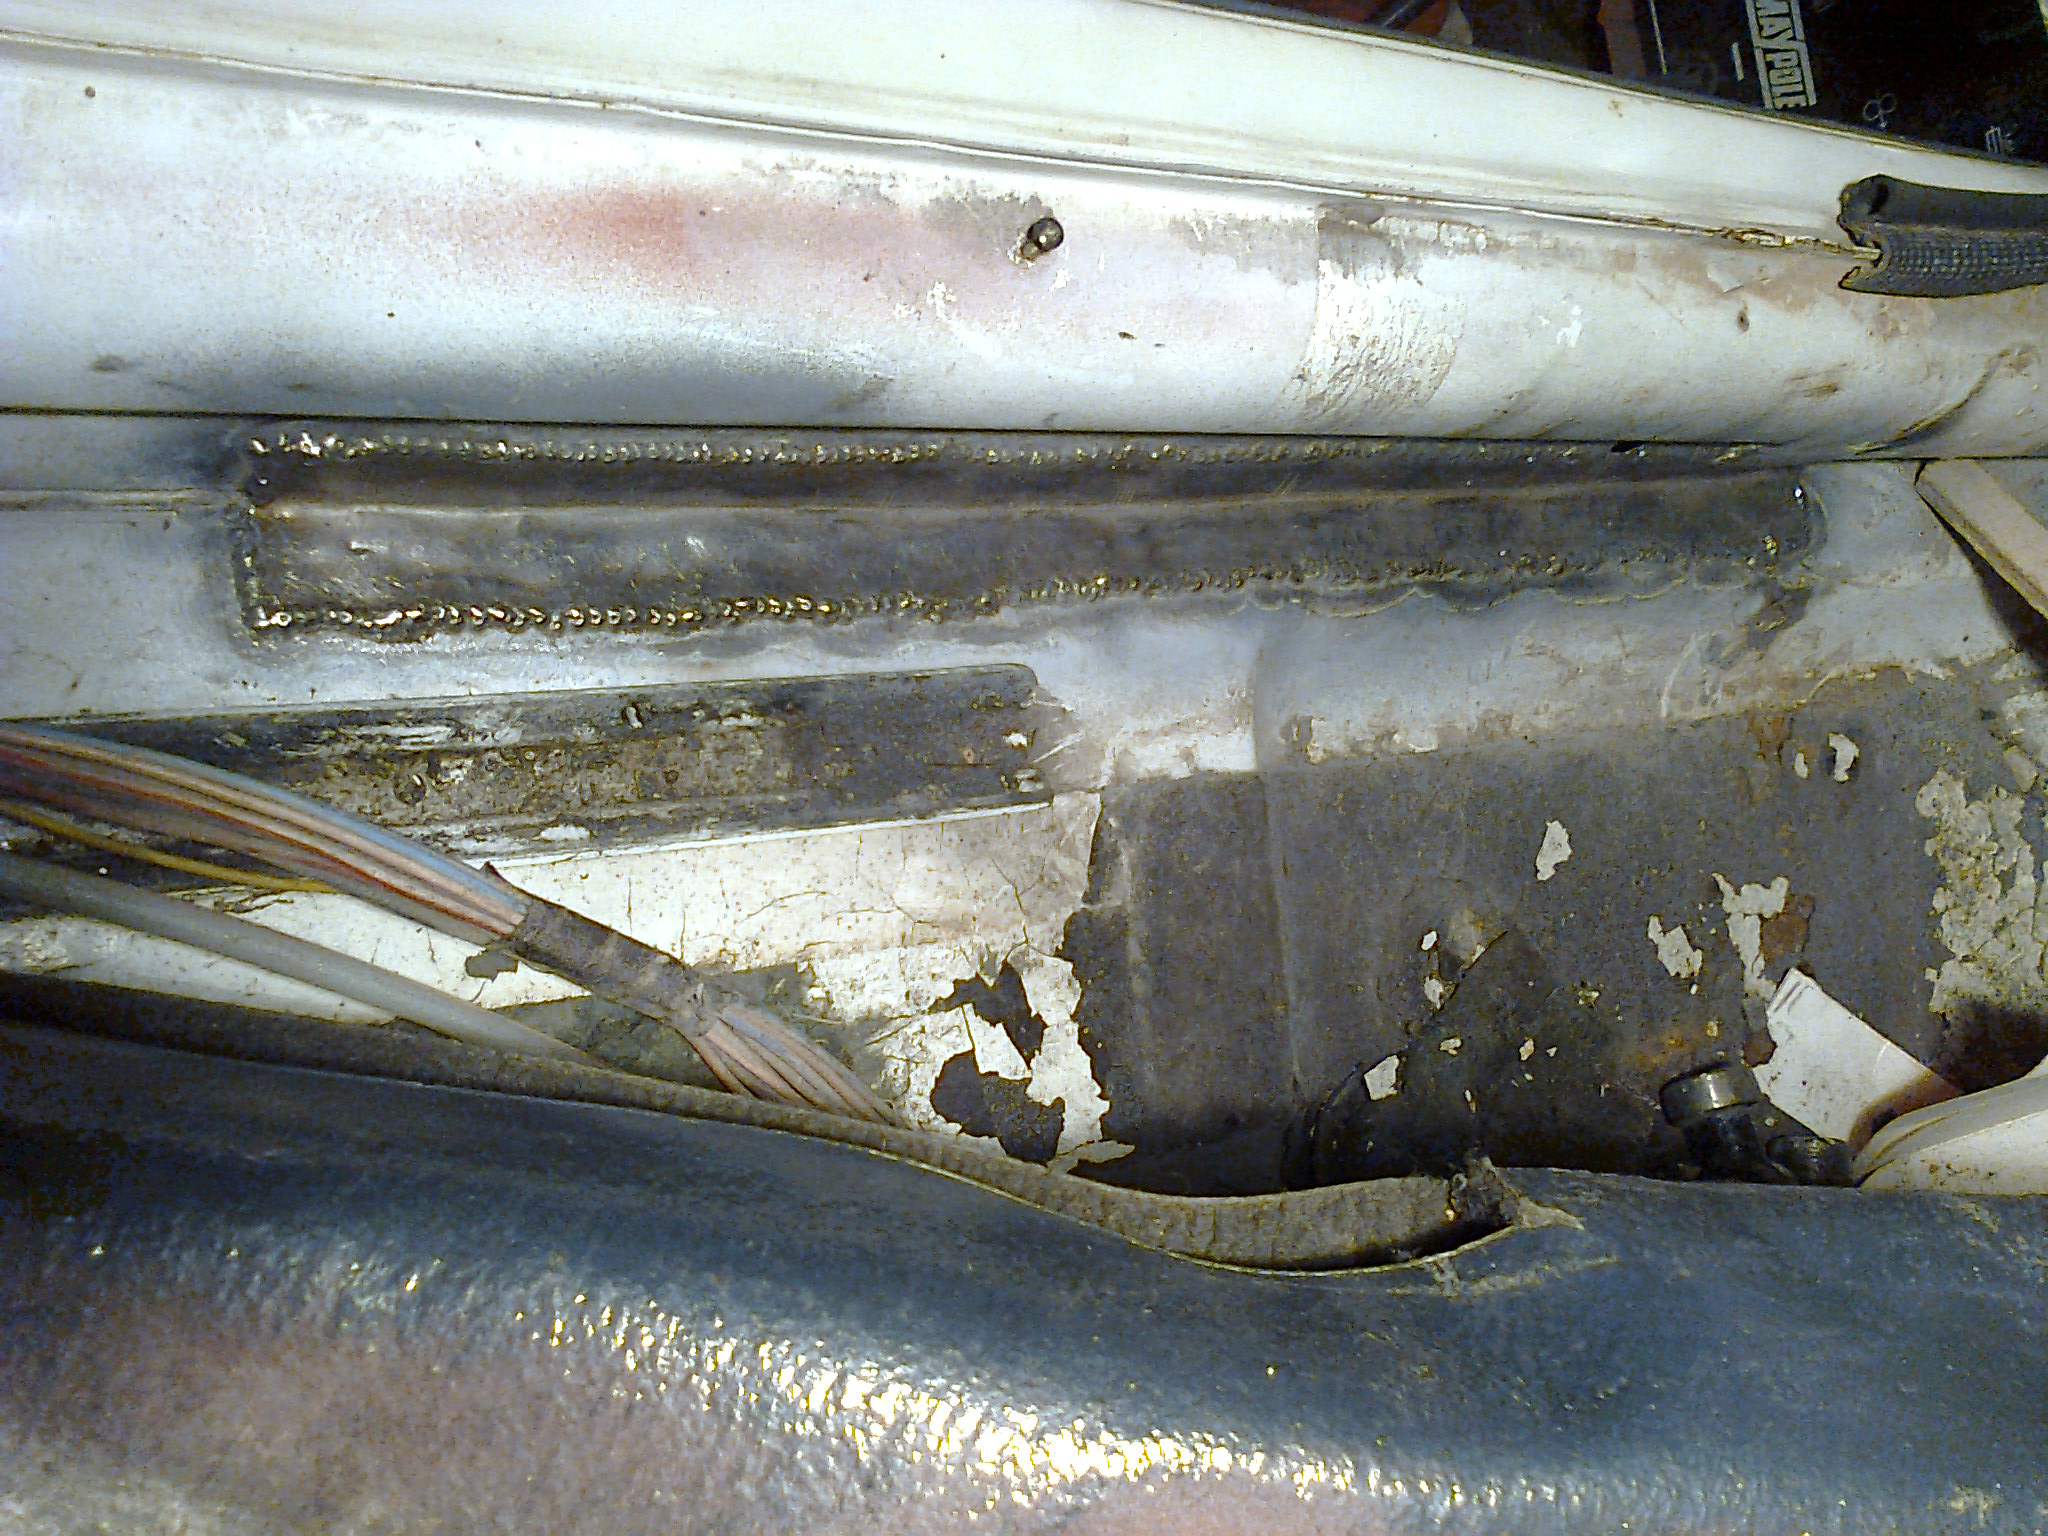
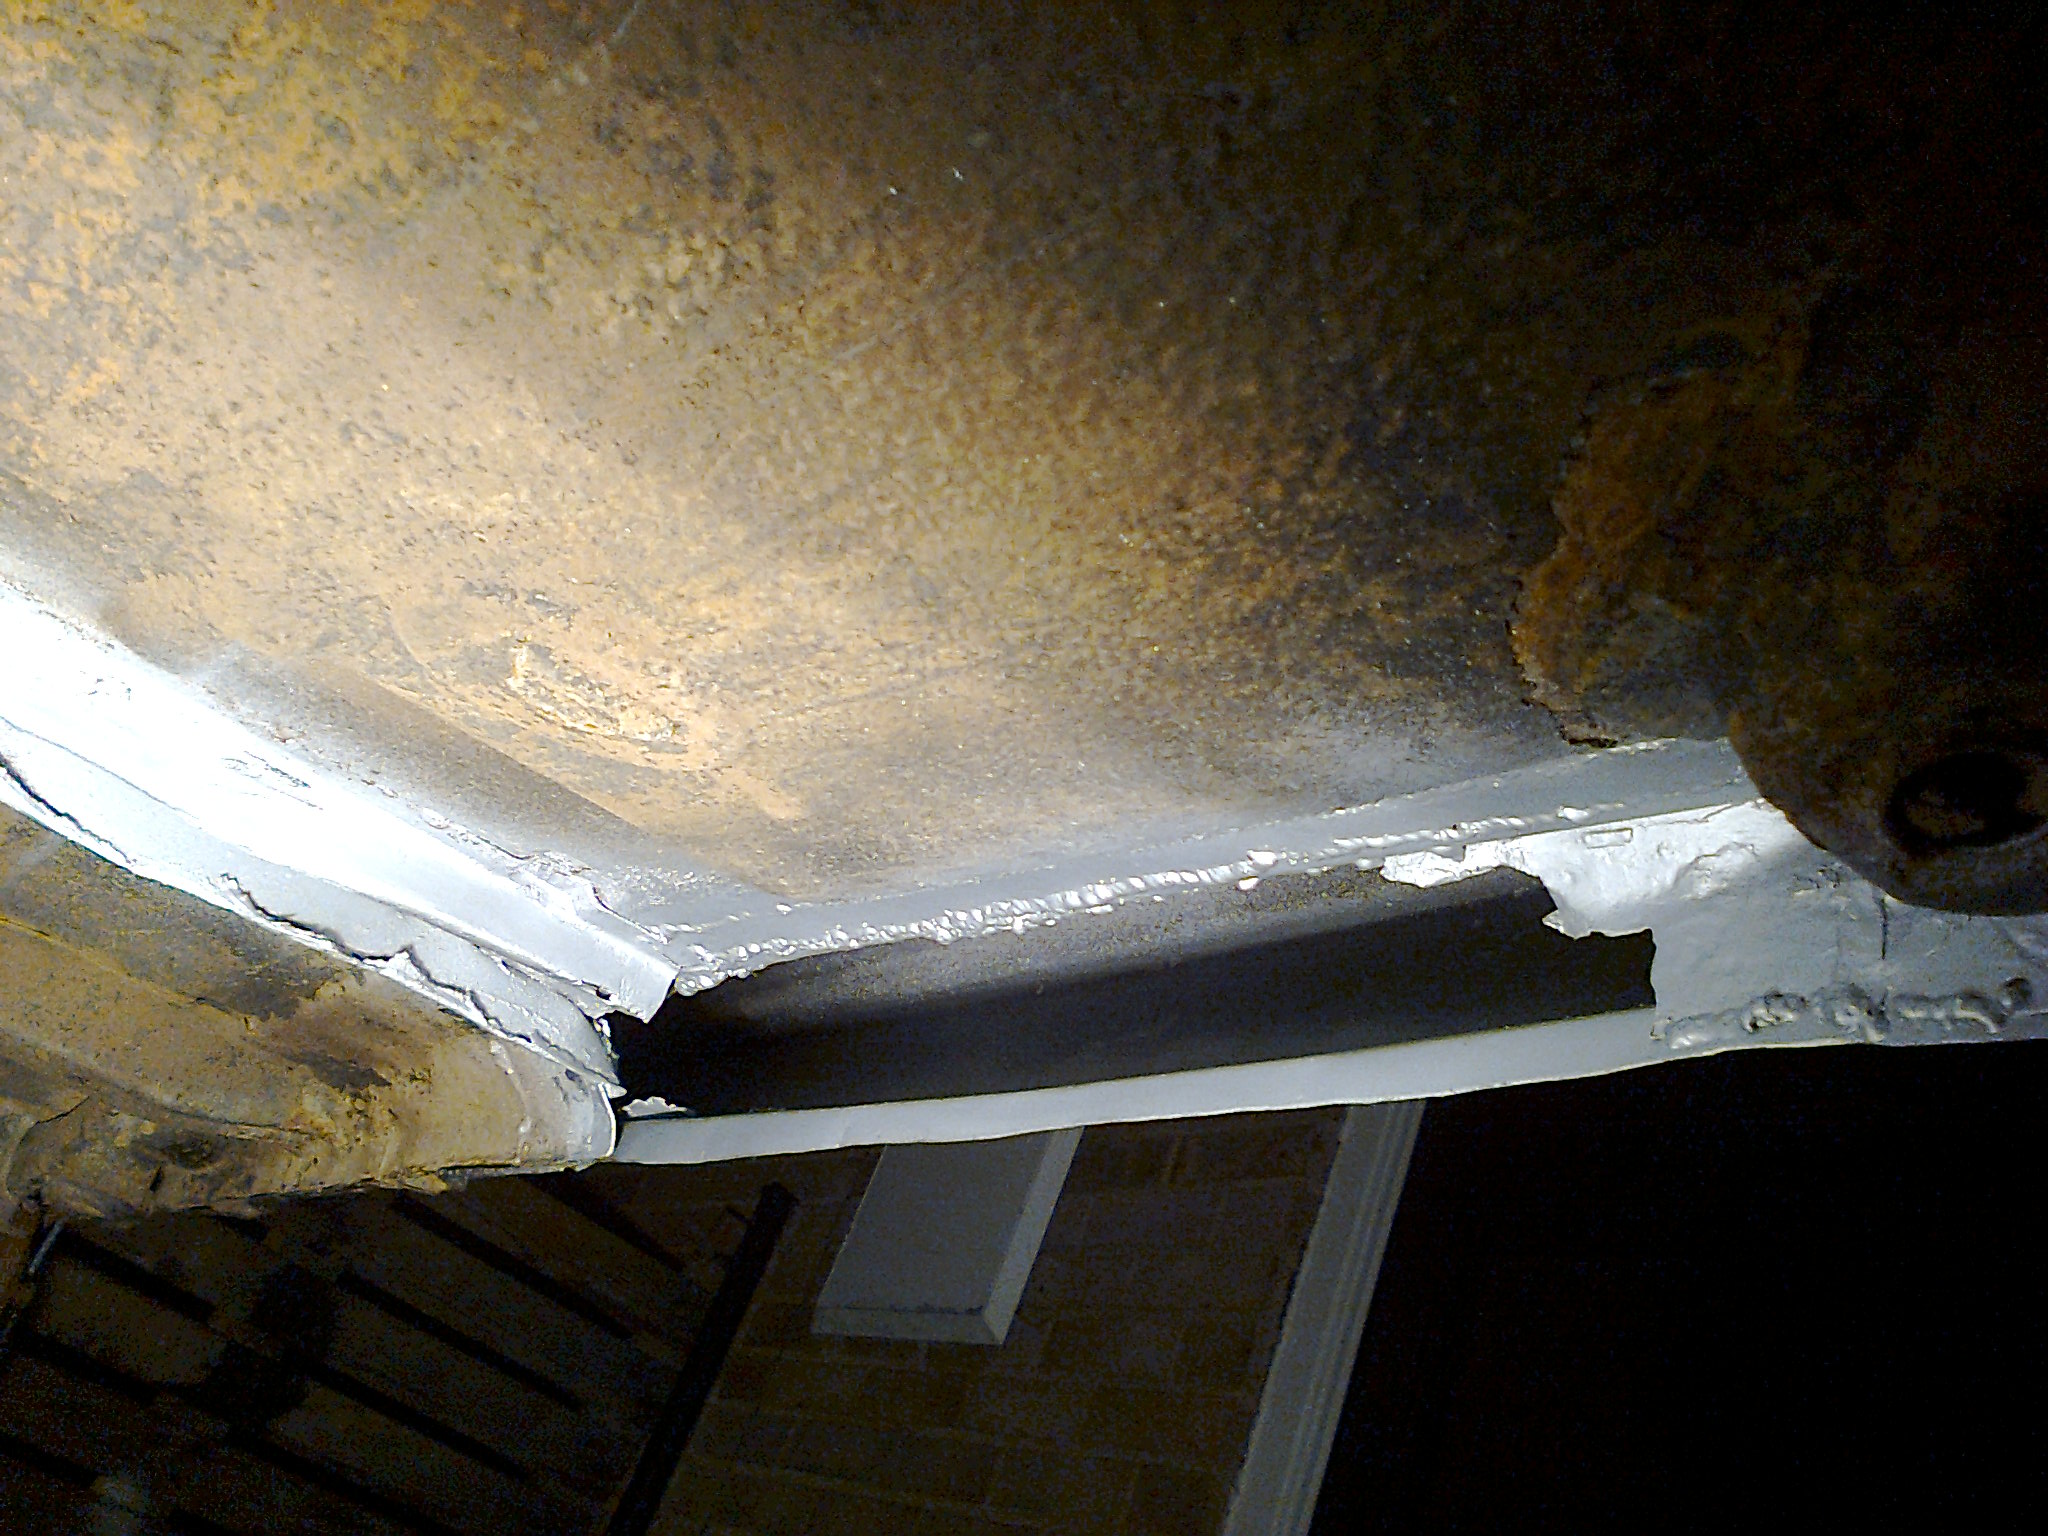
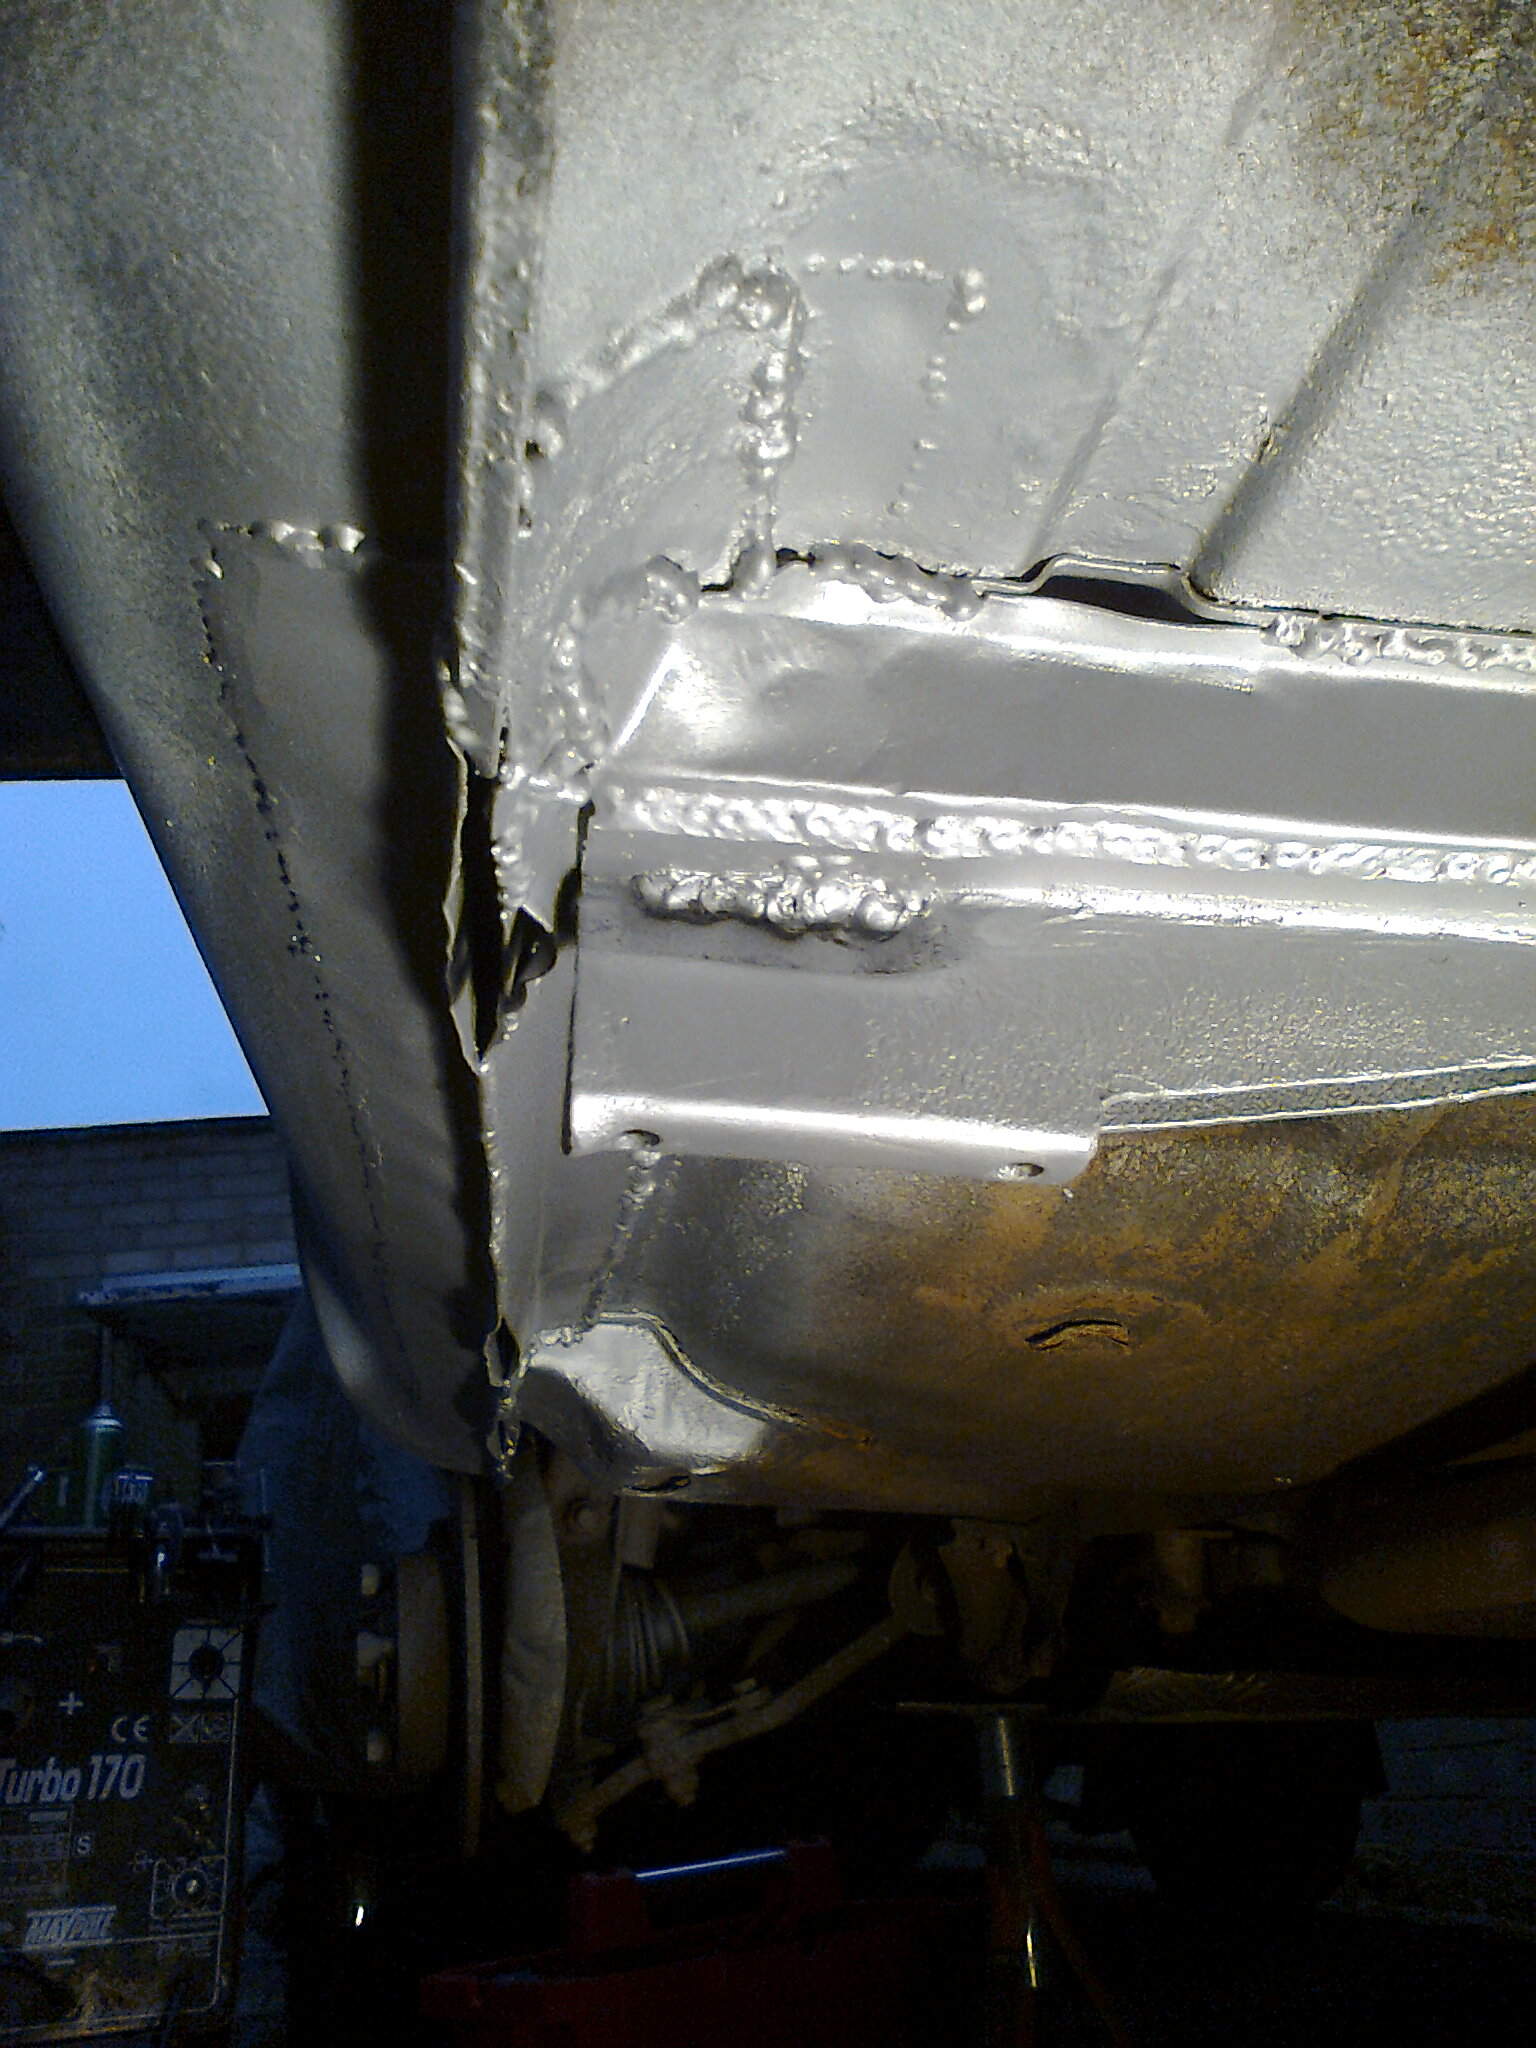
So one more patch later and looking a bit more promising. Welding here was a bit poop though as the welder developed a wire delivery fault and a gas leak :( but beginning to show some structure again...

Photo2650.jpg


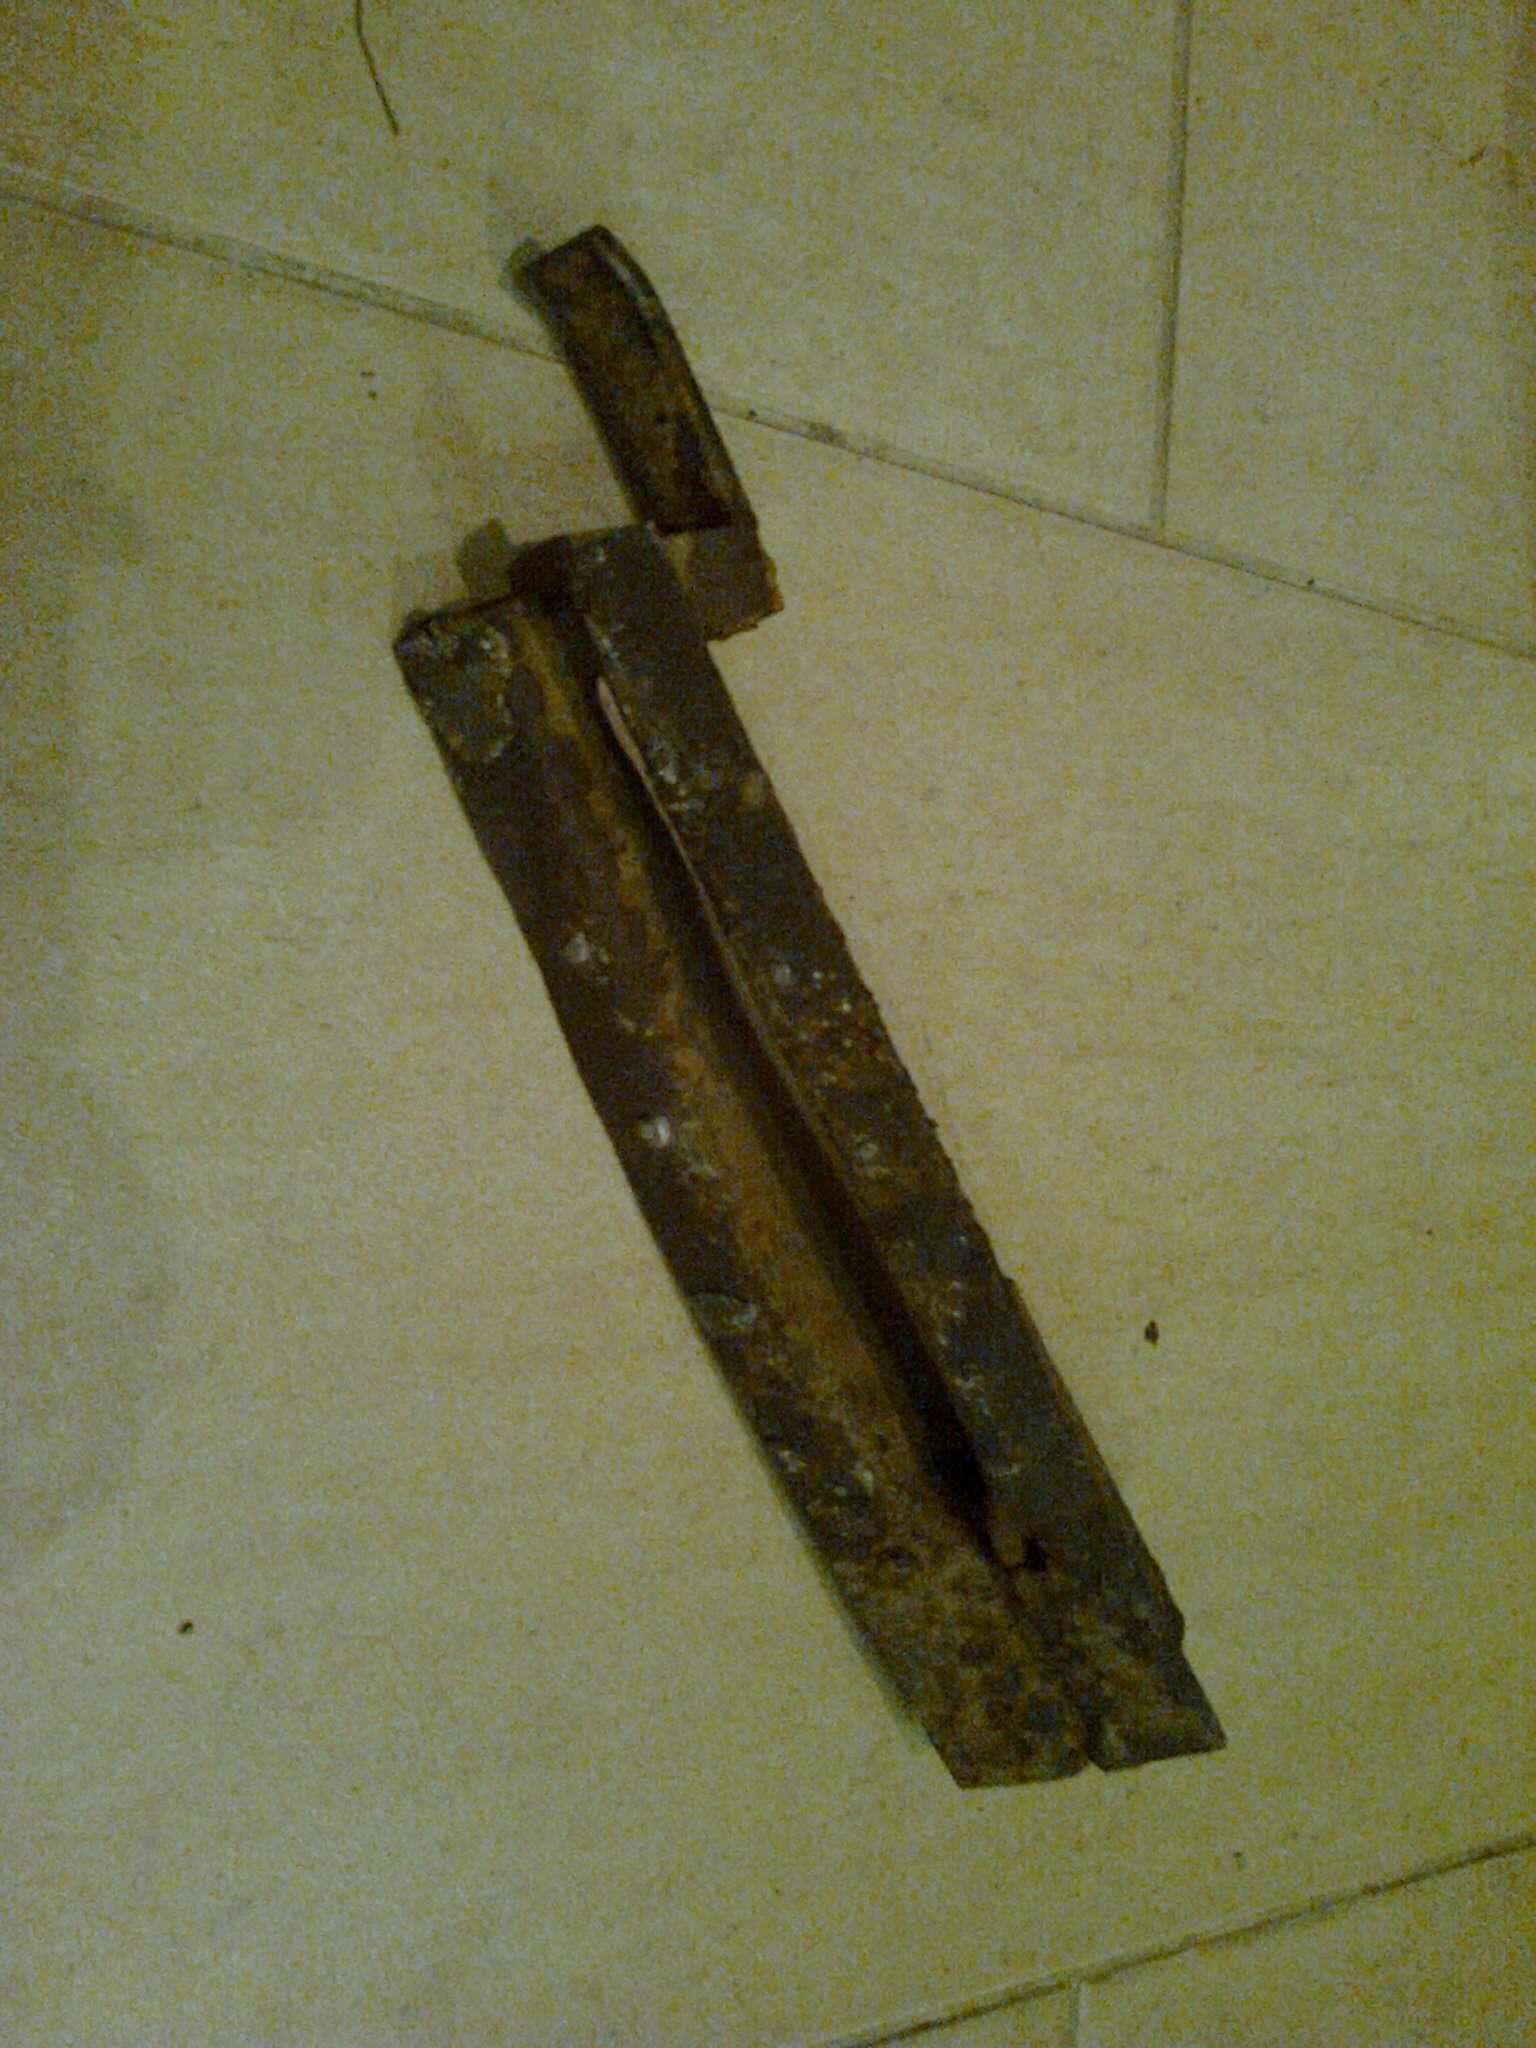
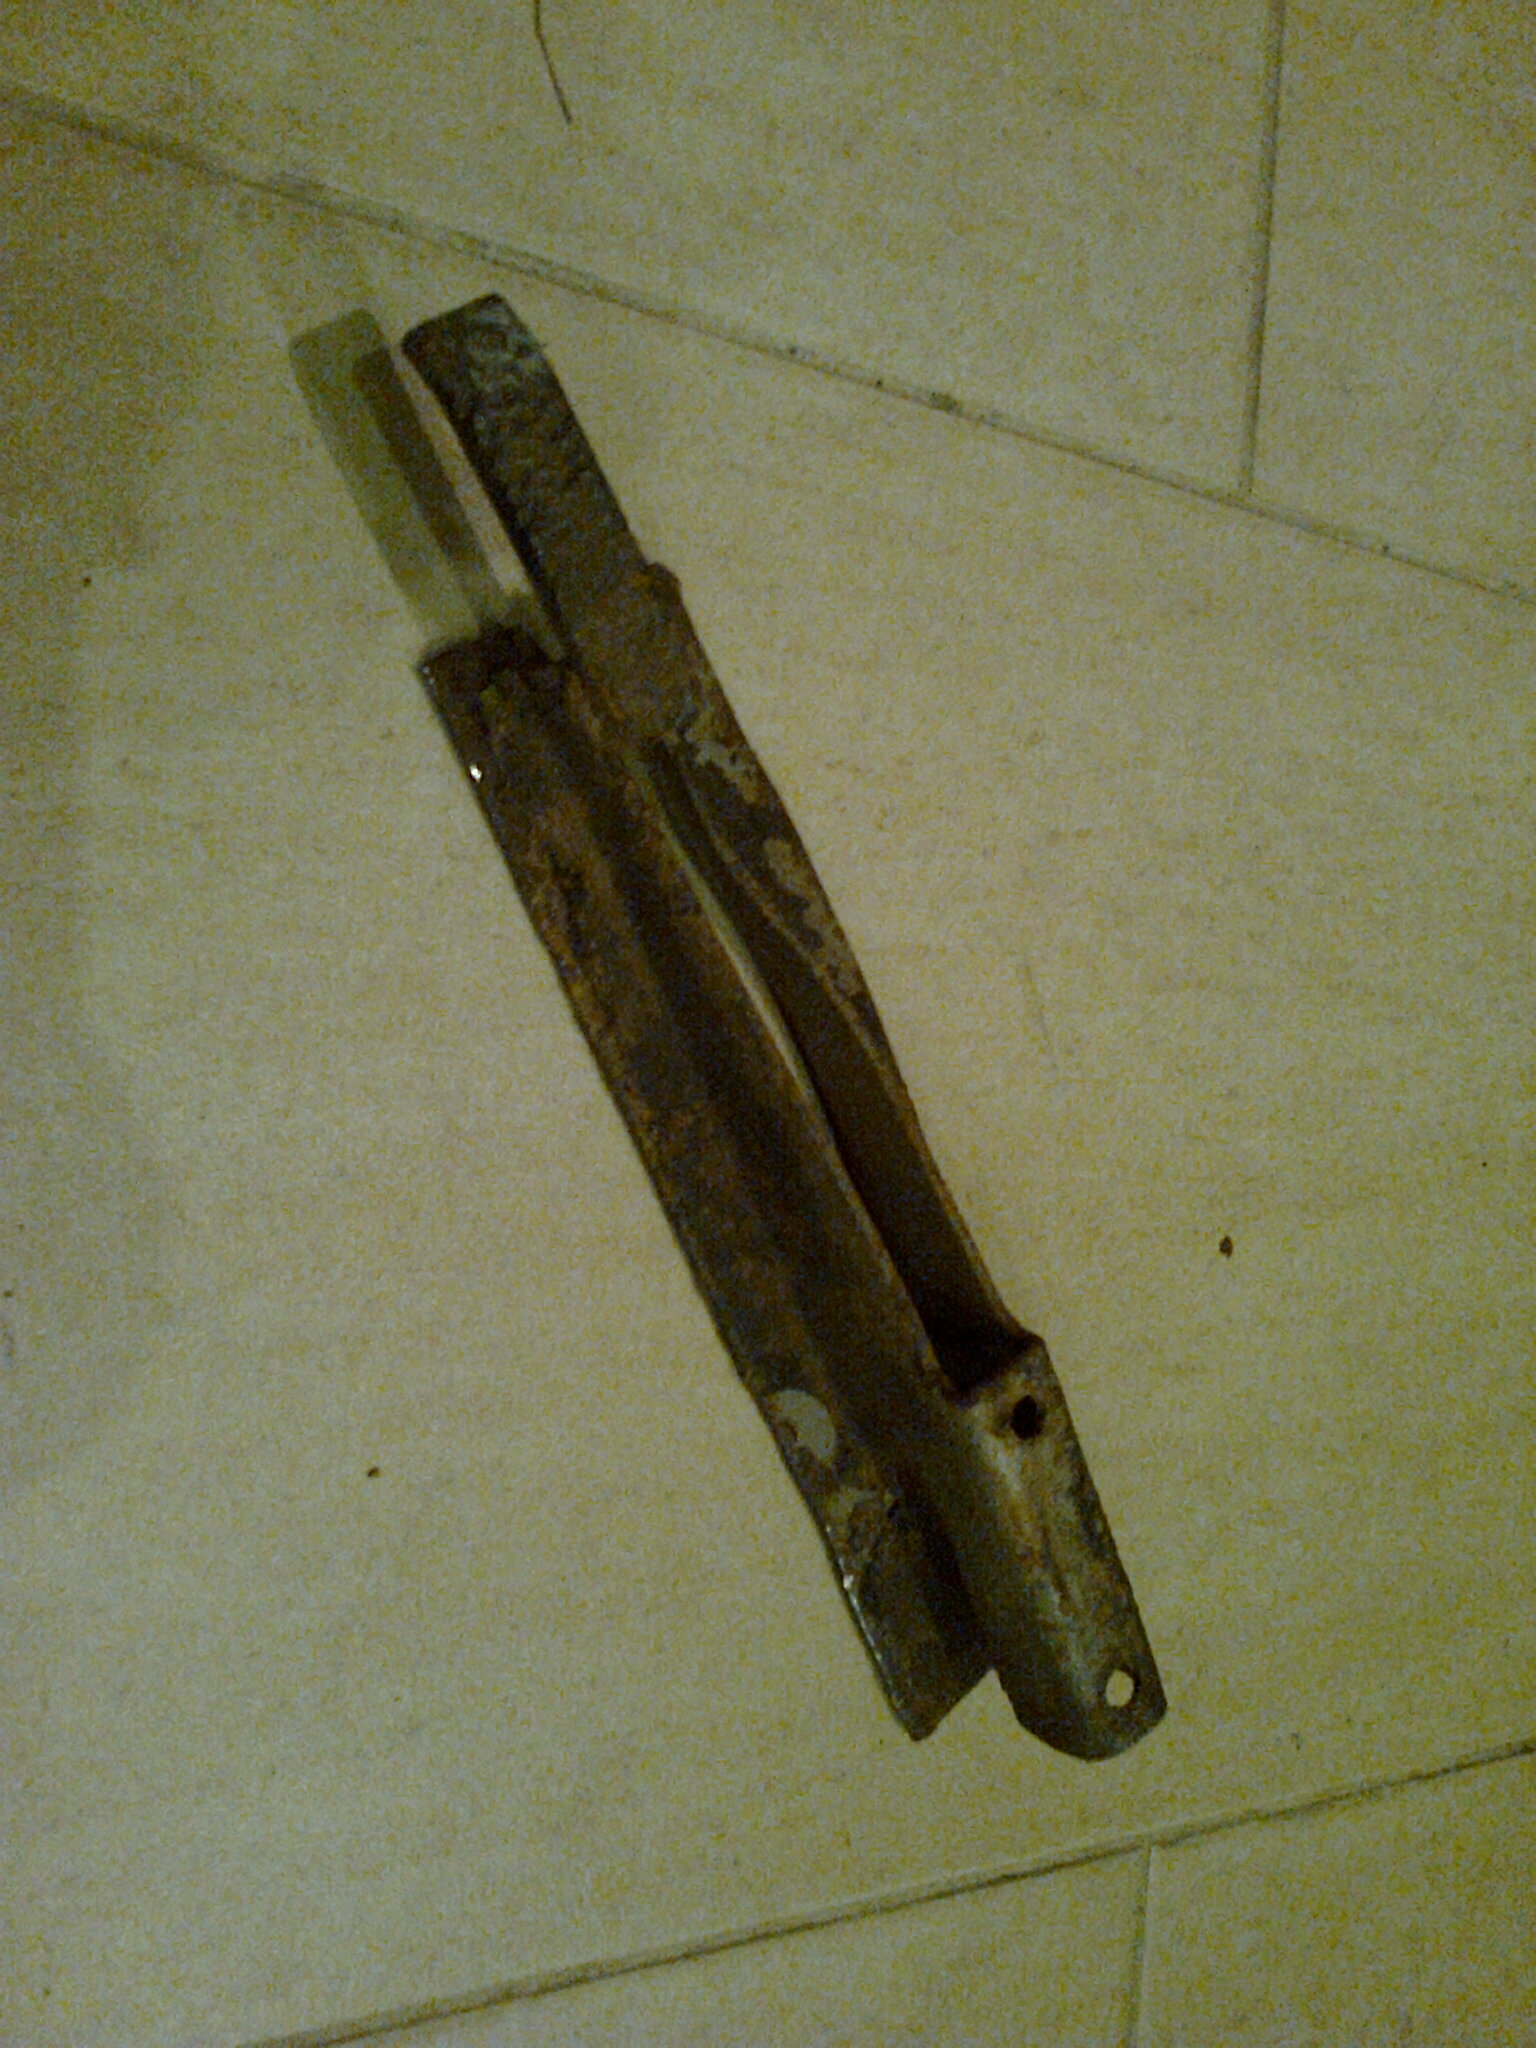
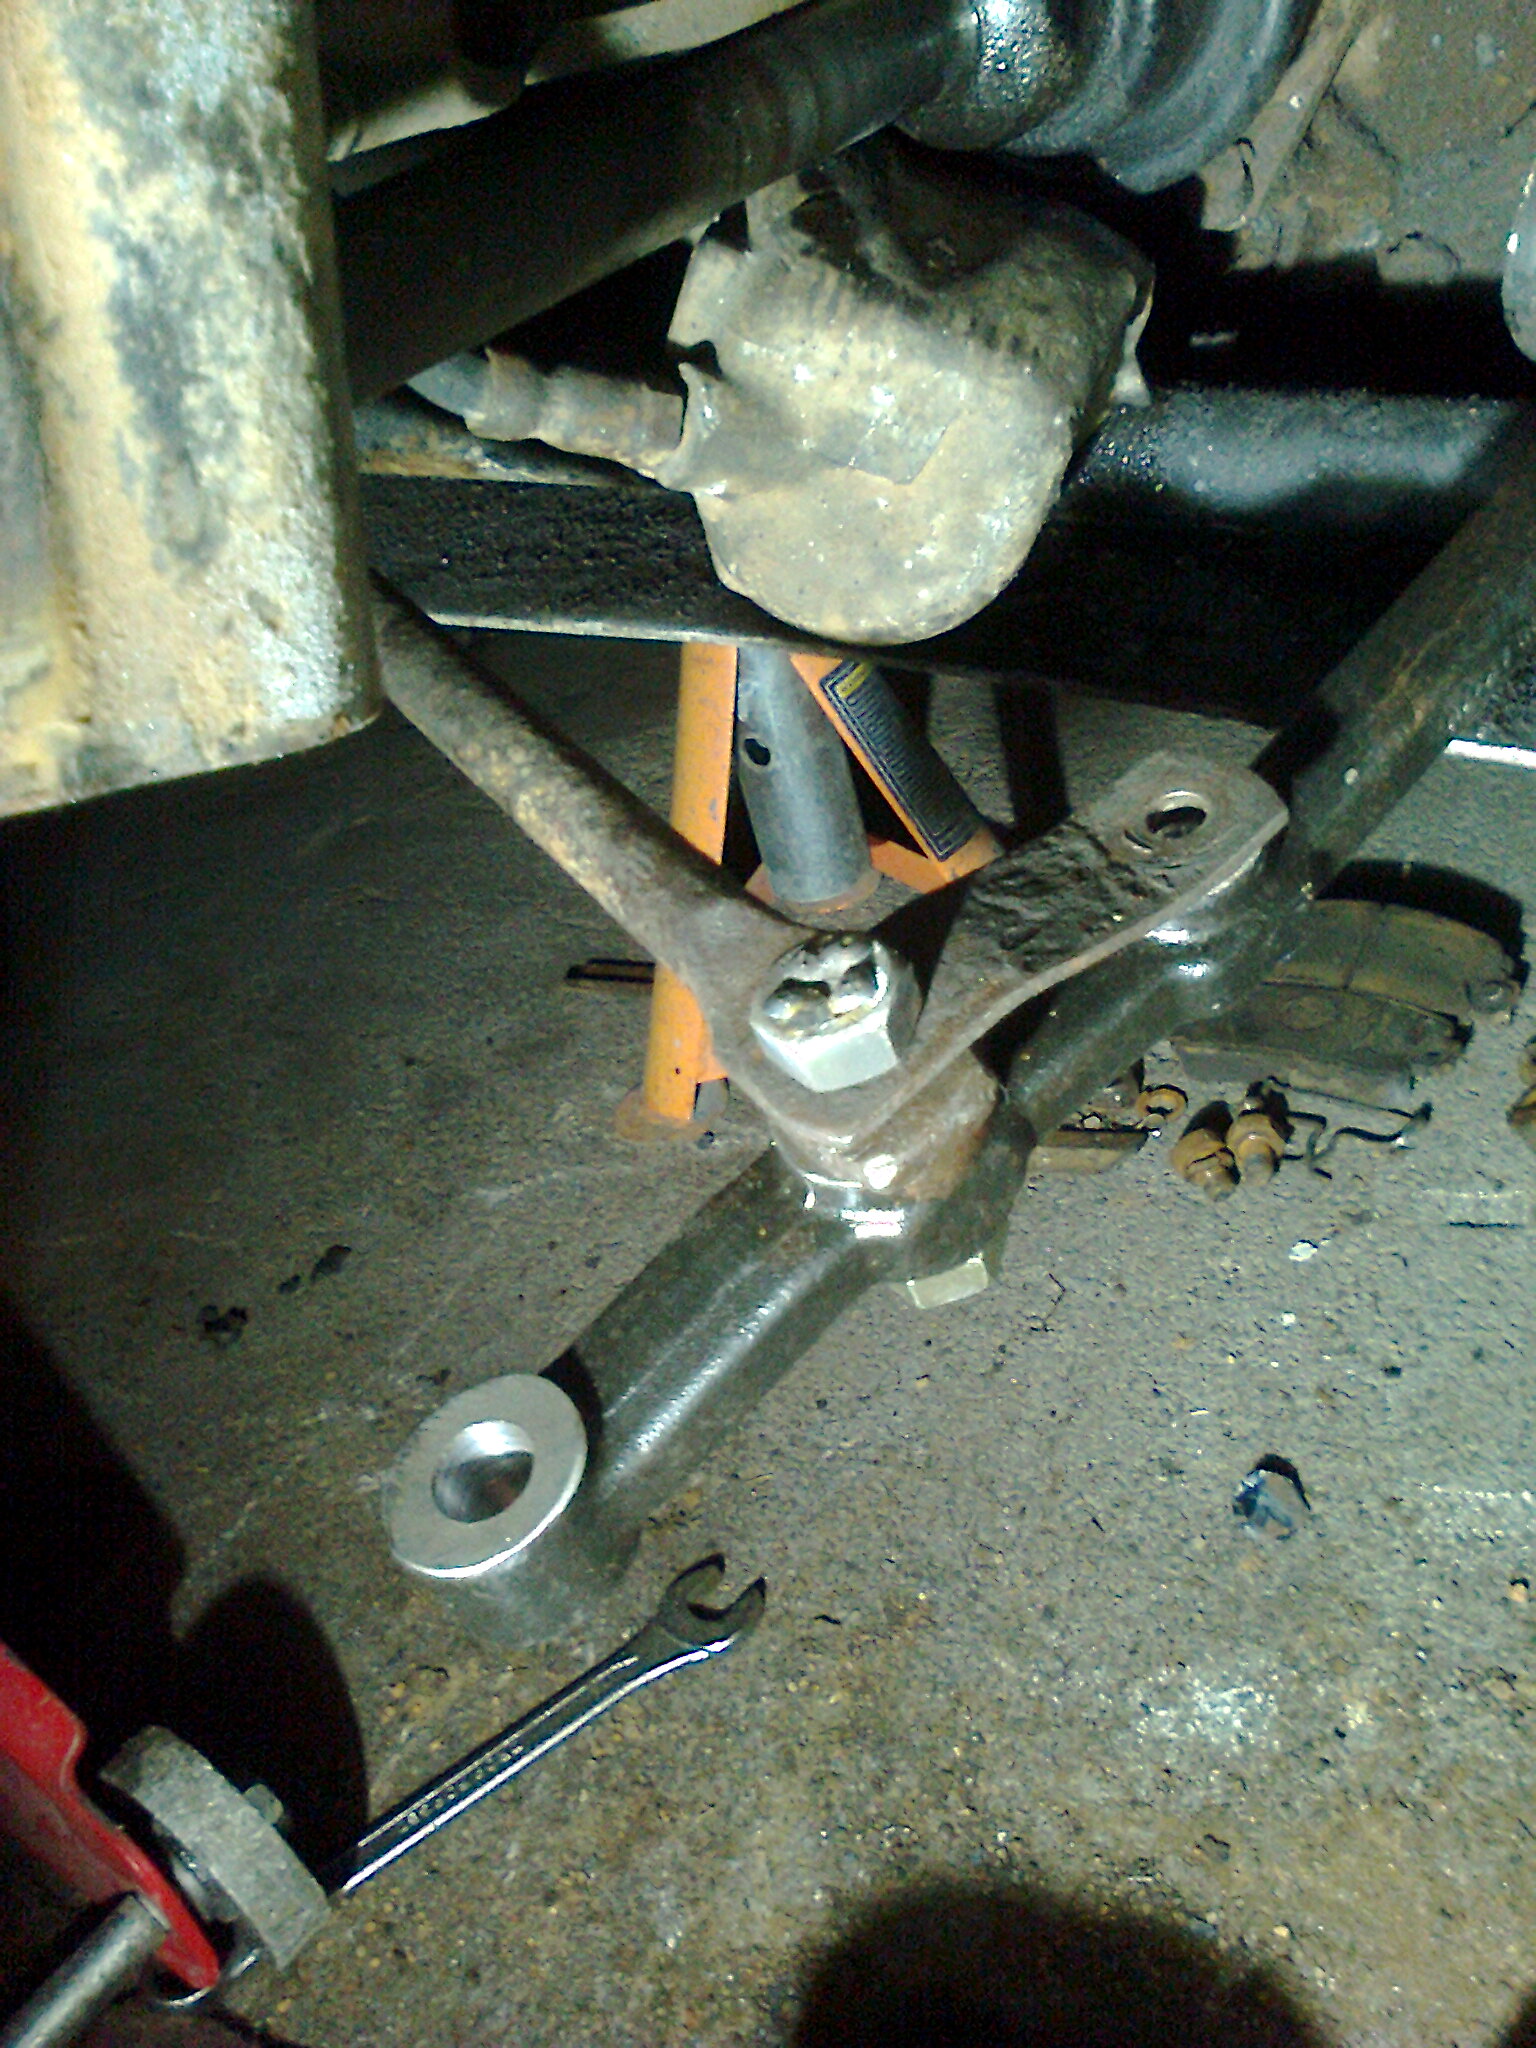
Next job was re-constructing the jacking point. This was so badly corroded I had to do lots of repairs to it before it could even go back onto the car...

Photo2654.jpg


Photo2653.jpg


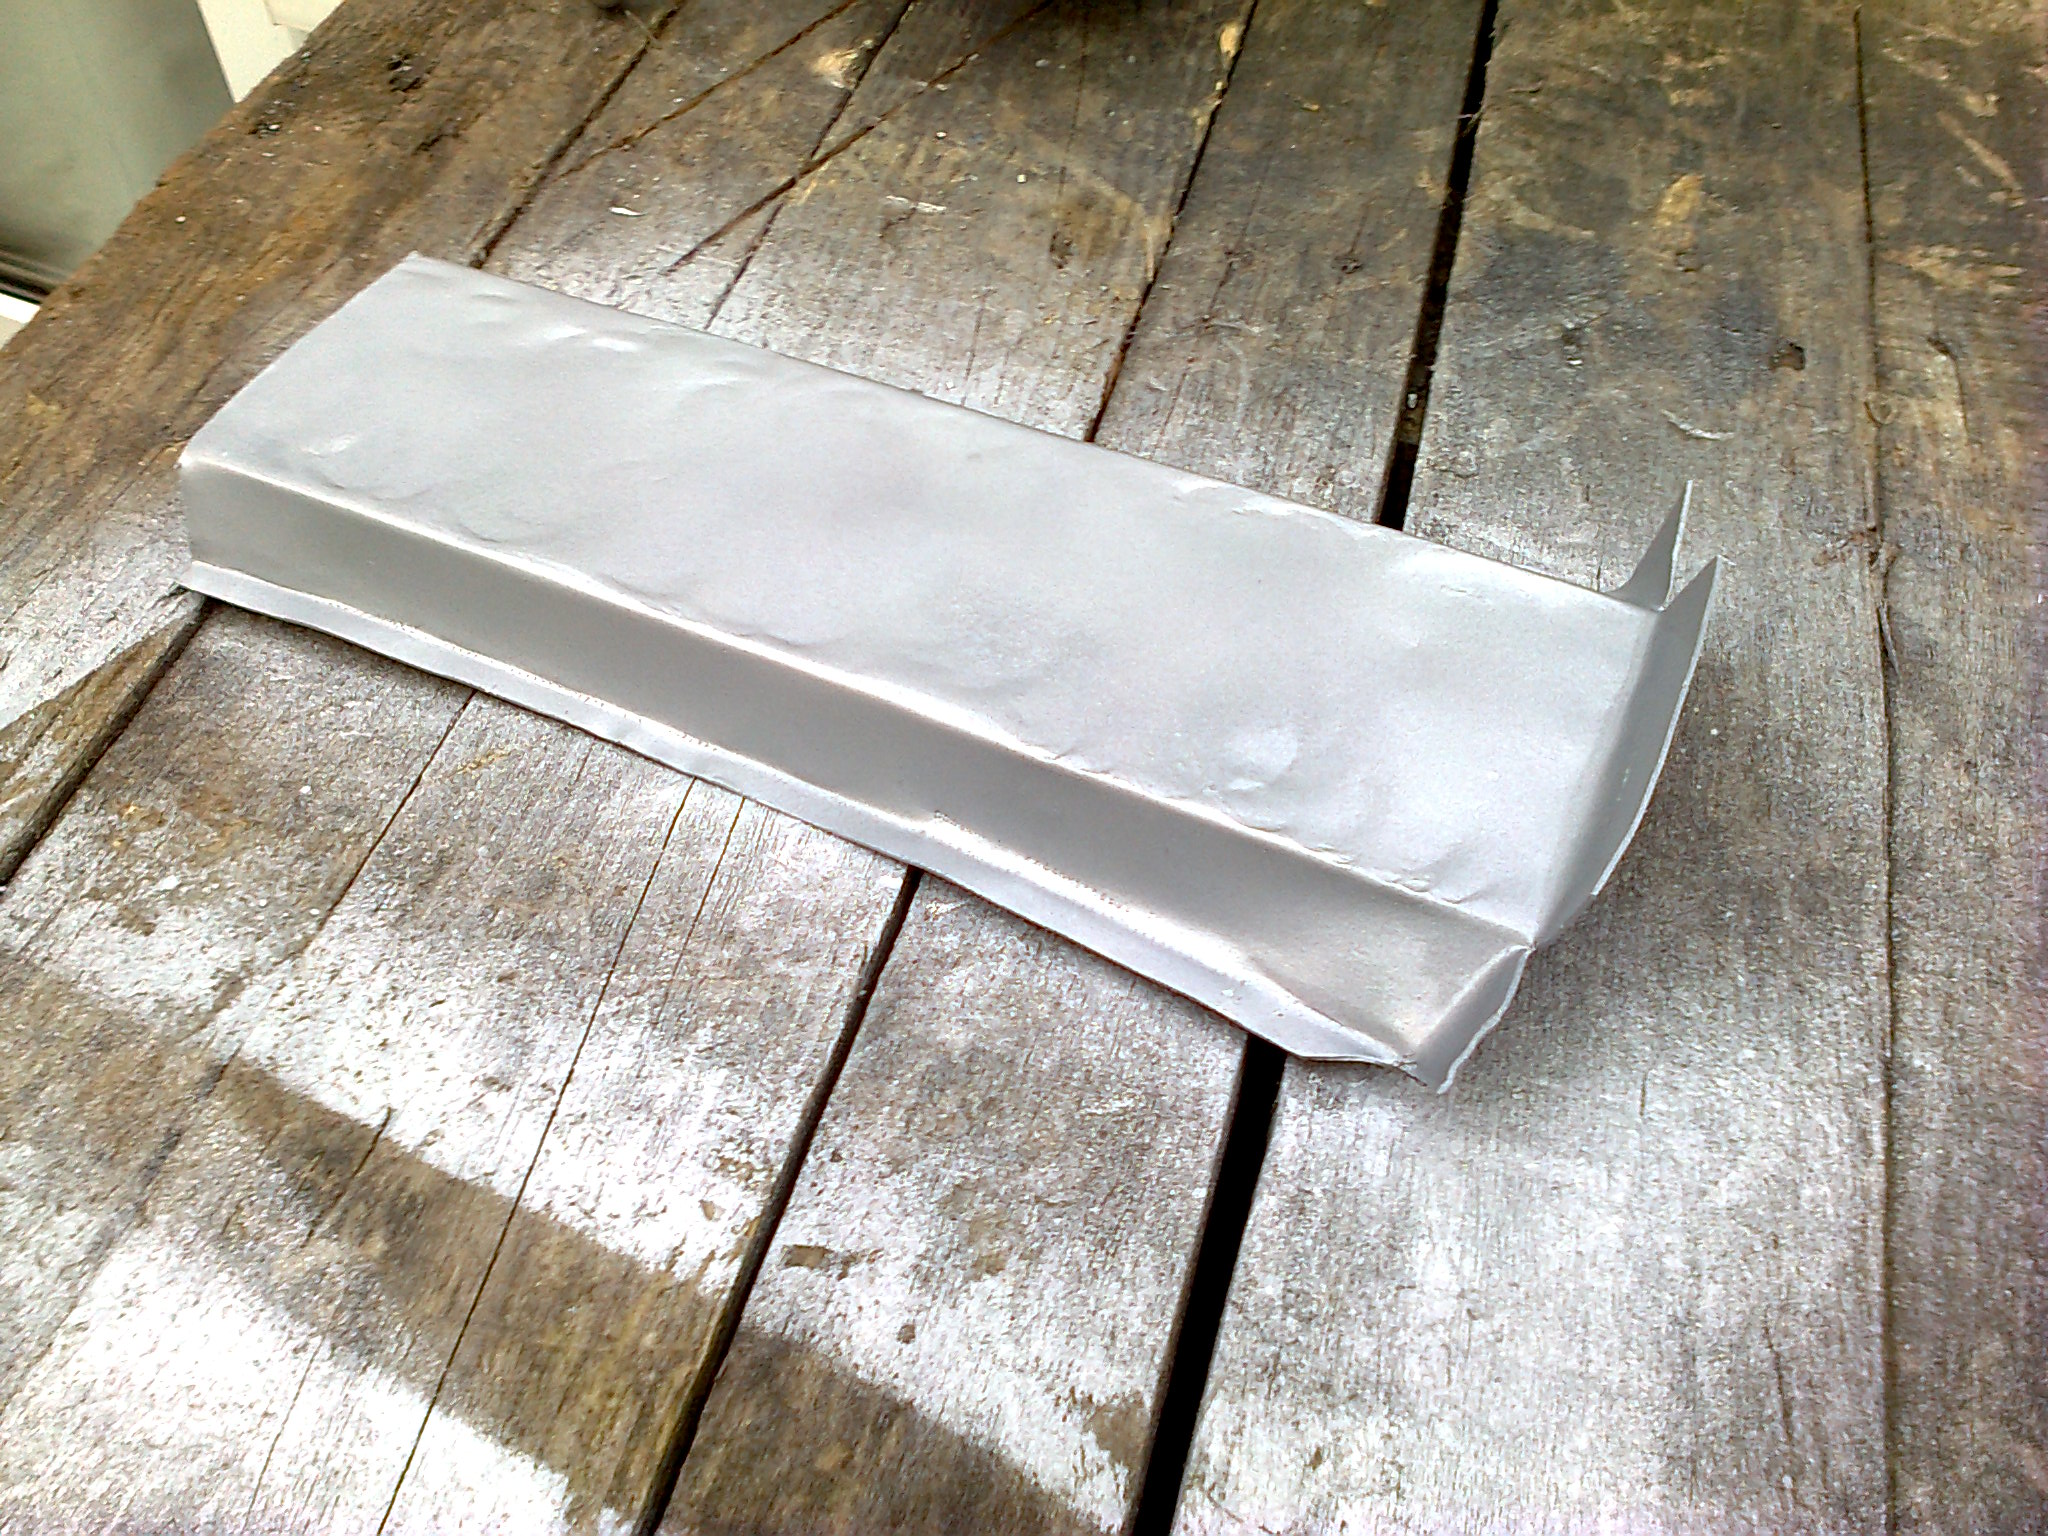
But before I could fix the jacking point to the car I had to rebuild the box section it sat on :eek: so fabricated this little jobby...:slayer:

Photo2655.jpg


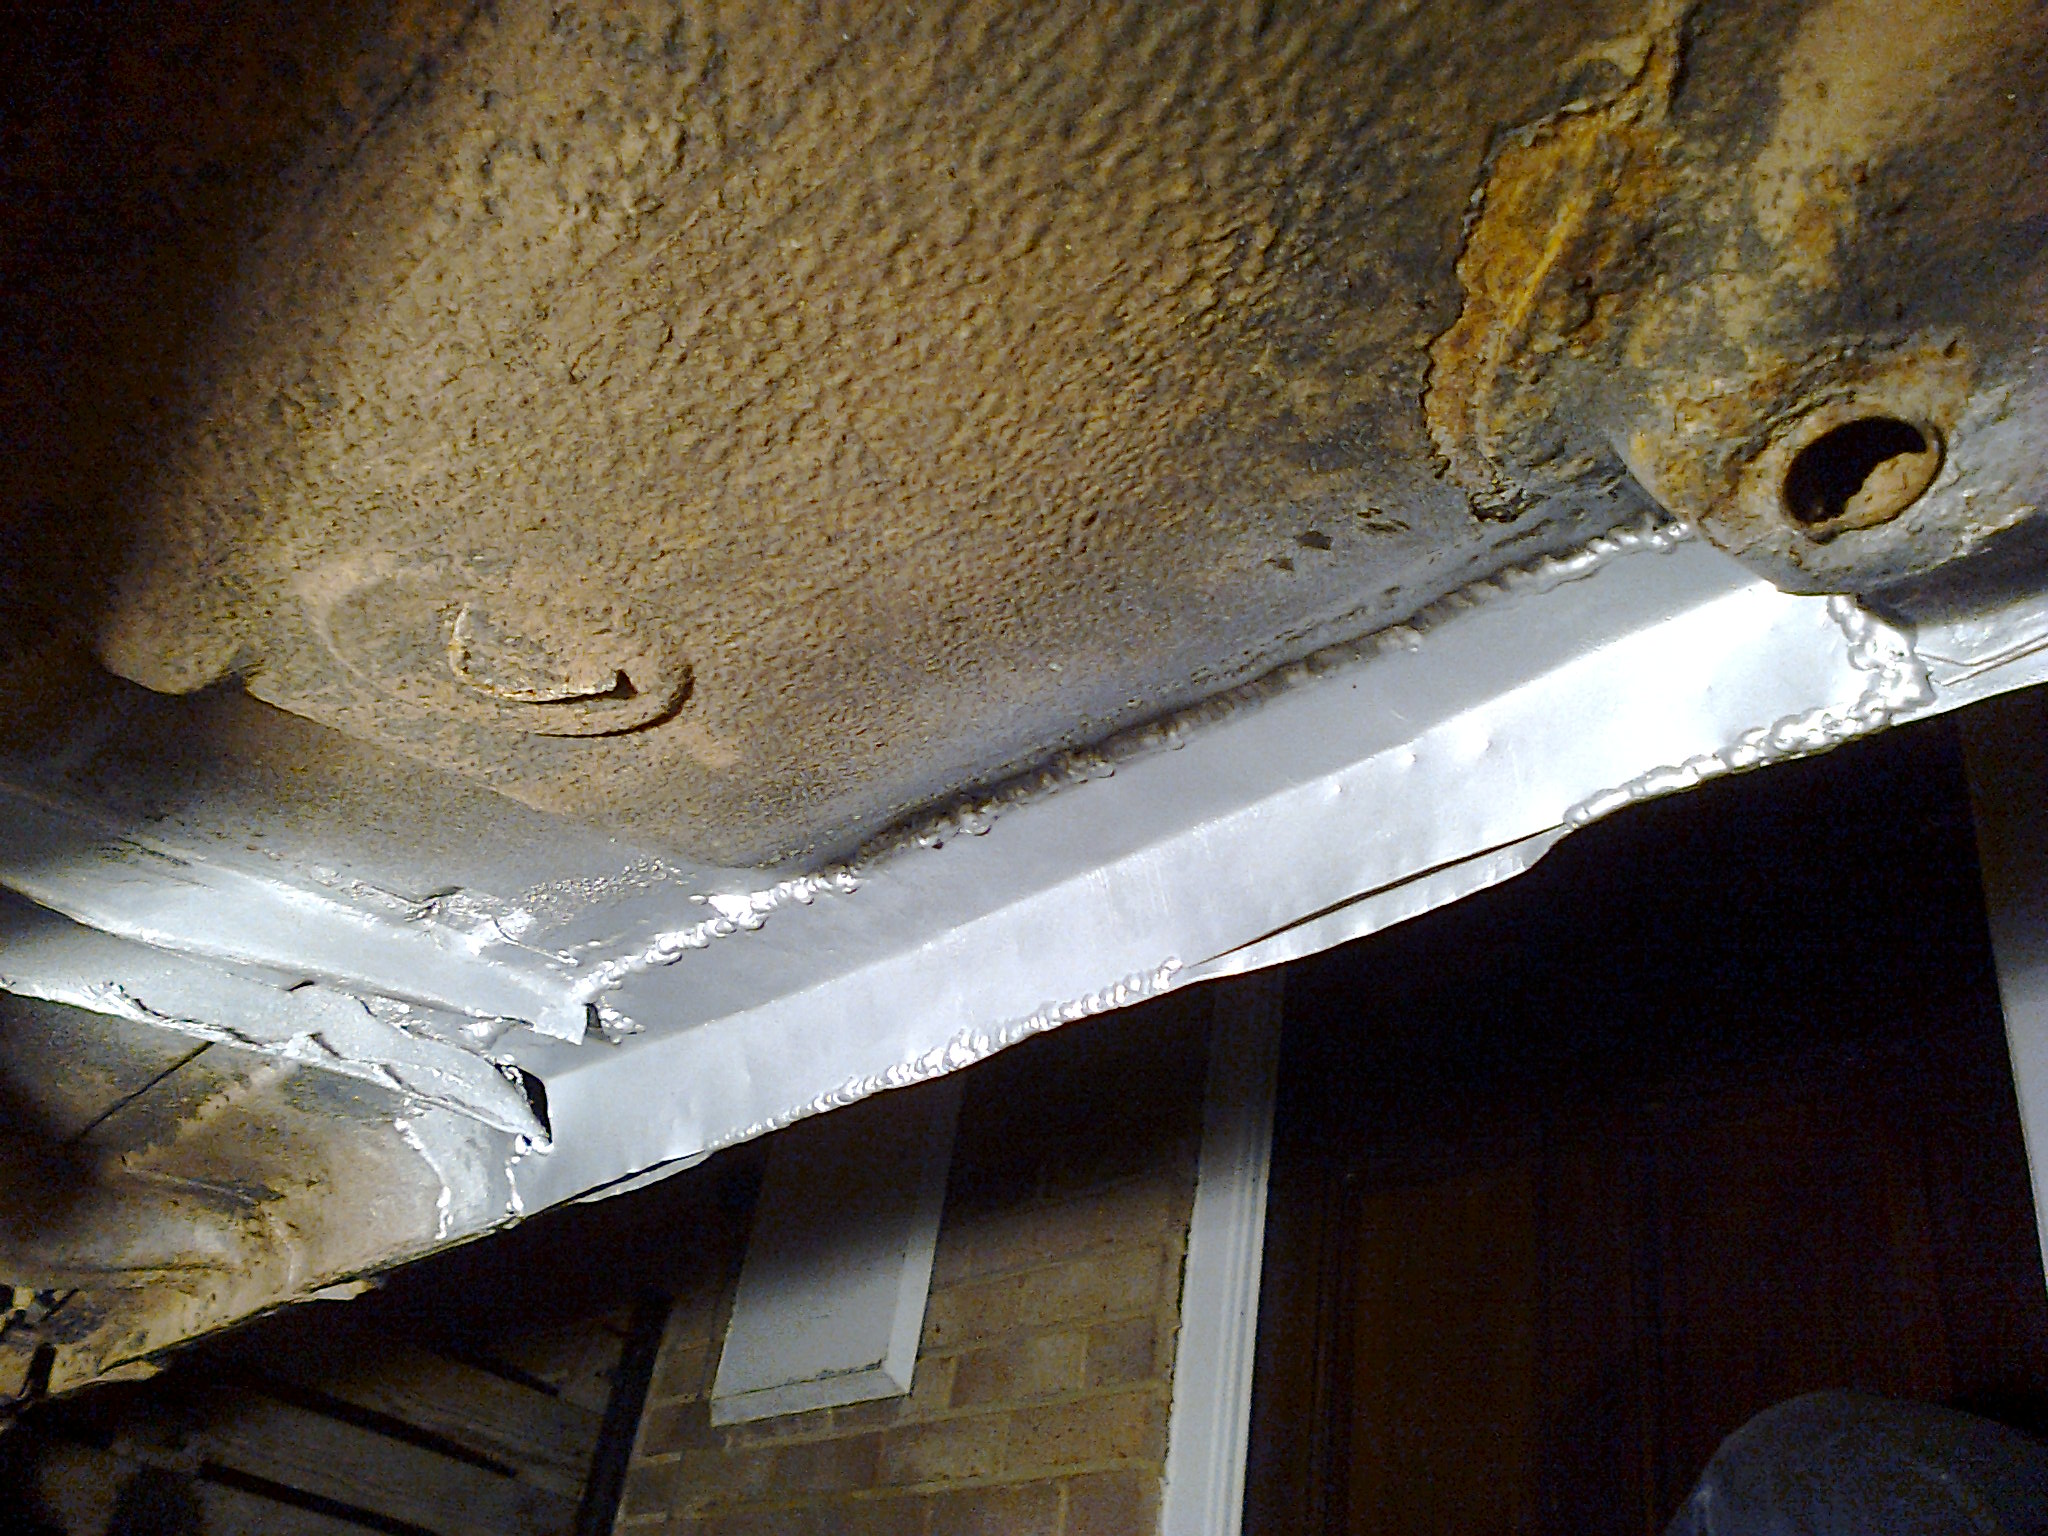
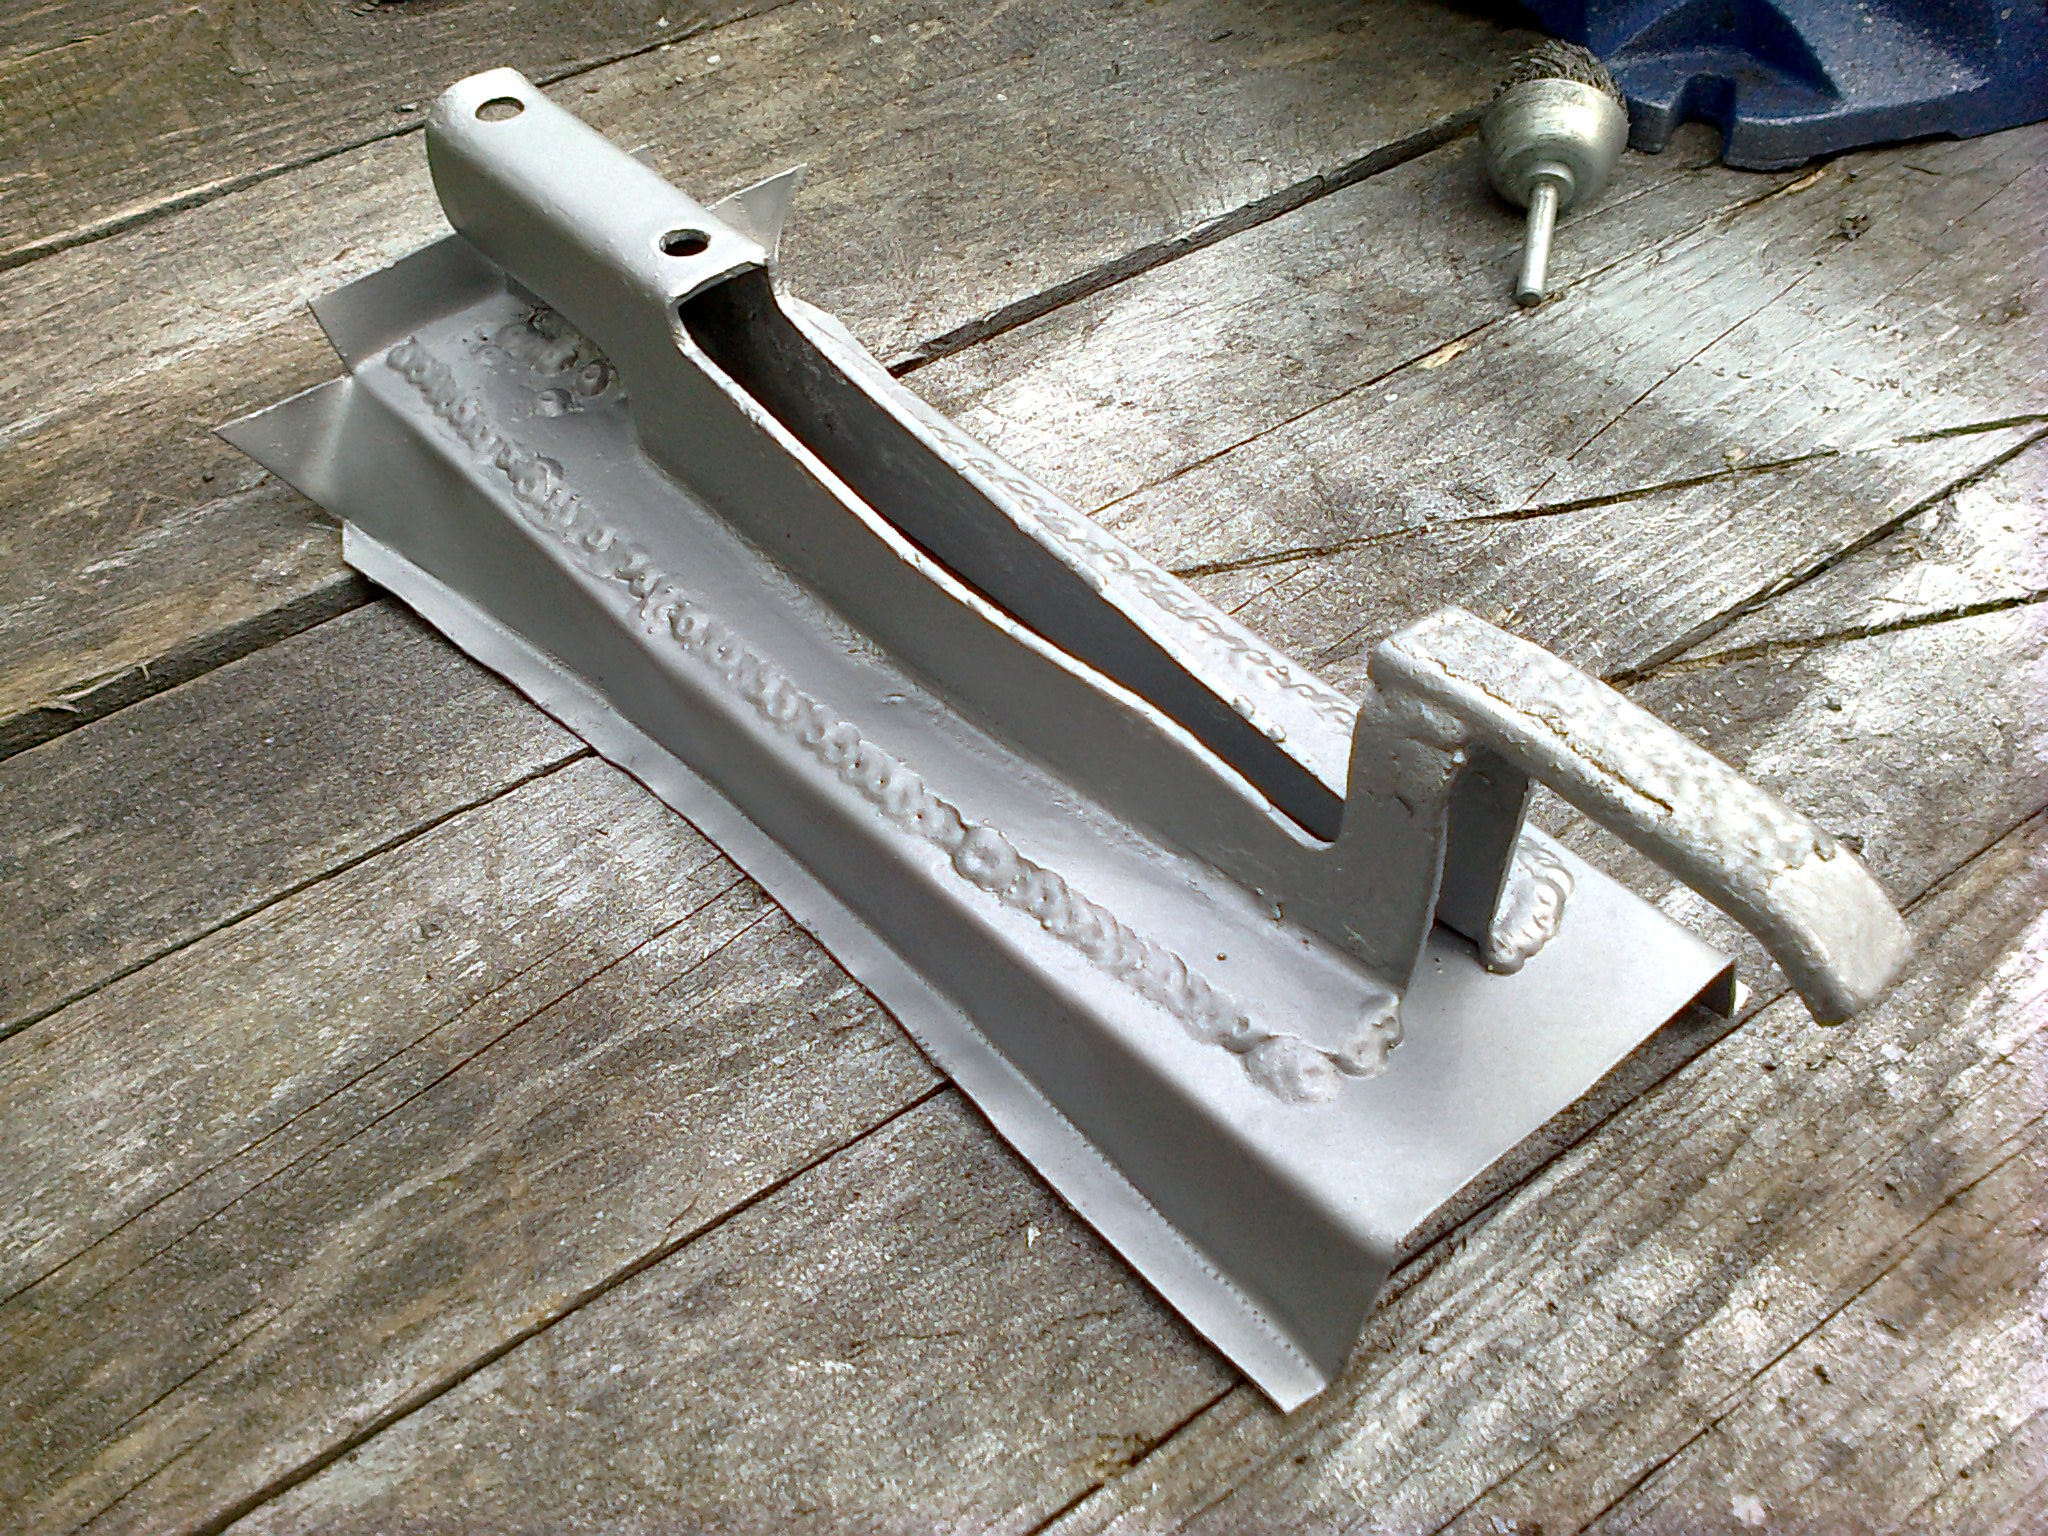
And then welded the jacking point to it before going on the car so I could respray the welds from the other side with zinc paint and primer :)

Photo2657.jpg


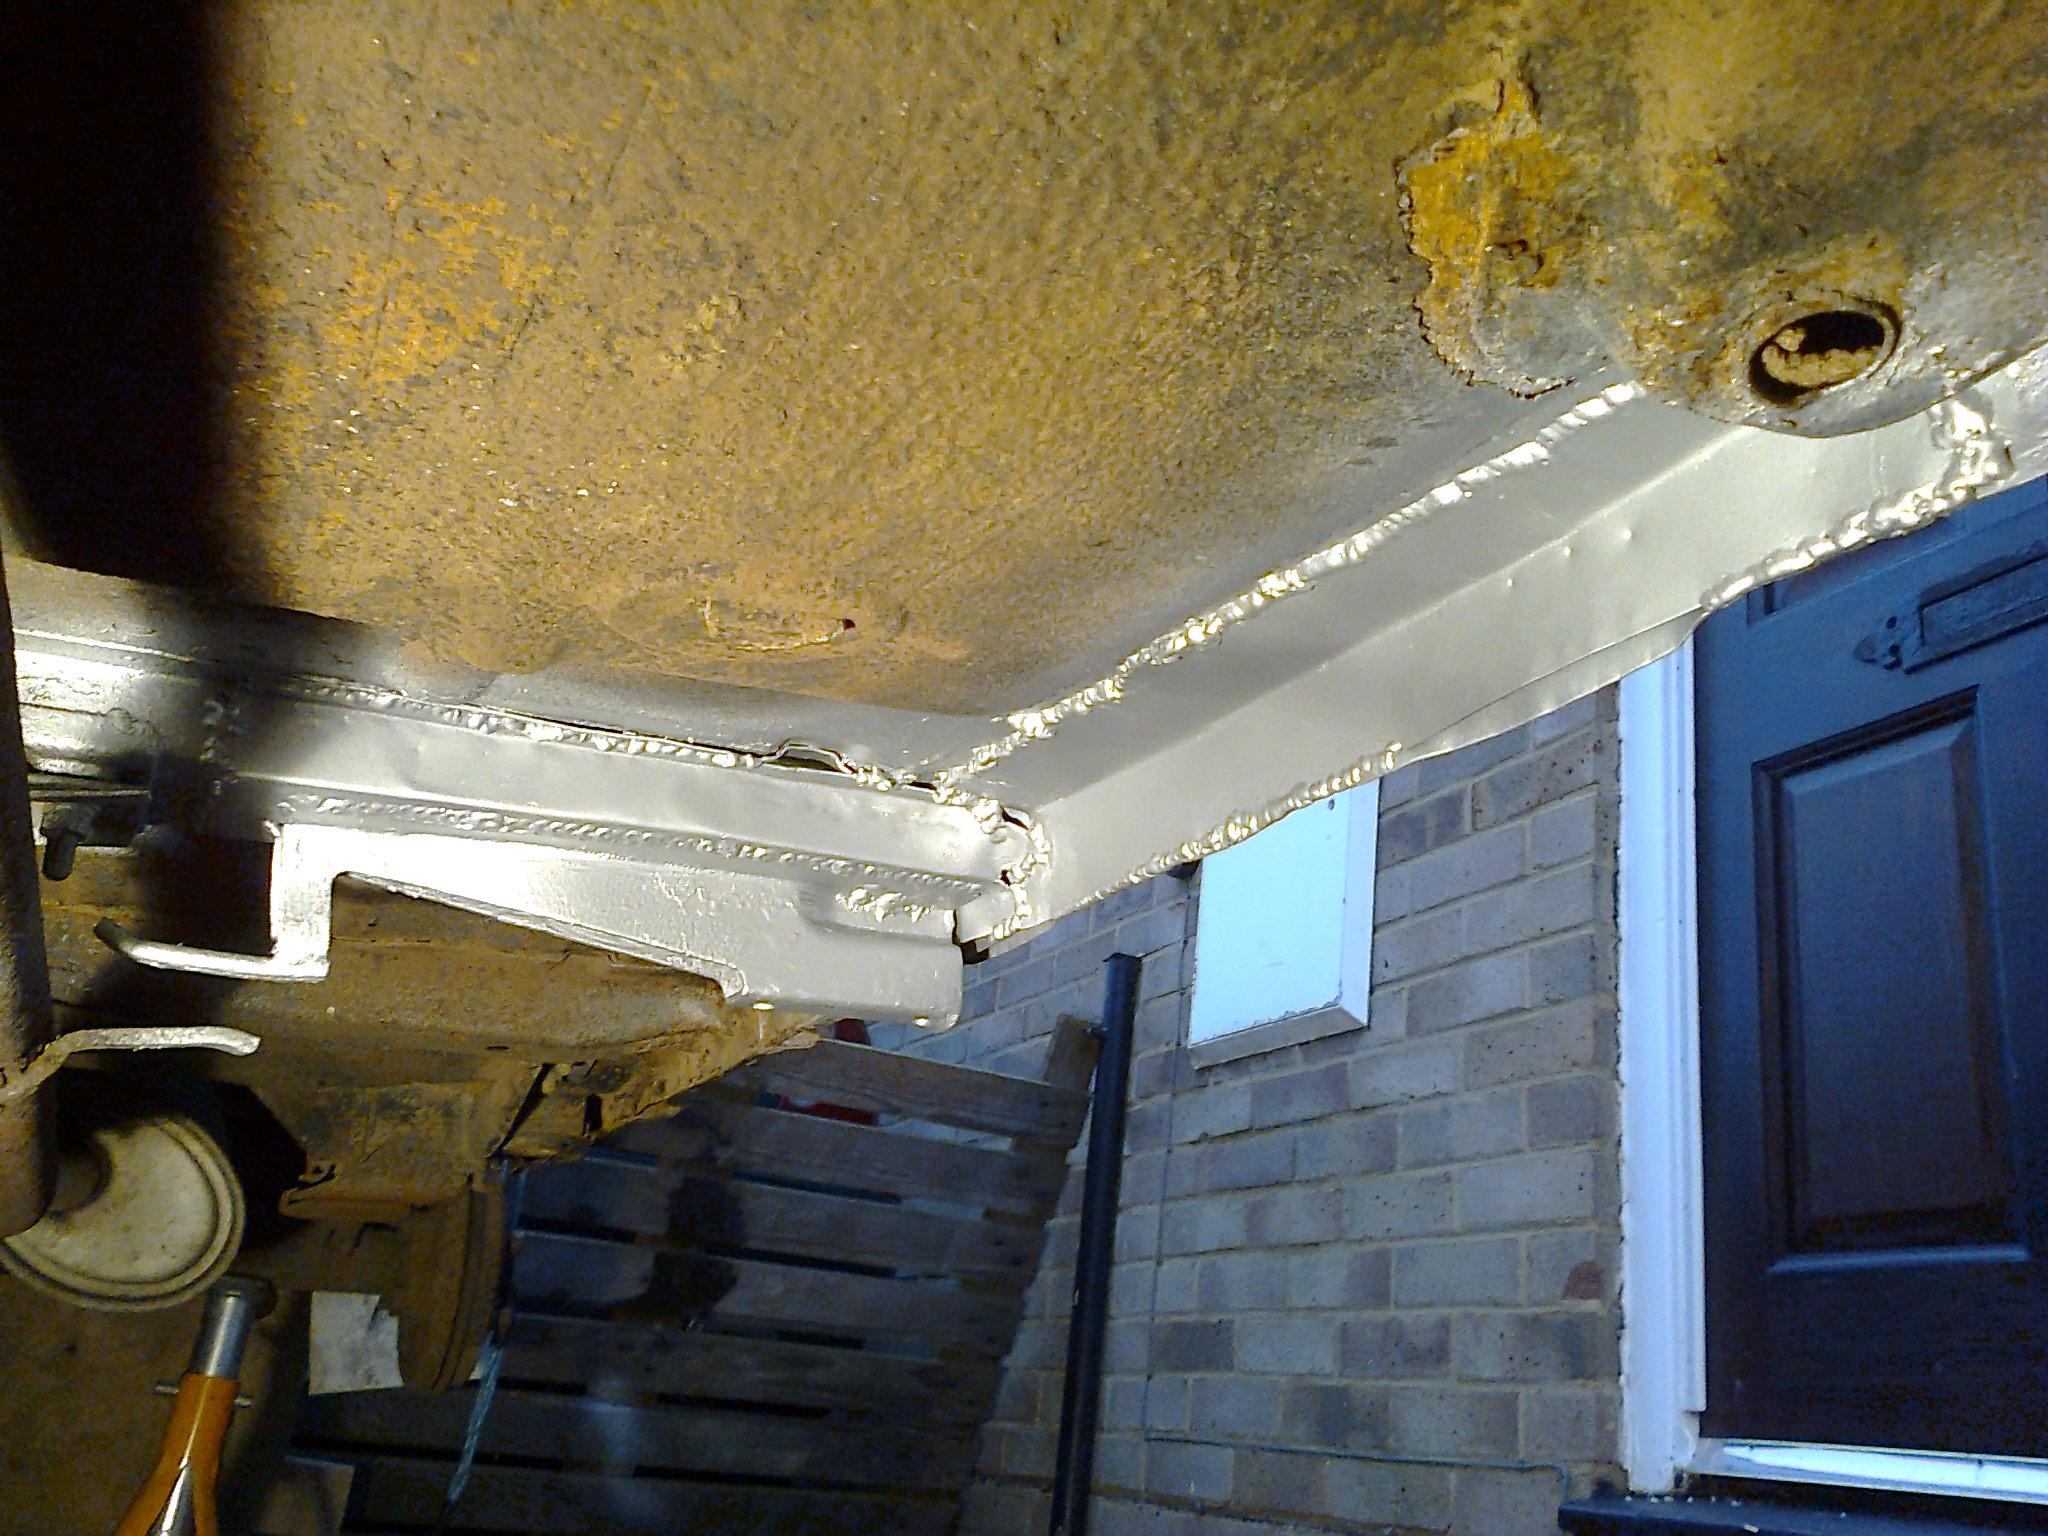
And attached to the car once more...hopefully strong enough to jack up on...too nervous to try...made it from thicker metal than Fiat did so should be fine really :eek:

Photo2660.jpg


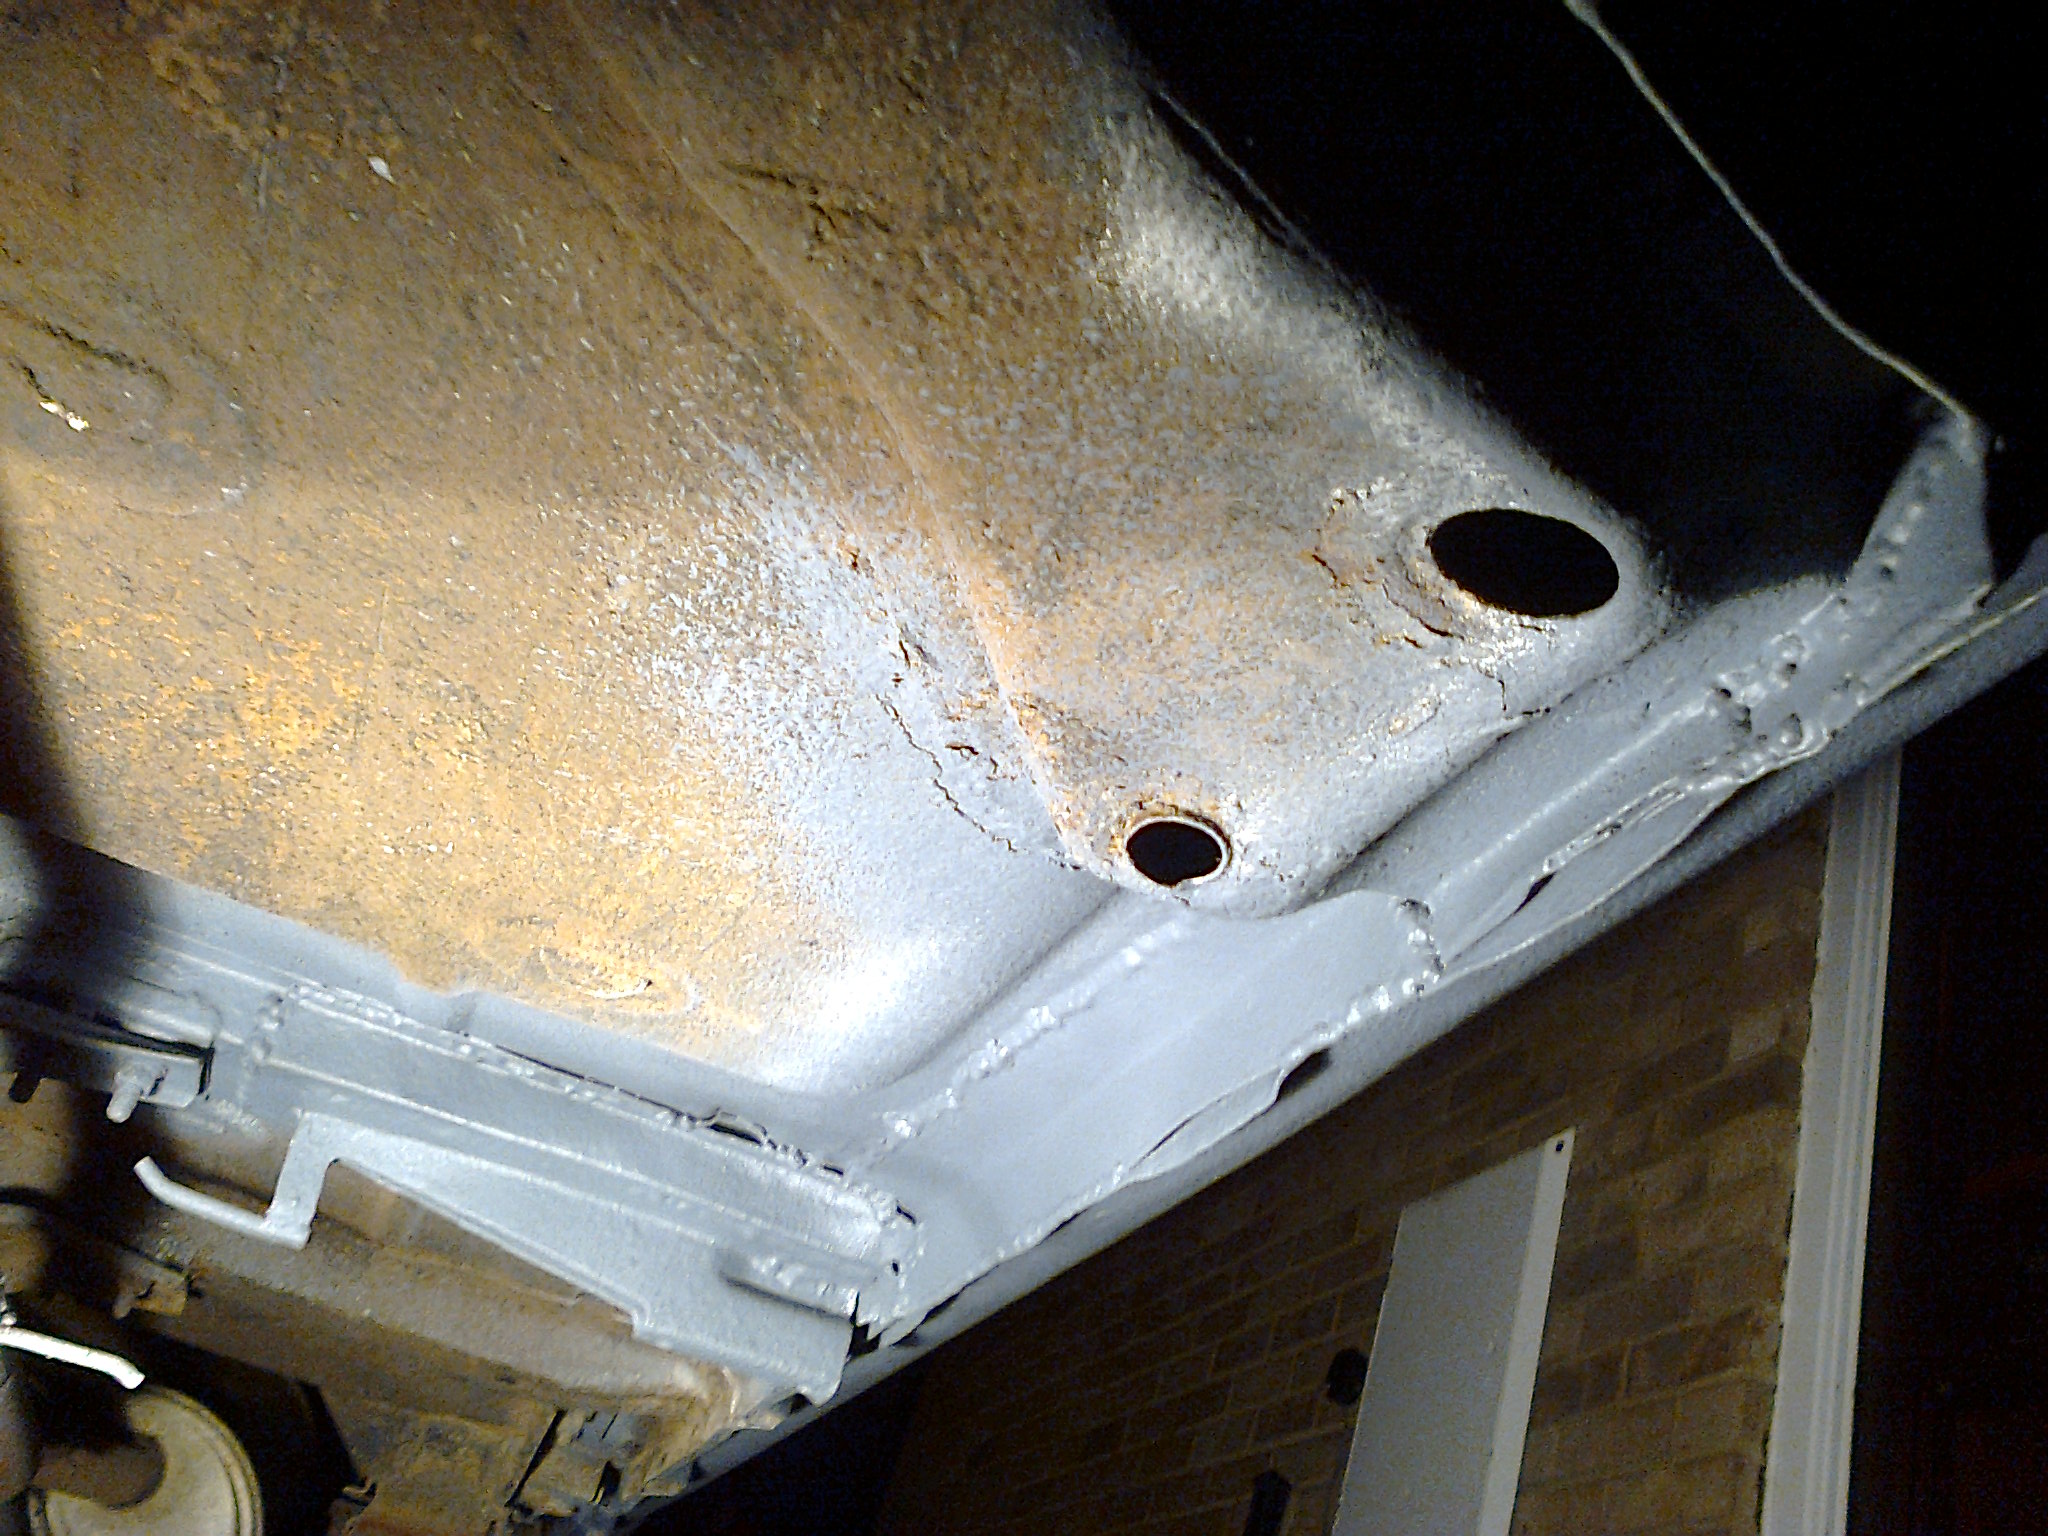
I wasn't able to reconstruct the original sill drain holes but I did add some and included one for the jacking point box section as well...I think they rot in there because water just gets trapped in there...hopefully not a problem now!

Photo2663.jpg


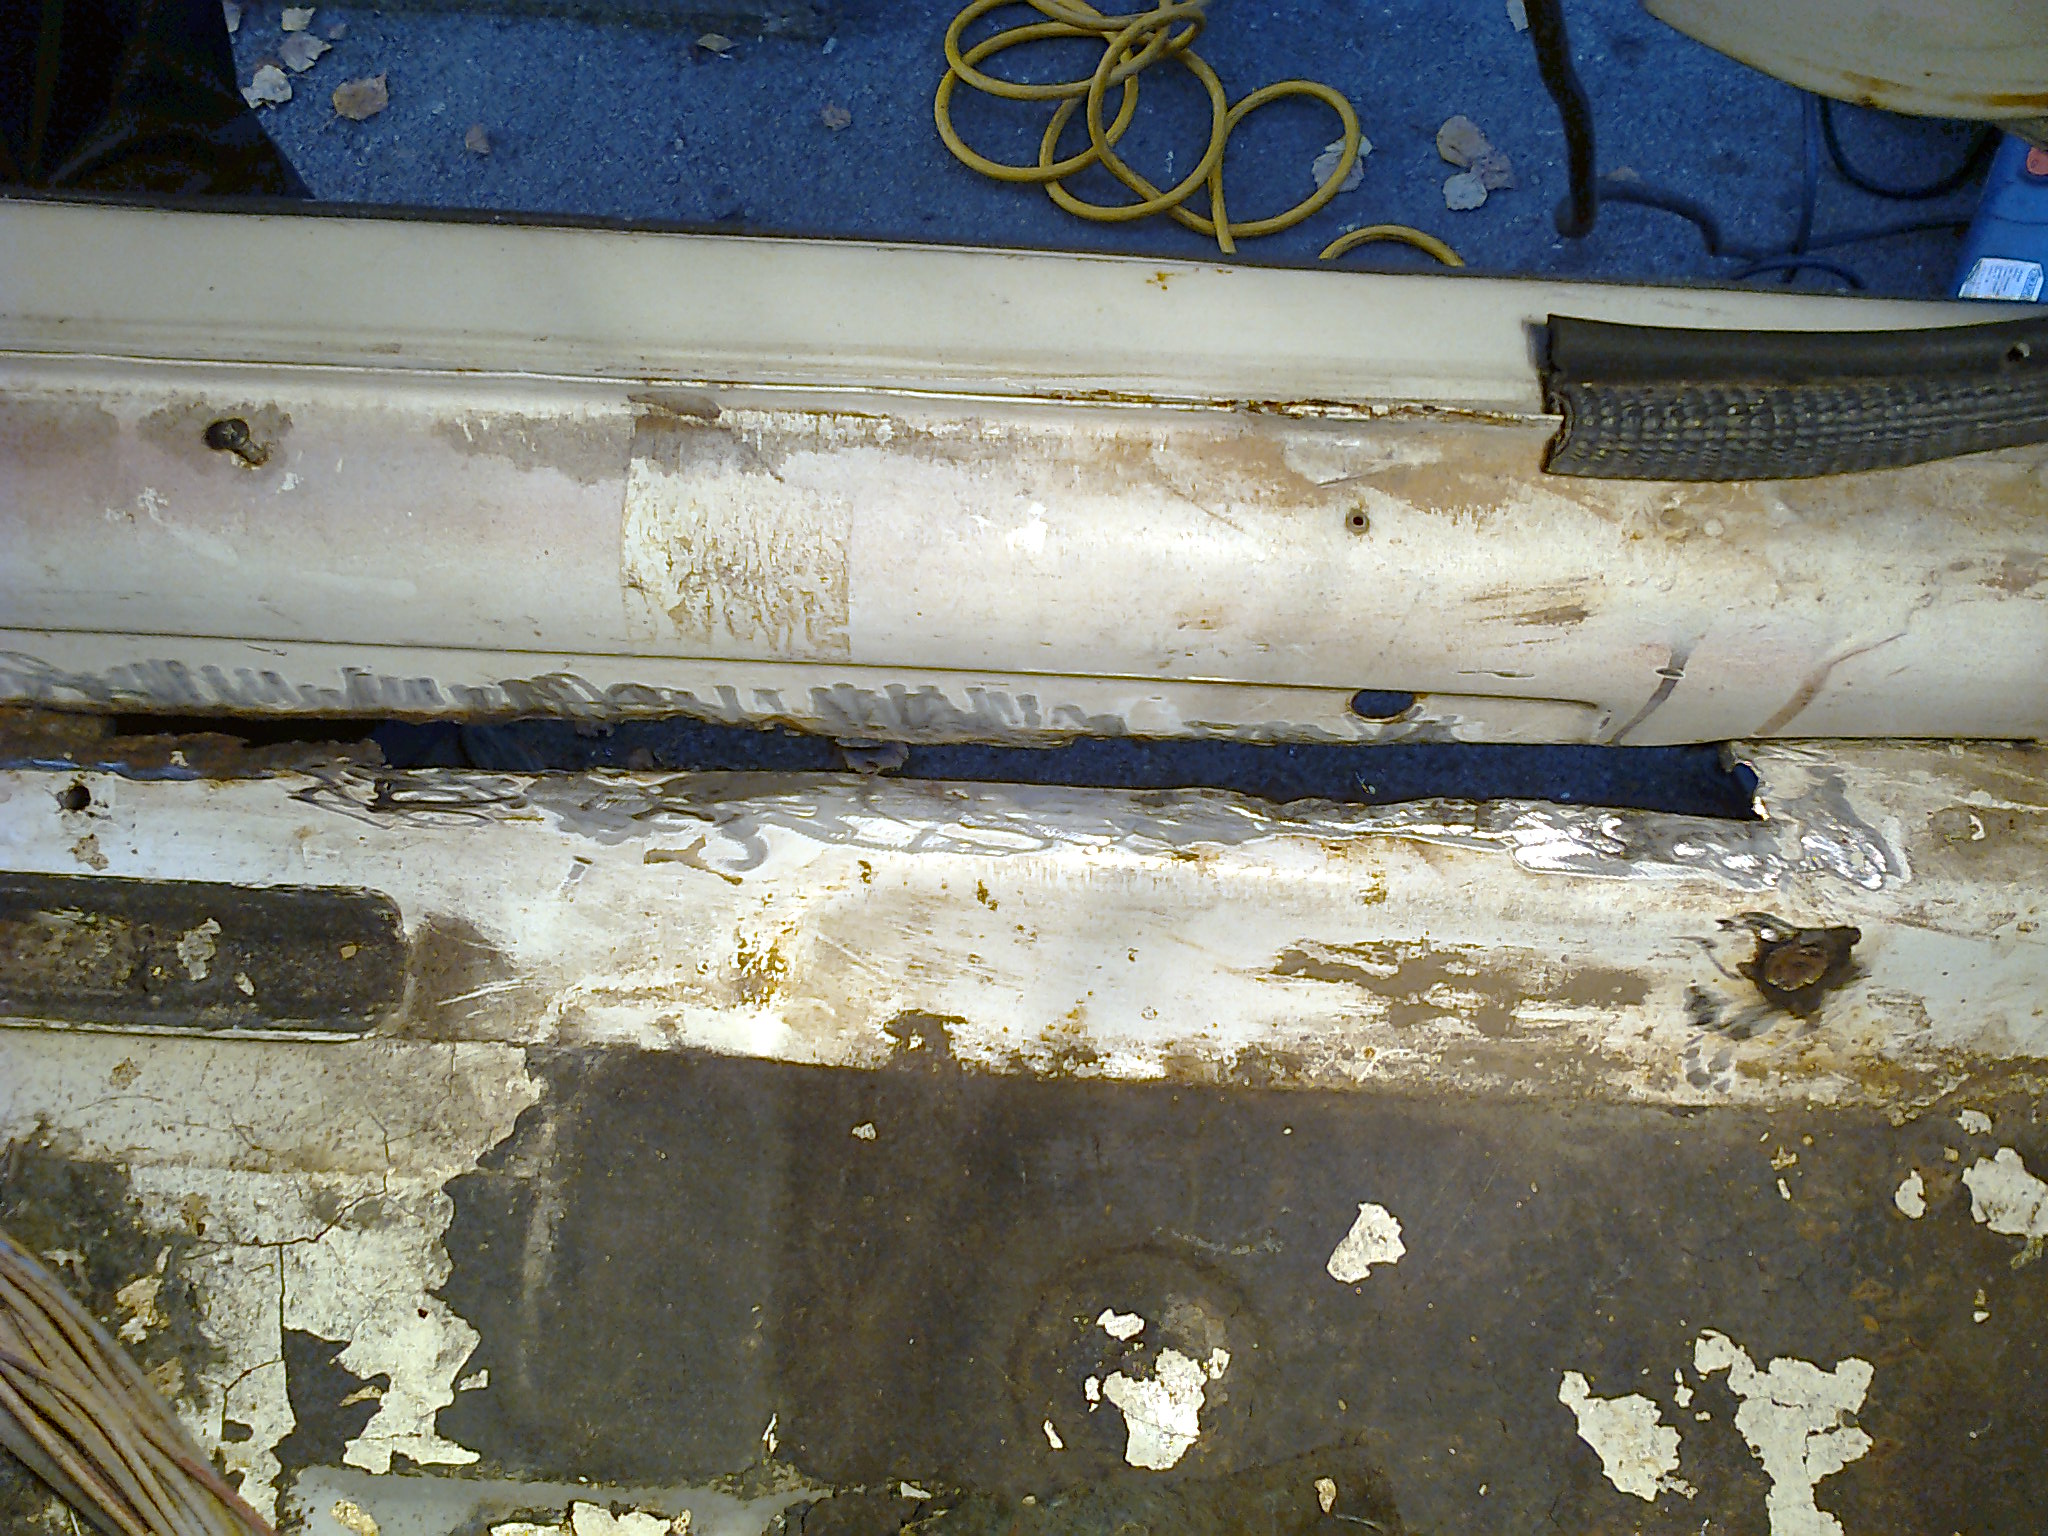
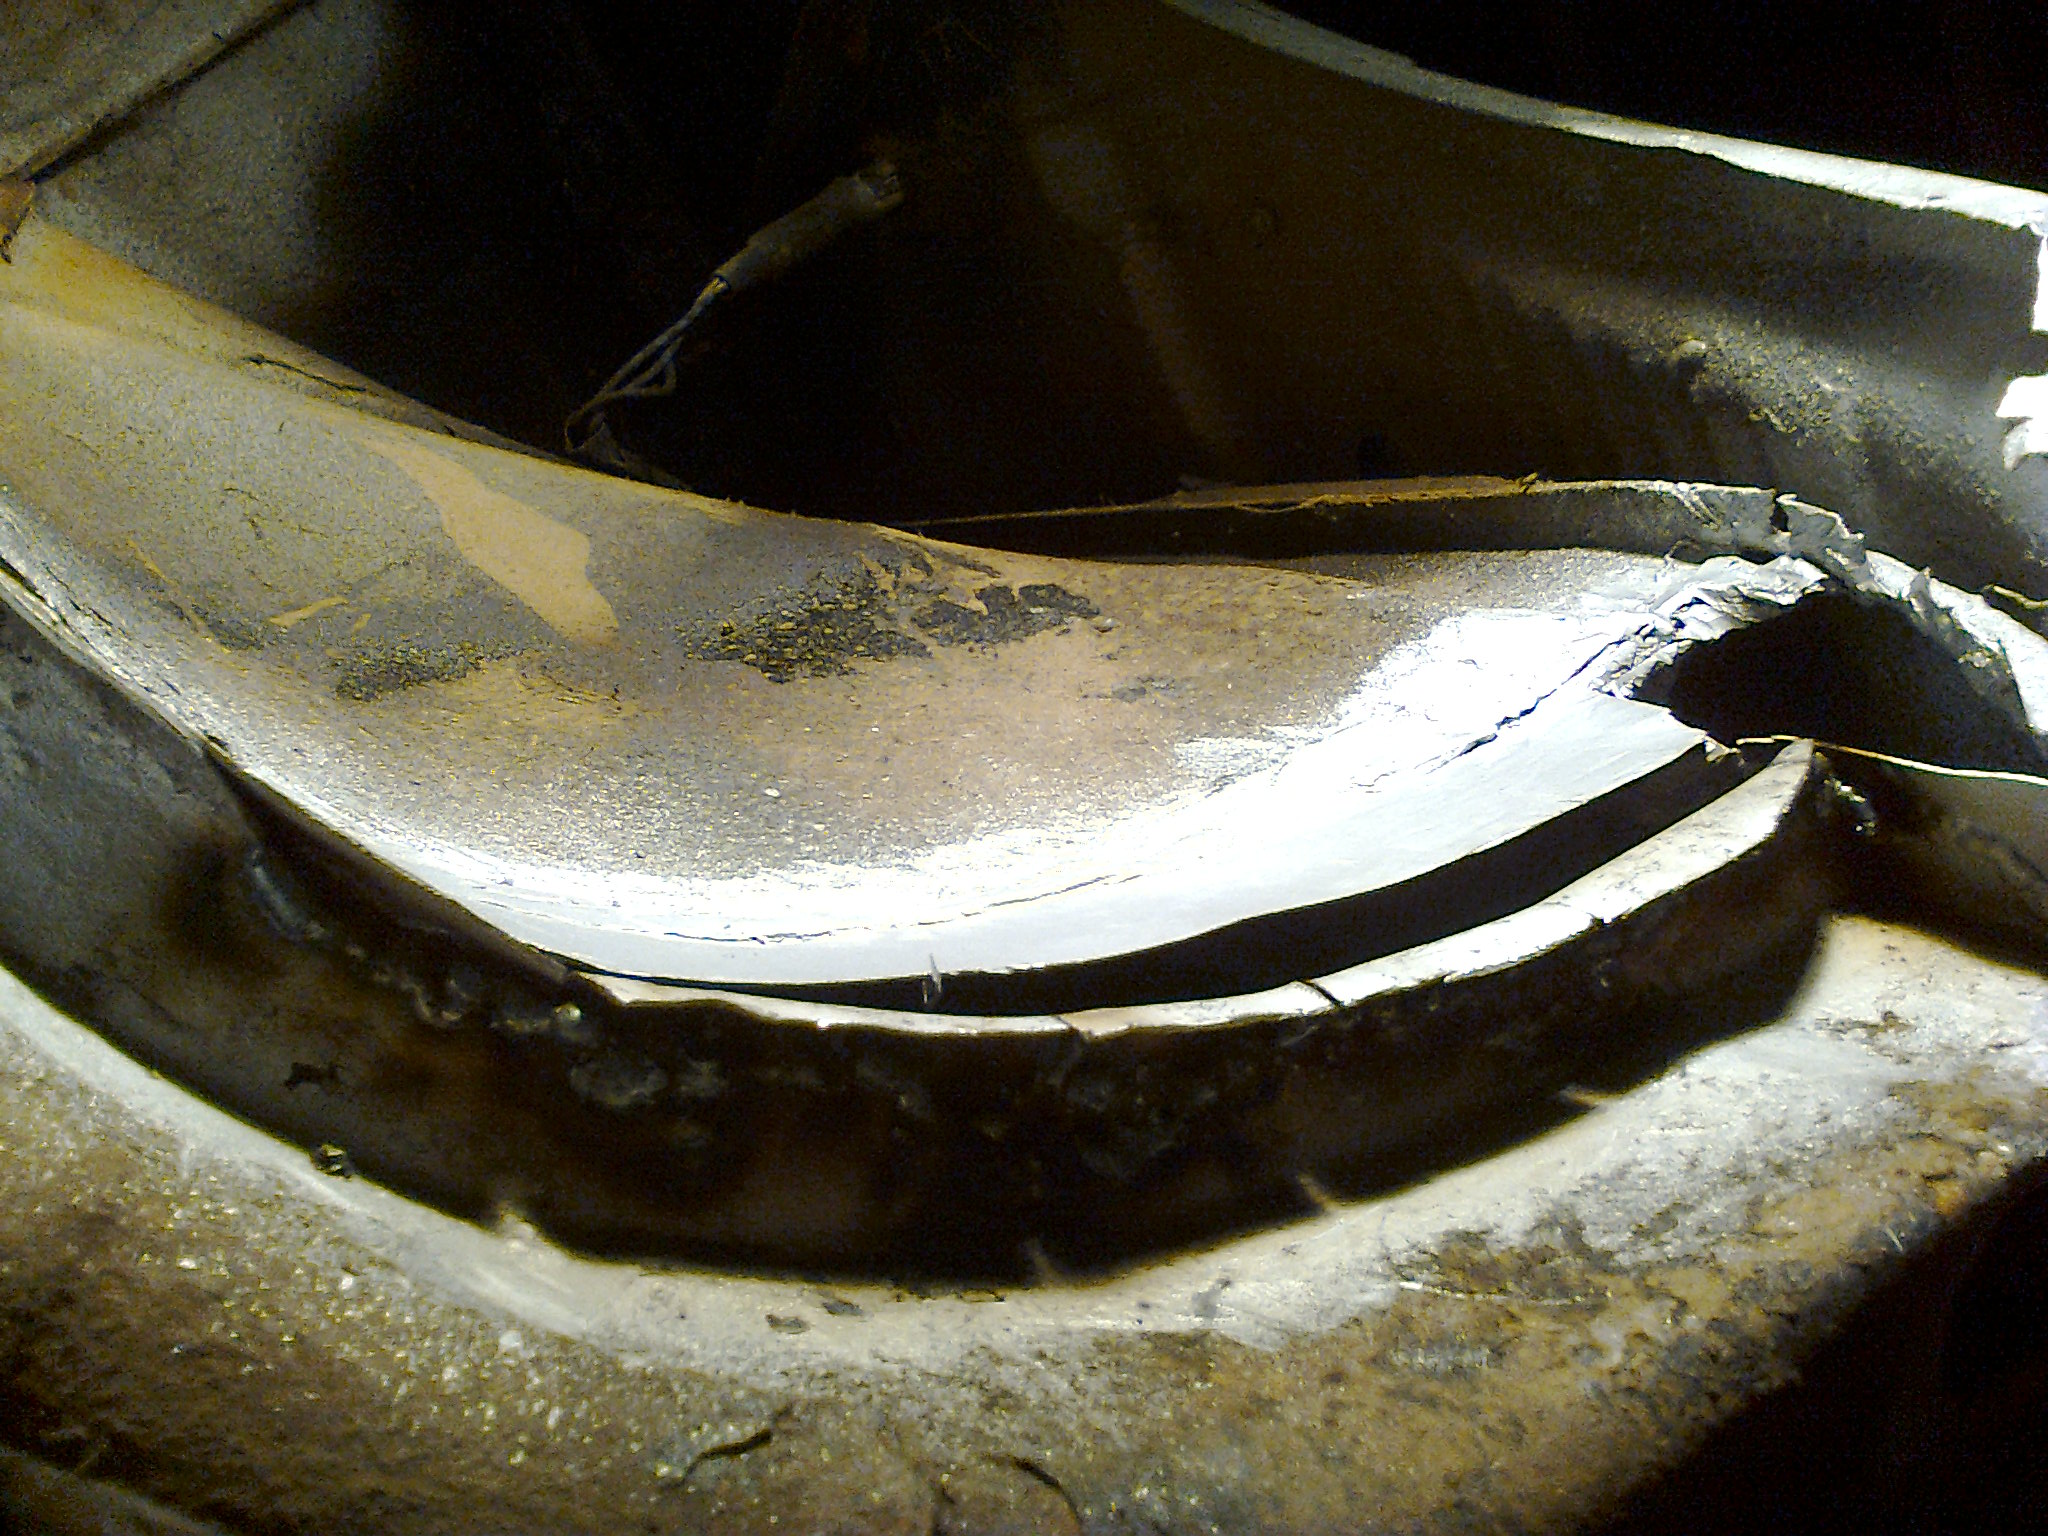
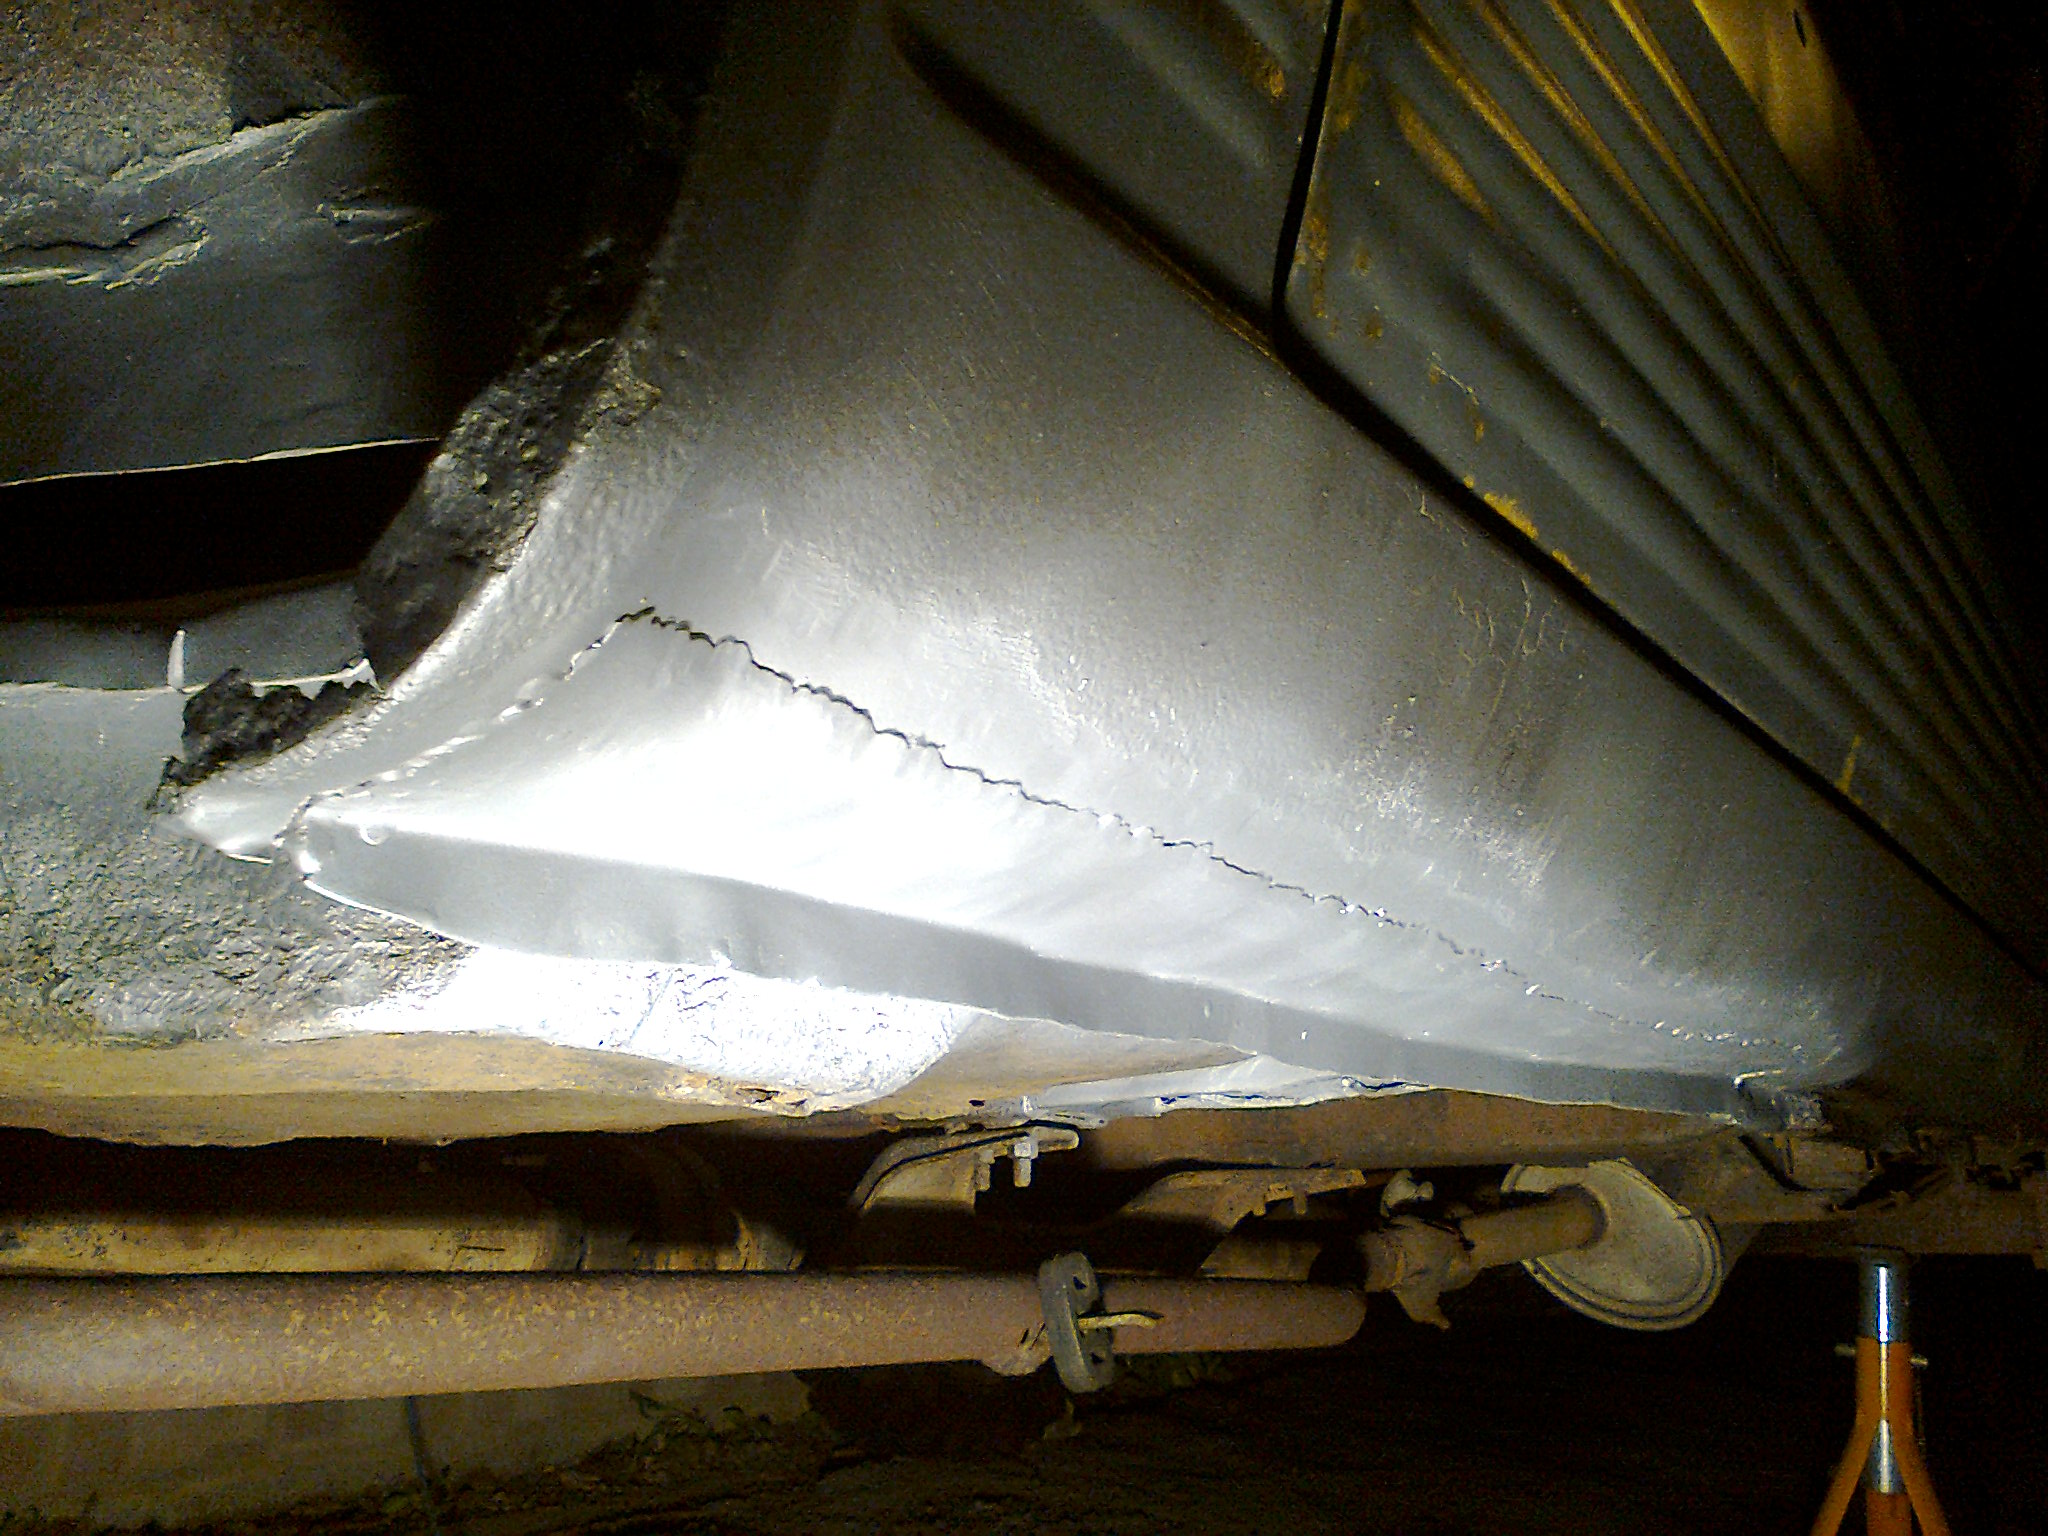
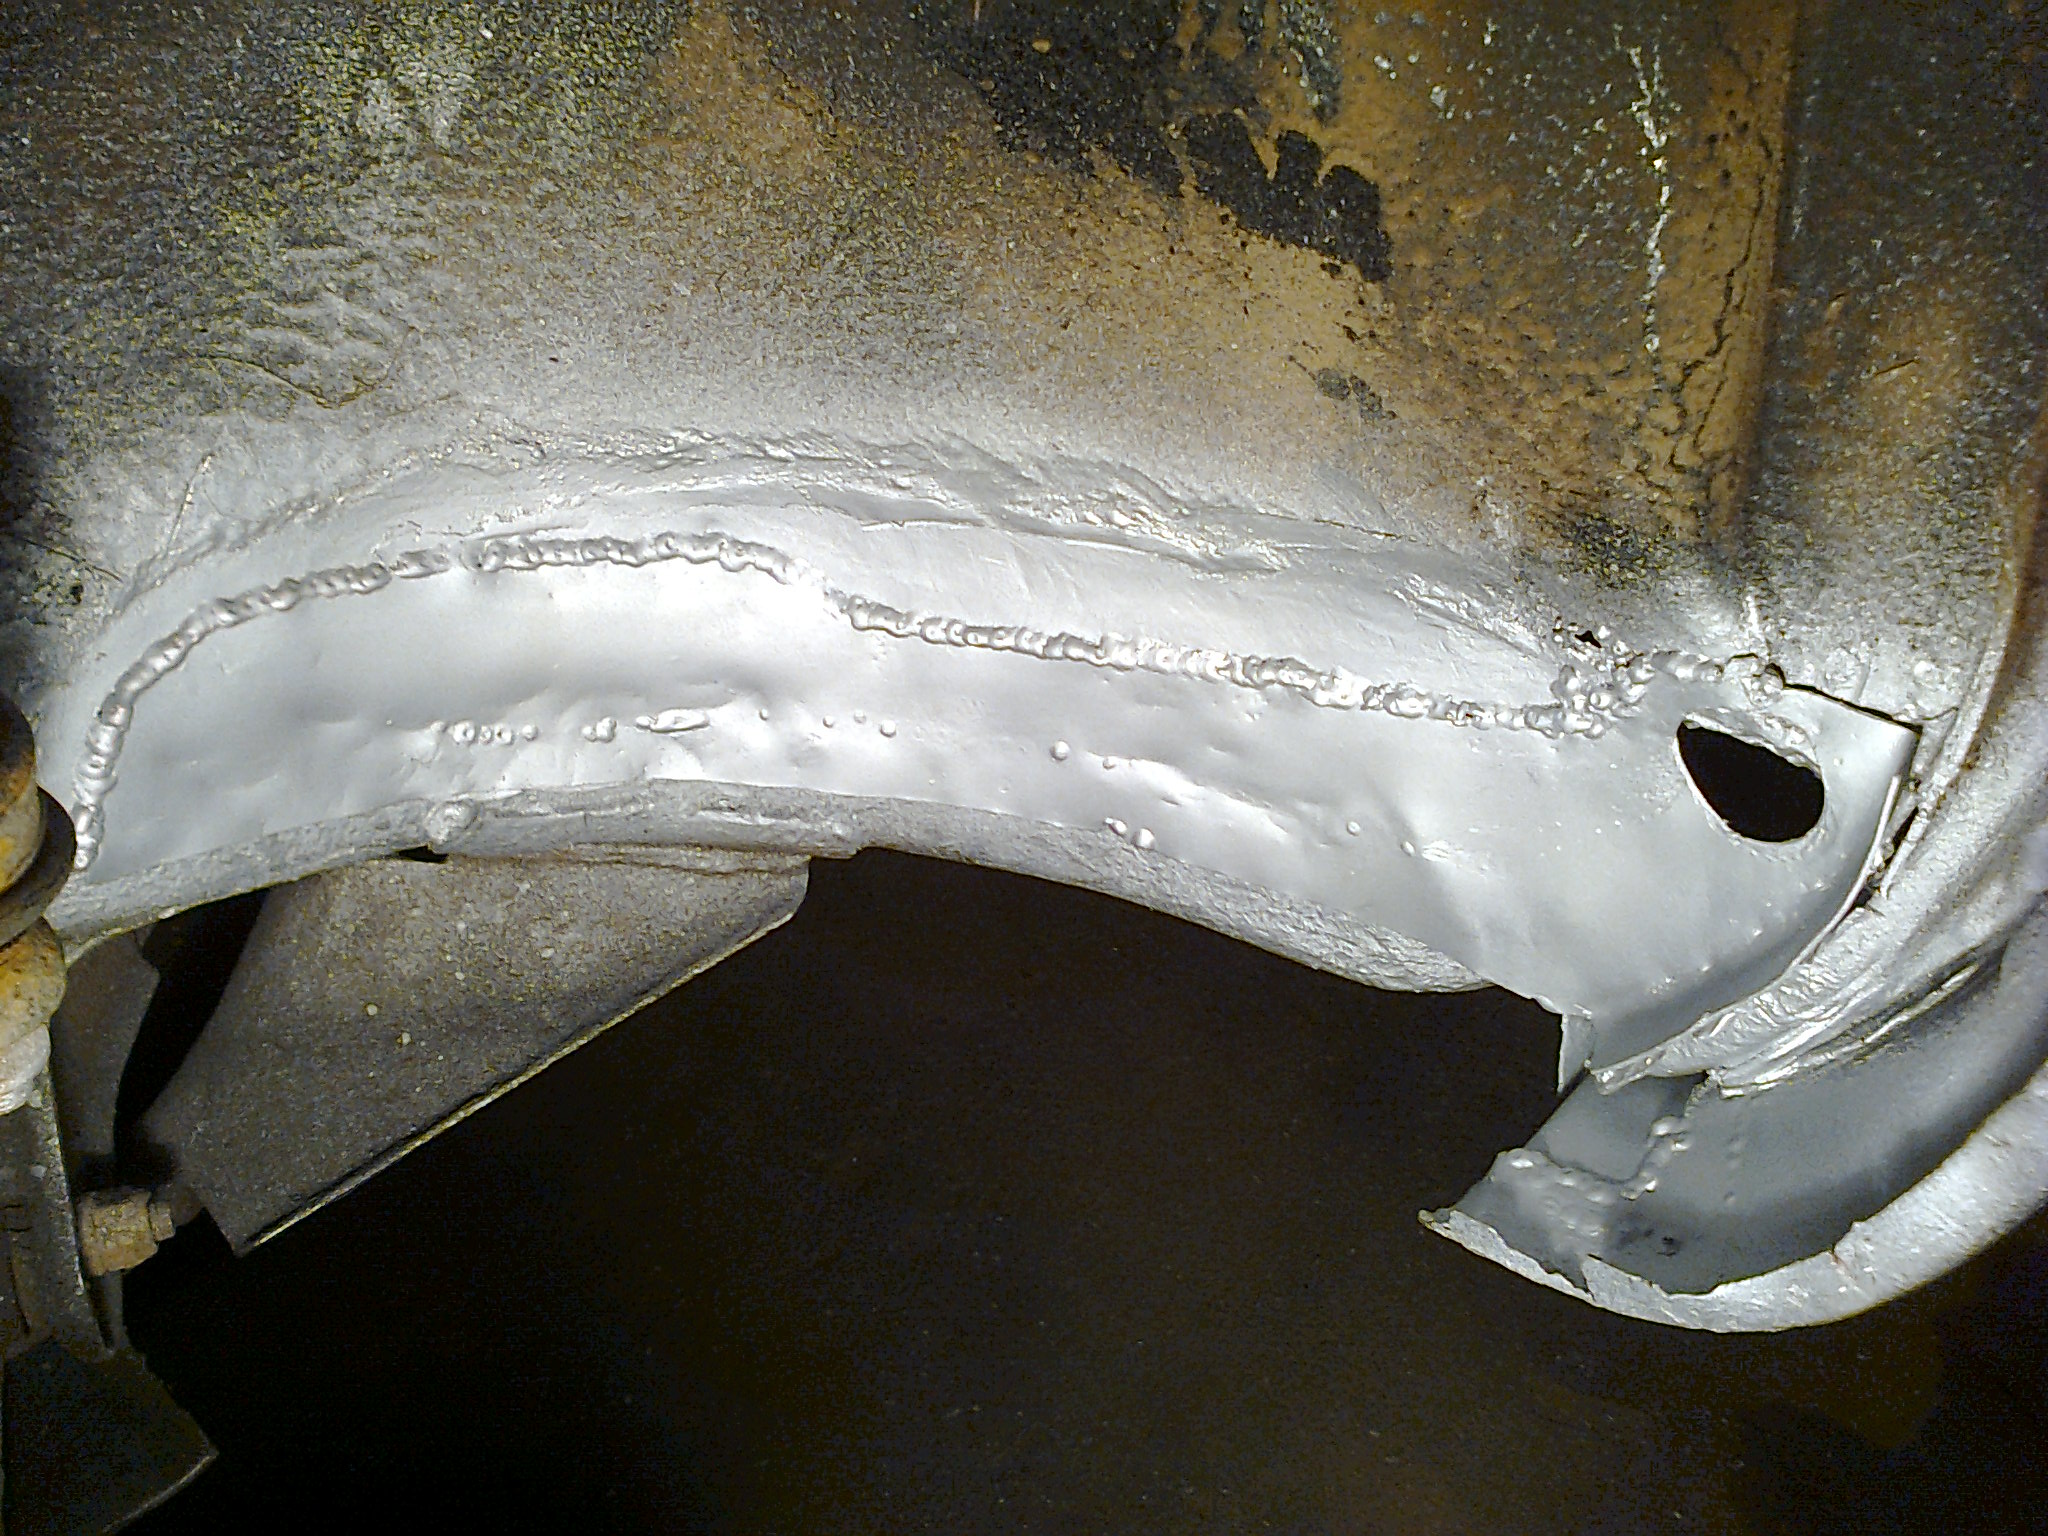
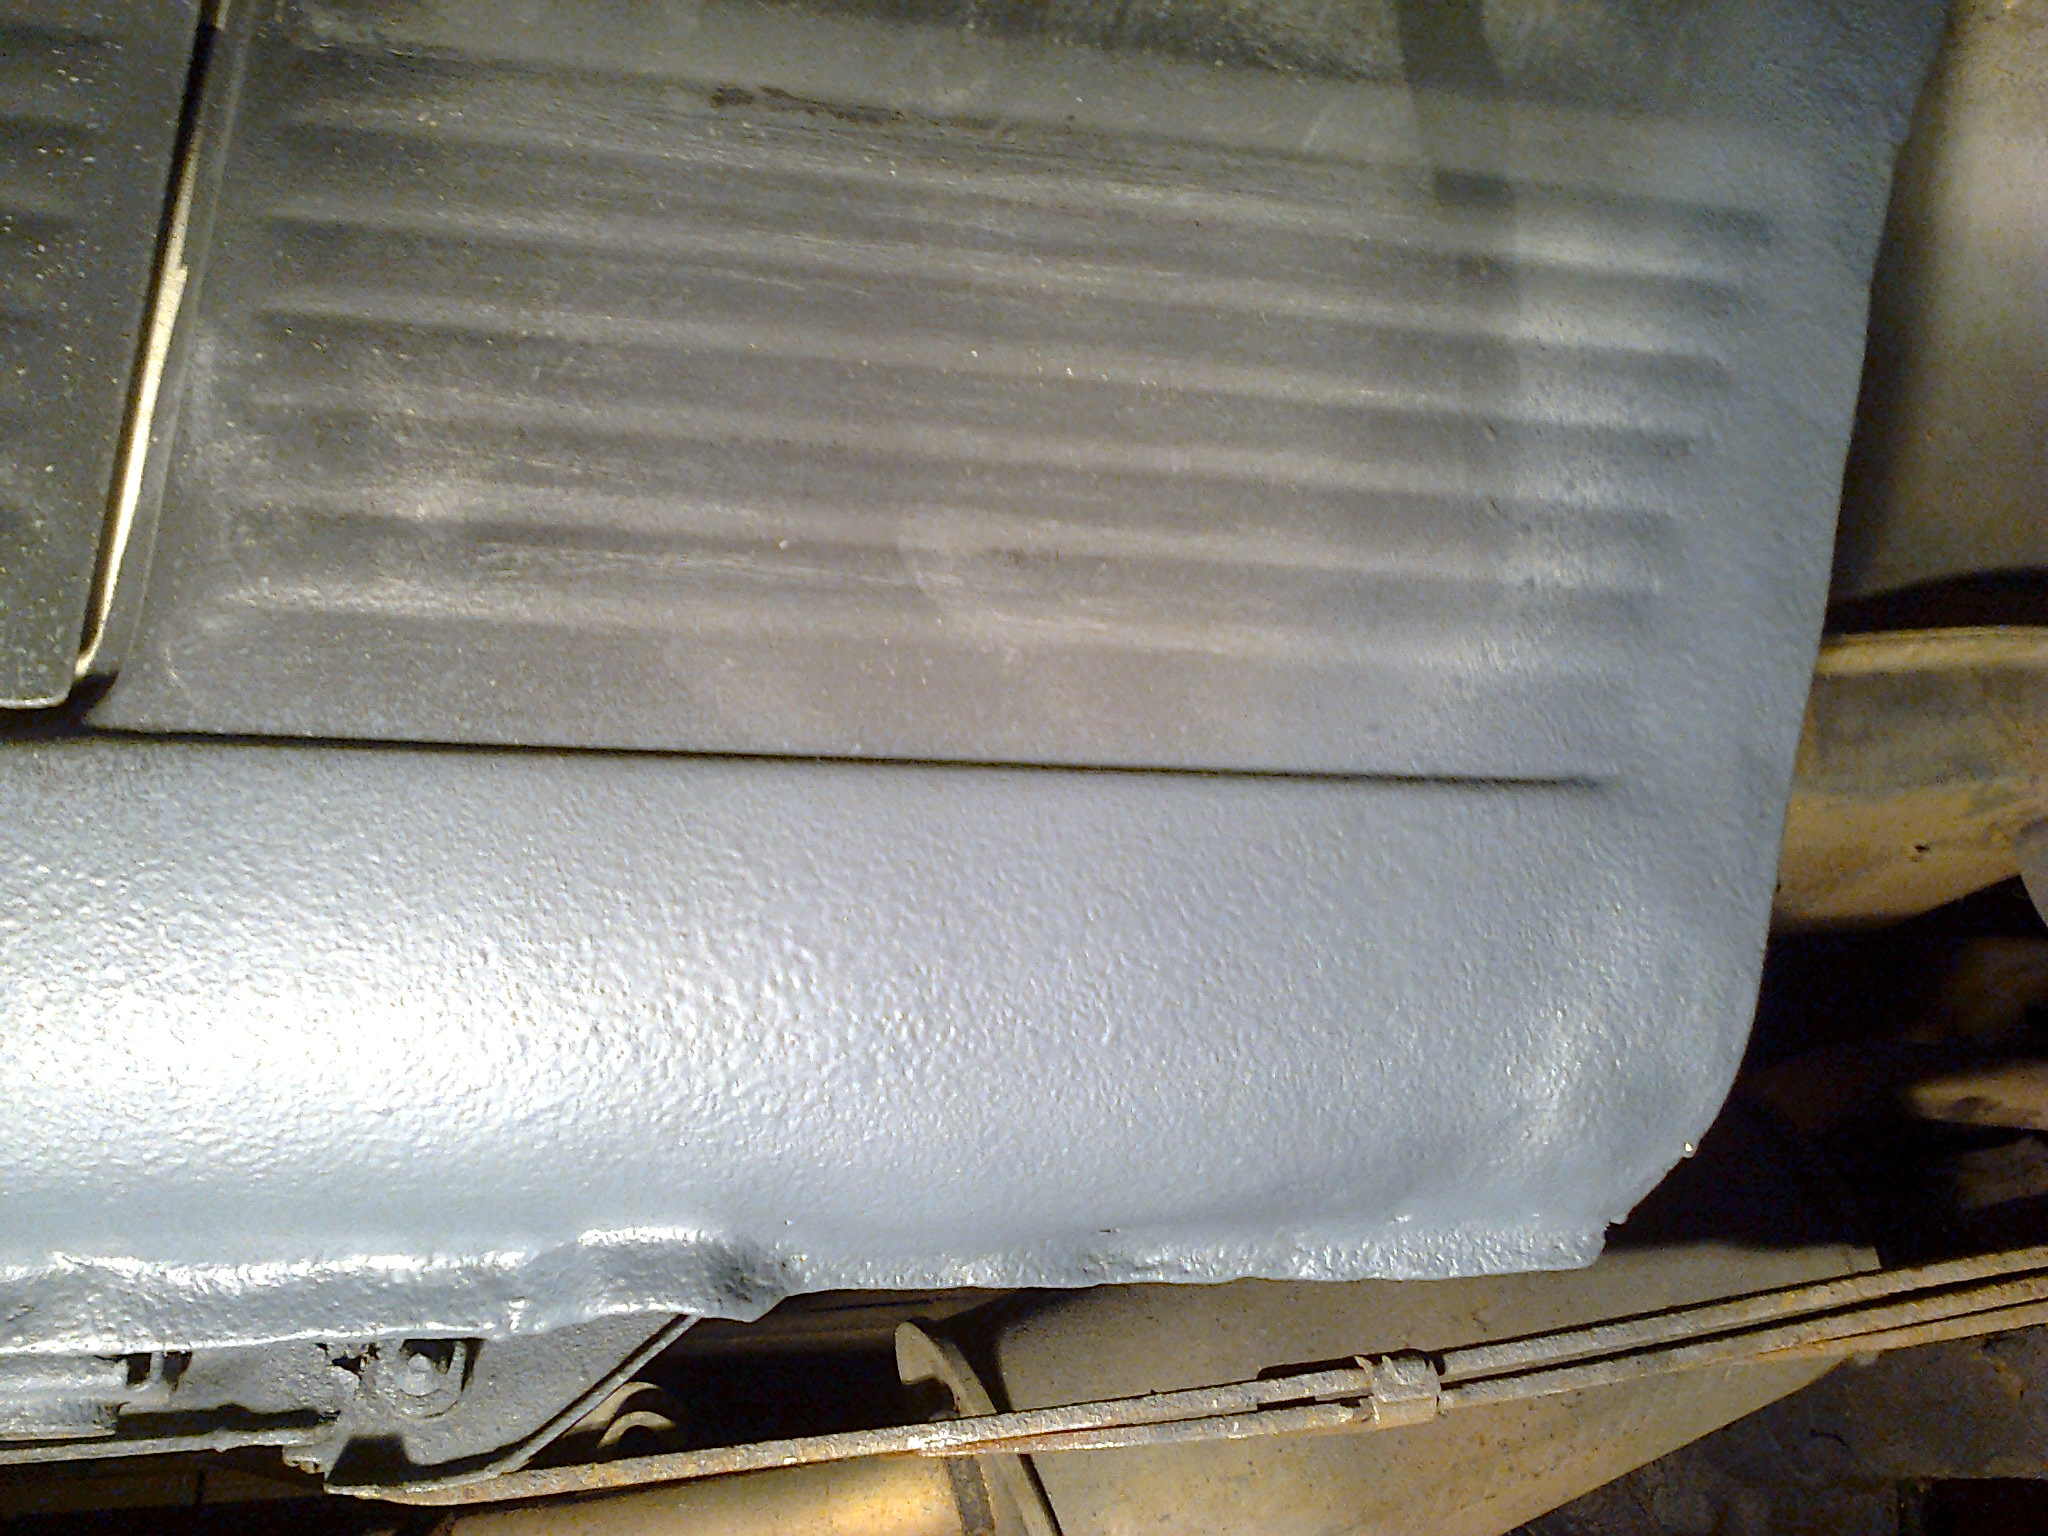
Final bit today (before I ran out of gas :() was to put the arch patch on. Going to be tricky to protect against rust properly but will use all the tricks on the seam and plenty of underseal as well as lots of coats of zinc primer :slayer:

Photo2665.jpg


Photo2666.jpg


So that's the update anyway, maybe if I can get all back together in time (and the last bit of welding done) I can book an MOT :devil:...

And only then can it snow :D
 
Liking your work sir, rust porn, then welding porn. Win win for Qing Qing (y)

I think more work will be needed in the future but gets her back on the road for now. I'm not too proud of the bit in the arch as the piece I made didn't fit properly and the access hole I added is not in the right position but it is structural and will be able to waxoil in the sill as well at least.

Hopefully get it all prepped and back on its wheels by sunday and book her in for an MOT as soon as possible. Got to pass first time though if going to get ready for christmas :eek:... not had a car go through first time for a while now :(
 
One last push this weekend and the welding / painting is done for now on the passenger side at least....need to double check over the drivers side but assuming the car is still all working after being laid up for a few months an MOT should be possible. I think I'll be re-MOTing in the summer though as I don't want this to happen every year! Winter is not a good time for an MOT!!

Anyway some pictures under flood light... still needs to be painted the same colour I used before but the stonechip paint has gone on very well and looks like the original I think...although a long time since I've seen what the original looks like!...

Photo2673.jpg


Photo2675.jpg


Final job is to get some seam sealant in the wheel arch bit and the jacking point as well.

the rear arch bit is also much tidier now and will get re-visited in the summer!...

Photo2676.jpg


Probably going to be MOT'd after Christmas though, but I did put it on my list for Santa...so there could be a miracle...:devil:
 
Yay!! I have an MOT!! A new years eve present :)

Had a bit of fun getting it though (yesterday 12 hours flat out in fact :()

The lower arm bushes were looking a little tatty and cracked so decided to replace them to make sure it wasn't picked up on. Drivers side was easy but the passenger side was another story! The lower arm wouldn't come off so in the end had to smash the hell out of the bold securing it to the chassis and then angle grind off the tie rod securing bolt which had fused itself solid. Mean't I needed to find a replacement bolt of this size which I didn't have :(...so made my own from some threaded bar! and a welded on nut haha!...
Photo2680.jpg


Found the brake discs were flaking apart! Certainly got my moneys worth out of them...
Photo2686.jpg


The hub carrier was not the right one for me I don't think either as the spacer which normally fits inside the hub (between the CV and bearing) was not thick enough and the wheel locked up when you tightened the driveshaft end nut :eek:...so made myself a spacer washer to get myself out of jail...
Photo2682.jpg


So anyway more shiney metal fitted back onto the car...brake disc sheilds are hanging on for their last few miles I think!..

Photo2683.jpg


Photo2684.jpg


So one happy chappy...now time to drink responsibly and bring in the new year! More stuff like this to come I hope! :slayer:

Happy New Year to all! :devil:
 
Yay!! I have an MOT!! A new years eve present :)

Had a bit of fun getting it though (yesterday 12 hours flat out in fact :()

The lower arm bushes were looking a little tatty and cracked so decided to replace them to make sure it wasn't picked up on. Drivers side was easy but the passenger side was another story! The lower arm wouldn't come off so in the end had to smash the hell out of the bold securing it to the chassis and then angle grind off the tie rod securing bolt which had fused itself solid. Mean't I needed to find a replacement bolt of this size which I didn't have :(...so made my own from some threaded bar! and a welded on nut haha!...
Photo2680.jpg


Found the brake discs were flaking apart! Certainly got my moneys worth out of them...
mePhoto2686.jpg

Good work mate. clearly been burning midnight oil. Out of curiosity what's that weird little plate that sits on top of the end of the tie rod and then drops downand bolts to the track control arm. It always seems an odd bit of an engineering.
 
Good work mate. clearly been burning midnight oil. Out of curiosity what's that weird little plate that sits on top of the end of the tie rod and then drops downand bolts to the track control arm. It always seems an odd bit of an engineering.

I was just burning the wick by the end...no more oil left haha!

Yeah that plate is to stop the bolt from coming loose over time if I understand correctly. I guess there may be micro movements between the lower arm and track control arm as the suspension moves around and you hit bumps etc...that plate will always stay at that position so the bolt head never moves.
 
So post Italy Raid 2015 I had a few jobs to do and the last of the major repairs was to replace the broken centre prop shaft bearings (apparently not strong enough to drop the weight of a Panda on).

So here are the new ones:
WP_20150815_14_06_13_Pro_highres.jpg


I had difficulty getting the old bearing off though but as it was dead anyway I gave the outer casing a smack with the hammer and was able to get to the bearing inner race and tap it off with a screwdriver:
WP_20150815_16_55_51_Pro_highres.jpg


I assume a bearing puller or something is what I should have used :eek:...

And new one pushed on:
WP_20150815_17_19_11_Pro_highres.jpg


I've been told these £30 ones off ebay are not that great so I only replaced the one which had snapped as the other was still fine (after 30 years beneath a car!)

WP_20150816_13_07_06_Pro_highres.jpg


All ready for Panday! :slayer:

Si
 
:( Ok so not out the woods yet unfortunately. Went for a test drive and at 30+mph there is a terrible vibration. So think the prop shaft is bent as well. I put the car up in the air (in a rather dodgy fashion it must be said!) and did notice a slight wobble to the forward most prop shaft so it is likely the case. There may be a slight dent in it and also part of it looks like it has been turned down a bit. Anyway will inspect further tomorrow hopefully but got a spare to fit if required. Here is a photo of how I checked the prop shaft vibration :devil:.....
WP_20150818_17_06_12_Pro_highres.jpg


I'll upload a video at some point as well as it looks quite cool to see all the bits turning. :cool:
 
Back
Top