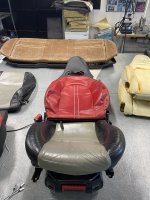
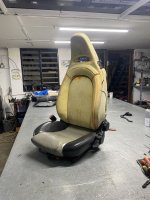
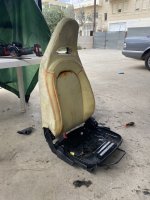
Styling KC3 Project Silver

Currently reading:
Styling KC3 Project Silver

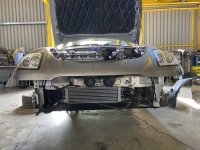
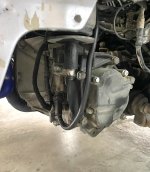
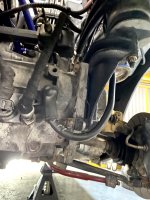
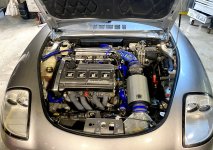
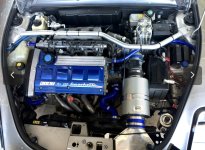
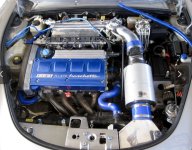
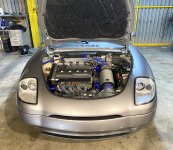
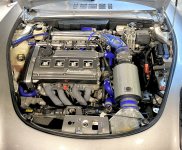
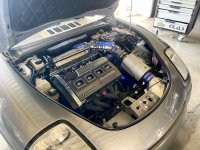
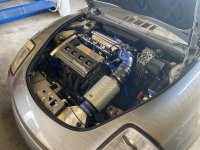
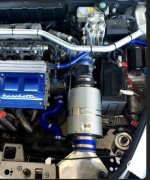
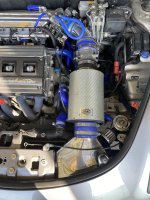
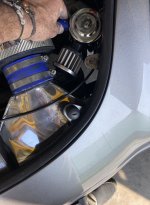
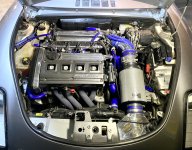
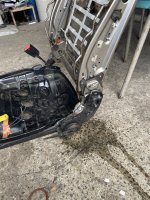
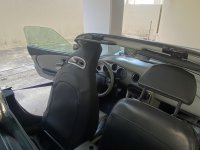
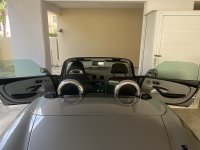
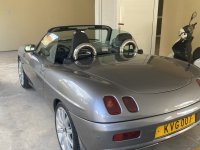
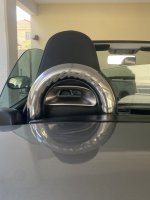
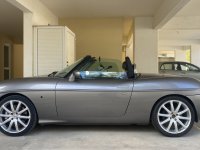
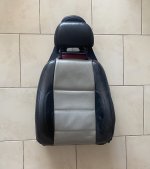
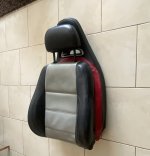
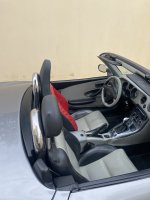
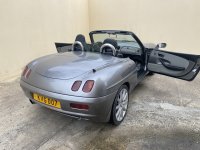
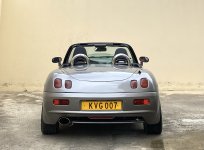
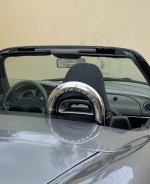
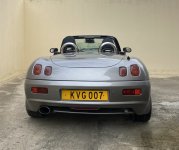
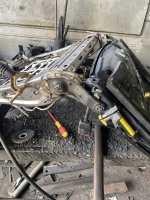
Engine is back in and running , a few tweaks are needed but sounds good . I’ll post more pics and videos as we go . Engine bay is looking better and improved upon than before now with battery in the bsck .
 
Last edited:
  • Like
Reactions: tjr
So improved the front earthing today with 0 gauge cable and engine bay is nearly there ,

Had to modify the intake slightly but all good and tidy, the wild thing is back and complete once again, 🏎️💨 Happy Days 😃
 

Attachments

  • IMG_3090.jpeg
    IMG_3090.jpeg
    2.4 MB · Views: 44
  • IMG_3074.jpeg
    IMG_3074.jpeg
    2.5 MB · Views: 39
  • IMG_3078.jpeg
    IMG_3078.jpeg
    1.8 MB · Views: 37
  • IMG_3076.jpeg
    IMG_3076.jpeg
    2.6 MB · Views: 41
  • IMG_3084.jpeg
    IMG_3084.jpeg
    3 MB · Views: 42
  • Like
Reactions: tjr
Some of the changes as the engine bay has evolved over the years .

Subtle gradual improvements ,but now much better and tidier . Welding and modding the intake has given more room and should also perform much better.

Ceramic coating to the exhaust manifold should give slightly better performance also .

And now with the battery in the back much more room in the bay and I’m back with a good amp battery over the small one .

Cylinder head rocker cover has been sprayed in tungsten silver to match the paintwork .

A little more suttle on the eye but pleased with the overall results .

Next is to have a new strut brace made as the old sparco one doesn’t fit now, but will design and have one made for me .
 

Attachments

  • IMG_1045.jpeg
    IMG_1045.jpeg
    229 KB · Views: 25
  • IMG_1047.jpeg
    IMG_1047.jpeg
    202.3 KB · Views: 24
  • IMG_3090.jpeg
    IMG_3090.jpeg
    2.4 MB · Views: 27
  • IMG_3084.jpeg
    IMG_3084.jpeg
    2 MB · Views: 25
Last edited:
Minor adjustments with the intake and small tweaks made by adding stainless steel bolts , silver surrounds .

Happy with the results 😊✨
 

Attachments

  • IMG_3090.jpeg
    IMG_3090.jpeg
    2.4 MB · Views: 25
  • IMG_3111.jpeg
    IMG_3111.jpeg
    1.3 MB · Views: 22
  • IMG_3110.jpeg
    IMG_3110.jpeg
    2.7 MB · Views: 23
  • IMG_3109.jpeg
    IMG_3109.jpeg
    2.7 MB · Views: 25
Last edited:
Șo a little more tweaking and modifying today .

I will improve on the oil catch tank.

Before any oil or vapors would have traveled a long way or even looking at how it was before more likely returning back . Now with the new design will be lower than the outlet pipe and work correctly. Some minor welding and will be in a new and nice position.

Also tweaked the position of the idle control valve and pipes ,

Next modification will be to fabricate a new strut brace to fit .
 

Attachments

  • IMG_3141.jpeg
    IMG_3141.jpeg
    125.4 KB · Views: 30
  • IMG_3147.jpeg
    IMG_3147.jpeg
    2.1 MB · Views: 32
  • IMG_3146.jpeg
    IMG_3146.jpeg
    2.5 MB · Views: 30
  • IMG_3159.jpeg
    IMG_3159.jpeg
    2.8 MB · Views: 30
Last edited:
  • Like
Reactions: tjr
Șo a little more tweaking and modifying today .

I will improve on the oil catch tank.

Before any oil or vapors would have traveled a long way or even looking at how it was before more likely returning back . Now with the new design will be lower than the outlet pipe and work correctly. Some minor welding and will be in a new and nice position.

Also tweaked the position of the idle control valve and pipes ,

Next modification will be to fabricate a new strut brace to fit .
Great job, good inspiration! Thanks for sharing.
 
Hiya!
These Abarth seats came up for sale at a good price so took the plunge and bought them with intention to fit in the Barchetta.

The dimensions of the seats are quite similar although they sit on a high base and platform runners.
 

Attachments

  • IMG_3890.jpeg
    IMG_3890.jpeg
    1.9 MB · Views: 13
  • IMG_3901.jpeg
    IMG_3901.jpeg
    256.6 KB · Views: 12
  • IMG_3905.jpeg
    IMG_3905.jpeg
    595.4 KB · Views: 14
  • IMG_3900.jpeg
    IMG_3900.jpeg
    847.2 KB · Views: 14
  • IMG_3886.jpeg
    IMG_3886.jpeg
    756.8 KB · Views: 12
Last edited:
The fun begins !

Project hi brid seat .
Barchetta base - Abarth back rest

So after some consideration and measurements , I took the plunge and began dismantling of the drivers seat . Barchetta and Abarth !
 

Attachments

  • IMG_3928.jpeg
    IMG_3928.jpeg
    2 MB · Views: 12
  • IMG_3965.jpeg
    IMG_3965.jpeg
    2.3 MB · Views: 12
  • IMG_3934.jpeg
    IMG_3934.jpeg
    3 MB · Views: 12
  • IMG_3927.jpeg
    IMG_3927.jpeg
    1.3 MB · Views: 14
  • IMG_3924.jpeg
    IMG_3924.jpeg
    2.4 MB · Views: 13
  • IMG_3950.jpeg
    IMG_3950.jpeg
    2.4 MB · Views: 14
Fusing the two together ,

Not a simple task , but after gradually cutting , grinding and measuring it was possible to weld the Abarth back rest to the base and runner of the Barchetta , hence creating a new Hi brid seat.

The seat works exactly as the old one does. It reclines backwards with the same lever’s although I will modify the forward fold release lever to work higher up . It came with a broken one , so waiting to get a new one .
 

Attachments

  • IMG_3969.jpeg
    IMG_3969.jpeg
    2.7 MB · Views: 14
  • IMG_3973.jpeg
    IMG_3973.jpeg
    2.3 MB · Views: 13
  • IMG_3987.jpeg
    IMG_3987.jpeg
    1.9 MB · Views: 15
  • IMG_3979.jpeg
    IMG_3979.jpeg
    2 MB · Views: 15
  • IMG_3978.jpeg
    IMG_3978.jpeg
    2.2 MB · Views: 12
  • IMG_3989.jpeg
    IMG_3989.jpeg
    2 MB · Views: 15
Last edited:
So fitted in today as a final test ,

Fits well and works as the original seat does .
Same levers and system although they came with a broken tilt lever for which I will fix and work to tilt the seat forward.

Will start on the passenger side and then have them re trimmed to match car
 

Attachments

  • IMG_4035.jpeg
    IMG_4035.jpeg
    1.2 MB · Views: 16
  • IMG_4033.jpeg
    IMG_4033.jpeg
    2.3 MB · Views: 18
  • IMG_4017.jpeg
    IMG_4017.jpeg
    1.8 MB · Views: 19
  • IMG_4011.jpeg
    IMG_4011.jpeg
    1.2 MB · Views: 17
  • IMG_4016.jpeg
    IMG_4016.jpeg
    1.7 MB · Views: 18
  • IMG_4021.jpeg
    IMG_4021.jpeg
    1.8 MB · Views: 20
  • IMG_4022.jpeg
    IMG_4022.jpeg
    1.1 MB · Views: 19
  • IMG_4019.jpeg
    IMG_4019.jpeg
    1.7 MB · Views: 22
  • IMG_4013.jpeg
    IMG_4013.jpeg
    1.7 MB · Views: 19
  • IMG_4027.jpeg
    IMG_4027.jpeg
    2.3 MB · Views: 17
Last edited:
hiya ! So after further testing and feeling the seat, I can say it feels real good , more support although cosmetically it does look like the head rest is high .

My next process will be to cut and lower the head rest so it will sit and look as the passenger side and hence produce an overall improved Barchetta seat for comfort , support and looks .
 

Attachments

  • IMG_4201.jpeg
    IMG_4201.jpeg
    2.1 MB · Views: 19
  • IMG_4202.jpeg
    IMG_4202.jpeg
    2.2 MB · Views: 14
  • IMG_4164.jpeg
    IMG_4164.jpeg
    1.6 MB · Views: 13
  • IMG_4168.jpeg
    IMG_4168.jpeg
    1.8 MB · Views: 15
  • IMG_4174.jpeg
    IMG_4174.jpeg
    1.2 MB · Views: 13
  • IMG_4170.jpeg
    IMG_4170.jpeg
    1,021.1 KB · Views: 13
  • IMG_4183.jpeg
    IMG_4183.jpeg
    1.5 MB · Views: 14
  • IMG_4181.jpeg
    IMG_4181.jpeg
    2.8 MB · Views: 16
  • IMG_4192.jpeg
    IMG_4192.jpeg
    985.6 KB · Views: 15
  • IMG_4006.jpeg
    IMG_4006.jpeg
    1.8 MB · Views: 15
great job! I prefer the original look of the seats, but this looks amazing. However I cant notice there is a bit less padding or the leather doesn't fit tightly enough.
I already seen this on FB, but I like more detailed photos/info that you put here...
Hiya, yes , thank you !
as it still testing stage I haven’t fully fitted the back rest cover correctly . There are clips that firm the leather around the foam .

I will remove the seat again to cut the head rest down .

But in general testing , the feel and hold is much better and there is no wind splash to the back of the neck . 😊

Once it’s perfected , will be sent to have a leather re trim .
 
I plan to take 3/4cm off the top of the head rest which will make the seat look and feel correct with the B’s interior and end up someway like these Porsche seats 😊🏁
 

Attachments

  • IMG_4235.jpeg
    IMG_4235.jpeg
    1.7 MB · Views: 13
  • IMG_4232.jpeg
    IMG_4232.jpeg
    2.3 MB · Views: 14
  • IMG_4230.jpeg
    IMG_4230.jpeg
    2.2 MB · Views: 11
  • IMG_4221.jpeg
    IMG_4221.jpeg
    655 KB · Views: 18
I plan to take 3/4cm off the top of the head rest which will make the seat look and feel correct with the B’s interior and end up someway like these Porsche seats 😊🏁
Started the passenger seat today and much easier after working on the first .managed to improve on it and also cut the head rests down by 4cm, so should sit nicely within the B and still look good and protect the neck from bsck wind. Working with my friend Pani who does the welding .

Happy days 😊✨


Next to be re trimmed
 

Attachments

  • IMG_4278.jpeg
    IMG_4278.jpeg
    2.4 MB · Views: 11
  • IMG_4273.jpeg
    IMG_4273.jpeg
    2.5 MB · Views: 10
  • IMG_4268.jpeg
    IMG_4268.jpeg
    2.4 MB · Views: 12
  • IMG_4270.jpeg
    IMG_4270.jpeg
    2.9 MB · Views: 12
  • IMG_4265.jpeg
    IMG_4265.jpeg
    2.1 MB · Views: 9
  • IMG_4262.jpeg
    IMG_4262.jpeg
    2.5 MB · Views: 11
  • IMG_4260.jpeg
    IMG_4260.jpeg
    870.1 KB · Views: 10
  • IMG_4259.jpeg
    IMG_4259.jpeg
    1.7 MB · Views: 10
Back
Top