IMG_20240620_180440_084.jpg

Seicento 2000 899 Seicento SX

Introduction

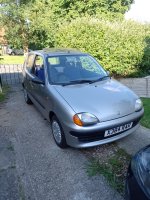
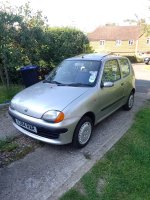
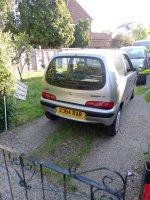
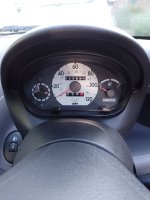
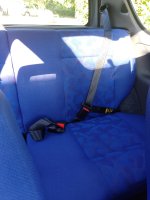
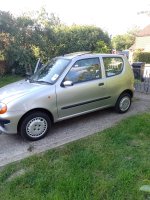
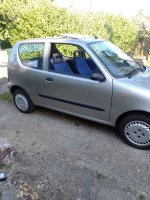
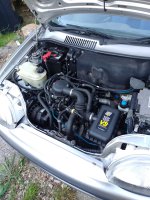
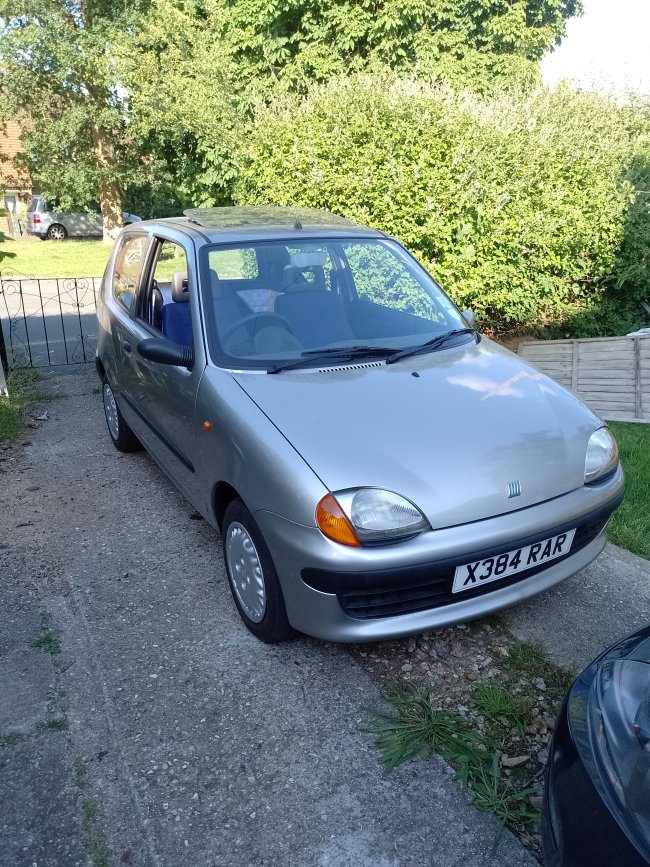
Hi all, this is my new Seicento which I picked up today, I'm well known in the Panda 2012+ section of the forum, but that car was recently giving me a constant headache with multiple issues so got rid & decided to go old school with this little beauty being the result, I've had a Cinquecento in the past so sort of knew what to expect😂 this is a 2000 pre facelift SX with 22k which cost me just short of £2k, all the underside is solid with no holes anywhere just a few surface bits which I've started to clean up beginning with the worst surface area being the back of the boot floor & bumper brackets which have now been wire brushed & treated so just a couple more dots to do & then rust proof the entire underside to future proof her, anyway here she is
IMG_20240620_180440_084.jpgIMG_20240620_180449_816.jpgIMG_20240620_180509_254.jpgIMG_20240620_180521_563.jpgIMG_20240620_180534_120.jpgIMG_20240620_180622_273.jpgIMG_20240620_180651_617.jpgIMG_20240620_180742_955.jpgIMG_20240620_180842_567.jpg
JBL speakers required quite a lot of trimming to fit in the standard aperture with the factory grills but I did it & now it still looks factory with the grill etc but they are a huge improvement.
I don't suppose you took any photos? Trimming what? And what model? 😁
 
I don't suppose you took any photos? Trimming what? And what model? 😁
Hi Ben they are JBL Stage 2 424 4 inch as below
Screenshot_20250126-124519.jpg

In the picture around the speaker is the metal frame with a hole in each corner, 2 of the holes attach to the speaker grill & the rest of the frame has to be cut off for them to fit nicely into the aperture in the dash otherwise the frame of the speaker interferes with the holes on the grills preventing them from sitting in the aperture, the 2 holes in the speaker frame which are used to secure the speaker to the grill have to be trimmed ever so slightly as well, here are pics of the speaker frame after being trimmed, it's not the prettiest though as I did it at night 😂 & with the speaker screwed to the grill so I had some sort of idea how far to go
IMG_20250126_130853.jpg
IMG_20250126_130908.jpg

& finally it all screwed back into place
IMG_20250126_131400.jpg
 
Last edited:
I got some new old stock genuine front indicators with holders & bulbs included for the old girl in the correct MK1 SPI amber lens as the original ones were letting water in so I got these for £28 for the pair from Italiparts.
IMG_20250129_161258.jpg
IMG_20250129_161309.jpg
IMG_20250129_161315.jpg

Also popped out earlier to get a few things & noticed at one stage on the way back she was just ever so slightly underpowered compared to usual & then it went back to normal so when I got home I lifted the bonnet & had a look, there was a very slight misfire which came & went, I suspected HT leads as she's still running her original 25 year old factory ones so whilst she was running on the drive I pulled out each lead individually, put 1 back in & moved to the next one. The leads for cylinders 1, 3 & 4 had a really healthy spark but the lead for cylinder 2 had a spark but was very weak compared to the other 3 so my thinking is either the leads are faulty or there's an intermittent issue with a coil pack as I seem to remember these & other Fiat's of the period being quite prone to coil packs so I've ordered both the leads & coil packs, it only cost me £43 for 2x Bosch coils & Intermotor HT leads as the only other choices were Lucas which are a bit hit & miss & Lemark who I've never heard of so avoided like the plague 😂 I'm ruling the plugs out as they were replaced only 3 months ago when I did the oil & filter change, although now it seems to be running ok but I'll change it all for peace of mind as there is clearly a minor intermittent fault somewhere in either the leads or coils.
 
Last edited:
Got the liner off the other side to clean behind it & there was no nasties on this side either 😁👌, so I cleaned the muck out & rust proofed as far as I could get in there
IMG_20250131_155315~2.jpg
Also my new coils & HT leads turned up this morning so I fitted them after doing the liner & now she's running a lot sweeter & the intermittent misfire is long gone so I call that a result 😁.
 
Operation clutch change has fully commenced as of yesterday afternoon 😂 as I'm looking into going to the Caffeine & Machine Fiat/Abarth meet next month so thought I better get it done before I go, both shafts are disconnected along with linkages, starter motor etc it's virtually all stripped down ready for the gearbox to come off, I'm just waiting on a engine support beam to be delivered then the gearbox can be removed. It all went very smoothly until I came across a previous botch though on the bottom ball joint 🤬 someone has snapped the stud for the ball joint on the lower o/s suspension arm so instead of just replacing the arm like any normal person would they left the snapped stud & rammed a 14mm nut onto it when it's usually a 17mm so it's cross threaded as well as snapped & the ball joint wasn't fully seated into the hub as it should be as a result of this, also on removal of the shaft on the same side it also turns out (probably the same imbicile who snapped the ball joint stud) can't even clamp an outer CV clamp properly, some people shouldn't be allowed near a car if that's how they put things on & are happy with it. So I've ordered a new pair of Quinton Hazell front lower arms while it's all apart to do it properly as unlike the previous muppet I'm not reinstalling an arm with a snapped ball joint stud. Rant over onwards & upwards 🤣🤣
 
Last edited:
Got all the clutch done today, gearbox back in it's place & all bolted up with a new front gearbox mount to go with my new rear mount which I did recently
IMG_20250205_105747.jpg

it was a nightmare to get back in as there's no room 🤣 but with my cousin's help we soon got it in & all lined up
IMG_20250205_163123.jpg

Although I think I'll be changing the cable as with all the excitement with getting the box on after having a fight with it I realised I forgot to route the cable through it's hole before lining the box up which resulted in it being squashed/bent, anyway I connected the existing cable up just to test the pedal to make sure all the release bearing etc was all good & doing its job before going any further, it felt all nice & good & with no clonk noise from the release bearing like before but it did feel a little slightly heavier than it should so I think the cable is damaged which is my own doing 😂, luckily I've got a couple of spare modified cables from Ricambio so I'll put one in, so things left to do

1) Fit both new O/S & N/S lower arms which turned up this morning

2) Fit new O/S engine mount

3) Fit new outer anti roll bar bushes as I wasn't 100% happy with the ones I originally purchased from I think it was eBay

4) reconnect gear cables

5) Fit new clutch cable

6) reconnect both shafts & top up gearbox oil

Shouldn't take too long.
 
Today started well & naturally went downhill 😂 so I've got the new bottom arms in with outer bushes for the anti roll bar which went smoothly
IMG_20250206_121235.jpg
IMG_20250206_121252_HDR.jpg


Then the issues started 😂 I thought as I've changed both gearbox mounts I'll change the engine mount, it unbolted easily enough which was good as I've heard about them snapping, then came getting the old mount out of the bracket in which a few naughty words were exchanged 😂 eventually it came out after some cutting as the metal cup that surrounds the mount had seized in the bracket, so new mount comes out & I thought I'll put a small bit of grease around the metal surround to help it slide into the bracket easier, got most of the way in & it got jammed 🤬 so now it can't be moved at all & after getting very annoyed with it I though at this point I'd rather just wear the money for a new bracket with the mount installed already which is what I did £80 later, then I reconnected the gear linkages but without the annoying bracket only to find they're not doing anything as there's no gear selection at all so some investigating to do, I'm wondering as the linkage was very worn maybe removing it wasn't good for it so I'm wondering whether it might need new linkages as I can't think of anything else, does anyone here have any ideas ?
 
Car is all back together now apart from the new engine mount I'm waiting for with the linkage all working, I was very tired the previous evening so I went to bed after having a bath, had a good night sleep & sorted it within a few minutes the next morning 😂 turned out I'd knocked the selector when I had the gearbox out of the car so put the selector back in the right position & all is working again with all 5 gears & reverse so happy days, I fitted the modified clutch cable yesterday as well although the cable itself is a better design as it's just a hole instead of the usual hook which normally breaks I'm not too convinced on the fixings which is a nut & bolt as

A - It's a nightmare to get in & access is even worse than the usual hook cable so imagine trying to fix it at the side of the road if it snaps

B - although the pedal is lovely & light as a new clutch has just been put in it feels slightly heavier with the modified cable than the normal type cable even with a brand new clutch

So my thinking is the nut & bolt arrangement might be a slight strain on the quadrant which I don't want so I did a bit of thinking with a cup of tea this morning which is usually dangerous 🤣 & I came up with an idea which would make it a lot easier & quicker to fix if it snaps & I think less strain than the nut & bolt arrangement so I measured the hole in the cable & the quadrant & then the length with the cable & quadrant side by side as if it was fitted to the car, went onto Amazon prime & picked up some clevis pins with R clips for delivery tomorrow, the theory is it would be easier to change if I had to as all I'd have to do pull the R clip out as I'd have it in a position which would be easy for me to pull out & the just push the pin out to release the cable & the clevis pin through the quadrant all greased up whilst also being allowed to move around freely whereas the nut & bolt doesn't would be a much less of a strain on the mechanism so should be better for it.

Also some goodies turned up today, a nice new Momo steering wheel boss with airbag resistor
from eBay & a new 13 inch steering wheel which is a Temu chinese special so I was a little suspicious as to what it would be like but was very cheap at only £43 so isn't real leather for that money 😂 but overall it seems quite sturdy & good quality, just to get an appropriate Fiat horn button now
IMG_20250208_214547.jpg

It also has quite a nice feel even though it's faux leather/vinyl as I've never been a fan of the rugby ball style steering wheel in the Seicento's which is why I'd like to change it, my old Cinquecento also had the same wheel & I remember swapping it with the steering wheel from my dad's MK1 Punto the day before he scrapped it as I was an 18 year old with no spare cash & it was a free upgrade at the time 😂.
 
Got the sporting rims fitted onto the car today
IMG_20250214_162746.jpg


IMG_20250214_162735.jpg


Also the BMC air filter element turned up from Italy a few days ago so put that in & it's made a huge difference in the 899, it actually feels a lot quicker & there's also a bit of induction noise in which 3rd & 4th is very amusing 🤣 as it sounds like a very mild supercharger noise 🤣
 
Got the sporting rims fitted onto the car today
View attachment 460732


View attachment 460733

Also the BMC air filter element turned up from Italy a few days ago so put that in & it's made a huge difference in the 899, it actually feels a lot quicker & there's also a bit of induction noise in which 3rd & 4th is very amusing 🤣 as it sounds like a very mild supercharger noise 🤣
Looking good. 👌🏻
 
I did the best thing today (apart from the wheels 😂) & fitted Cinquecento door mirrors as the standard Seicento mirrors are quite frankly pants 😂 so saw these advertised on eBay for £25 & managed to get them for £15 the pair delivered & although the fit isn't the best around the edges as they are aftermarket for £15 they are good enough & are a huge improvement over the standard Seicento ones
IMG_20250224_165330_HDR.jpg
IMG_20250224_165322.jpg

Also she started seeping gearbox oil from what at first looked to be the casing so I started to think worst case scenario & decided to undo the shaft from the gearbox & my prayers were answered 😂 as it turned out to not be the casing like I feared as there was no damage or imperfections to the gearbox, it turned out to be the half shaft cover which has some corrosion along the bottom edge resulting in some pitting & when bolted up to the gearbox you can see the half shaft cover is ever so slightly mishaped along the bottom edge resulting in a very minor gap for oil to dribble through & also the bearing in the inner boot is starting to seep as well although it's not excessive I've decided to get the bits & sort it straight away so I've ordered a new genuine Fiat half shaft cover from Italy which is coming this week & I've got some long journeys coming up as I'm going to Caffeine & Machine & then soon after going back down south to see family & friends etc I'll be doing roughly around 1,000 miles all in so I decided to not muck around with individual parts & got a brand new SKF shaft with joints, boots etc all included & pre assembled just like I did with the near side a few months back which was also SKF from the same supplier & I've had no issues with it which was why I went for the same make for the offside, also it'll be a lot quicker than doing the bits separately, cheaper & also peace of mind for the upcoming journeys as it'll all be brand new so that'll be all fitted some time next week as it's coming from Germany
 
Last edited:
I found some Heko wind deflectors on eBay for the Seicento which don't seem very easy to get hold off nowadays, the seller only had 3 & as soon as I purchased them the other 2 were sold as well & they turned up in just 3 days from Slovakia. On some cars they look a bit silly as they stick out but on a Seicento they sit pretty much in line with the door without sticking out so they look quite good 👌

IMG_20250227_180424~2.jpg
IMG_20250227_180436~2.jpg


The new half shaft cover also turned up today which was also very quick just 3 days from Italy, just waiting on the new shaft to arrive & then it can be all fitted in & forgotten about.
 
So the new shaft turned up & the inner boot is wrong as it's a near side one so will not fit into the half shaft cover 🤬 so I looked up the info to make sure the OEM number was correct with ePer & what was stated on the order which both matched, although it turns out after some research there's 2 complete shafts for the 899 on offer with different parts numbers along with all the exact same measurements, tripod bearing etc with the only difference being the inner boot & my exact thought was how stupid & why 😡 so I sat down, thought about it & decided rather than have the hassle of sending it back to Germany as I can see now how much hassle that would be & to be honest I can't be bothered with it 😂, also the rest of the shaft is correct so I'll just live with it, change the boot for the correct one I've ordered as I'll get it off with a bearing puller & learn from this mistake partially on my half as I didn't think there'd be 2 types for an 899 which was news to me, so now just to wait for the new correct boot with bearing to turn up
 
So the new shaft turned up & the inner boot is wrong as it's a near side one so will not fit into the half shaft cover 🤬 so I looked up the info to make sure the OEM number was correct with ePer & what was stated on the order which both matched, although it turns out after some research there's 2 complete shafts for the 899 on offer with different parts numbers along with all the exact same measurements, tripod bearing etc with the only difference being the inner boot & my exact thought was how stupid & why 😡 so I sat down, thought about it & decided rather than have the hassle of sending it back to Germany as I can see now how much hassle that would be & to be honest I can't be bothered with it 😂, also the rest of the shaft is correct so I'll just live with it, change the boot for the correct one I've ordered as I'll get it off with a bearing puller & learn from this mistake partially on my half as I didn't think there'd be 2 types for an 899 which was news to me, so now just to wait for the new correct boot with bearing to turn up
What a ball ache...
 
Got round to fitting the new shaft today as I had no plans so decided to do something productive, so after removing the old shaft I measured the distance between the rubber weight balancer & the bearing on the original shaft which was 33.5cm before swapping the balancer over to the new shaft, I'd already put the new inner boot & new metal cover on the shaft before fitting to the car, so it's now all done & no more leaks 😁👌

IMG_20250305_152213.jpg
IMG_20250305_152154.jpg


I also undone the 2 8mm bolts that hold the crank sensor to the bracket, withdrew the sensor & gave it all a good clean & had a good look over the car to make sure that nothing else needed to be done so the car is now all ready for Caffeine and Machine on the 18th.
 
My stereo for the car broke a few days ago, it was only a cheap Chinese one from eBay just to get the system working properly at the time so didn't expect it to last long although it did 9 months for £20 so can't complain 😂, so I set about looking for a decent one & didn't want anything too lairy but I did want bluetooth so came across a new one on eBay from a company I've purchased a few things from in the past & got a discount code so was only £70 delivered for a Kenwood mechless bluetooth stereo, I went mechless as I don't own CDs anymore 😂 & also I can get DAB on my mobile via bluetooth so didn't see the point of paying extra for DAB as the signal is better from the mobile than a proper DAB aerial 😂
IMG_20250313_173141.jpg
.

Also I'm really considering some lowering springs to get rid off some off the body roll & a nice subtle exhaust to go with the BMC air filter I put in a few weeks ago, with the springs I'm thinking about 20 - 30mm drop as it's a daily driver & where I live is full off speed bumps so don't want to go too mad 😂 & with the exhaust I'm thinking with an adapter sleeve which can be purchased off eBay for quite cheap I'd be able to put a standard cat back SPI Sporting system on her as the SPI Sporting's have the cat in the same place underneath as the 899 & also has a slightly wider diameter with an extra silencer which would help flow & performance etc.
 
Last edited:
Back
Top