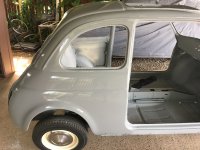
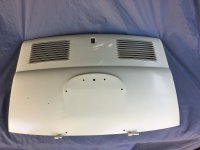
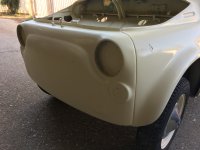
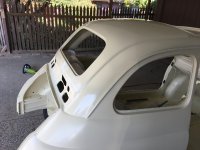
General Fiat 500F rejuvenation

Currently reading:
General Fiat 500F rejuvenation

Attachments

  • 9A2A7CCD-C2D0-405C-9A0D-E2FADF2FE6FD.jpeg
    9A2A7CCD-C2D0-405C-9A0D-E2FADF2FE6FD.jpeg
    1.8 MB · Views: 45
Just a reminder before you spray the finish coats. (Sorry if I'm stating the obvious...)

DUST IS THE ENEMY OF A GOOD PAINT FINISH!

Bdtd!!!!
Clean car thoroughly after final sanding/preparation. Don't forget about corners, recesses, underneath bonnet/engine lid, inside of doors, the boot and engine bay. Replace any masking, wheel covers etc with fresh ones before spraying the finish coats. Don't wear clothing that can hold dust or shed fibres.- you can get inexpensive disposable paper type coveralls. Dampen down the surrounding floor. I see you're spraying in a relatively open space- try to minimise draughts from openings - any air movement can carry dust. For some reason, flies etc just can't seem to wait to land on your final finish.

If spraying the interior, engine bay and boot it might be better to mask off the outside of the car and spray these first. This is good practice for your spray gun settings etc. Then mask off the interior, boot and engine bay and spray the exterior. Trying to do all at once often results in overspray on the interior or engine bay spoiling the final result overall.

Best of luck with the final spray coats (y)

AL.
 
Last edited:
Too humid to be painting this weekend so still sanding.

Thanks for the tips.

I had a friend from our car club pop in the other day. He is a retired spray painter. I had been sanding in circles which left swirls.

He said to keep the sanding nice and straight and the finish is a lot better. He said to do the roof and sides in a front to back direction.

Latest photo with panel wet down with wax and grease remover.
 

Attachments

  • D98C906B-D8C7-4B61-B812-8C130B691106.jpeg
    D98C906B-D8C7-4B61-B812-8C130B691106.jpeg
    2.2 MB · Views: 33
Last edited:
Hmmm. The more I sand the more teeny tiny imperfections I see.

I need to take off my glasses, stand back And be happy ?

The weather looks ok for some painting this weekend
 

Attachments

  • A03E0CE4-4AB0-4938-A7E7-E2385EF4C25A.jpeg
    A03E0CE4-4AB0-4938-A7E7-E2385EF4C25A.jpeg
    1.8 MB · Views: 41
Quite lucky that the weather forecast is good for this weekend. 28 C so should get a good lot of painting done.
 

Attachments

  • 959E4CCE-E9C9-4436-9B67-6CEA7985ABA8.jpeg
    959E4CCE-E9C9-4436-9B67-6CEA7985ABA8.jpeg
    2.6 MB · Views: 37
Sanding showed up some areas where the primer was too thin. Taped up ready to give the outside a few more coats.
 

Attachments

  • CB3EBA96-87A3-4254-BF5D-92A6038FB8F2.jpeg
    CB3EBA96-87A3-4254-BF5D-92A6038FB8F2.jpeg
    2.1 MB · Views: 35
Last edited:
Hi Geoff,

I think you made the right decision! (y)

There's a natural tendency when re-painting a car to 'press-on' especially if you're trying to fit this work in around other commitments. (Btdt :cry: )
But if you spot any defects when sanding, it always better to defer painting until they're rectified.

Well done for exercising patience, I hope you'll achieve a great finish.

Regards,

AL.

Thanks Al

My patience was almost wearing as thin as the primer.?

I got a few good coats on this afternoon thanks to our unseasonally warm dry weather.

Cheers

Geoff
 

Attachments

  • AAF76F9B-A204-4B49-A8B0-259241D18FE9.jpeg
    AAF76F9B-A204-4B49-A8B0-259241D18FE9.jpeg
    2 MB · Views: 32
Success. The weather was warm enough but a bit windy so we pushed the Austin7 and Fiat 850 out of the garage. Covered things up, wet the floor and painted.

A much better finish than the first go.

At 10.30pm tonight I could say to my wife “I don’t have to do any sanding tonight ‘. And then proceeded to work on our local Fiat club magazine
 

Attachments

  • 2D8B373D-E098-4CCB-841E-69BFD119AB2F.jpeg
    2D8B373D-E098-4CCB-841E-69BFD119AB2F.jpeg
    2.2 MB · Views: 32
The Austin7 sees the light of day. Need to fix the generator now there is some paint on the 500
 

Attachments

  • BA7E47E2-87A9-4F53-AD17-8AC3B89A61C5.jpeg
    BA7E47E2-87A9-4F53-AD17-8AC3B89A61C5.jpeg
    2.4 MB · Views: 22
This pic shows the difference between roof that has been cut back and rear quarter panel waiting it’s turn.
 

Attachments

  • 0AACB926-554A-475D-9DC3-0E94C7D42B76.jpeg
    0AACB926-554A-475D-9DC3-0E94C7D42B76.jpeg
    2.1 MB · Views: 25
Looking good.

But please don’t look too closely as when I was nearly done on the rear quarter panel, I got too close to the wheel arch on the wrong angle. The foam pad on the buffer caught the edge and took a tiny bit of paint off. Oh well. A small touch up will fix that.
 

Attachments

  • 887CDA78-93AB-4B03-BCB0-6B8EE1060BBE.jpeg
    887CDA78-93AB-4B03-BCB0-6B8EE1060BBE.jpeg
    2.3 MB · Views: 25
Back
Top