Technical 650 Engine Rebuild

Currently reading:
Technical 650 Engine Rebuild

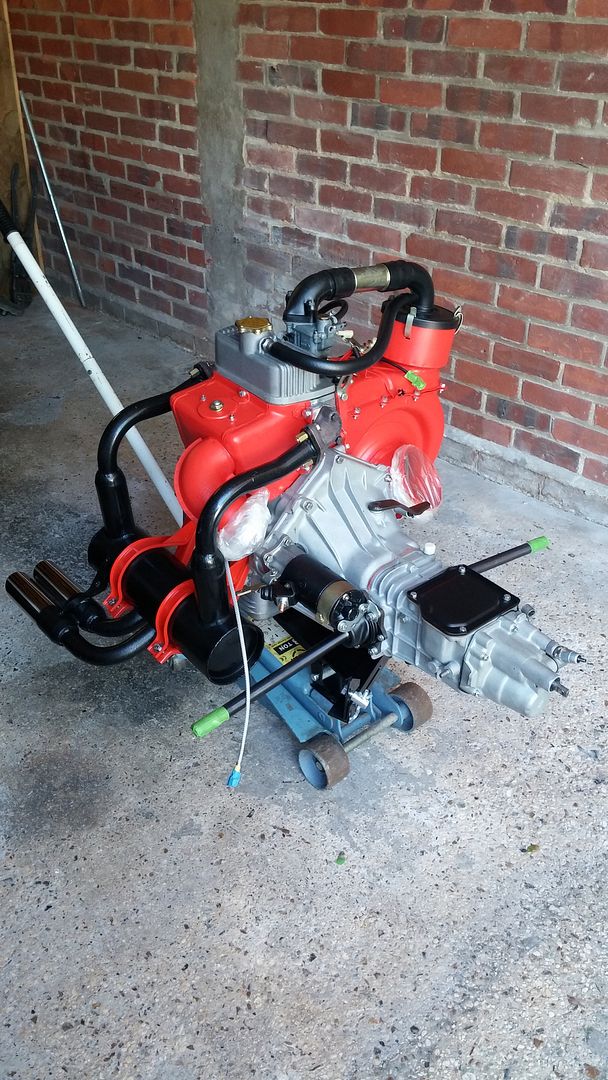
I think it originates from a 126 pre-1977 and the engine type-number would have an extra "5" in it if it was from an "R".
It might be supposed to have a few extra horse-power,; we'll see!:D
Apparently they were mean with the "R", or perhaps they were catering for the more discerning driver:D, but they didn't have synchro.
It actually cost £102 but there was no way I was driving to Hull so delivery was £50...still a bargain as you say.
I think it might already have been once transplanted into a 500 so it makes me wonder what went on?
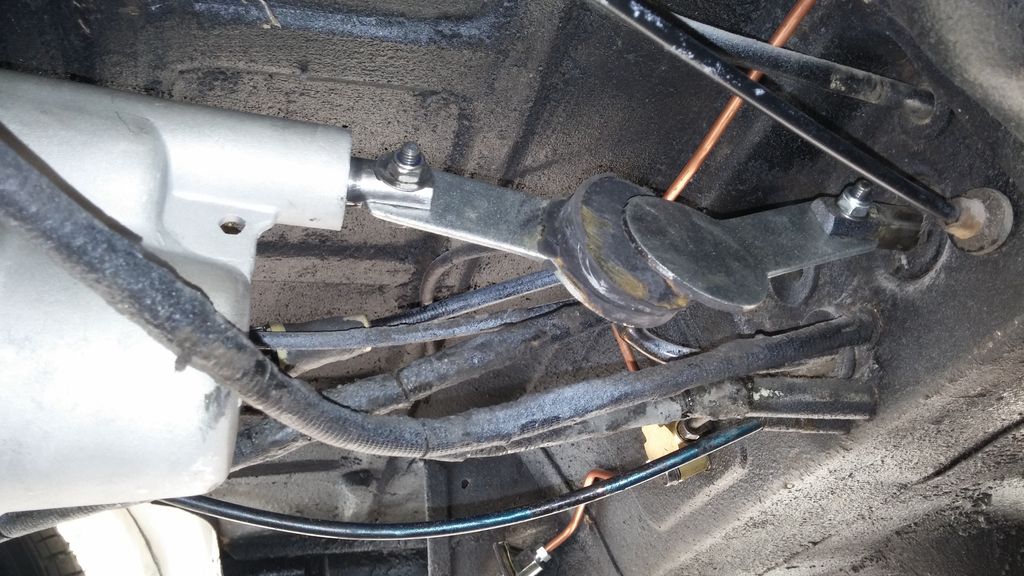
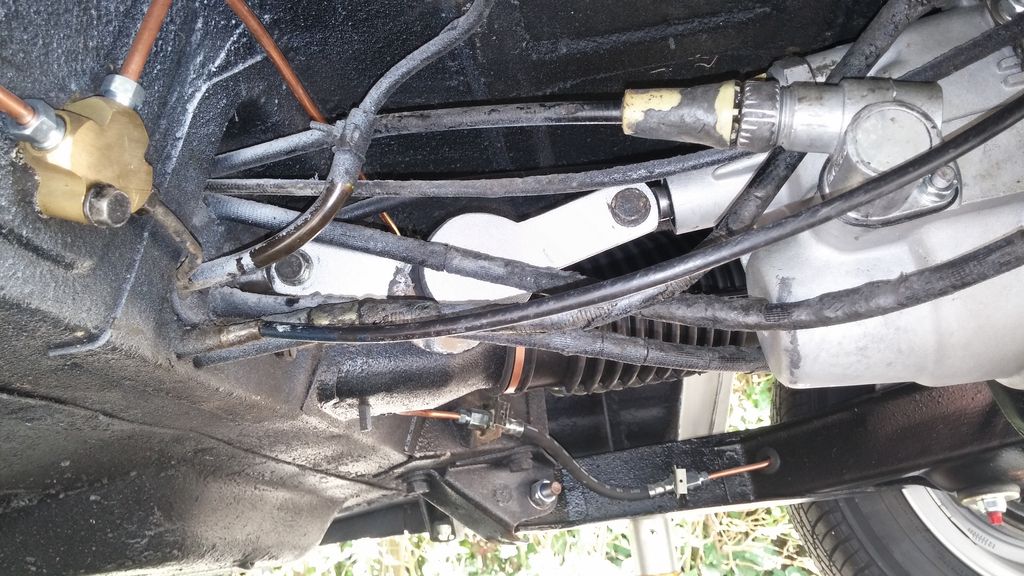
There don't seem to be 28IMB carbs without a return pipe, so someone must have blocked it (very professionally). The engine mounting has the long 500 studs. Somehow it is functioning with the 500-type thermostat housing (slightly modified). I'm not sure that the exhaust is 126 or 500.
There is atiny amount of end-play on the crankshaft but I am hoping that it's demise was because of a fault with the dynamo; the clue is that someone must have started to remove it as that securing strap takes a fair bit of deliberate effort to remove.
So now I have the full set of engines that I care to own (I don't want anything to do with those N and D engines) ;) . maybe I can stop buying now.:rolleyes:
 
I have removed the thermostat housing from the 594, partly to see where the oil leaks are coming from and to work out if it will fit on the 652. It's definitely from a 500 but I'm not sure that using it would let me refit the heater hose when fitted to my 500 car. You can see the tin-bashing someone has done to help keep clear of the exhaust pipe.
MAL_5789 by Peter Thompson, on Flickr
I thought it worth showing the difference in the cowlings because it gets asked about, (including by me), quite frequently. The silver one is from the bigger engine. There is the elbow of course, and the thermostat pivot being secured by a nut with the return spring externally fitted.
MAL_5794 by Peter Thompson, on Flickr
MAL_5784 by Peter Thompson, on Flickr
I cleared up another cowling conundrum that had kindly been explained to me on the Forum; the studs for mounting the alternator seen on this cowling are quite a bit wider apart than they would be for a dynamo.
MAL_5819 by Peter Thompson, on Flickr
It's obvious that the usual culprits are responsible for most of the oil leaks.
MAL_5805 by Peter Thompson, on Flickr
Finally, the carburettor appears to be a "28IMB1 and here it is with the blanked return orifice.
MAL_5809 by Peter Thompson, on Flickr
MAL_5812 by Peter Thompson, on Flickr

The plan now is to try the newly acquired gearbox on the 650 engine and I don't think I need to acquire anything else of great significance in order to get on with fitting it in Murf. As I said previously, i'm just after the fun of doing the job and having a tryout. It would take a great deal of driving before I could ever have the confidence that I've gained in the trusty 500 engine.
I will try it with the alternator although that is an unknown quantity especially since I soldered-on a new rectifier from a completely different make of alternator.:eek:
This modding is really addictive; I'm planning a big pink stripe down the side next.;)
 
After reading my last post I note that I didn't paint the pink stripe,:D I found that the gearbox I planned to use was as worn as the first and I did test the alternator on the car and it works fine.
So I'm now fitting the engine and box and I am getting down to the details that you only really understand when you get involved in the task.
I took up all available slack in the main starter cable from the battery by pushng it forwards from the front and unclamping where it is clipped above the gearbox.
MAL_3577 by Peter Thompson, on Flickr
I also removed the existing starter-pull cable whch is clamped at the same point and fitted the 126 version, which is longer. This has a different connection to the pull-lever, so I will need to obtain the correct clip to secure it.
MAL_3574 by Peter Thompson, on Flickr
Tomorrow I hope to slot the engine and box into place.
 
....and what performance now!:eek:
The 650 started first time, which just emphasised how bad the 500 had become.
I used a new, standard engine-mounting spring which was a fair bit longer than the old one.
MAL_3609 by Peter Thompson, on Flickr
If anything, the new engine sits lower than the old one...(apologies for rust).
MAL_3606 by Peter Thompson, on Flickr
It was worth putting in because the engine sits very firmly now.
I can now see the issue with the heater transfer box getting close to the starter motor...tin-bashing or a new 126 version needed.
the back of the starter is quite close to the suspension pillar but is OK.
MAL_3604 by Peter Thompson, on Flickr
The rear exhaust pipe is just clipping the fixed part of the shelf.(rust treatment underway)
MAL_3597 by Peter Thompson, on Flickr
I read that I needed the 126 starter pull-cable, but that is way too long so I hope the original will fit.
I used the engine complete with its matching synchro box. The new clutch plate had stuck to the flywheel but the design helped me as I could loosen it at the inspection cover and prised it away with a thin knife.
The engine needs running in with new rings and bearings etc.. so I can't push it yet, but it's definitely very perky, especially since I must have lost compression on the old engine. It's wierd having synchromesh to drive to Sainsburys with.:)
But I can see why people do this upgrade.
 
I would advise upgrading the spring. Theres not much movement in that standard one
 
I would advise upgrading the spring. Theres not much movement in that standard one
? Not sure about that. The original spring may have been at least 20mm shorter and was much more compressible. This one possibly has more coils and although they are close to binding​ on each other, there is such a powerful rebound torque there, I can't imagine other than a shorter one with thicker coils could be any heavier duty.
I can't yet see an actual or potential problem with it.
To clarify.... it isn't squashed with the weight of the engine, rather it is with the action of tightening the mounting bolts that clamp the assembly to the engine and rear panel.
The only alternatives that I see commonly listed are suited to the different rear panel and mountings for the 500R and 126.
Still I'm open to being pointed at a more appropriate spring.
 
I originally fitted the uprated rear spring. I ended up removing it and using the original one. The new one was so rigid that the car had massive vibrations coming from everywhere and felt horrible to drive.
Having never driven the car before I didn't know quite what to expect - but it wasn't that.
I have the standard spring, no additional spacer between the engine mount and the cam cover, my exhaust cleared the side panel but I did need to reshape the bolt on side cover. Its the same exhaust as yours and have plenty of clearance under the rear panel.
I bought the 126 heater channel which fits nicely and gives you the additional clearance - just!
I think you are going to find Murph so much nicer to drive! And with all that extra hp just think of all those mountains you can climb now
smile.gif
 
Ooh good, so first impressions are what? You can feel all those additional horses itching to go faster? Any noticeable engine noise difference? Gearbox nice and smooth and a lot less effort?
 
Ooh good, so first impressions are what? You can feel all those additional horses itching to go faster? Any noticeable engine noise difference? Gearbox nice and smooth and a lot less effort?

Definitely to the first...more noticeably than I expected, better acceleration, less need to change gear, much quieter (but there are obviously a lot of reasons for that), a significant power boost.
.
The gearbox does have a slightly higher overall gear, synchromesh works well but has a slightly insipid feel as you might expect with the tiny internal components. There is the same first gear whine and all those sprockets are new and a small amount of different gear sounds in all gears because I have a brand new shaft meshing into the original helical gears. There isn't as much differential whine as my old box.

I've only done about ten miles but never felt the need to stop and adjust anything and tickover is perfect. Once I've sorted the 500 engine I might even have a play with the 600 and if really worn I would go the whole hog wit new pistons and a regrind etc. Both engines upto now have been only partially reconditioned as many of us tend to do.
 
Original will fit Peter, it just needs re-routing and a new p-clip putting in.

Thanks Steve. That might work in some situations but for mine it is literally a bit of a stretch. The worst thing is that the cable cuts across the starter terminal. Despite it having heavy insulated cover there's no way I'm doing that.:D
MAL_3626[1] by Peter Thompson, on Flickr
So I have looked at the longer one again to understand the 500R method. As well as the dent in the heater tube, there is also a nylon stop which locks into the tube, so I have drilled and filed a slot for that. There should also be a couple of tabs to bend over to stop the cable flapping. I have also re-routed the starter cables to go under the motor before connecting so that they are out of the way.
I just have to prime and paint the heater tube before can show what I mean. I also need to paint the brand new sump as the paint has simply flaked off despite it never being used.(n)
 
My starter cable exited on RHS of tunnel, then ran parallel to heater duct..

f736b3b2a2612697cb96f52ac18aa2b6_zpstma2kkdd.jpg


59b902ff2f92ebde93ddd24d8545f6e2_zpsftban5uy.jpg


Then I ran it outside gearbox mount to run above A-frame/drop arm. It was p-clipped to gearbox/suspension mount and had a straight pull on starter, with no chance to come near positive terminal...

08c6d1b95caf4ae245cd129d1dcdac52_zpsoynfuw4s.jpg


Unfortunately, I don't have any pics of it in situ.

Cheers, Steve
 
I thought the gear linkage was straight but yours is almost at 45 degrees Steve?
 
Back
Top