One will need:
-Strong fingernails
-Flathead screwdriver if the nails let you down
-An empty jar
-Hot water (from the tap)
-About 15 mins of your time
Step one:
Open the bonnet by pulling the tab inside the car under the steering column toward you. Unclip the bonnet retention spring and lift the bonnet and secure with the rod on the left hand side.
Step two:
On the underside of the bonnet is some black material which serves as sound proofing. Held on by a whole load of black circular clips. Take your strong fingernails and pull them out, or use the screw driver to carefully prize them out. No pics here I'm afraid as my sound proofing was already off.
Step three:
Now you can see the underside of the washer nozzle and hose.
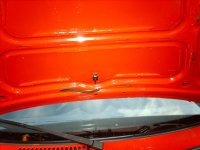
Remove the hose from the nozzle by simply pulling it off. Support the nozzle with a spare hand whilst you do this to avoid damaging the bonnet.
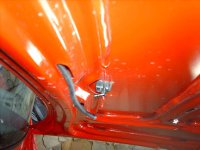
Step four:
To remove the nozzle, push in the clip in and push the nozzle out of the gap. It will come out rear first, not front (where the clip is) first.
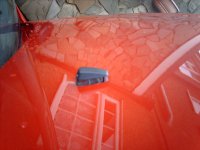
Step five:
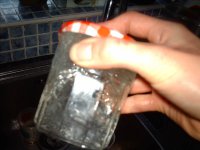
Take your jar and fill it with hot water from the tap. Now, dunk the nozzle in and put the lid on.
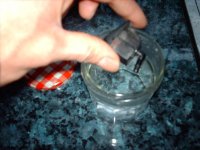
Give it a good old shake around then leave to settle for a bit. I left mine until the water cooled.
Step six:
Take nozzle out and blow where the pipe goes in. It won't kill you (If it does affect you I accept no liability )! if water comes freely out of all three washers then yay, you're good to go. If not, repeat step five.
Step seven:
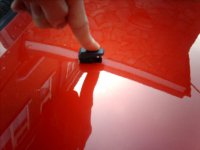
Refit to car by pushing the nozzle in rear first (reverse of as it came out). Once the nozzle clicks in and sits flush with the bonnet, you're all set. You may want to give the paint around the whole a clean before you refit, as I had old polish around there etc.
Step eight:
Refit the washer hose by pushing it on. Refit the sound proofing by just lining it up and pushing the circular clips back in.
Step nine:
Give the washers a go and if they all squirt then job well done. You may also need to adjust where the nozzle sprays. To do this, take a pin and insert it into one of the nozzles. You are free to move it around then on it's ball joint. Adjusting is by trial and error.
Step ten:
Clear away any tools used, wash up the jar and sit back and relax in the knowledge that you will be able to see next time you're following a massive truck on a semi-wet road!
-Strong fingernails
-Flathead screwdriver if the nails let you down
-An empty jar
-Hot water (from the tap)
-About 15 mins of your time
Step one:
Open the bonnet by pulling the tab inside the car under the steering column toward you. Unclip the bonnet retention spring and lift the bonnet and secure with the rod on the left hand side.
Step two:
On the underside of the bonnet is some black material which serves as sound proofing. Held on by a whole load of black circular clips. Take your strong fingernails and pull them out, or use the screw driver to carefully prize them out. No pics here I'm afraid as my sound proofing was already off.
Step three:
Now you can see the underside of the washer nozzle and hose.

Remove the hose from the nozzle by simply pulling it off. Support the nozzle with a spare hand whilst you do this to avoid damaging the bonnet.

Step four:
To remove the nozzle, push in the clip in and push the nozzle out of the gap. It will come out rear first, not front (where the clip is) first.

Step five:
Take your jar and fill it with hot water from the tap. Now, dunk the nozzle in and put the lid on.

Give it a good old shake around then leave to settle for a bit. I left mine until the water cooled.

Step six:
Take nozzle out and blow where the pipe goes in. It won't kill you (If it does affect you I accept no liability
Step seven:
Refit to car by pushing the nozzle in rear first (reverse of as it came out). Once the nozzle clicks in and sits flush with the bonnet, you're all set. You may want to give the paint around the whole a clean before you refit, as I had old polish around there etc.

Step eight:
Refit the washer hose by pushing it on. Refit the sound proofing by just lining it up and pushing the circular clips back in.
Step nine:
Give the washers a go and if they all squirt then job well done. You may also need to adjust where the nozzle sprays. To do this, take a pin and insert it into one of the nozzles. You are free to move it around then on it's ball joint. Adjusting is by trial and error.
Step ten:
Clear away any tools used, wash up the jar and sit back and relax in the knowledge that you will be able to see next time you're following a massive truck on a semi-wet road!

