This is the first time i have ever wrote a how 2 so it may not be so good and i also made the mistake of only taking a few piccys whilst doing it.
This was the first time i ever tried anysort of painting on this scale and i have no skill so dont worry if you have never done it before also i did it whilst the b/kit was on the car on a sunny windles day
!DISCLAMER!-this article is based on the way i made my shabby body kit and plastics look that little bit better untill i can afford a proper respray.So therefore i accept no responsibilty if your tidy up goes wrong.
BODY KIT
STEP 1
First of all you'll need some basic materials (i got from halfords )
)
Now lets get the preperation started
(if this is rushed or done incorectly it WILL ruin the whole job)
getting the paint on
again this should not be rushed
for the plastics just follow the above instructions and you should be ok but just make sure they are all smooth before painting.
heres a list of the plastics i painted and whether i removed or painted on the car
THANKS FOR READING AND GOOD LUCK
This was the first time i ever tried anysort of painting on this scale and i have no skill so dont worry if you have never done it before also i did it whilst the b/kit was on the car on a sunny windles day
!DISCLAMER!-this article is based on the way i made my shabby body kit and plastics look that little bit better untill i can afford a proper respray.So therefore i accept no responsibilty if your tidy up goes wrong.
BODY KIT
STEP 1
First of all you'll need some basic materials (i got from halfords
)- correct coulerd paint
- filler primer
- the correct coulerd primer for the paint
- Laquer
- filler,fibre glass kit (if required)
- 80 grit sand paper (if filler is used)
- 1200 grit wet 'n' dry paper
- some sort of surface clenser (cant remember what i used)
- a few rolls of maskin tape
- a lot of old newspaper
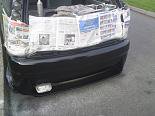
Now lets get the preperation started
(if this is rushed or done incorectly it WILL ruin the whole job)
- now do all necessary repairs,obviously fill big holes with fiberglass then use the filler to smooth the whole b/kit over (i.e scrapes,little holes etc)
- allow to dry and then rub down with the 80grit paper BUT LEAVE ENOUGH ON FOR THE FINISH SAND
- now get the 1200 grit wet 'n' dry with a bucket of water and wet the paper untill its dripping then rub down the whole bumper (inc. filler) until totaly smooth keeping the 1200 wet all the time
getting the paint on
again this should not be rushed
- after allowing to dry, wipe the bumper with the cleansing wipes so it is ready for the filler primer
- now read the can's application instructions and give the bumper 2 coats of the filler primer
- now rub down with the 1200 grit again untill smooth,then do the same process as the filler primer but with the right coulerd primer for the paint
- again do the same as above with the correct coulerd paint but applying 3 coats and rubbing down inbetween each 1
- now leave for 24 hours
- now cleanse the surface and give 2 coats of laquer
- stand back and admire your results:slayer:
for the plastics just follow the above instructions and you should be ok but just make sure they are all smooth before painting.
heres a list of the plastics i painted and whether i removed or painted on the car
- Door handles - left on the car and masked off
- rear boot handle - removed - by three hex keys
- plastic strips on front of rear windows(3 door) -removed - open the door and remove the 2 screws and slide the plastic off
- Mirrors - will be removing
THANKS FOR READING AND GOOD LUCK