Swapping the regulator and wiring the plug
It would be a good idea to lower the window as far as you can, perhaps by having an assistant operate the switch while you push down on the glass, etc. If this is not possible, you will still be able to remove the glass from the regulator but it will be more of a struggle than if the window were lowered first.
Unplug the motor plug - you might need to pull out the yellow part of the plastic clip first.
Undo the three 10mm nuts that hold the regulator to the door.
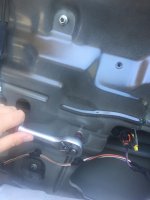
Reach inside the door and locate the spring finger that holds the glass to the regulator - release it while pushing the glass up a little. This is quite straightforward, but in the words of Deckchair5 (from the Stilo forum, ten years ago) - "practice first by shuffling a deck of cards, upside down, in the dark, with one hand"
Remove the regulator through the largest hole in the door metalwork.
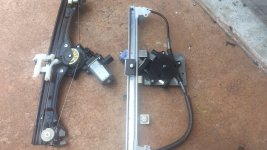
Marvel at the differences between the original regulator and the replacement part - here they are side-by-side again:
Fit the replacement plug (supplied) to the regulator motor - it is easier to do this before the regulator is fitted to the door, as the plug is a tight fit. Pass the wiring between the securing bracket and the door, to prevent any chance of the wiring getting tangled by moving parts.
I suggest wrapping the wiring with foam tape to reduce the risk of chafing/insulation damage.
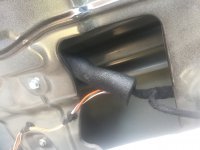
Fit the new regulator into the door. It will probably arrive with one or more bolts fitted - remove these and use them in lieu of the original nuts. Leave nuts and bolts loose at this stage.
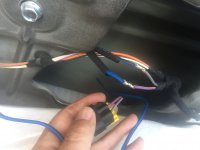
Cut the original plug off the door wiring. Shorten the wires of the replacement plug to an appropriate length - always leave a little excess - and strip the insulation. I recommend soldering the wires and the use of heat shrink tubing, but you could also use crimp connectors (blue size) which would be faster. A final option is a screw terminal block; reliable, but looks a bit of a bodge.
For the left door,
Blue wire of replacement plug - purple and yellow wire of car's wiring
Blue and black wire of replacement plug - purple and green wire of car's wiring
It helps if the window regulator is fully lowered before fitting the glass to the regulator. Now that the wiring is attached, you can of course achieve this by using the switch.
Fit the pin of the regulator through the glass and attach the C-shaped clip onto the outside of the glass.
Complete the wrapping of any exposed wiring using foam tape (or similar).
Tighten the regulator nuts/bolts and test the window operation before refitting the white foam sheet and door panel.
You will probably find that the newer-style regulator operates faster than the old-style regulator. Perhaps you will now replace the other window regulator as well

