The service CD I got didn't have too much detail, but it implies that the aerial base does contain an aerial amplifier.
I know that on other cars that these have failed due to water getting into them.
The aerial amplifier needs a 12V supply via the aerial lead, this is supplied by the original headunit but not by other types.
The connection of the aerial lead is more critical than for just carrying the AM/FM radio signal, small breaks or connector corrosion will stop the 12V supply getting to the aerial amplifier.
The aerial amplifier actually reduces the signal if it does not receive power (or is broken), ie. the reception is worse than for an un-amplified aerial.
If you have problems with the reception on the original headunit - check the aerial lead for continuity and aerial base unit for corrosion (not so easy as I believe the internal headlining needs to be removed). I have put details for the built-in radio diagnostic check at the bottom.
With an aftermarket headunit another aerial amplifier is not needed, but the existing wiring and aerial base amplifier unit need to be in good condition.
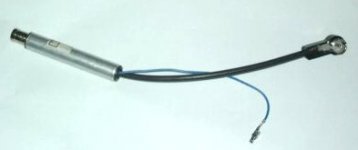
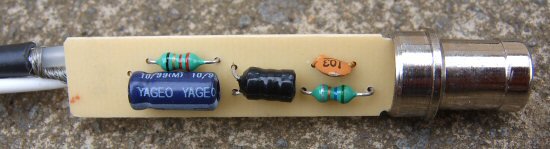
The adaptor which I described in a previous post is actually what is needed - it feeds 12V up the aerial lead, so that the aerial base amplifier will work - these are often described as an aerial booster for VW (but does not actually amplify the signal itself), can be found for £10-£20 on ebay.
Non too helpful info from CD :
AMPLIFIED AERIAL CHECK
Continuity of the coaxial aerial cable - Aerial cable faulty
- Renew or replace the aerial cable
Aerial amplifier faulty
- Replace the aerial amplifier
Diagnostic test for radio :
Radio aerial reception - Diagnostic tests, original radio.
Irrespective of the position of the ignition key, switch on the radio by pressing the 'VOL PUSH ON/OFF' knob for more than a second.
Voltage reading for signal coming from the radio aerial :
Press buttons '3' and '6 RND' at the same time. The acoustic test at the speakers has started. Press button '3' again to enter this mode.
An indication of the intensity of the radio tuner output signal, expressed as a voltage (e.g. 'SIGNAL STRENGTH 1.6 V') will appear on the display.
Diagnosis of short circuit (audio channels and radio aerial) and open circuits (radio aerial) :
Press buttons '3' and '6 RND' at the same time. The acoustic test at the speakers has started. Press button '6 RND' again and check that the words 'SHORT CIRCUIT - OK' appear on the display.
If there is a short circuit at one or more of the speakers, a list of components will appear on the display with an X at the side indicating the faulty speaker. The presence of a mark indicates that the channel(s) is/are not short circuited.
LF = left front audio channel
RF = right front audio channel
LR = left rear audio channel
RR = right rear audio channel
X = audio channel short circuited
Mark = audio channel not short circuited
If the words 'AERIAL: GND SHORT' appear, this indicates a short circuit to earth at the radio aerial intake.
If the words AERIAL: BATT. SHORT' appear, this indicates a short circuit to the battery positive at the radio aerial intake.
If the words 'AERIAL: OPEN CCT' appear, this indicates an open circuit to the radio aerial intake.
Note : Where several faults are present at the same time, the respective signals will be shown on the displayed alternately (rolling) lasting around 2 seconds for each message.
To exit the diagnostic procedures, switch off the radio by pressing the 'VOL PUSH ON/OFF' button for more than a second and/or turn the ignition key OFF.