Technical No oil light but immobiliser light stays on

Currently reading:
Technical No oil light but immobiliser light stays on

Has to be said...thanks a million sir, your advice and guidance has kept me going, especially on helping identify the correct pins to check the wire.
Really, really appreciate it
:):)(y)

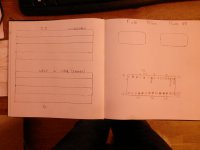
I only began to realise what you must be going through when I went to my garage to identify all of the ECU wires and began to have a mental breakdown at wire 3. and I could not even manage to get the pin numbers right! :)
 

Attachments

  • P4061259.JPG
    P4061259.JPG
    413.1 KB · Views: 72
I only began to realise what you must be going through when I went to my garage to identify all of the ECU wires and began to have a mental breakdown at wire 3. and I could not even manage to get the pin numbers right! :)

Ha, that was 1 more than me! I stopped when the red wire showed no continuity. Being a simple minded bloke I hoped that a red wire meant power and that was that. Glad you managed to get the pins sorted as it gave me the confidence to put the snicks in to check from there. From that point it became simple enough. I will post some photos later as Varescrazy has asked where the issue was located. Something we can all learn from, especially those like myself that like to ‘tinker’ with what’s under the bonnet with no real clue as to what is happening.
Thanks again, really shows the benefit of this forum.
 
Last edited:
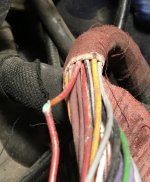
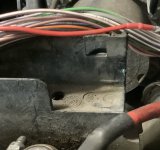
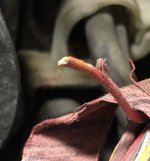
So now the problem has been resolved I thought I’d share some photos showing the location of the issue. At the inside end of the battery box is a channel that the wiring loom from ECU to fuse box sits. It looks as though there should be some clips that would hold the loom against this channel thus preventing movement. These are missing. The loom has been rubbing against the edge of the channel as can be seen by the cleaner section of plastic. The light coloured spot on the edge is where the wire has been rubbing, worn through the covering and left a deposit of corroded wire. If you look closely in the first photo you may be able to see that other wires are showing signs of wear (yellow, red and brown) and will need to be checked before taping up.
Hope these are of some use. Top learning tip for me......remember that everything electrical requires a feed and an earth. Pays to check these thoroughly before opening the wallet to replace components that are otherwise 100% ok!!!
Hey ho
 

Attachments

  • 7D3ED13E-3B96-42F5-ABF5-F92EEA878F1F.jpeg
    7D3ED13E-3B96-42F5-ABF5-F92EEA878F1F.jpeg
    556.8 KB · Views: 260
  • B4CC4BA4-B415-4293-A5B0-FF8C982C35D2.jpeg
    B4CC4BA4-B415-4293-A5B0-FF8C982C35D2.jpeg
    945.7 KB · Views: 47
  • D09DF5BA-F66C-4370-BACD-DE534C1A2B51.jpeg
    D09DF5BA-F66C-4370-BACD-DE534C1A2B51.jpeg
    192.5 KB · Views: 244
Last edited:
Back
Top