General My Mk1 Uno 45

Currently reading:
General My Mk1 Uno 45

stealthstylz

New member
Joined
Aug 3, 2007
Messages
118
Points
36
Few pics of my Uno 45. Was gonna be for sale but my red Mk2 broke so I weighed it in and sorted this one out instead. Looked like this before I started

DSCF2226.jpg


DSCF2230.jpg


I then put my MSW wheels from the red car onto it, but was un-impressed with the ride height lol.

Image007-4.jpg


I had a pair of Jamex front shocks with -30mm springs, some -30mm rear springs and I borrowed some De Carbon rear shocks off my Turbo. As -30mm can never be classed as lowering (well come on its giving a lift to a fat chick really lol) I lopped 2 coils off each front spring and a coil off each rear spring.

Image009-3.jpg


Image000-8.jpg


Image010-6.jpg


Image009-4.jpg


Image007-5.jpg


Image008-9.jpg


Doesn't look too bad now. Might try and get some shorter front shocks so I can drop it a bit more. Apart from that i've fitted some clear front indicators, the mirrors off my Turbo and gone over the bumpers with a heatgun to black them.

Matt
 
Good decision - saving the Mk1 (y)

That face-off photo is cheating - the red Mk2 has a flat tyre!
I reckon the Mk1 would look much lower with the Mk2 tyre pumped up :)

It illustrates the difference in the frontal styling perfectly. The Mk2 bumper is fatter and higher, so the door swage line has to be fudged with those stepped strips to coincide with the front bumper. The rear bumper (not in this photo) is lower. At one point I was going to do a facelift on my Mk1 with parts from a Mk2, but I decided it just isn't worth it.

The styling is nice if you have a Mk2, but equally nice if you have a Mk1.

I tried the heatgun technique once and it didn't work for me at all - except where I melted the plastic...

How does your Uno drive now after the lowering? Any less 'luxurious'? :p

You have that patch of red-oxide primer to paint over... show us some pics when you do!

Anyway, again, good work in saving a Mk1. Similar story happening in my garage, except that I have so much other work to do, I'm not out there when I want yet.

-Alex
 
Last edited:
Its got lot of red oxide primer spots now lol. The car was fairly solid, but has loads of dents everywhere so i've been busy knocking them out. You can see how much its lowered just with the difference in the wheelarch gaps. Its a bit bumpier but still comfy. Handles loads better though.

You've gotta go pretty steady with the heatgun. I can't really describe how to do it, but you can see it change colour then you've gotta move quickly.

Matt
 
Isnt cutting coils off the springs illegal in your country? Over hear your car gets ordered off the road, and most cars that looks lowered attract cops so you quickly get caught.

Also we have experienced driving a car with cut springs, and it feels kind of dangerous. The problem with the Uno is that they look much higher than they are, I think a better product for the Uno would be lowering front wings :) bring the wings down to the wheels :) also paint the bottom sills car colour (doesnt really apply to your black car)
 
Lots of people think its illegal for some reason. All I do is ask them how they make a spring to start with - as at some point they've got to be cut lol.

Matt
 
Hmmm the reason why you aren't ment to cut the springs is that the top and bottom of them are specificatally designed to fit in the brackets. With them cut there is a huge risk that the springs will fall off (we've seen it happen).

American cars are probably different, there is probably one spring which they use for all cars and it probably resembles the spring out of a pen (after all Americans are still using leaf springs in even their performance cars), so cutting it probably makes no difference.

But if you look at the spring the top and bottom are different shapes to the middle of the spring.

I think cut springs are a bad idea, I bet if you took a car with cut springs onto a race track, or tried pushing a bit harder than usual, then the spring would fall off and you would crash in a spectacular way. Lowered cars only look and feel raceier, they arent actually raceier.
 
Why should it fall off? I chopped the coils off the bottom of the springs. This part of the spring is the same diameter as the majority of the spring. Once i'd cut the coils off I heated the last 4", being careful to keep the rest of the spring cool. I then bent that in so it was at the same angle as before. For extra safety I wired the springs into the seats.

You can't cut pigtail springs i.e ones where they have a smaller diameter bit at the top and bottom.

I started with stiffer springs than standard, and then when you cut coils off they get even stiffer. They're not stiff enough for the track, but absolutely perfect for on the road. The handling has been transformed. The turn in is much quicker due to the induced negative camber and there is very little body roll. I was thinking of running the Eibach anti roll bar off my turbo on the front but I think that'll increase understeer.

Race setups are exactly that, for racing. On the road (especially round here) they're worse than the standard setup.

Matt
 
Isnt cutting coils off the springs illegal in your country? Over hear your car gets ordered off the road, and most cars that looks lowered attract cops so you quickly get caught.

Cutting springs isn't illegal if it's done properly. However, if done too much then there is a risk that the too short springs can fall out under suspension movement. If that were the case you could be had up under the Constructions and Use act and be prosecuted for driving a vehicle that is unfit to be used on a public road. To be honest you'll probably wreck your spine going over bumps before you get caught though!

Stealthstylz, I love your little mk1 45! Black really seems to suit the mk1 well, and the clear indicators are a smart move (y) Not sure on the black wheels as I feel there's a bit too much black going on with the car with them. Not sure if your budget will stretch to it, but deep dish chrome/ polished alloys would look awesome. :cool:

Also, I take it you have the uber base model Uno 45? 4 speed gearbox, 1 speed interior fan, 1 speed wiper (+ intermittant)? They're still cool little cars but a little basic! My first Uno was a blue 45 FIRE, also the base model. By the time I'd finished with it I had it up to 45S spec with the exception of the gearbox! It even had electric windows too :slayer:

Anyway, good luck with yours and keep the forum posted with its developments (y)
 
I like the look of lowered Unos. Matt, I think you've done a great job so far. (y) 
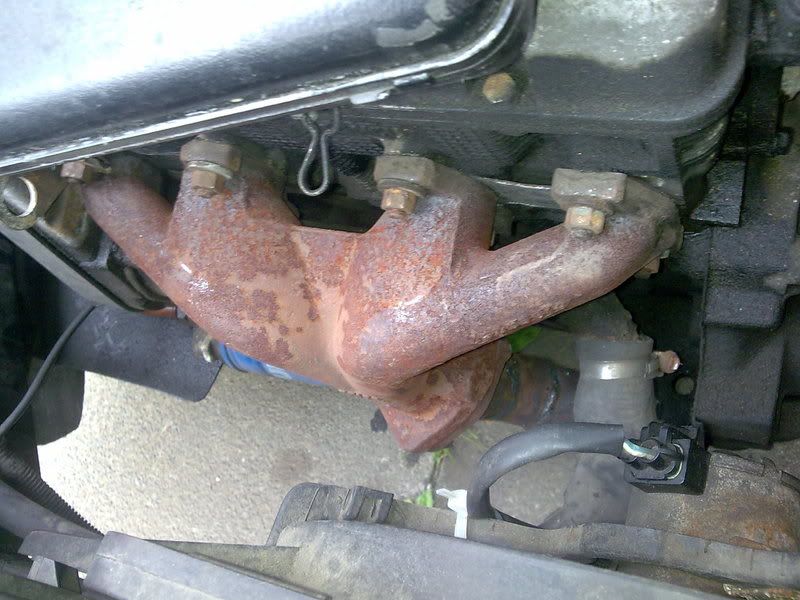
What's the deal with that green Turbo then? Is it too rusty to save?

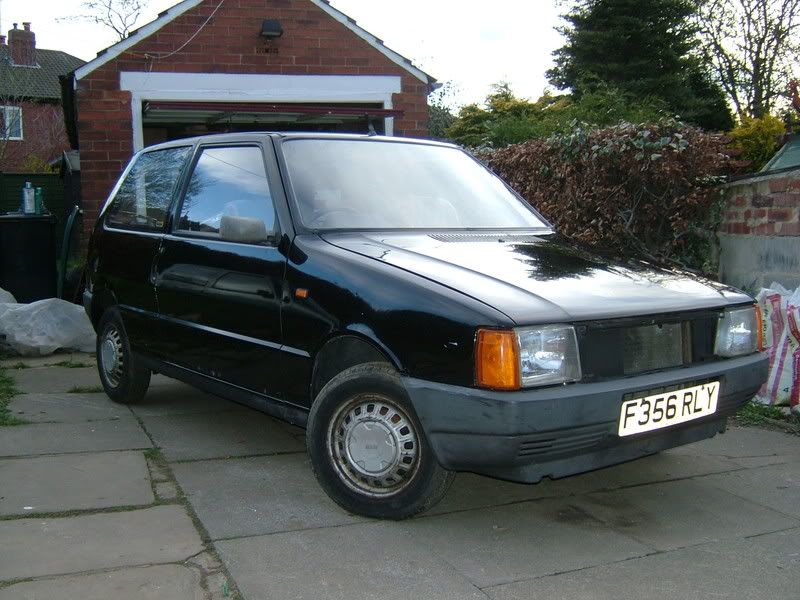
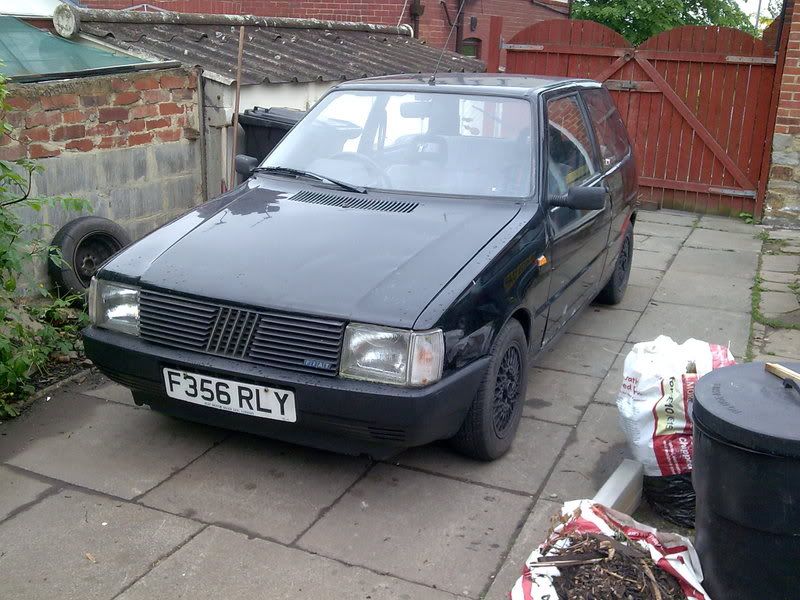
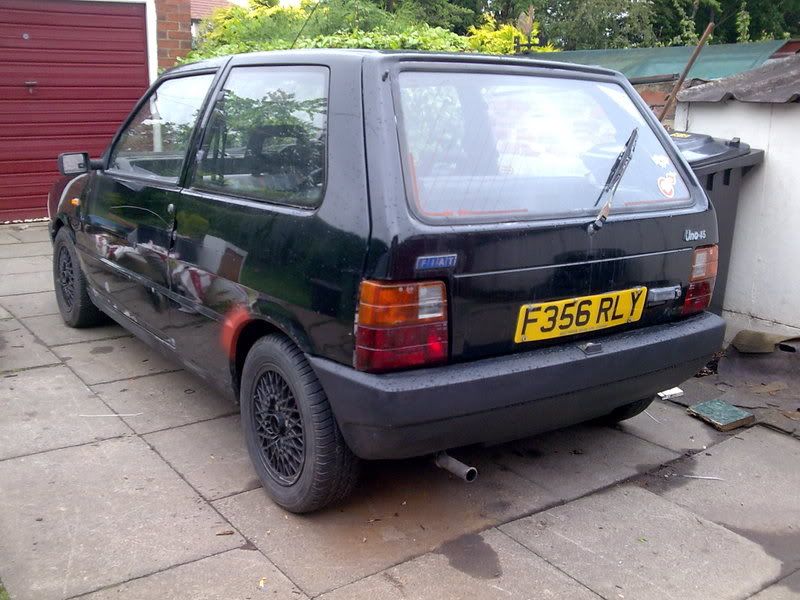
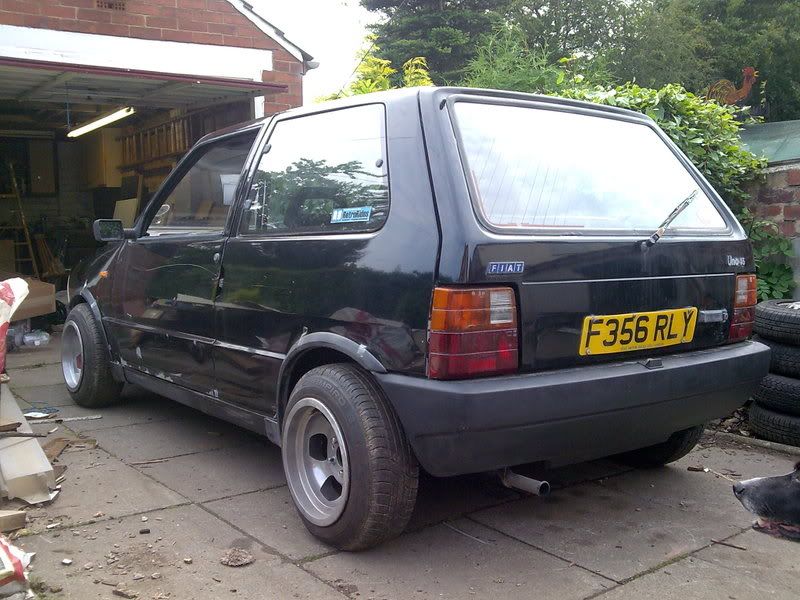
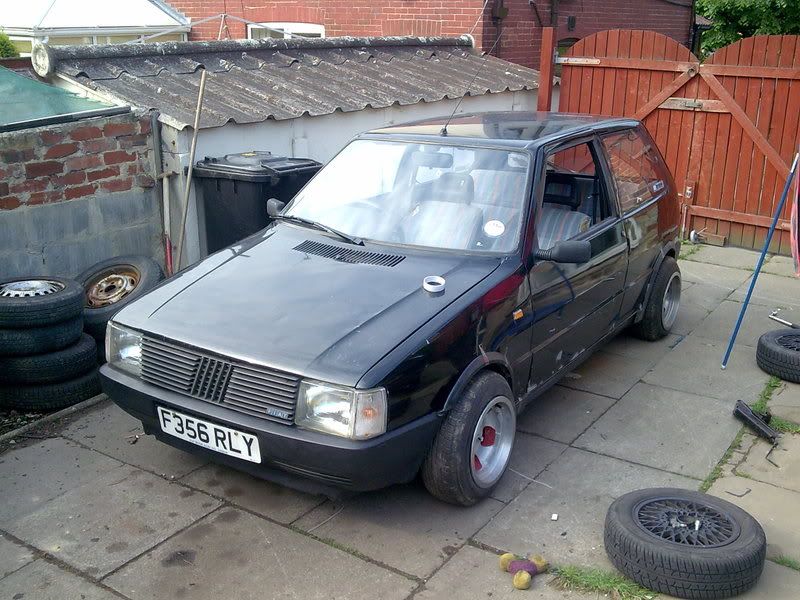
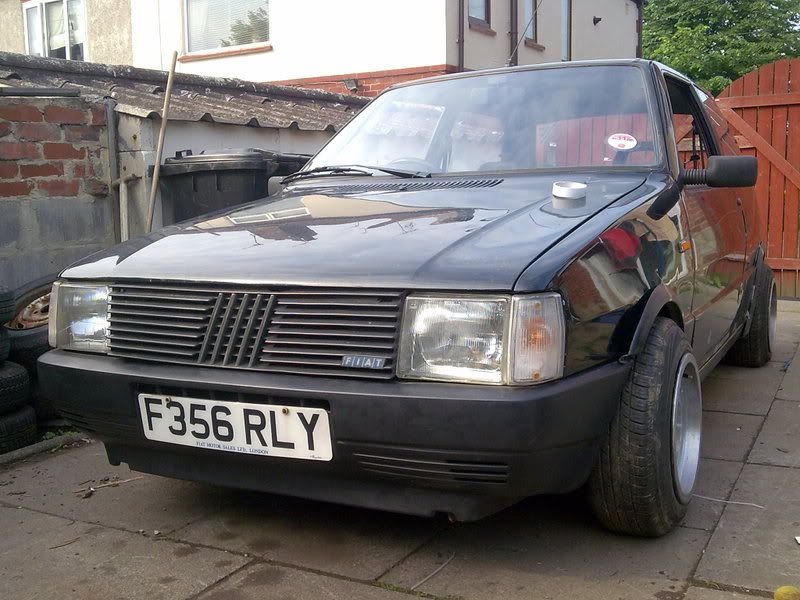
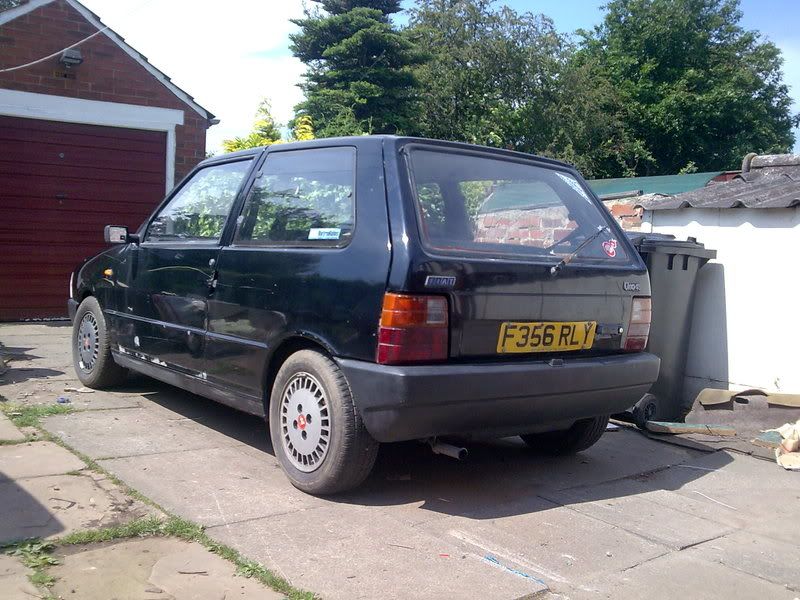
My Turbo is about 50mm lower and looks great parked next to modern, bulbous cars - the Uno bumpers are below knee-height and those infamous 'square block' headlights (which, I would like to point out, aren't square) are actually smaller than the headlights on modern cars.

Something like my Punto has the 'lowering' front wings that James mentioned - there's a huge slab of metal above the wheelarch where there should be a svelte crease like on an X1/9 (which of course doesn't have an engine at the front) or on my 164 (where Alfa Romeo deliberately modified the suspension to get the bonnet line down!) The problem is that with modern cars, the bonnet has to be high for pedestrian safety and aerodynamics.

Anyway about the base spec equipment that Chas mentioned - yes, it is nice to make some upgrades. Here are my favourites:


- 2-speed heater fan (requires heater box removed and split to change fan). The refinement of a working heater, set to demist, and the fan on '1' cannot be underestimated on damp, cold nights.

- Lighter socket - for powering your phone, GPS etc. Gets fitted at the same time as you upgrade to the 2-speed heater panel ;)

- Central locking. Don't waste time with Uno 70 central locking, as it's probably flogged-out by now. Just fit a new kit - and ideally a remote-controller (e.g. car alarm) as well. For a 5-dr you can fit rear door handles to the front doors, which is de-locking nirvana - so simple! :)

- LED over the ignition key. Connected to the driver's door switched earth for the interior light. The shape of the steering column cover is perfect for a 5mm hole to be drilled so that a hot-glued LED shines on the keyhole.

- Interior light delay - related to the above, a small gizmo pre-made connects to the switched earth and keeps the interior light/key light on

- Clock and map reading light, either the LCD of the later Mk1 or for a real old-school look, the red LED unit in the early Mk1 70S/SX.

- Mk2 Uno wiper. I think this is loads better than the Mk1 wiper - it's faster, makes no whirring noise, and parks out of the way :)

- Rear wiper intermittent, ideally with adjustable delay. This is an electronics kit - I don't know whether Maplin carries this sort of thing, we're a bit better catered-for in the DIY electronics world thanks to www.jaycar.co.nz and www.dse.co.nz. My Uno Turbo has a fixed 40-second delay, perfect for driving in average wet conditions.

- Turbo seats and door cards - or for a 5-dr, Mk2 60S/70SX seats and door cards (the Mk2 has window winders and handles in different places, but this can either be bodged or fitted directly to later Mk1 doors).

- Proper horn. The Japanese-style diaphragm horn fitted to base models is an embarrassment. You need the wind-tone horns from a 70 model (or many other cars). The FIAMM horns available aftermarket will do OK also, as they're basically identical to FIAT horns.

- Headlight relays. These make a big difference even with standard bulbs. The relays can get power from the starter motor live feed - just crimp on a ring terminal - you can have one relay each side (best), or take some shortcuts and put both sides on one relay. Remember to fuse the feed wire. I'm actually more concerned about dipped beam but of course you should relay the high beam as well. Then you can put in 100W/90W bulbs and marvel at the amazing light output :cool: Illegal but so much better than original bulbs and wiring, and at least they're still correctly aimed and dipped - aren't they...

- Steering wheel - maybe - I have a strange fetish for the thin and hard base-model rim, but most people like to grab a thick - err, rim.

- Clutch squeaks, floppy gearchange, rough engine idle (standard Uno features these days) must all be fixed :)

-Alex
 
Last edited:
Oh yes its the uber base model. I've fitted the 2 speed fan facia just to fit a cig lighter but not wired it in yet need to get it done. Will there be the wiring for it already or do I need to start from scratch? Apart from that i'm leaving it. Was gonna fit electric windows but I can't be arsed lol. Got a pair of Astra GTE recaro's so might stick those in at some point.

I've put a Mk2 Turbo wheel on. The thin original one was awful when driving fast.

The gearchange is floppy when driving normally, but suprisingly precise when giving it some beans. The clutch is fine though, and the engine runs like a swiss watch.

As for wheels, I have an assortment to choose from.

13x8 ET-10 Shelby Cal 500 slotmags with 165/65 tyres. These are just for cruising about on when i'm in that sorta mood. My girlfriend also drives the car and I wouldn't trust her not to kerb them when they stick out so far.

Image013-10.jpg


Image015-5.jpg


Image016-3.jpg


Turbo wheels with 185/60 tyres. Handles brilliantly but the tyres are too tall so it ruins the acceleration and top speed, and they also rub on the arches. Got a set of 185/55 to go on. These are for when I want to have a hoon around. I like these because people get embarassed when the ask what mods my Uno Turbo has to make it keep up with their Impreza/Astra VXR etc down the local lanes, and I tell them its a 1 litre. As I say to them, anybody can go fast in a straight line.

turbo.jpg


Theres also these beauties. 14x7 and 14x7.5 Lotus Esprit S2 wheels. I'm just refurbishing them, with the 4 spokes and the raised sections round the holes polished, and the rest painted black. They need new tyres though, probably 165/55.

Image003-4.jpg


Matt
 
Last edited:
Oh yes its the uber base model. I've fitted the 2 speed fan facia just to fit a cig lighter but not wired it in yet need to get it done. Will there be the wiring for it already or do I need to start from scratch?

The wiring won't be there. Don't ask how I know :bang: Alright, do ask! My first Uno was a 45 base model and it uses a more simple under dash wiring to the 'S' and upwards models. I got round the problem by breaking a 1984 Uno 70S and taking the whole wiring loom and dashboard and then swapping them into my 45. It's actually easier than you may think as most of the dashboard wiring unclips from the fuse box and connectors, and you just swap them over.

If you can get most of the wiring you can also fit the switch that operates the handbrake warning light on the dashboard and also the choke operation warning light. Little things that make Uno driving a more enjoyable experience.

If you can find an SX to take the loom from that would be the easiest thing to do, plus you'd also get the wiring for the electric windows, central locking and also the two speed interior fan. You'll also get the fibre optics to light up the switch pods and wiring for the centre console illumination. You'll also get the wiring and connectors to run the SX dashboard with tachometer. A turbo also has similar wiring but I'm not sure if the instrument pod connectors are quite the same.

For the two speed fan you have to remove the heater box to get to the motor (the 1 speed fan doesn't have the wiring for two speeds), though if you can get a 2 speed heater box I'd just swap it over complete rather than taking it apart to get to the fan.

Apart from that i'm leaving it. Was gonna fit electric windows but I can't be arsed lol. Got a pair of Astra GTE recaro's so might stick those in at some point.

Electric windows aren't actually that difficult. I fitted the loom and switches from a mk2 turbo into my mk1 45S. It's fiddly but doable if you take your time. I did a thread about dashboard and wiring swapping here:

https://www.fiatforum.com/uno-technical/35761-mk1-dashboard-removal.html

And a thread on how to remove the dashboard, in particular the two awkward lugs in the top left and right corners:

https://www.fiatforum.com/uno-technical/36562-how-remove-mk-1-dashboard.html

For fitting Recaros you may also want to see Paul Drage's thread on fitting aftermarket bucket seats:

https://www.fiatforum.com/uno-styling/140774-bucket-seats-makes-ebay.html

I've put a Mk2 Turbo wheel on. The thin original one was awful when driving fast.

I remember them well - felt like holding a Bic ballpoint pen in each hand! I have a mk2 UT wheel (it's actually a genuine Momo leather wheel), but have grown to like my SX wheels. My 45S has one and the SX, obviously, has one too. I may fit the Momo wheel to the 45S when I get round to doing that project.

The gearchange is floppy when driving normally, but suprisingly precise when giving it some beans. The clutch is fine though, and the engine runs like a swiss watch.

I found that the 4 speed 45 box was more accurate in shifting than the 5 speed. Not sure why that is as they both used similar linkages (with the exception of the 70SX as it uses a different 'box). The sloppiness is easy to deal with as chances are the plastic inserts for the linkages have worn. They cost literally pennies from Fiat (if they can be bothered to look up the part numbers :bang:) and aren't that hard to fit. You should also check the linkages for the gear lever itself (under the rubber gaiter, underneath the car) as they can sometimes work loose. There is also a bellcrank mechanism that can wear though that is more difficult to deal with. I've also had the shaft in this seize up, but with lots of penetrating oil/ WD40 they can be freed off again.

As for wheels, I have an assortment to choose from.

13x8 ET-10 Shelby Cal 500 slotmags with 165/65 tyres. These are just for cruising about on when i'm in that sorta mood. My girlfriend also drives the car and I wouldn't trust her not to kerb them when they stick out so far.

They are somewhat wide! You certainly wouldn't want to drive with them in London with all the pot holes and kerbs everywhere. Do you find that the car bump steers more with them, as their offset may affect the front steering geometry?

Turbo wheels with 185/60 tyres. Handles brilliantly but the tyres are too tall so it ruins the acceleration and top speed, and they also rub on the arches. Got a set of 185/55 to go on.

Yes, 185/60's give a greater rolling radius but I'm surprised that they rub on the arches. I'm sure Louie had a set of UT alloys with 185/60's on his old mk1 45 Bianca and didn't have any problems? I think the original sized UT tyres were 175/60's, so 185/55's should give the correct rolling radius.

These are for when I want to have a hoon around. I like these because people get embarassed when the ask what mods my Uno Turbo has to make it keep up with their Impreza/Astra VXR etc down the local lanes, and I tell them its a 1 litre. As I say to them, anybody can go fast in a straight line.

Lol! "Straight line warriors" I call them. As you say, anyone can put their foot down and go fast in a straight line. Not anyone can go round corners quickly, and a Uno 45 being so light can corner pretty damn well in the right hands. A brilliant mod for the basic Unos is to fit the anti-roll bar from a mk1/ mk2 turbo, or a mk2 SX/ Diesel. With the right brackets these bolt straight on and absolutely transform the handling (y)

Here's how I did it to my 45S:

https://www.fiatforum.com/uno-technical/39303-fitting-turbo-anti-roll-bar-45s.html

Theres also these beauties. 14x7 and 14x7.5 Lotus Esprit S2 wheels. I'm just refurbishing them, with the 4 spokes and the raised sections round the holes polished, and the rest painted black. They need new tyres though, probably 165/55.

I really like those Lotus wheels (y) Do they fit straight onto the Fiat 98 PCD stud pattern? Bet they're like rocking horse poo to find though :(

When I finally get round to my Uno projects (I might be embarking on a 1974 Cortina V6 project first!) I plan on fitting X1/9 VS alloys to my 45S MPi sleeper and will fit Cinq Sporting alloys to my 70SX. So much to do and so little time!

Anyway, good luck with your project Matt and keep the forum posted with developments (y)
 
I've got a complete turbo loom, just going to borrow the bit for the cig lighter I think. Oh another little mod I did. The exhaust manifold was cracked, and finding a replacement was proving to be impossible. I went to the scrapyard and got a Punto manifold and downpipe for £5 then modified the downpipe to fit. I also added the flexible joint off the red Uno rather than the solid downpipe/centre section they usually have.

Image004-9.jpg


Image005-11.jpg


Image006-7.jpg


Matt
 
nice work....just a note of caution, that control arm looks a touch rotten, they do all go that way, and most will generally be ok for years, but occasionally, the balljoint will punch through the arm making you wobble all over the road, screaming like a loon as the on coming traffic tries desperately to avoid you.....

not that it's ever happened to me:p

give it a good look over just in car(y)
 
Yeh I noticed the rust. I've got a brand new pair subframe & wishbones just haven't had chance to swap them over.

Matt
 
The paint on the front track control arms is wafer thin, comes off and they always go rusty. Often they look worse than they are but it's always a good idea to check them.

When you fit a new one you could always paint it in better paint. I did that for mine using a spare tin of Smoothrite. Looks good and should offer better protection (y)
 

Attachments

  • DSCF0006.JPG
    DSCF0006.JPG
    396 KB · Views: 29
nice job(y)

let us know how it goes:D

anyone know the colour code for a grey metallic uno sx btw? (mk1)
a little rust here and there who need painting:p
 
Last edited:
anyone know the colour code for a grey metallic uno sx btw? (mk1)
a little rust here and there who need painting:p

Fiat used loads of different shades for each colour they used so it would be hard to say offhand. However, the paint code should be on a silver sticker on the inside of the tailgate. Have you got this sticker on yours?
 
Fiat used loads of different shades for each colour they used so it would be hard to say offhand. However, the paint code should be on a silver sticker on the inside of the tailgate. Have you got this sticker on yours?

yep, it was there(y), thanks:D

it has been painted on some spots before, so it is some different shades on the left side:mad:, doesn't look so good.

I shall take some pictures as soon as it stops raining:p
 
Back
Top