Hi Jock,
Your mention of making oil filter removal tools using old? timing chains reminded me :- back in the mid1970's I was working in a Fiat main dealership. Many Fiats used timing belts not chains. I used to hate throwing away old timing belts and wondered what could I use them for.
My idea for an oil filter removal tool, used a section of old timing belt formed into a loop with the teeth facing outwards, with both ends passing through a rectangular slot cut in a piece of thick wall metal tube (old electrical conduit).
The reason for having the belt teeth on the outside was so that they would grip the edges of the rectangular slot in the tube.
To turn it, I drill out a large used Fiat hub nut (27?mm hex) and brazed it in place onto the tube, the length of tube could be varied to suit different applications. If you wanted a jumbo-sized strap wrench for some application, you could utilize the full length of a timing belt.

If I knew how to post normal size pics,

I'd dig out this old home-made tool and post a pic. (I don't like these thumbnail images).
Regards,
Al.
'Mornin Al.
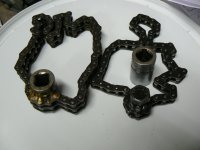
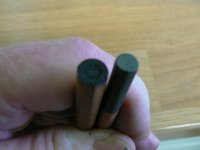
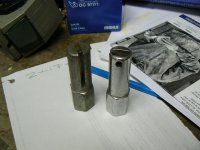
I really like the idea of that filter removing tool. Although I've had those home made chain filter removal tools "for ever" just very occasionally I've run into a filter where there is not enough clearance to get the, relatively thick, chain round it. I've bought 2 strap type tools to tackle this over the years but, on both, the strap webbing failed after a while leaving me with this:
I have a collection of "trophy" timing belts, fan belts and cam/rocker cover gaskets which I tend to just throw up here:
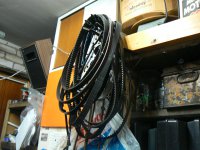
until enough of them accumulate to be worth adding to my heap of stuff to take down to the recycling centre. I'm going to see if one of the timing belts could be easily adapted. I bet it would last a nice long time.
You can see I'm very keen to post illustrations - a picture paints a thousand words as they say - I'd love to see a picture of the tool you mention above. I too struggled with this until another forum member helped me through the process - Was it you PB? Apologies if it was someone else.
The way I compose and post pictures to the thread is:
1) Click "reply" at the bottom of the post you are replying to
2) Click the box "Quote message in reply" as this gives you the option later to modify the original poster's entry to suit what you are replying to.
3) Click "Go Advanced" where you will see things displayed a little differently. Scroll down until you get to the box that has imogis on the right side.
4) At the top of this box you will see a paper clip? Click on it and a "manage attachments" box will appear. Click the top "Choose File" box and your computer will display options from your hard drive for you to manipulate and choose from. Highlight, by clicking on the image you want, and click "open" at the bottom of the box.
The Forum will then display the file no. in the "Choose File" box.
5) Click the upload button to upload this image - if you watch the bottom of the page you'll see how it's doing. When it's finished don't jump in too quickly or you'll loose it. Wait 'till you see the file appear in the "current attachments" box (which will only appear after you upload the image.)
The file can now be placed in your text.
6) Move your cursor to where you want the image to appear in your text and click - you'll see the flashing line appear.
7) Take your cursor arrow up to the paper clip and click on it. A list will appear, headed by "manage attachments" - which you should click if you want to add, or remove, more files.
8) Click the file you want and the picture will appear where you just "planted" that cursor in No. 6.
You're done! Now click on the "preview Post" box and you can view exactly what you've done with the option of going back in and altering it before you hit "Submit Reply".
I found that, when you are viewing forum posts, these images, either your own or those posted by other members, can be viewed in much greater detail if you click on the small image displayed in the text. Just hover your cursor over the image and click. after a moment of "sorting itself out" you'll see a larger image displayed in a box. Click on this and it looses the box surrounds and gets a little bigger. Click on this again and it gets a lot bigger, so big in fact that the whole image more than fills the screen! Of course not everyone is as ignorant regarding computers as me! So apologies if you already know how to do this.
Voyeur that I am I find it very enjoyable to do this and then search for "stuff" lurking around the periphery of the image. It's amazing what some people have lurking in the dark corners of their garage/workspace!
This all sounds quite daunting if you've not tried it before and it took a few tries before I really got my head around it. Now though I can take a picture on my camera (I don't have a smart phone), upload it to my laptop and be posting it within minutes.
Do give it a go, I'd love to see that filter tool. Hopefully that ability to expand the image will help overcome your aversion to thumbnails?
As ever, kindest regards
Jock


