Technical idle speed high

Currently reading:
Technical idle speed high

Al thank you very much for your long reply, i really appreciate your time and i believe solution is someware between your lines. I will answer your questions one by one.

First of all i haven't done a compression test but i will as soon as i get a pressure gauge kit.

Haven't done a co test on hollow bolts, i don't think they can do that but here is what i done today, i put a small piece of nylon that i got handy to each of one hole on the head. (Hollow bolts are just missing) Start the engine and rev up for a few seconds to see what will happen to nylon and it just stayed there so i am 90% sure no gas is escaping from there but i am living a 10% for further investigation.

Regarding the timing marks as i said my pulley didn't had any of them except the TDC so i made mine in the way you are describing so i am pretty sure they are correct.

As soon as i put the electronic ignition which i believe is better than the point type especially when the distributor is not new and it is a modification that i do in every old vehicle i have/had. The only good thing with point type is reliability, electronics work better but can fail. Anyway it is a mod intended to be for better operation, just my opinion.
Haynes gives 047 to 053mm gap but i think i will agree with you maybe 03 is better and i will readjusted again something between 030-035mm

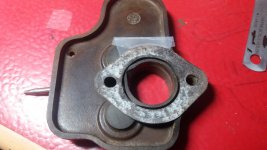
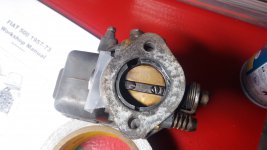
I think the ''truth'' is someware between the carb and the head. In any case i will remove and overhaul carburetor, a job i can perform with no problem since i have done it many many times with other carbs. Next step will be head overhaul, i am planning to remove inspect and recondition as necessary.

I was wondering if original weber manual is available so i can take a look on it.

I will keep you updated.
Thomas
 
I took a contact cleaner and spray some at my carburetor, i noticed that when i spray at the ends of batterfly shaft (both frond and aft) engine stalls. Same on idle screw. Correct me if i am wrong but aren't there two plastic/Teflon bushings that seal the shaft?:confused:
 
I took a contact cleaner and spray some at my carburetor, i noticed that when i spray at the ends of batterfly shaft (both frond and aft) engine stalls. Same on idle screw. Correct me if i am wrong but aren't there two plastic/Teflon bushings that seal the shaft?:confused:

That sounds like an air leak at the carb butterfly shaft. The flammable spray richens the mixture resulting in the idle speed being lowered.

I forgot to mention the carb when talking about possible air leaks. Iirc, there are no bushings sealing the butterfly shaft, the shaft runs directly in a drilling in the carb. body. Obviously this area can wear. It is possible to remove the butterfly shaft and bore the worn drillings oversize, then fit bushes and a new shaft. But it's a tricky operation to get just right and probably not cost-effective.

If you can get access to both ends of the butterfly shaft (sometimes you can't because washers/linkage parts/levers are fixed/rivetted into place), then maybe you could use a small hole cutter over the butterfly shaft to cut a small recess around the butterfly shaft into which you could put 'o' rings or felt rings to seal any air leakage?

As regards getting official Weber tech. info? I used to get Weber Carburettor Information sheets from an authorised Weber Carb repair agent here in Ireland. Maybe there are carb. repair specialists in your country. Don't be surprised if they advise buying a new carb. The carbs used on the 500 and many other Fiats are Webers 'built down to a price, not up to a quality'. 'Proper' Weber carbs e.g. 40DCOE, 40IDF etc utilize small ballrace bearings on the butterfly shafts which can be renewed, lead plugs which can be extracted to clean passageways then renewed, a range of sizes of all jets, auxiliary chokes, etc. to allow optimum setting for a particular engine.

Haynes do a Weber Carburettor Owner's Workshop Manual ISBN 0-85696-393-3. IDK if this covers the Fiat 500 carb.

It might be possible to obtain a Weber Tuning Manual from Webcon UK Ltd, but I don't know if this covers overhaul/repair of the Fiat 500 carb.

If you add up the cost of buying manuals, parts etc plus no guarantee that you can get this carb to work correctly, the best option is probably to buy a new carb if possible.

Regards,

Al.
 
Al, i have decided to remove and inspect it. If it needs anything more than a set of gaskets that cost about 15 euros then i will go for a new one since i can find locally NOS for 80 euros! I will change it and it will be fine for the next 30-40 years. Maybe i will remove it later today and put it on my bench.
On the other hand i would like to know what happens to a good carburetor if someone spray at the butterfly shaft? Is it 100 sealed or all webers do the same, new or old. Perhaps someone can try it and tell us.

I've often stripped carbs and didn't renew the gaskets. :eek:. If they were split/broken, then yes, of course. 'O' rings if split or unduly squashed were also changed.

When you have the carb removed, could you post up any identifying marks. I'm not an expert on the 500 (unlike some of the members here), just worked as a Fiat Dealership Mechanic back in the 1970's>. Fiat sometimes used Solex carbs as an alternative to Weber on some models., so there wouldn't be much point in buying a Weber manual only to find your car was fitted with a Solex.:eek: Iirc, Weber ceased producing carbs in Italy c. 1992 and moved production to Spain. Is your car an original sold new in Greece or an import?

If you do strip the carb to clean it, I'd suggest you pay close attention to the float needle valve and seat, as 'the hobbler' recommended.
Look at the v tip on the needle. If you can see a shiny circular groove worn about 1/2 way along the side of the v,(and you probably will!) then the needle valve is probably not fit for further service. You then have to decide if you are wiling to take a chance that fitting a new needle and seat will cure the carb problem.
I have seen these needle valve and seat units 'refurbished' by someone using a very small lathe. (Do you know any modelmakers?( (Hint!).

To answer your last question re: spraying gas or other flammable substance around the butterfly shaft. Afaik, this was a quick test to check if there was a leak in this area, allowing air to be drawn in thereby weakening the mixture. It was also used to check for airleaks on manifold gaskets etc.

Another way was to squirt oil around the area of suspected leakage to temporarily stop the leak. Oil is safer than gas!

Good/unworn carbs don't allow air in around the butterfly shaft, so spraying gas shouldn't affect the engine running/speed at all. Often there are no seals fitted here, just a good fit between the shaft and the drilling in the carb body. No bushings here either unless someone has refurbished the carb in the past.

Btw, 80 Euros for a nos carb sounds like a bargain. Individual parts used to be pricey.

Any more questions, please don't hesitate to ask. As well as being a former mechanic, I also lectured in Motor Vehicle Technology subjects in a Technical Institute. Don't be put off by the length of my answers, I eventually get to the point. We Irish love to talk, it's a national past-time!

Seasons Greetings, (belated :eek:)

Al.
 
Got my carb in pieces and all i can say is that this is a good clean carburetor, seems that someone else has done the dirty job for me. There is a shiny circular groove as you mention but it seals 100% with no doubt. I test it by removing the needle valve seat, put the needle in and fill it with contact cleaner which didn't leak and with just the weight of the needle it self, no other pressure applied at the ball end. Only thing i found out of specs was the float. I set the 7 and 15mm dimensions as per manual. It was set to 5 and 13 before for whatever that matters. (Not much i believe).
Also the butterfly shaft looks pretty ok to me with a very small play close to nothing which i believe all carburetors have after some use.
My car i am not sure if it sold to Greece as new back in 1979 and i doubt if the frame numbers are original. According to frame number is a 1966 model but it has a square tachometer, is this normal?

''(Do you know any modelmakers?( (Hint!). ''
Well yes me, modelmaking is what i do since i was eight and also i have a watchmakers lathe, you can have a small idea about what i do here:http://www.thomasworkbench.com/

I still believe that my trouble is electric and its is getting worse. I checked the play of the distributor shaft inside the distributor housing and it moves up and down about 2-3mm along with the centrifugal mechanism. Is that normal?
I need a set of new gaskets but untill they are here i will put it back as is...

My season's greetings to all
 
Last edited:
I checked out your website!

You are truly a very talented individual. :worship:

What have you done on motorcycles? (I used to be a motorcycle mechanic before I was a car mechanic, still ride and have a couple of Hondas :D)

Re: Distributor shaft end-float. 2-3mm sounds excessive but I'm not sure if it would cause any problem as gravity and the distributor cap! would keep the shaft down unless the shaft was gear driven which iirc it is not on the Fiat 500.
You could always fit a shim washer if you wish.

Some of the old Fiats had a fibre/plastic oil flinger disc on the distributor shaft just below the distributor body. This could disintegrate resulting in a lot of end-float on the distributor shaft. But I don't think this applies to the Fiat 500.

If you feel the problem is ignition/electrical after you refit the carb, is there any possibility to have the car hooked up to an engine analyzer. Might be the quickest way to check things out.

The carb float level being incorrect by 2mm (high?) can definitely cause problems i.e. flooding. Good that you've corrected this.

Please excuse the haziness of some of my information. I'm getting old and trying to remember things from 40 years ago. I'm doing my best.:)
 
Al no haziness at all, as i said before the truth is somewhere between your words, i just trying to find where, its not rocket science, just a two cylinder four stroke engine. We all together here will find it in the end.
Ad for my motorcycles i had some vespa bikes, the last one was sold unfortunately so i can buy the 500 but you can't have it all, at list not me. I still have my old 1954 BMW R25/3 with sidecar for everyday town rides, you know taking kids to school, going to the market etc.
I will see what i can do to that distributor end play and after i fix it and put the electronic module i will take it to an engine analyzer to tune it.
I was wondering what is the meaning of carburetor Bakelite spacer and what this small metal tube (which ofcourse was blocked) do.
 
Is this gasket the correct one? You can see how it fits both the carb bottom flange and spacer.
 

Attachments

  • 1482793106581-1354369374.jpg
    1482793106581-1354369374.jpg
    2.7 MB · Views: 40
  • 1482793199312-1462959630.jpg
    1482793199312-1462959630.jpg
    2 MB · Views: 31
Is this gasket the correct one? You can see how it fits both the carb bottom flange and spacer.

Somethings not looking right here!

What is that cutout? at the 10 o'clock position in the bore of the spacer?

What is the purpose of the two notches in the carb bore at the 11 o'clock and 6 o'clock positions?

How is fuel from a flooding situation supposed to get from the base of the carb out to the bakelite drain tray?

I'll have to leave it to members with more in-depth knowledge to decide if these parts are correct for the 500 and what the correct gasket should look like.
 
I was wondering what is the meaning of carburetor Bakelite spacer and what this small metal tube (which ofcourse was blocked) do.

The bakelite spacer act as a heat shield to prevent heat soak into the carb causing overheating of the fuel resulting in poor running, possible flooding of the engine after switch-off etc. The upturned rim acts a catch tray for any fuel that leaks out and the little pipe diverts it safely away.

The metal tube normally has a very small opening in the end.

I'm not sure if these parts are correct for the 500, perhaps other members with more in-depth experience could comment?

Al.
 
Last edited:
Cut out at the bakelite spacer aligns with the one at 11 o'clock which is the cold start device as they call it. The little one at 6 o'clock is the idle screw hole.
 
I'm sure that tube and the groove has been explained before but I can't think which thread it was.

* EDIT* Found it*
https://www.fiatforum.com/500-classic/441246-some-minor-engine-trouble-newbie.html
Doesn't the tube connect with the groove and the groove can collect any surplus fuel that might have been overpumped or lost when the car is tilted on the road?
A clue is the fact that the later 28IMB doesn't have the groove or pipe (although the carb has the notches) and maybe that is because it also has a return flow pipe which directs any over-pumped fuel to the tank. So the environmentally unfriendly waste pipe is not needed.
MAL_7552 by Peter Thompson, on Flickr
MAL_7549 by Peter Thompson, on Flickr
 
Last edited:
Great pics, Peter! (y)

Might I ask what camera or phone you used to capture these images?
(I don't know much about these sort of things :eek:)

Thanks for the link, also (y)

Al.
 
Great pics, Peter! (y)

Might I ask what camera or phone you used to capture these images?
(I don't know much about these sort of things :eek:)

Thanks for the link, also (y)

Al.

It's a fairly old camera by the standards of these times, when technology dates things so quickly. It's a Nikon D7000, but I recommend any of the Nikon range of DSLR cameras as they all take sharp images with good colour rendition; just that some have got more buttons than others.;)
 
I think i got something good here. Cleaned the carb (was already clean anyway) Make ''deformed'' Bakelite spacer surface dead flat. Same on carburetor flange, was also little bend and grind it dead flat. Idle jet seal was possible damaged and since i don't have a spare i just put temporary some epoxy glue to seal it until i get the repair kit. Adjust float 7 and 15mm dimension and put the carb back.

I also adjust valves which where way out. Nominal gap is 015mm and i found them from 020 to 035mm!! Start the engine and now it is able to keep low idle with gen. red light on, something impossible before. There was also no throttle setting screw before so i put one and now i have adjust idle using both butterfly and idle screw up to the limit of Gen light out.:slayer:
I believe that what fix the problem was valve adjustment since there was no leaks from the carburetor before. That explains why cold engine could keep idle and then after a while it was increasing.
If i spray some contact cleaner or anything else at the butterfly spindle or idle screw engine still wants to die but i don't think that this really matters although i would like from someone else that THINKS that his carburetor is good to try it and tell us the results.
Now major problem remain is the exhaust fume but i will open a new thread for this after i put the electronic ignition.
 
Also I removed distributor dismantle, clean, lubricate and add extra washer to reduce and-play. Put it back and now runs even better.
 
Back
Top