I started off with a Recaro seat that already had a subframe on it - this made things miles easier!
What you need is an old Panda seat. We chose to use the correct side as we wanted to keep the part that the seatbelt end clicks into.
To get the old seats out you have to tap in the wedge on the back end of the rails. this means you will be able to adjust the seat all the way out the end. The inner runner will probably catch on the carpet so it will need some persuasion to get it out!
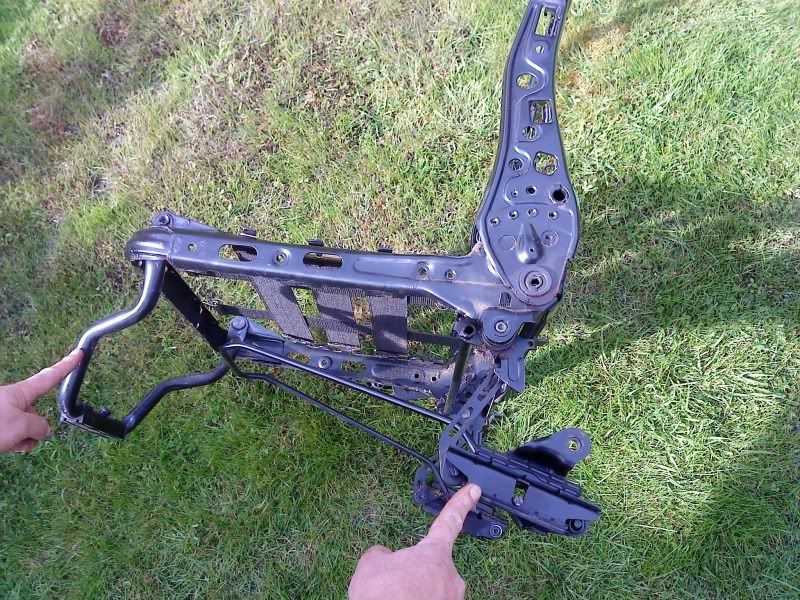
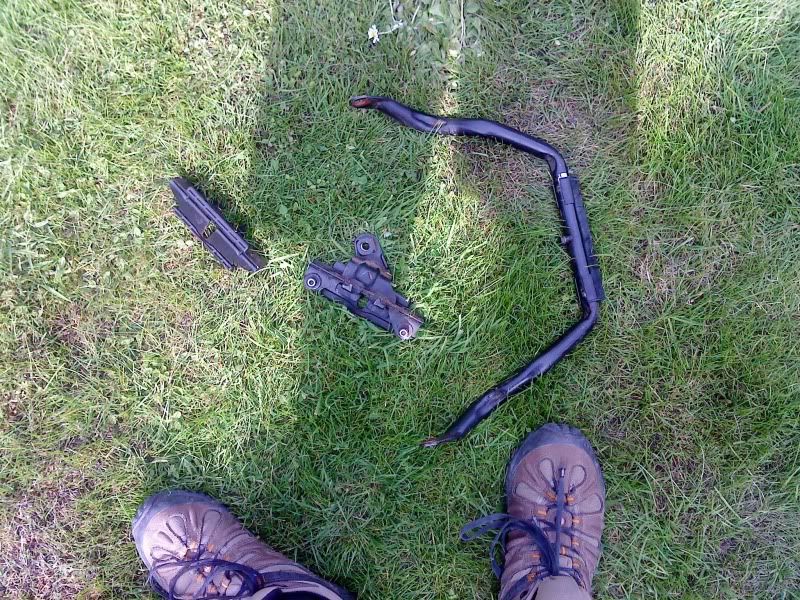
Firstly you need to remove the runners that go into the frame on the side of the car and remove the front pivotting bar (cleverly being pointed at in my photos!). You can just grind these off and wiggle the pins out with a pair of pliers. Then you can deburr them although they will be hot!")
This will leave you with this.
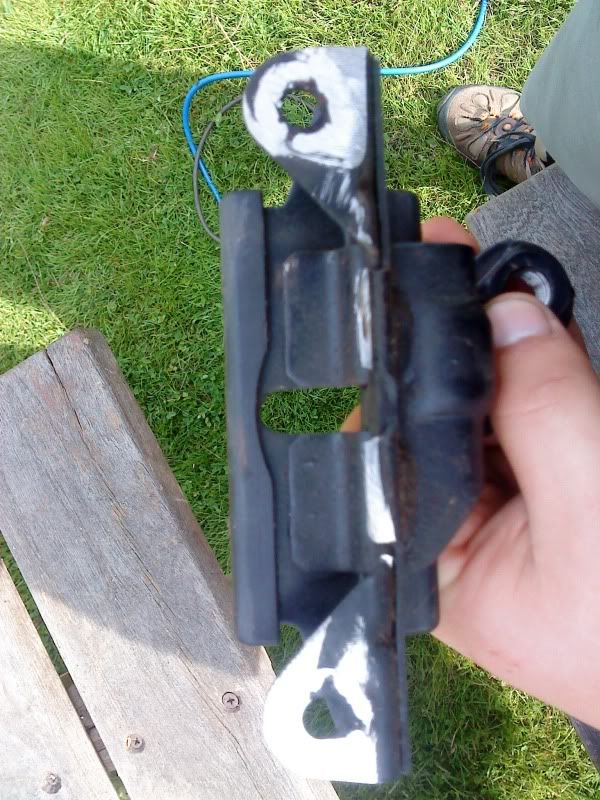
Then grind off the extra tags when the rubber tags sits as these are no longer needed.
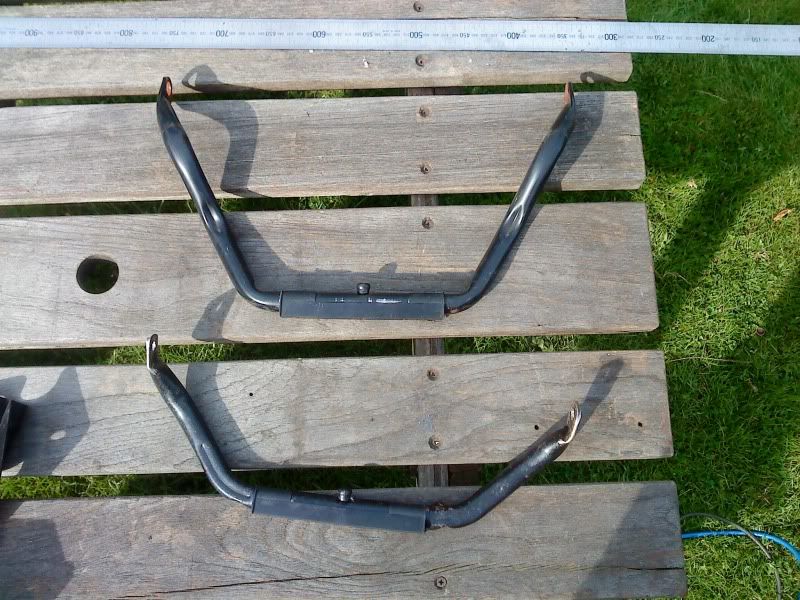
Then you need to shorten the front pivot. If you have it at full length the front of the seat will sit for to high at the front and you will be staring at the sun visors rather than through the windscreen. The top pivot it a unmolested bracket the bottom one is our modified shortened one.
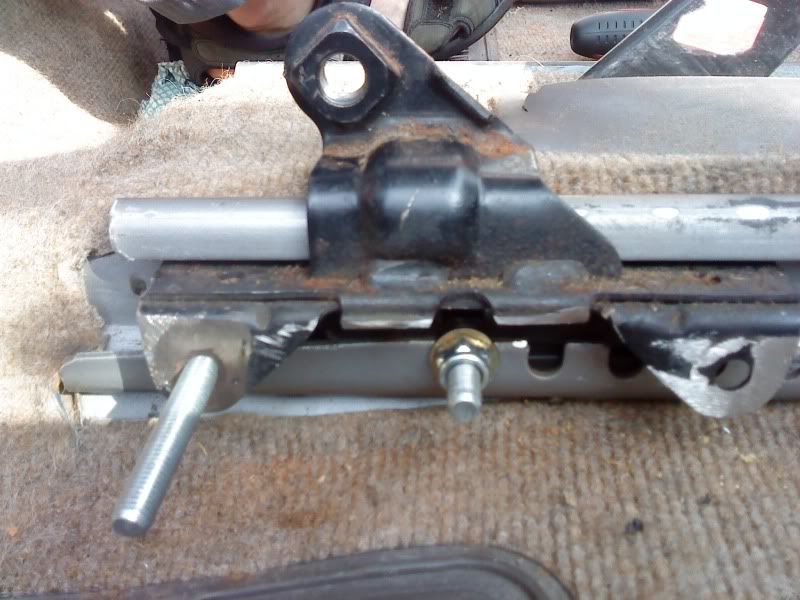
Now you are ready to mount the runners into the car! As you have removed the spring loaded pin you will need to replace it with an M8 bolt. This means you cannot adjust the seat using the Panda adjustment and will have to use the adjustment on the seat. The back bolt is longer to allow the angle of the seat to be adjusted, more on this later.
Rumaging around in the garage found the old cross pieces from a roof rack. I think they measured 20 x 30 mm but I can't remember at moment! This was bolted on using the long bolt at the back and using the shortened front pivot to give the correct angle for the seat. The holes were spotted through from the seat runners. The paralellism was dealt with by using washers as spacers.
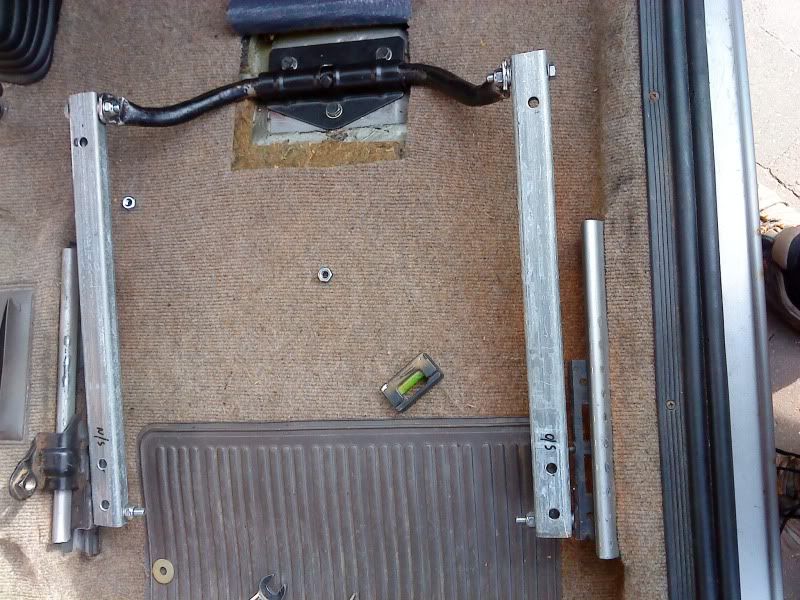
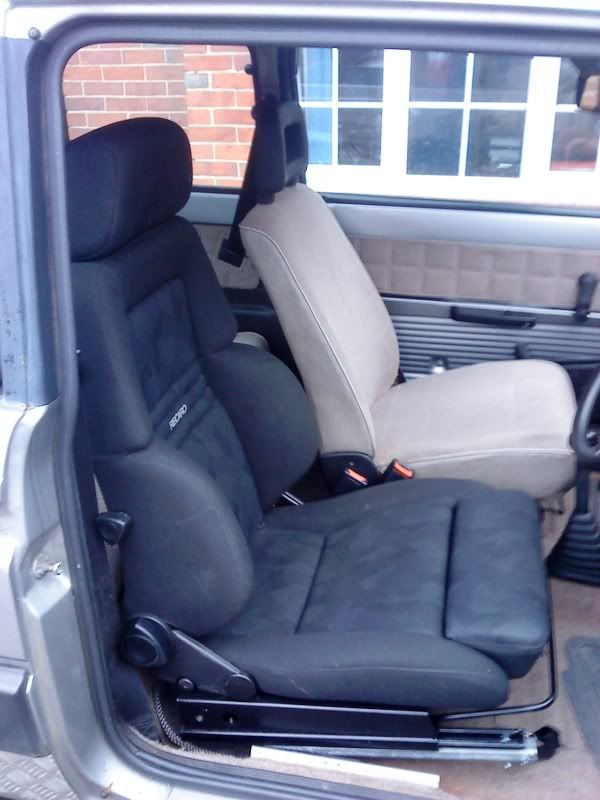
I also used a mini spirit level to get the parallels roughly flat. Once you have done this you can mount your seat!
Ta Da!
Please excuse slightly dodgy phone pictures!! Im hoping to go and get a AI ticket on Friday and then be there on Saturday so you can all inspect it and decide if you want to have a go! If anything in the above is unclear then pipe up on here and I will try and make it a little clearer!
What you need is an old Panda seat. We chose to use the correct side as we wanted to keep the part that the seatbelt end clicks into.
To get the old seats out you have to tap in the wedge on the back end of the rails. this means you will be able to adjust the seat all the way out the end. The inner runner will probably catch on the carpet so it will need some persuasion to get it out!
Firstly you need to remove the runners that go into the frame on the side of the car and remove the front pivotting bar (cleverly being pointed at in my photos!). You can just grind these off and wiggle the pins out with a pair of pliers. Then you can deburr them although they will be hot!
This will leave you with this.
Then grind off the extra tags when the rubber tags sits as these are no longer needed.
Then you need to shorten the front pivot. If you have it at full length the front of the seat will sit for to high at the front and you will be staring at the sun visors rather than through the windscreen. The top pivot it a unmolested bracket the bottom one is our modified shortened one.
Now you are ready to mount the runners into the car! As you have removed the spring loaded pin you will need to replace it with an M8 bolt. This means you cannot adjust the seat using the Panda adjustment and will have to use the adjustment on the seat. The back bolt is longer to allow the angle of the seat to be adjusted, more on this later.
Rumaging around in the garage found the old cross pieces from a roof rack. I think they measured 20 x 30 mm but I can't remember at moment! This was bolted on using the long bolt at the back and using the shortened front pivot to give the correct angle for the seat. The holes were spotted through from the seat runners. The paralellism was dealt with by using washers as spacers.
I also used a mini spirit level to get the parallels roughly flat. Once you have done this you can mount your seat!
Ta Da!
Please excuse slightly dodgy phone pictures!!
Im hoping to go and get a AI ticket on Friday and then be there on Saturday so you can all inspect it and decide if you want to have a go! If anything in the above is unclear then pipe up on here and I will try and make it a little clearer!