After 95,000 hard miles, the back end of my second Stilo was getting a bit noisy, and the bushes had obviously failed. I read all the threads here, and decided to attempt it myself (for financial reasons, I'm not a masochist). For the benefit or amusement of others, this is my story....
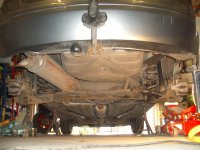
I started by jacking up the rear and propping it on axle stands, located on the chassis rails under the passenger doors. This gave me plenty of working space, and as much height as possible - both invaluable. This photo is from later in the job.
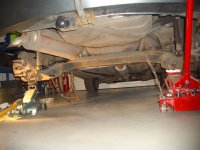
After removing the wheels, you need to disconnect the cables and pipes from each side. The handbrake cable can be pulled out of it's mountings and moved out of the way, but there's also two smaller connections. One is the hydraulic brake pipe, the other is an electrical sensor on the rear of each hub.
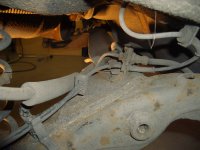
The electric wire can be traced to a connector block hidden behind the felt wheel-arch shield, and unplugged. It might be easier to unbolt the sensor, I didn't try that. The brake pipe needs to be disconnected at the flexible joint on top of the axle. Clamp the pipe first (I also remove the brake fluid reservoir cap, put a piece of plastic bag over the filler and screw the cap back on - an airtight seal at the front end slows down any losses).
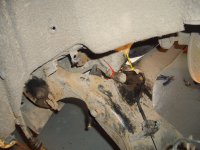
The rigid brake pipes are really hard to disconnect without damage. If I did this again I wouldn't even try, I would just snip them off and replace the pipe - it's quicker to flare and bend a short length of new copper tube.
Take the weight of the hubs with jacks, and remove the bolt attaching the bottom of each shock absorber to the axle. Release the jacks, and the weight of the hub assemblies should hang low enough that you can pull the coil springs out.
Then put a trolley jack under the centre of the rear axle, and unbolt the mounting plates from each side. You have to displace a plastic shroud to get access, but the four bolts came out easily enough. Lower the jack gently, and the whole axle can be dragged out and lifted onto a workbench.
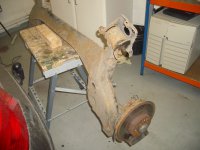
Removing the old bushes is an ugly business. Saw or disc-cut the bolts, and remove the brackets. I cut the centre assembly out first, with hacksaw and chisel.
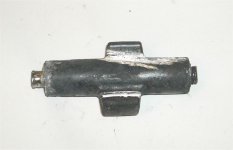
The next step was to drive out the inner part of the bush with a cold chisel applied to the outer rim. I suspect I could've done this with the centre assembly in place, and saved myself some time.
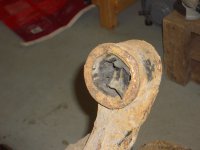
The tattered remains of the old bush will eventually come free, but be ready to apply any brute force or blunt instruments at your disposal.
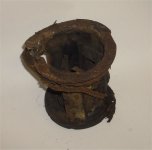
All that remains now is the outer shell of the old bush, a steel canister tightly pressed into place. Hacksaw through it, and then peel it out by hammering a small chisel under the cut.
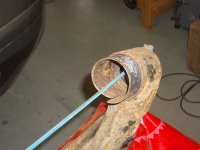
Grab the cut edge with pliers and twist, and it will coil slightly and pull free easily.
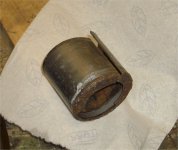
Clean up the inside of the carrier with a rotary wire brush or flap wheel.
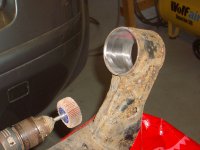
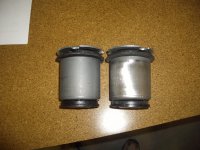
Based on advice from cris1117 in another thread, I decided to polish the new bushes with an emery flap wheel......
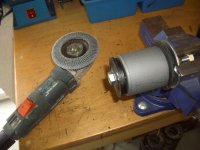
Working under the supervision of an expert engineer....
The finished result was smoother, and also very slightly smaller, so hopefully would go in nicely.
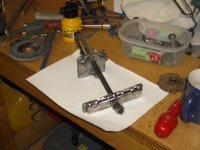
I had already constructed a crude but strong pulling assembly, using a high tensile bolt and fabricated-from-scrap end pieces.
Remember to mark the alignment of the bush with the axle weld line.
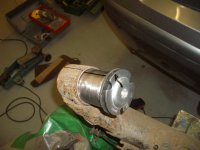
Finally, I smeared some Loctite 660 on the bush to ensure a tight, strong assembly, and then started pulling the new part into place. Everything went well for the first 50-60%, but then it would go no further. Smeg!
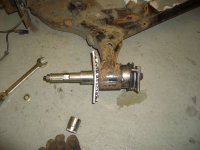
I had to quickly cut the bush out before the Loctite cured and complicated the problem. Disassembly of the bush revealed that the pressing force had distorted the steel lip at 2 of the 3 contact points, causing the loss of fluid visible in the previous photo.
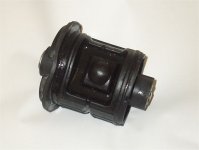
Quick phone call to Shop4Parts, who were brilliant as usual and sent another bush by overnight courier, and then try again. For the next attempt, I did a lot more pre-polishing, taking particular care with the ends.
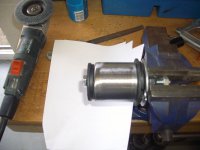
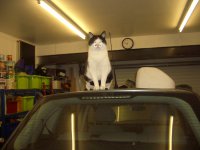
Using a long bolt through the bush, I tapped and wriggled the new bush as far as it would go into the socket. I then pulled it out and polished the high points marked by scratching, and tried again. It took about an hour of this process to match the bearing to the carrier, until it slid into place tightly with fast, light tapping (just hand-pulling on the through bolt, no hammer). Engineer cat tells me this is known as a Transition Fit, but he was plainly relying on Google for his information...
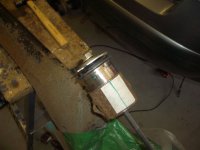
It's useful to mention here that the carrier was slightly oval, as mentioned by other members. Both the carriers on my axle were narrower on the 3 o'clock to 6 o'clock axis in this photo below (which would be top-to-bottom when fitted).

After matching the bearing to the carrier, I gave both a thin coat of Loctite 660, and pressed the bearing home with firm hand pressure and the long bolt. I then made up a brake pipe to replace a damaged part, and loosely remounted the bracket.
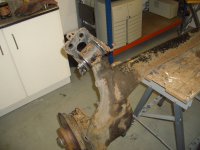
DHL delivered the new bush this morning, and I repeated the "grind to fit" process for the other side. Took about 40 minutes this time, because I was more confident in where I was going. Loctited into place, and bracket loosely fitted before lunch (then some odd jobs to give the adhesive time to cure).
This afternoon I refitted the mounting plate and lifted the axle back onto the ground, lined-up approximately with the back of the car. Using a trolley jack at the centre point, slide the assembly under the car and lift it into place. The mounting plates will not line-up properly until the hubs are raised to their approx normal position, I just put a wooden block under each side for this.
I was working solo on this job, and aligning the axle was a real pain. Every time I pushed and dragged one side into place, the other side would swing away. Once the mounting bolts are all tightly refitted let the axle 'droop' to reinstall the coil springs, then jack it back up to re-bolt the shock absorbers.
Reinstall the hub sensor wiring, the handbrake cable and the brake lines (and then bleed the rear calipers). I then moved the trolley jacks to the lower coil spring mounting, and lifted the car up to remove the axle stands. Lowered both jacks gently to something approximating normal ride height, and tightened the bush/mounting plate bolt. Lifted up a few inches to refit the wheels, and the job was done. Ride quality is greatly improved - the car glides smoothly over harsh surfaces and potholes, with no hint of looseness.
The only question is whether the Loctite will hold up. I will report on that if there's any basis for concern later.
I started by jacking up the rear and propping it on axle stands, located on the chassis rails under the passenger doors. This gave me plenty of working space, and as much height as possible - both invaluable. This photo is from later in the job.

After removing the wheels, you need to disconnect the cables and pipes from each side. The handbrake cable can be pulled out of it's mountings and moved out of the way, but there's also two smaller connections. One is the hydraulic brake pipe, the other is an electrical sensor on the rear of each hub.

The electric wire can be traced to a connector block hidden behind the felt wheel-arch shield, and unplugged. It might be easier to unbolt the sensor, I didn't try that. The brake pipe needs to be disconnected at the flexible joint on top of the axle. Clamp the pipe first (I also remove the brake fluid reservoir cap, put a piece of plastic bag over the filler and screw the cap back on - an airtight seal at the front end slows down any losses).

The rigid brake pipes are really hard to disconnect without damage. If I did this again I wouldn't even try, I would just snip them off and replace the pipe - it's quicker to flare and bend a short length of new copper tube.
Take the weight of the hubs with jacks, and remove the bolt attaching the bottom of each shock absorber to the axle. Release the jacks, and the weight of the hub assemblies should hang low enough that you can pull the coil springs out.
Then put a trolley jack under the centre of the rear axle, and unbolt the mounting plates from each side. You have to displace a plastic shroud to get access, but the four bolts came out easily enough. Lower the jack gently, and the whole axle can be dragged out and lifted onto a workbench.

Removing the old bushes is an ugly business. Saw or disc-cut the bolts, and remove the brackets. I cut the centre assembly out first, with hacksaw and chisel.

The next step was to drive out the inner part of the bush with a cold chisel applied to the outer rim. I suspect I could've done this with the centre assembly in place, and saved myself some time.

The tattered remains of the old bush will eventually come free, but be ready to apply any brute force or blunt instruments at your disposal.

All that remains now is the outer shell of the old bush, a steel canister tightly pressed into place. Hacksaw through it, and then peel it out by hammering a small chisel under the cut.

Grab the cut edge with pliers and twist, and it will coil slightly and pull free easily.

Clean up the inside of the carrier with a rotary wire brush or flap wheel.

Based on advice from cris1117 in another thread, I decided to polish the new bushes with an emery flap wheel......

Working under the supervision of an expert engineer....

The finished result was smoother, and also very slightly smaller, so hopefully would go in nicely.

I had already constructed a crude but strong pulling assembly, using a high tensile bolt and fabricated-from-scrap end pieces.

Remember to mark the alignment of the bush with the axle weld line.

Finally, I smeared some Loctite 660 on the bush to ensure a tight, strong assembly, and then started pulling the new part into place. Everything went well for the first 50-60%, but then it would go no further. Smeg!

I had to quickly cut the bush out before the Loctite cured and complicated the problem. Disassembly of the bush revealed that the pressing force had distorted the steel lip at 2 of the 3 contact points, causing the loss of fluid visible in the previous photo.

Quick phone call to Shop4Parts, who were brilliant as usual and sent another bush by overnight courier, and then try again. For the next attempt, I did a lot more pre-polishing, taking particular care with the ends.

Using a long bolt through the bush, I tapped and wriggled the new bush as far as it would go into the socket. I then pulled it out and polished the high points marked by scratching, and tried again. It took about an hour of this process to match the bearing to the carrier, until it slid into place tightly with fast, light tapping (just hand-pulling on the through bolt, no hammer). Engineer cat tells me this is known as a Transition Fit, but he was plainly relying on Google for his information...

It's useful to mention here that the carrier was slightly oval, as mentioned by other members. Both the carriers on my axle were narrower on the 3 o'clock to 6 o'clock axis in this photo below (which would be top-to-bottom when fitted).

After matching the bearing to the carrier, I gave both a thin coat of Loctite 660, and pressed the bearing home with firm hand pressure and the long bolt. I then made up a brake pipe to replace a damaged part, and loosely remounted the bracket.

DHL delivered the new bush this morning, and I repeated the "grind to fit" process for the other side. Took about 40 minutes this time, because I was more confident in where I was going. Loctited into place, and bracket loosely fitted before lunch (then some odd jobs to give the adhesive time to cure).
This afternoon I refitted the mounting plate and lifted the axle back onto the ground, lined-up approximately with the back of the car. Using a trolley jack at the centre point, slide the assembly under the car and lift it into place. The mounting plates will not line-up properly until the hubs are raised to their approx normal position, I just put a wooden block under each side for this.
I was working solo on this job, and aligning the axle was a real pain. Every time I pushed and dragged one side into place, the other side would swing away. Once the mounting bolts are all tightly refitted let the axle 'droop' to reinstall the coil springs, then jack it back up to re-bolt the shock absorbers.

Reinstall the hub sensor wiring, the handbrake cable and the brake lines (and then bleed the rear calipers). I then moved the trolley jacks to the lower coil spring mounting, and lifted the car up to remove the axle stands. Lowered both jacks gently to something approximating normal ride height, and tightened the bush/mounting plate bolt. Lifted up a few inches to refit the wheels, and the job was done. Ride quality is greatly improved - the car glides smoothly over harsh surfaces and potholes, with no hint of looseness.
The only question is whether the Loctite will hold up. I will report on that if there's any basis for concern later.
Last edited:

