In this guide I will go through the steps I took to replacing the original film on the dials with the ones over at birba.com. There isn't really much help on this on the internet so hopefully this will be helpful to others.
Difficulty Rating: Medium
This isn't exactly simple but it looks much harder than it is. The hardest bit is dismantling the steering column shroud to get at the cluster. Everything after that is easy once you take your time.
Difficulty Rating: Medium
This isn't exactly simple but it looks much harder than it is. The hardest bit is dismantling the steering column shroud to get at the cluster. Everything after that is easy once you take your time.
What You Need
- Number 3 allen key
- Small Phillips screwdriver
- Camera
- Pencil
- Ruler
- Torch
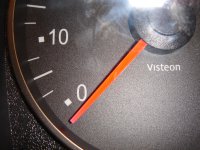
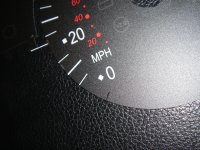
You need to turn on the ignition and wait until the engine warms up and all the needles have settled. **Then you have to take a photo or a few of the position of the needles on the dials.** This is the most important bit! DO NOT continue if you don't have a photo of the dials.
Once you've got these, on to the next step
Removing the Instrument Cluster
Start by removing all 3 allen bolts on the underside of the steering column (2 up front and 1 further down)
Then unclip the plastic cover from the top part and pull away.

Once this is done you will probably need to turn upside down to see the other 2 bolts. You will probably need a torch to see these bolts. You can then remove the top plastic cover.
Move the material out of the way until you see the 2 bolts holding down the cluster.

Remove these and then remove the 2 visible bolts at the top part of the cluster.

You can then pull out the loose bit of plastic to get proper access to the cluster. You then need to pull the cluster out. As soon as you see the wiring loom plug it out and pull the cluster free.

Opening the Cluster
This bit is probably best to do indoors.

Gently open the catches around the cluster only on the front part and remove that.
You now need to mark the resting point with a pencil and maybe some photos will help you too. The more info the better!


DO NOT continue until you have done this.
Replacing Dials

You now need to remove the needles. Take your time with this and be careful because if you pull out the metal pin when taking off the needles you're pretty much screwed!
A few people have said to use a fork or a spoon or knife to prise the needles off at each corner around in 360degrees. I tried this and I was getting nowhere so i pulled up gently and twisted anti-clockwise and they come off after a few rotations. Much easier this way. You really do have to be careful with this though.

You should now have all the needles off.

Remove the original film.
I fitted the birba dials which had adhesive bits on the back of the film which will help you stick onto the white plastic.
Now replace the needles.
The speedometer and rev counter are the easier ones. If you lay the original film over the new film you can mark off the position of the pencil mark onto the white plastic which won't be seen.

Then place the needles on the dials pointing to this spot.
For the fuel and engine temp you might be better of using a ruler to measure the distance between the empty/coldest mark to the resting point you marked on with pencil earlier.
Once you're done you need to put the cluster back together.

connect the cluster to the wiring loom to make sure everythings alright. speedometer should read zero etc. Relate this to the photo you took earlier.
Put everything back in reverse order.
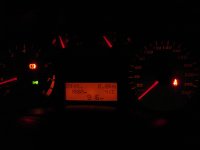
Admire:)
You are now done and its time to admire those lovely dials


I couldn't be happier!!