345884264_1724100544686172_4671623679724577340_n.jpg

Punto (Mk1) Project R the Mk1 Cabrio Restoration project

1998 Rosso Red Mk1 Punto ELX Cabrio, that has been very neglected.

Introduction

Project page for my 1998 Punto Cabrio Restoration project. This car was aquired in October 2023, with no service history and in a pretty poor state, however they are becoming extremely rare now in the UK, just a dozen or so of the 1.2 16v models left on the road and about 30 or so cabrios in total.

Pictures are from the forsale add and ones the previous owner sent me before I got it.
I fear a fair number of mk1 parts will get more scarce. I am still very tempted by a 3 door P90 or P85, the only issue is space & probable future ULEZ in my area...
Here is my 'good enough' bodge from years ago, it is not glamorous 😂
That Throttle linkage 🤣 typical Italians using multiple parts where one would do.


There was someone on the mk1 Facebook group last year who basically was happy for anyone to come take parts off his mk1 cabrio because he was going to scrap it under a ULEZ scrappage scheme, if anyone wanted the car they could have it for £2k which is what the scheme would have given him. Predictably no one wanted to pay £2k for the car so it got scrapped. It's a shame but is also what is making these cars so rare.
 
That Throttle linkage 🤣 typical Italians using multiple parts where one would do.
Yes it is quite the marvel of unnecessary engineering, not as bad as my mk2 Panda's which did a full 180º turn for some reason, causing it to eventually snap on the A3. Fortunately there was an alternate throttle linkage & cable available which funnily enough went straight from the pedal to the linkage rather than make the elaborate turn
 
The last couple of weeks the rebuild has stalled due to going on holiday, and stupidly losing a clip that has to come from Italy.

So I have taken to doing a little light restoration work, this involved using stuff around the house to Nickel plate some of the more rusty and grubby parts

Brackets that support the air filter box
KETT0331.JPGKETT0361.JPGKETT0334.JPG

Misc metal brackets that hold the headlights in place
KETT0359.JPGKETT0360.JPG
And I have been plating all the bolts and hardware to prevent corrosion when putting it all back together.
KETT0343.JPG
Doing those little things will make a big difference when it’s done 👍🏻, look after the air box brackets they are like unicorn poop .good luck with the rebuild 😀
 
I’ve heard that they are somewhat difficult to get hold of
Yeah, they are very similar to the ones on the gt , many owners over the years binned them when putting K&N etc filters on , now they are wanting to go back to standard look none are available , or if you’re lucky to find any very expensive .
 
Yeah, they are very similar to the ones on the gt , many owners over the years binned them when putting K&N etc filters on , now they are wanting to go back to standard look none are available , or if you’re lucky to find any very expensive .
I follow another youtuber who has a GT he is restoring and I know from his videos that they are impossible to get, that being said most things for GTs are seemingly impossible to get now. The cars that were left standard rotted away and got scrapped, the cars that where subject to the max power treatment as you point out had a lot of standard parts thrown away, they sat in someone’s garden or shed for 20 years and now they all want £3k for a rusting wreck that’s missing half its parts
 
Hello,
Just so you know, I am heavily following your topic and even your YT channel. I have exactly the same model with 155k km, works really fine.
I am doing some repairs and light tuning on it. I'll update some photos when it'll be ready, for now I just have angel eyes and I'm just changing every things that have to be changed (oil, rocker arm gasket, spark plugs, fuel filter, etc).

Thank you for your time and please keep posting, thanks to you I know what to buy for the car (Ribe bits) ;)
 
Bonjour cauchemarre, (interesting name btw hopefully not a description of fiat ownership)

Thanks for following. I have been unwell this past week or so, and everything has come to a halt, however the next video is nearly done.

Be sure to stick about on this forum as well, there is about 20 years of knowledge on this site so if you need help you can pretty much find it all here.
 
Rebuild process here


I have also been working on some other little jobs along side the engine.

I have obtained a second steering wheel with airbag which I plan to retrim with Leather, a nice little project to undertake soon.
IMG_3126.jpeg

I have also been working on the allow wheels in the background. This is the first of 4 to be done. It was a total mess of corrosion to begin with so really happy at how well it has turned out. It still needs a couple of coats of lacquer but looking forward to getting all 4 to this state so they can finally go on the car and I can get rid of the horrible modern Punto wheels currently on the car.
IMG_3254.jpegIMG_3258.jpegIMG_3260.jpeg

The front of the wheel is Steel silver and the back is black with a blend between the two behind the spokes to give them some contrast, once the suspension is sorted the calipers and everything behind the wheels will be painted so the black will help make that pop a bit more.​
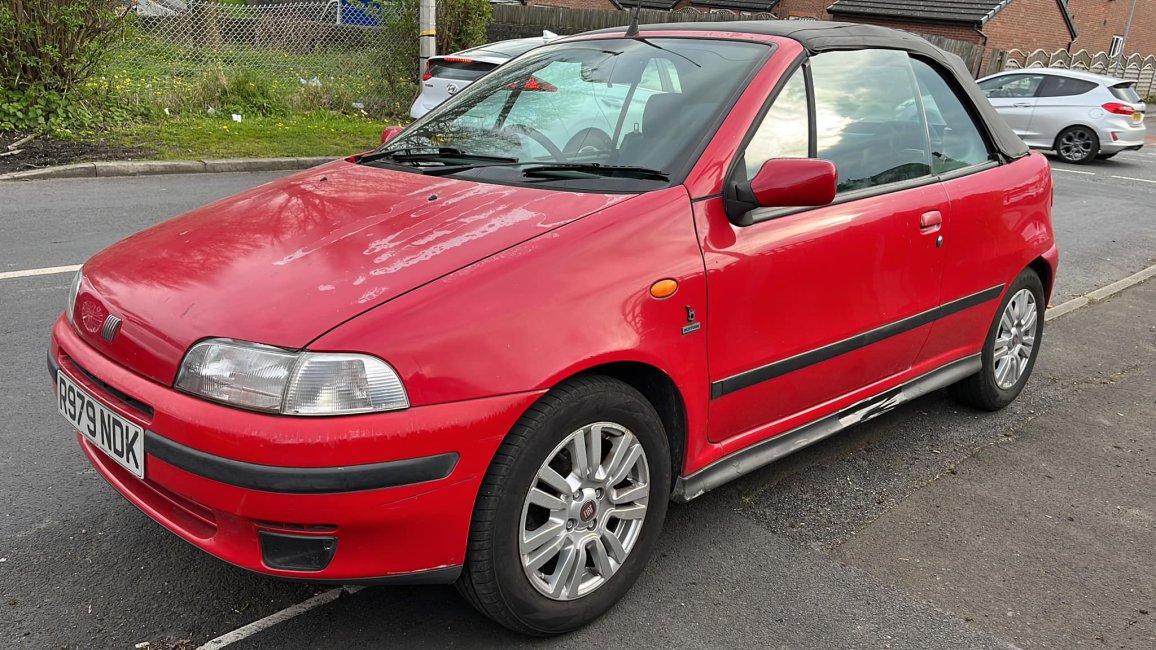
So what started out as a wheel refurb as you'll see in my last post, turned into something rather more involved.

With the wheels off everything behind the wheel looked really grotty and rusty. The main concern was the subframe given italians tendency to build them out of rust which just crumbles in our UK weather, I was also concerned about the state of what was behind the wheel arch liners and if the fronts of the sills where rusty.

So without any real plan I started stripping everything down. Off came the lower arms. Steering joints. the drive shafts. struts and wheel arch liners. It wasn't long before there was nothing left in the wheel arch but a brake caliper hanging on its pipe. (that eventually came off too)

Soon the car was dangling in the air without any of its important bits that connect it with the ground.
IMG_3325.JPEG

The subframe was not just in a surprisingly good condition, aside from some very mild surface rust, it was basically completely untouched.

A quick clean up with a wire brush to clean up any loose dirt and rust, and then a damn good blast with the pressure washer and it was as good as new.

I layed down a coat of Etch Primer, then some gloss black to make it actually look as good as new.

IMG_3308.JPEG IMG_3306.JPEG
IMG_3307.JPEG

These three pictures show the subframe before paint.
IMG_3296.JPEG

This picture shows the subframe before removal from the car and you can only see any real rust behind where the exhaust bracket mounter. this was just from the bracket and the metal under the rust was basically unmarked and still painted.
What then followed was a lot of sanding, wire brushing and cleaning. over the course of the last 3 or so weeks in the evenings. Then the application of a lot of paint. Some colour coding of parts to make it a little more visually appealing rather than just painting everything black. So anything springy (springs and roll bar) got painted red. Anything structural got painted black, and anything else was either painted silver or nickel plated to add contrast. The steering joints for example were painted silver as everything attached to them was painted black. Finally because the brakes would be visible through the wheels and the car being red I panted the calipers a nice bright Yellow.

KETT0505.JPG


KETT0509.JPGKETT0506.JPG
The drive shafts have also been fully refurbished and painted. new grease and checked for wear.

Everything was properly prepped and painted with high quality paints.
KETT0511.JPGKETT0512.JPGKETT0516.JPGKETT0518.JPG

I have installed all new parts where needed or essential for safety. So new brake discs and pads. New shocks, new antiroll bar bushings. New ball joint covers, new clips and bolts where needed. New boots and gaiters where needed.

KETT0514.JPGKETT0515.JPG

I am super happy with how it has all turned out. Everything looks shiny and new and is better than when it left the factory. I am just waiting on a set of bump stops for the shocks (the old ones had ceased to exist) and then I can start bolting everything back on the car. The one thing that has really surprised me is the insane amount of weight in all these components for such a little car, I would estimate probably more than 75 KG in everything bolted to the subframe. I think I may have to find a way to weight it to see for sure, and that is without wheels.

Anyhow I hope you can enjoy all the shiny bits before they get bolted back on never to be seen again. I would like to thank @ben for not only allowing me to host the pictures from the build here but for also providing a really good set of tools to format all these pictures and text to lay it out so its easy to read and navigate having been here >10 years I can appreciate just how much the forum has changed and improved over the years,


Back
Top