

vidtek
Member
Stuffing around with the Blaupunkt standard radio in the wife's Panda connecting via a bluetooth FM dongle eventually lost it's lustre. I decided I'd bite the bullet and get an aftermarket shiny new radio with all the bells and whistles.
I checked many of the name brands and they all had their own firmware which inhibited the addition of any more apps.
Eventually I found an aftermarket head unit I could live with after seriously considering Joying which I had previously installed to both my BMW convertible and my EOS cabriolet. They had some good units but were running really old Android versions, the newest was Android 10. At the moment of writing we were up to Android 14 in October 2023.
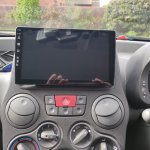
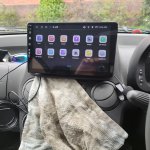
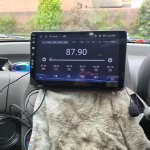
So I found this Android 12 unit on Amazon. Amazon Head Unit
It has a nice 9 inch screen, 6gb ram and 128gb of storage which is fairly standard amongst newish Android 'phones and tablets, but a rare beast indeed with aftermarket Head Units.
I also ordered one of these: Aerial adapter
some of these: Steering Wheel controls
and one of these from Ebay: Escutcheon
Once they all arrived I set to work. I had many of the little tools to remove head units from various vehicles I inherited when I was State Service Manager for Pioneer Electronics in Perth Western Australia, and luckily a pair of them fitted nicely. It is also possible to fashion a pair from a wire coat hanger, but a bit fiddly.
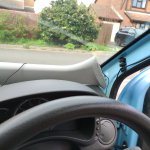
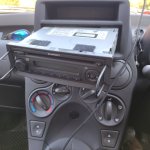
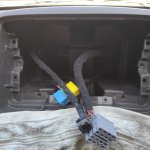
Removal of the head unit after sitting in the vehicle for over 13 years was er, problematic. Lots of huffing and puffing and an almighty heave and it finally started to budge.
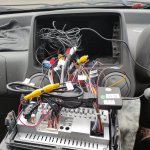
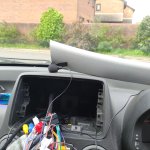
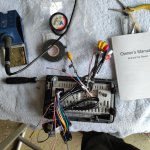
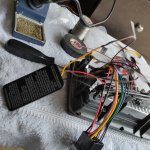
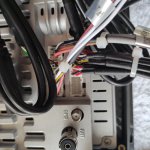
See piccies attached. The seller of the head unit tries to be helpful, but fails miserably with his poor English and lack of technical knowledge, he does his best. I still have no idea who makes this head unit. The power socket from the original radio just plugs straight in to the new head unit and with the aerial adapter it received great FM and AM signals. I spliced the 12v supply and gnd cables for the steering wheel receiver and also Key1 and Key2 data connections to their counterparts.
I also had a barebones DAB radio lying around the workshop and popped that in for good measure. Wiring for the supplied microphone and rear camera was fiddly but fairly straight forward. The fitting of the head unit to the new escutcheon was not obvious. I drilled a couple of tiny holes and screwed them with small self-tappers and washers to affix the head unit to the escutcheon. I then used a hot-melt glue gun to fix some small pieces of rubber to the 4 prongs on the escutcheon to make it secure in the din slot. It works a treat, solidly secure and easy to remove again if I have the need.
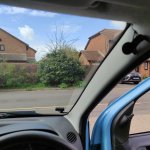
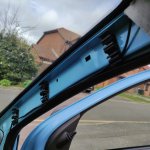
I looked at fixing the camera outside, but didn't want to drill holes in the car, so plumped for double-sided tape on the rear centre stop light housing viewing through the rear windscreen.
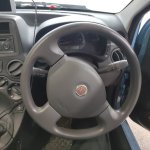
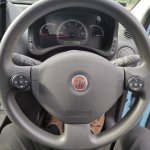
The setup of the steering wheel controls was interesting, to get the little red protectors from the sticky gluey things was very difficult. They do not stick well, even though I prepared the steering wheel with methylated spirits. The first time the lovely Jane took the car out she accosted me with the 2 controls in her hand and demanded to know what they were and they just fell off. I need to sort another method of mounting them. They fit into little rubber cups as they will need to be recharged every now and again via a micro usb connection lead supplied. I think if I make a couple of tiny slits and use a couple of cable ties through the rubber may be a practical solution. To map the buttons to controls is easy in the head unit setup. It is possible to map 10 functions in the head unit's setup page software.
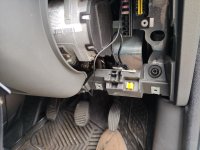
The only issue I have is no image from the rear camera. When selecting reverse I get the guide lines, and then after a couple of seconds a message saying "no camera image received". I hope it is just in one of the settings I haven't correctly set in the camera settings pages., as I'm pretty sure my wiring is correct. I drilled a tiny hole in the metal support bracket for one of the headlining buttons and a self-tapper for the earth wire.
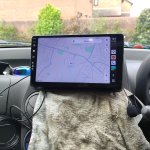
I hope my experience can assist others who are also missing an automatic BT connection and proper navigation. The head unit has Google Maps, Waze and Sygic all pre-installed, as well as the Google Play store app. The first time I fired it up, the unit kept crashing Google Play, but after updating it now works fine. With Android auto and the evil empire's carplay starting automatically on BT on entering the car it is a nice little unit. The steering wheel controls are essential, as there are no physical knobs to play with on this unit, the only drawback I have found to date.
If anyone has any questions just PM or make a comment, I'll try to assist. Cheers Tony.
I checked many of the name brands and they all had their own firmware which inhibited the addition of any more apps.
Eventually I found an aftermarket head unit I could live with after seriously considering Joying which I had previously installed to both my BMW convertible and my EOS cabriolet. They had some good units but were running really old Android versions, the newest was Android 10. At the moment of writing we were up to Android 14 in October 2023.
So I found this Android 12 unit on Amazon. Amazon Head Unit
It has a nice 9 inch screen, 6gb ram and 128gb of storage which is fairly standard amongst newish Android 'phones and tablets, but a rare beast indeed with aftermarket Head Units.
I also ordered one of these: Aerial adapter
some of these: Steering Wheel controls
and one of these from Ebay: Escutcheon
Once they all arrived I set to work. I had many of the little tools to remove head units from various vehicles I inherited when I was State Service Manager for Pioneer Electronics in Perth Western Australia, and luckily a pair of them fitted nicely. It is also possible to fashion a pair from a wire coat hanger, but a bit fiddly.
Removal of the head unit after sitting in the vehicle for over 13 years was er, problematic. Lots of huffing and puffing and an almighty heave and it finally started to budge.
See piccies attached. The seller of the head unit tries to be helpful, but fails miserably with his poor English and lack of technical knowledge, he does his best. I still have no idea who makes this head unit. The power socket from the original radio just plugs straight in to the new head unit and with the aerial adapter it received great FM and AM signals. I spliced the 12v supply and gnd cables for the steering wheel receiver and also Key1 and Key2 data connections to their counterparts.
I also had a barebones DAB radio lying around the workshop and popped that in for good measure. Wiring for the supplied microphone and rear camera was fiddly but fairly straight forward. The fitting of the head unit to the new escutcheon was not obvious. I drilled a couple of tiny holes and screwed them with small self-tappers and washers to affix the head unit to the escutcheon. I then used a hot-melt glue gun to fix some small pieces of rubber to the 4 prongs on the escutcheon to make it secure in the din slot. It works a treat, solidly secure and easy to remove again if I have the need.
I looked at fixing the camera outside, but didn't want to drill holes in the car, so plumped for double-sided tape on the rear centre stop light housing viewing through the rear windscreen.
The setup of the steering wheel controls was interesting, to get the little red protectors from the sticky gluey things was very difficult. They do not stick well, even though I prepared the steering wheel with methylated spirits. The first time the lovely Jane took the car out she accosted me with the 2 controls in her hand and demanded to know what they were and they just fell off. I need to sort another method of mounting them. They fit into little rubber cups as they will need to be recharged every now and again via a micro usb connection lead supplied. I think if I make a couple of tiny slits and use a couple of cable ties through the rubber may be a practical solution. To map the buttons to controls is easy in the head unit setup. It is possible to map 10 functions in the head unit's setup page software.
The only issue I have is no image from the rear camera. When selecting reverse I get the guide lines, and then after a couple of seconds a message saying "no camera image received". I hope it is just in one of the settings I haven't correctly set in the camera settings pages., as I'm pretty sure my wiring is correct. I drilled a tiny hole in the metal support bracket for one of the headlining buttons and a self-tapper for the earth wire.
I hope my experience can assist others who are also missing an automatic BT connection and proper navigation. The head unit has Google Maps, Waze and Sygic all pre-installed, as well as the Google Play store app. The first time I fired it up, the unit kept crashing Google Play, but after updating it now works fine. With Android auto and the evil empire's carplay starting automatically on BT on entering the car it is a nice little unit. The steering wheel controls are essential, as there are no physical knobs to play with on this unit, the only drawback I have found to date.
If anyone has any questions just PM or make a comment, I'll try to assist. Cheers Tony.
Attachments
-
 IMG_20240404_185811.jpg1.8 MB · Views: 53
 -
 IMG_20240407_161123.jpg1.9 MB · Views: 26
 -
 IMG_20240407_161056.jpg2.3 MB · Views: 30
 -
 IMG_20240407_161050.jpg1.9 MB · Views: 30
 -
 IMG_20240407_154436.jpg1.9 MB · Views: 32
 -
 IMG_20240407_131339.jpg2 MB · Views: 25
 -
 IMG_20240407_131334.jpg2.5 MB · Views: 26
 -
 IMG_20240407_131330.jpg1.2 MB · Views: 31
 -
 IMG_20240407_131326.jpg1.6 MB · Views: 25
 -
 IMG_20240407_131323.jpg2.2 MB · Views: 24
 -
 IMG_20240407_124550.jpg2.2 MB · Views: 29
 -
 IMG_20240407_103443.jpg1.5 MB · Views: 27
 -
 IMG_20240407_103841.jpg1.6 MB · Views: 27
 -
 IMG_20240407_121208.jpg1.9 MB · Views: 21
 -
 IMG_20240407_121219.jpg1.8 MB · Views: 22
 -
 IMG_20240407_121227.jpg1.3 MB · Views: 23
 -
 IMG_20240407_122643.jpg2 MB · Views: 29
 -
 IMG_20240407_124526.jpg2.2 MB · Views: 24
Last edited:
This post contains affiliate links which may earn a commission at no additional cost to you.