Dr Zoidberg
Member
- Joined
- Jul 13, 2008
- Messages
- 334
- Points
- 62
This morning I swapped the front door speakers in my Bravo for a pair of Pioneer TS-H1703 custom fit jobbies.
The first door took about 4 times as long as the second while I figured out where all the fixings are , so here's a guide to save anyone else the hassle.
The first place the door card is held in place is behind the door handle - pop the small trim piece out with a flat bladed screwdriver and there's an allen bolt behind it. A 5mm allen key will do the job.
Next step is the panel around the electric window switches - this just unclips with a little notch at the front end to help you do this. Once it's out disconnect the cable.
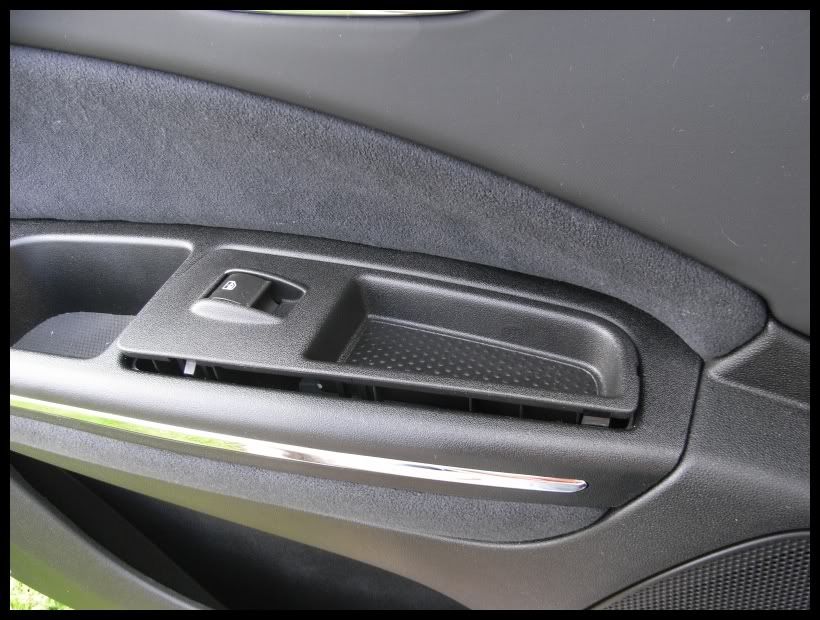
Now to take off the arm rest piece of the door. There's a rubber mat in the handhold area - lift this out and there's three more 5mm allen bolts to undo.
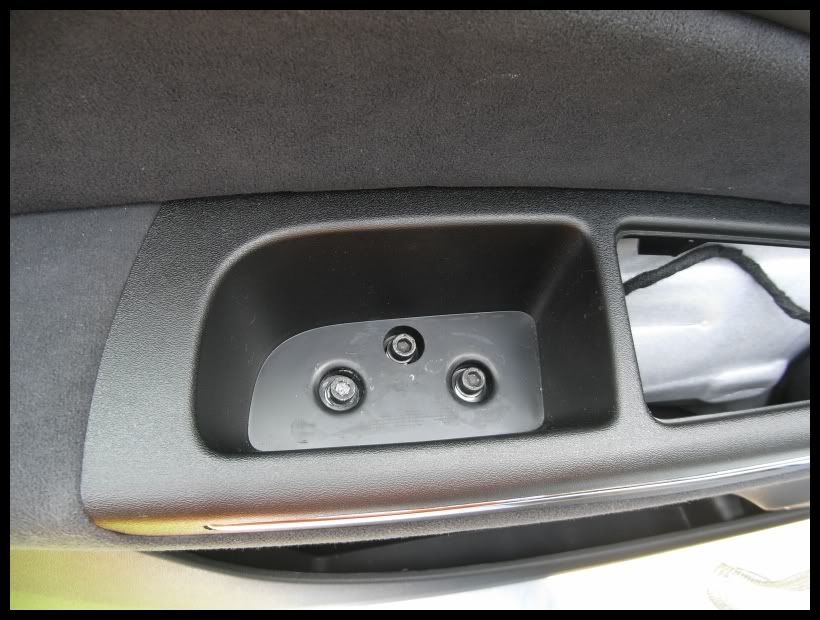
You can then remove this whole section , being careful not to force the two clips by the inside edge.
With that out there's two more 5mm allen bolts going into the door to remove (though they were missing on the drivers side in my car!).
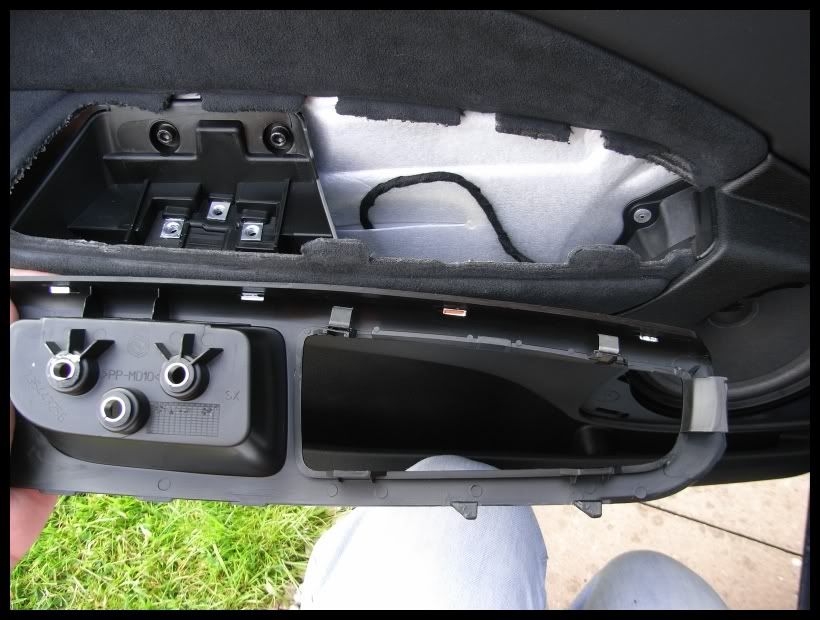
The last thing to undo is the two philips screws right at the bottom of the door card.
With those out you can now do the nerve-wracking bit and pull at the door card to release the push-in clips. There's 4 in total - 2 at the bottom corners and two half way up. They are a decent design and shouldn't be in danger of breaking but a warm day will help keep them safe. I suggest the bottom corner on the outside is the place to start.
Once they have been unclipped you can now lift the door card up to detach it fully - wind the window down to make this much easier, and don't forget to unclip the plastic section that holds the tweeter above the door by the A-pillar which pulls off easily.
It will still be held in place by the door release mechanism but there's enough slack to lean it against the door without detaching it.
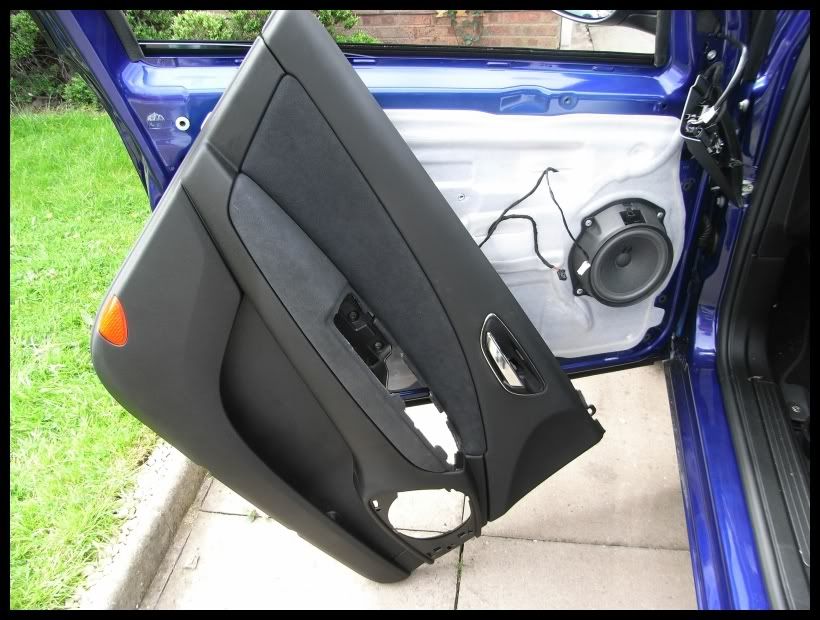
Now you can see the factory fit speaker which is held in place by 4 rivets. There's nothing else you can do but get the drill out - a 4mm bit did the job I believe. Make sure the window is up at this point - you don't want to smash the glass!
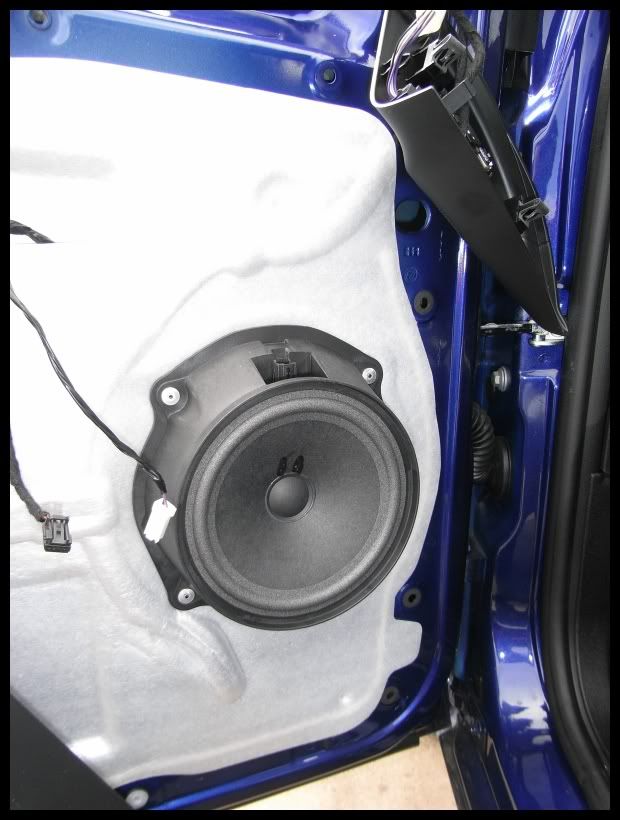
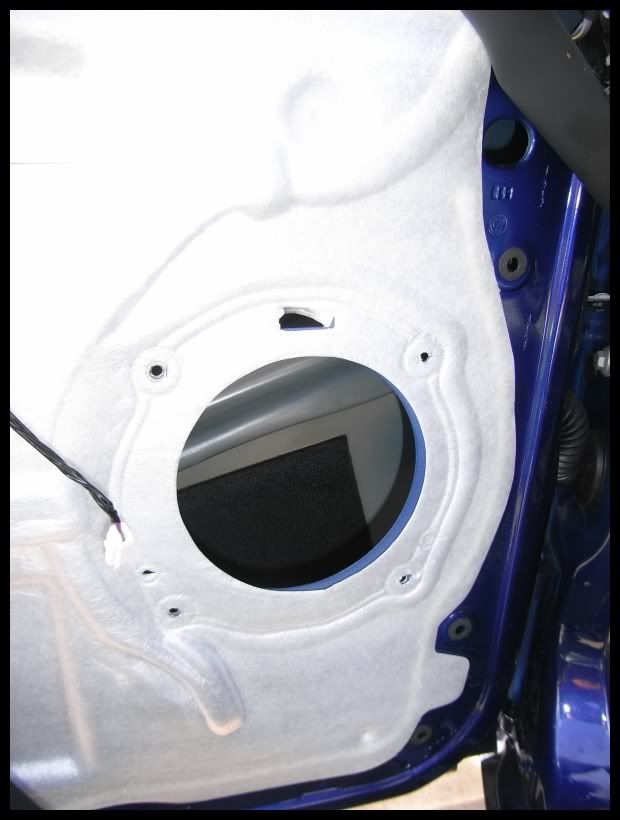
You will need some plastic spacers to fit the new speakers into - they are the same ones as the Fiat Stilo if you can't find some specifically labelled as being for the Bravo.
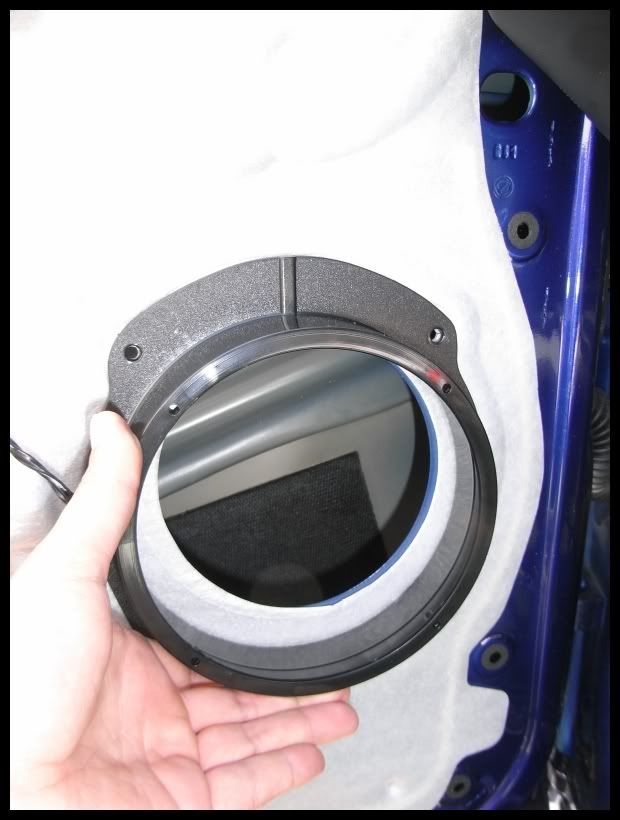
They screw into the holes left by the rivets (you'll probably need to buy some screws & clips separately for these) then the new speakers screw into place on top.
If you want to fit some sound deadening material to the door and trim panel , now's your chance. Dynamat is good but pricey so a much cheaper alternative is the self adhesive flashing tape you can get from DIY shops.
Here's the new speakers in place.
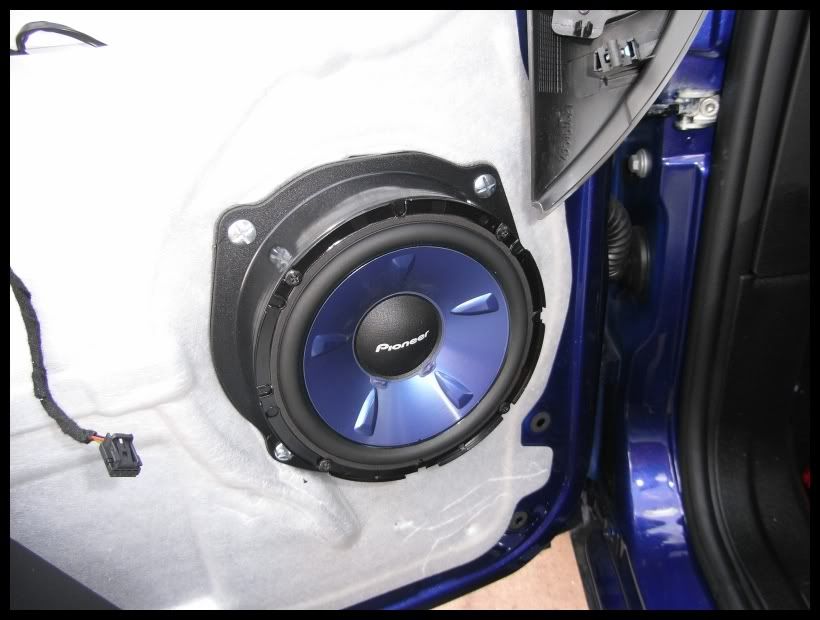
The Pioneers I use are components so the factory fit tweeters were unclipped and removed and the replacements put in their place. They aren't an exact match so I used a hot glue gun to hold them firmly and then forgot to take any pictures of this bit.
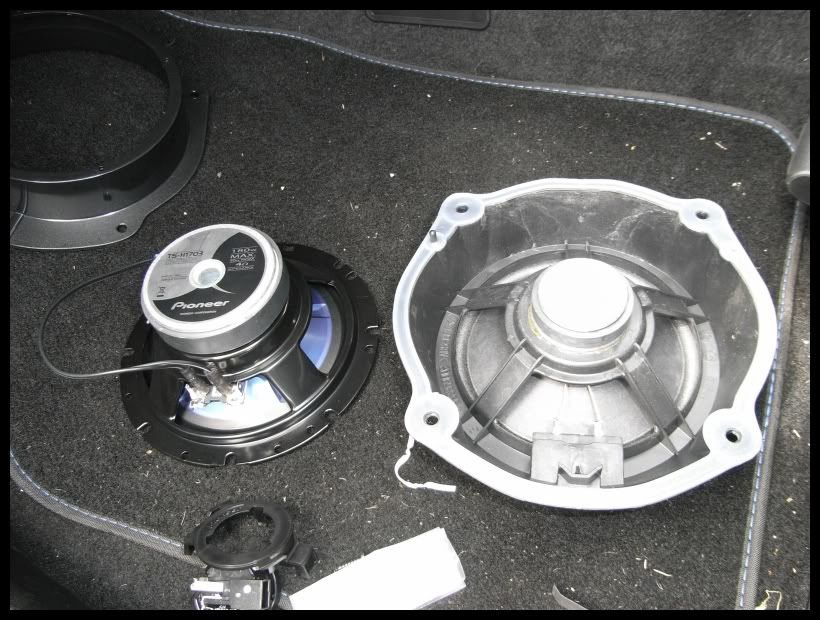
To compare the replacements and the factory fit speakers , here's the back.
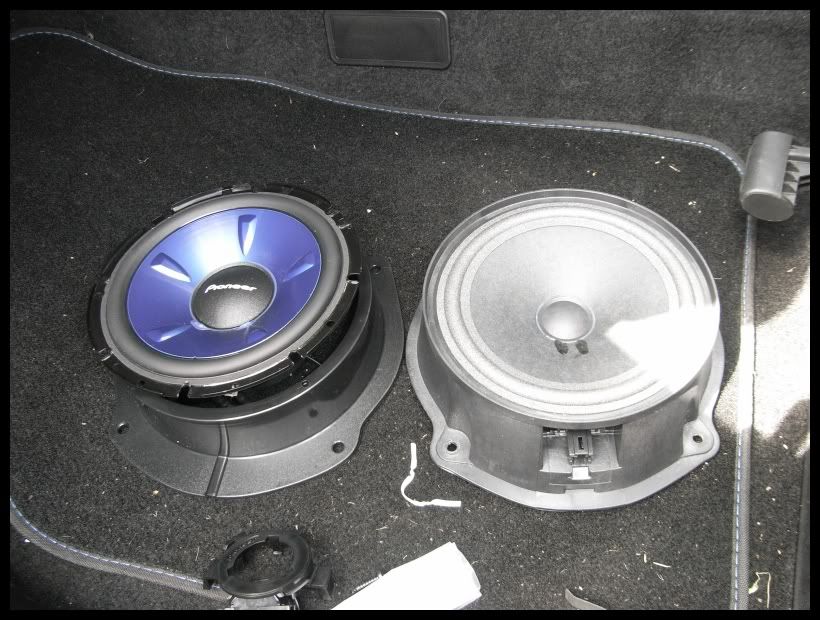
And front.
Reassembly is just a case of following the guide backwards and pretty easy.
Next job is the back doors but I'd expect the procedure to be near identical.
As for the result - I'm happy with it. The sound is much clearer and of a noticably higher quality. There's more bass, though not a vast difference and the treble is much smoother. Well worth the £90 or so it cost me in total. Hope you find this useful.
The first door took about 4 times as long as the second while I figured out where all the fixings are , so here's a guide to save anyone else the hassle.
The first place the door card is held in place is behind the door handle - pop the small trim piece out with a flat bladed screwdriver and there's an allen bolt behind it. A 5mm allen key will do the job.
Next step is the panel around the electric window switches - this just unclips with a little notch at the front end to help you do this. Once it's out disconnect the cable.

Now to take off the arm rest piece of the door. There's a rubber mat in the handhold area - lift this out and there's three more 5mm allen bolts to undo.

You can then remove this whole section , being careful not to force the two clips by the inside edge.
With that out there's two more 5mm allen bolts going into the door to remove (though they were missing on the drivers side in my car!).

The last thing to undo is the two philips screws right at the bottom of the door card.
With those out you can now do the nerve-wracking bit and pull at the door card to release the push-in clips. There's 4 in total - 2 at the bottom corners and two half way up. They are a decent design and shouldn't be in danger of breaking but a warm day will help keep them safe. I suggest the bottom corner on the outside is the place to start.
Once they have been unclipped you can now lift the door card up to detach it fully - wind the window down to make this much easier, and don't forget to unclip the plastic section that holds the tweeter above the door by the A-pillar which pulls off easily.
It will still be held in place by the door release mechanism but there's enough slack to lean it against the door without detaching it.

Now you can see the factory fit speaker which is held in place by 4 rivets. There's nothing else you can do but get the drill out - a 4mm bit did the job I believe. Make sure the window is up at this point - you don't want to smash the glass!


You will need some plastic spacers to fit the new speakers into - they are the same ones as the Fiat Stilo if you can't find some specifically labelled as being for the Bravo.

They screw into the holes left by the rivets (you'll probably need to buy some screws & clips separately for these) then the new speakers screw into place on top.
If you want to fit some sound deadening material to the door and trim panel , now's your chance. Dynamat is good but pricey so a much cheaper alternative is the self adhesive flashing tape you can get from DIY shops.
Here's the new speakers in place.

The Pioneers I use are components so the factory fit tweeters were unclipped and removed and the replacements put in their place. They aren't an exact match so I used a hot glue gun to hold them firmly and then forgot to take any pictures of this bit.
To compare the replacements and the factory fit speakers , here's the back.

And front.

Reassembly is just a case of following the guide backwards and pretty easy.
Next job is the back doors but I'd expect the procedure to be near identical.
As for the result - I'm happy with it. The sound is much clearer and of a noticably higher quality. There's more bass, though not a vast difference and the treble is much smoother. Well worth the £90 or so it cost me in total. Hope you find this useful.

