You need:
- allen key number 3.0
- a tool shown in the haynes manual to dettach the radio unit (or a knife as i used)
- a little bit of patcience.
Here goes:
- remove the fan speed selector button, the left and the right fake buttons from the button unit (the one that contains the demist button, fog lights and fog lamp).
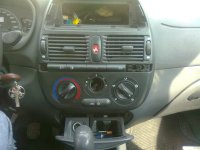
-remove the radio unit, inserting the knife in the left side up and pressing up (in this time, with the hand inserted in the casette slot, pull towards you), then insert left side down pressing down, then right side up pressing up, and right side down pressing down.
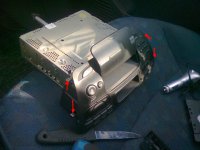
- remove the bolts shown in the picture below with the allen key (the ones from the bottom are at an 45 degrees angle above the ashtray).
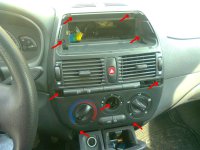
- put the knife underneath the buttons unit (the one with the demist button...) in the right side and pull it up, and with the other hand pull towards you (it should slide out pretty easy) then take out the two connectors (they have an "ear" on the bottom of them).
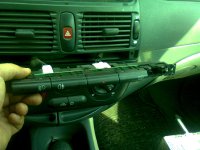
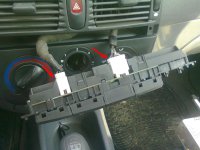
-if you want to change the lights from the buttons, you can take the buttons out by inserting an inline screwdriver on the top and pull up, and on the bottom (there are 2 plastics on top and 2 on bottom the ones in red circles), then to change the lights they go like this: red arrow on/off bulb, and blue arrow, sign backlight bulb.
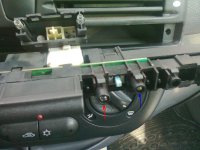
-after you take out the radio unit, the buttons unit, and the screws pull the facia towards you until it pops out. You will have to disconnect another cable from the back of the facia (the one from the buttons of the recirculation and air conditioning), and the cable that goes to the hazard lights button.
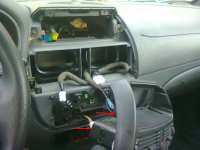
And that's it, reattaching (in true Haynes style):yum:, is the oposite of dettaching.
Hope it helps someone and that is detailed enough.
- allen key number 3.0
- a tool shown in the haynes manual to dettach the radio unit (or a knife as i used)
- a little bit of patcience.
Here goes:
- remove the fan speed selector button, the left and the right fake buttons from the button unit (the one that contains the demist button, fog lights and fog lamp).

-remove the radio unit, inserting the knife in the left side up and pressing up (in this time, with the hand inserted in the casette slot, pull towards you), then insert left side down pressing down, then right side up pressing up, and right side down pressing down.

- remove the bolts shown in the picture below with the allen key (the ones from the bottom are at an 45 degrees angle above the ashtray).

- put the knife underneath the buttons unit (the one with the demist button...) in the right side and pull it up, and with the other hand pull towards you (it should slide out pretty easy) then take out the two connectors (they have an "ear" on the bottom of them).


-if you want to change the lights from the buttons, you can take the buttons out by inserting an inline screwdriver on the top and pull up, and on the bottom (there are 2 plastics on top and 2 on bottom the ones in red circles), then to change the lights they go like this: red arrow on/off bulb, and blue arrow, sign backlight bulb.

-after you take out the radio unit, the buttons unit, and the screws pull the facia towards you until it pops out. You will have to disconnect another cable from the back of the facia (the one from the buttons of the recirculation and air conditioning), and the cable that goes to the hazard lights button.

And that's it, reattaching (in true Haynes style):yum:, is the oposite of dettaching.
Hope it helps someone and that is detailed enough.

