Technical Fiat Punto new clutch replacement

Currently reading:
Technical Fiat Punto new clutch replacement

JimiH

New member
Joined
Sep 19, 2010
Messages
7
Points
1
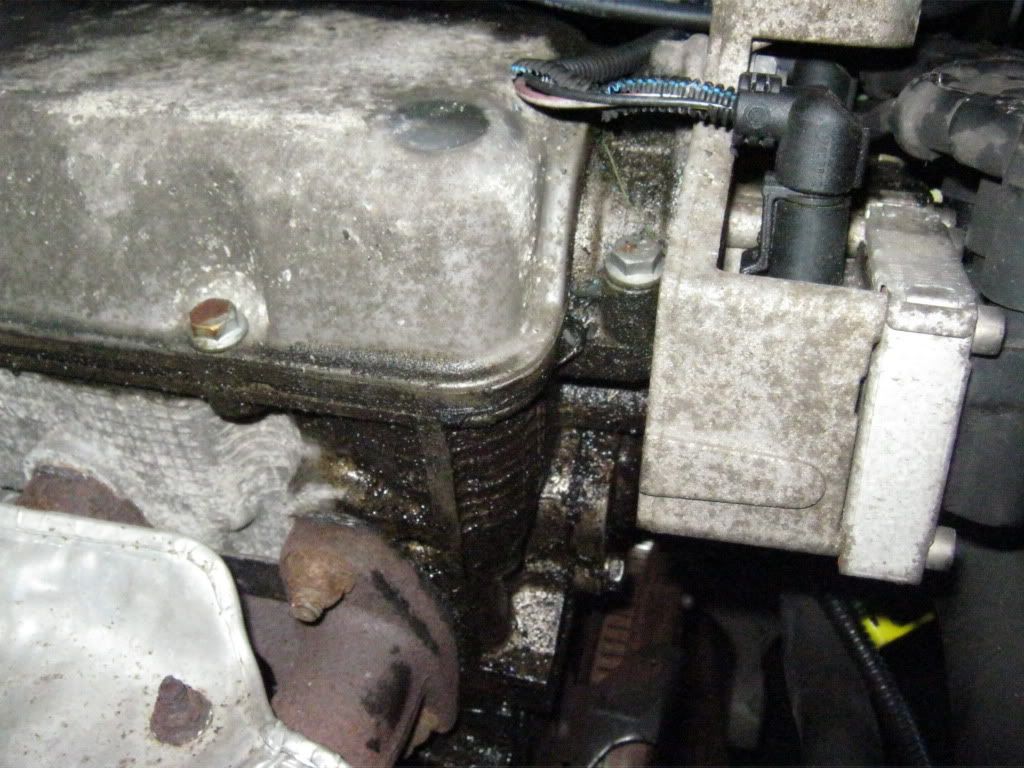
Hello, is this one of the bolts that hold the starter motor on? The Haynes manual isn't very clear.

Punto 1.2 Mk2 8V

IMG_0071.jpg


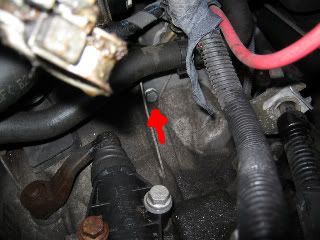
Also is this the correct place to put the car on Axels, will it get in the way when I'm removing the transmission?

IMG_0070.jpg


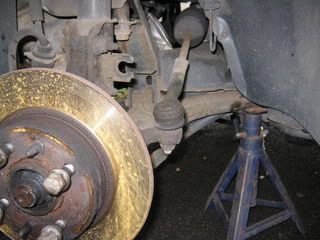
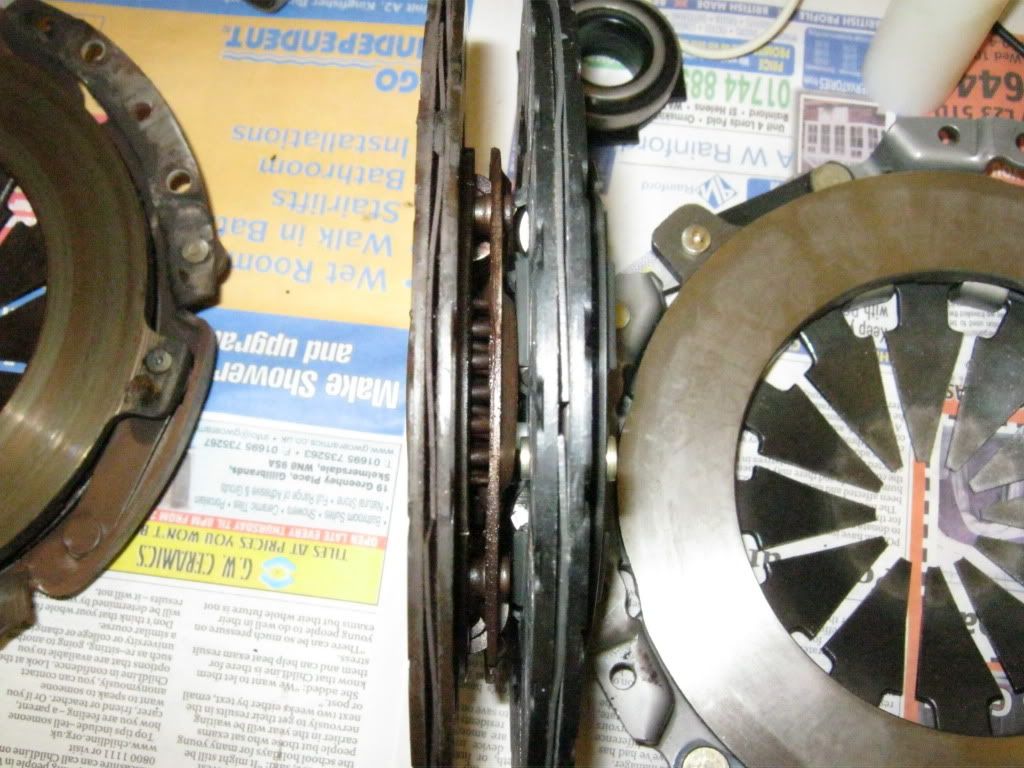
This is my first go at doing a clutch and I thought I'd save some cash. I got the clutch kit for £42, the manual off eBay for £8 and had a friend machine me a alignment tool. I want to get as far as I can before I get some help removing the transmission. there doesn't seem to be that much on Google regarding this procedure. What there is doesn't have any pictures with them.

Hope you can help

Geoff
 
Last edited:
Hello mate :)

Just done my clutch, not too bad, just take your time and be methodical about everything and you should be fine.

Where abouts are you mate? If your near to sunny Hull then I can help if you want?

As far as that bolt is concerned i'm not sure. But the starter can stay attached as long as you take out all the other bolts/nut on the bell housing. If the starter is still attached it wont matter at all. If anything it may even be a little easier as its one less thing to wrestle back into position.

Axle stand wise, yeah they look fine to me. I put mine where the wish bones are attached using a piece of wood under each.

I'm going to try and remember some important bits and list them as best I can :)

1- Use a large piece of wood/steel box across the engine bay and buy a couple of cheap ratchet straps to support the engine before the gearbox mount is removed. (The other strap can be REAL helpful in supporting the 'box as you remove/re-fit it. Even with a good jack beneath the 'box its still really handy to do it this way, bit of a lump once away from the engine).

2- Make sure that the release bearing is properly clipped onto the release fork, mine took a few goes.

3- Give the input shaft a wobble to check for bearing wear, bit of a problem on our cars sadly. Also look for oil from same place and also behind the flywheel if you can.

4- On mine I took out the release fork and give it a greasing inside the two bushes, be a good idea to do yours.

5- You'll need new clips/big cable ties/grease for the inner CV joints since they are the ones that have to be un-done to get the 'box off.

Think thats it mate, good luck with it (y)
 
Thanks for the offer :) but I think I'm a bit far from you, Im in Skelmersdale just outside Liverpool.

i should be able to get the straps from work so I just need the clips & grease.

the Haynes manual is a bit vague on removing the transmission. Idealy I'd like a few more pictures (two pictures not enough for me) but I'm sure I'll be able to figure it out :confused:.

As for the clips what shall I ask for at my local auto spares shop?

Again thanks for your help.

Geoff
 
skem not too far from me :LOL:
Ormskirk im from haha..

I replaced my clutch when i bought my car and took me ages because i didnt have it lifted off the floor, and a sub frame bolt i took out the nut which you tighten it into, had moved so i had to pull the subframe down to get it back on..

I would say its fairly easy just takes a long time because of all the bolts and pulling things out
 
Yes that is a starter motor bolt, and you definitely need all three out! You can leave the starter where it is but you need the bolts out. It's pretty much common sense as to what to remove: Bellhousing bolts (3) stud nut (under starter at back) two or three nuts and bolts on the bottom of the gearbox/engine, one little 10m screw holdind the dust plate onto the gearbox, gearchange cables, speedo sensor plug, reversing light sensor plug, slave cylinder (2bolts) and earth strap next to the slave cylinder(everyone forgets this)and starter motor bolts. The driveshafts obviously have to come out of the box, there's several different methods that's your choice.
 
Those clips Geoff, not sure if they are available separately as they normally come as part of a kit with new CV boot/grease.

But I just used a fairly large cable tie on each of mine, inner CV joints dont have to move as far as the outers and so far mine have been perfect, totally sealed and all the grease is inside where its supposed to be (y)

Cant think of anything else Geoff, any hassle i'm sure the other guys on here will have ideas or drop me a PM :)
 
I use the bolts that hold the subframe to the car body. Be careful and you can jack from one and put the axle stand under its next door neighbour. I would avoid using the wishbones. Not being level, even with wood blocks, the axle stand could slip.

Dont forget a brick under both sides of both rear wheels
 
Yes that is a starter motor bolt, and you definitely need all three out! You can leave the starter where it is but you need the bolts out. It's pretty much common sense as to what to remove: Bellhousing bolts (3) stud nut (under starter at back) two or three nuts and bolts on the bottom of the gearbox/engine, one little 10m screw holdind the dust plate onto the gearbox, gearchange cables, speedo sensor plug, reversing light sensor plug, slave cylinder (2bolts) and earth strap next to the slave cylinder(everyone forgets this)and starter motor bolts. The driveshafts obviously have to come out of the box, there's several different methods that's your choice.

Hello, I've read in the Haynes manual that I need a ball joint seperator. Is this really the case?

I'm off wednesday so I'm hoping to get it done then.

Thanks

Geoff
 
Hi again Geoff :)

No mate, I didn't need one. The bottom ball joint (beneath the hub assembly itself) isn't a tapered fit so once the bolts out of the way, the most you'll need to do is maybe use a flat blade screw driver in there to spread where it clamps to get the thing off the lower arm. The steering rack ball joint can stay on, you have lots of room to pull everything clear once its all undone.

I forgot to say...the Haynes recommends removing the drivers side hub assembly/drive shaft as well as the passenger side but I gambled in just un-doing that CV clip and once the box was clear the drivers side just plopped out. (Use two carrier bags, one on each removed joint to stop crap getting in there until its back together again. I popped a bit of extra grease in the open boot upon reassembly just for piece of mind).

On re-assembly though its a bit more tricky, especially if your on your own like I was :( Best advice I can give you is.....

1- Cable Tie the drivers side drive shaft into the position it normally would be so that when the gearbox is on its way back down the input shaft upon reassembly it'll hopefully find its way back into the CV "cup" again. If your laid under the car looking up, I think from memory one of the thick alternator cables is in the perfect position to (carefully) hang the drive shaft from using a few cable ties all joined together to give it enough length.

2- Definitely definitely try and make/pinch/borrow some long thick beam of wood/steel box that a good size to fit across the engine bay (with cloths under each end for your paint on the inner wings). In my opinion, dont do anything until you have that support to hand :) It'll save you a world of pain from the moment that gearbox mount is off the car to when you begin to jack up and re-fit the gearbox. You'll need at least two ratchet straps we mentioned as well. One to support the engine from above and the second you'll need to attach to the box once its under the car on a trolley jack ready for installation. The jack'll do the lifting but you'll find that you can slew the box and stop it falling off the jack using the second ratchet :) Sorry to go on lol but its a real ball ache of a job, any help is better than non.

3- Avoid allowing ANY weight of the box to hang on the input shaft when removing/refitting :)

Think thats it for now Geoff lol, good luck with it all dude (y)
 
No you don't need a splitter. You can either undo the pinchbolt at the bottom and lever out with a long bar (my prefered method) or undo the two bolts holding the hub to the leg. One thing to be careful of, release the brake flexi hoses from the guide on the leg to avoid stretching them. I've never used any sort of engine beam, just a trolley jack under the sump.
 
Thanks everyone for your advice.

Well day one over (Rain ended play :)) pretty glad it did. Had a nightmare removing the LH hub. Those two bolts that hold the hub to the suspension just wouldn't come all the way off. The bolt ends started to round off :mad:, so I hamered a socket onto it and wedged the ratchet onto the frame , using a ring spanner and a bar I eventually got them both off (New nut and bolts me thinks). Taking the driveshaft off wasn't a problem So now I have a bag over the and tie rapped up. Tomorrow its the RH drive shaft to come off, I haven't decided which suggestion to go for yet. Then onto removing the transmission. Regarding which where is this cover plate on the bottom? Cant see it on mine.

Dont mock me on my 7 hours to get this far :eek:

Let you know what happens tomorrow.

Cheers

Geoff
 
Last edited:
The cover plate is sandwiched between the engine and gearbox. There's one little 10mm screw to undo. It should stay in place but if you leave don't undo the screw you can't get the gearbox past the flywheel. It is possible the screw has been left out as the plate will still be held by the other couple of bolts which pass through the bottom of the box
 
Again thanks for your help.


managed to remove the bell housing with a bit of a struggle but eventually its came out. After I took the pressure plate off the friction plate dropped out, so I never got a chance to see its position. I think its repositioned with the higher spring assembly out. The clutch didn't look too bad if a little thin, see pic of old (left) and new (Right)

IMG_0168.jpg


I did notice there was a smearing of oil over the friction plate, it wasn't soaked but definately oily. So where would that come from?

Regards

Geoff
 
Yes I can see the oil on the pessure plate in the picture. You need to check the input shaft on the gearbox. This should have no play at all if you try and shake it from side to side. If ther's any play the bearing inside the gearbox has gone. If this is the case you must get this fixed before you replace the box. If this is ok then try and trace where the oil is coming from. Even if the rear cranckshaft oil seal goes it rarely gets through to the clutch, but sometimes a leak higher up the engine can find it's way down into the clutch.
 
Thanks, When you say zero play in the shaft do really mean zero play? because I would say about there's about 1mm worth of play max. Plus the bell housing is dry as. I would expect this to be splattered with oil.

IMG_0172.jpg


I've had a leak for a while from the top cover plate, which I now discover is directly over the clutch assembly. Do you think this is the culprit or the gearbox bearing is on its way out.

IMG_0174.jpg


Looks really bad this one.

Cheers

Geoff
 
Yeah, looks like the top one's the problem. Should be near enough zero play, thoil feeds along the shaft so it does'nt have to spatter the bellhousing. If the shaft does'nt feel loose you should be alright.
 
Hello.

Managed to put it all back together with the help of my brother. The clutch depress's fine and I can select all gears no problem. However there is sceeching ,scraping sound when I start the engine. I remember when I was tightening the bolts on the the new clutch that it was slightly touching the bottom dust plate when it rotated due to tightening. I thought that when it was all assembled that this would go but it looks like it hasn't. I haven't drivin it yet as I wanted some advise. Would it be possible to remove the dust plate without completely splitting the trasmission? Maybe the flywheel got bent when I removed the trasmission?

thanks

Geoff
 
Too much text to read through but just wondering. Whenever I've removed a gearbox I haven't bothered removing bolts on suspension to get the driveshaft out and just lowered the box with just the shafts left attached in and they pop out fine. Would they just pop back into place the same way putting the box back in if you lined both sides up right as you highered the box?

It works in my mind :p
 
Wow! two questions to reply to at once. First to bredsticz: maybe, but it seems a strange way to go about it. JIMIH yes it's probably the dust plate rubbing on the flywheel that's making the noise. No, you cannot have bent the flywheel unless you are the incredible hulk. Don't worry about it, the dust plate is a thin bit of pressed steel, the flywheel will wear that level in no time!!!
 
Back
Top